
In today’s digital age, preserving memories has never been more important. Many of us have cherished analog photos, VHS tapes, cassettes, and music albums that hold significant sentimental value. However, the ravages of time can fade these memories and render them inaccessible. To ensure these precious moments are not lost forever, it is essential to digitize and preserve them. Digitization allows for easy access, viewing, and sharing of memories across various devices. Whether it’s old family photos, home videos, or favorite music tracks, digitizing analog media can provide a lasting tribute to the past and a chance to pass down these memories for future generations to enjoy. In this article, we will explore the benefits of digitizing analog photos, VHS tapes, cassettes, and music, and provide you with a comprehensive guide on how to preserve your valuable memories for years to come.
Inside This Article
- The Importance of Preserving Analog Memories
- Steps to Digitize Analog Photos
- Digitizing VHS Tapes and Cassettes
- Preserving Music and Other Analog Formats
- Conclusion
- FAQs
The Importance of Preserving Analog Memories
With the rapid advancement of technology, our lives have become increasingly digital. From smartphones to streaming services, we rely on digital formats for communication, entertainment, and preserving memories. However, amidst this digital age, we must not forget the value and significance of our analog memories. These tangible artifacts, such as analog photos, VHS tapes, cassettes, and vinyl records, hold a unique charm and sentimental value that digital copies cannot replicate.
Analog memories are a snapshot of the past, capturing moments, emotions, and experiences that shaped our lives. The textures, colors, and imperfections found in analog formats evoke a sense of nostalgia and connection to a bygone era. Preserving these analog memories allows us to revisit cherished moments, share them with future generations, and pass down a piece of our history.
Another important aspect of preserving analog memories is the risk of loss or deterioration over time. Analog photos may fade, develop discoloration or mold, and VHS tapes and cassettes can degrade, affecting the quality of the content. By digitizing these analog formats, we can safeguard our memories from being lost forever.
Moreover, digital copies offer several advantages over analog formats. They are more convenient to store, easily accessible, and can be easily duplicated without sacrificing quality. Digital preservation allows us to organize, catalog, and search our memories effortlessly, eliminating the hassle of sifting through physical copies.
Preserving analog memories is not only about nostalgia and personal significance; it also contributes to cultural preservation. Analog formats often hold historical, artistic, or cultural value that needs to be protected. By preserving analog memories, we can save and celebrate important cultural artifacts and contribute to the collective memory of society.
Steps to Digitize Analog Photos
Preserving your precious memories captured on analog photos is crucial to ensure that they are not lost to the passage of time. By digitizing your analog photos, you can not only protect them from potential damage but also easily share and access them whenever you want. Here are the steps to help you digitize your analog photos:
- Gather your analog photos: Collect all your physical photos and organize them in a safe and orderly manner. Ensure that they are clean and free from any dust or debris before proceeding to the next step.
- Invest in a high-quality scanner: To digitize your analog photos accurately, you’ll need a good scanner that can produce high-resolution scans. Look for a scanner with a high DPI (dots per inch) capability to ensure clear and detailed digital copies of your photos.
- Prepare your photos for scanning: Before scanning, gently clean your photos using a microfiber cloth to remove any fingerprints or smudges. If your photos are larger than the scanner bed, consider carefully cropping them to ensure they fit properly during the scanning process.
- Adjust scanner settings: Set the scanner to the appropriate resolution (usually around 300-600 DPI) for photo scanning. You may also have the option to adjust color settings, such as brightness, contrast, and saturation. Experiment with these settings to find the best results for each photo.
- Place photos on the scanner bed: Carefully place one photo at a time on the scanner bed, making sure it is aligned correctly. If necessary, use a scanning preview feature to ensure that the entire photo is captured within the scanning area.
- Start scanning: Once your photo is positioned correctly, start the scanning process. Depending on the scanner, you may have options for automatic or manual scanning. If given the choice, perform manual scanning to have more control over the quality and settings of each photo.
- Save the digital copies: After each scan is completed, save the resulting digital copy to your preferred location on your computer. It is recommended to use a file format like JPEG or TIFF to ensure compatibility and image quality.
- Organize and backup your digital photos: Once you have digitized all your analog photos, create folders or albums on your computer to sort and organize them. Make sure to back up your digital photos regularly to prevent any loss or damage.
- Edit and enhance: With your digitized photos, you can use photo editing software to enhance the images. Adjust brightness, contrast, colors, and apply any necessary repairs to bring out the best in each photo.
- Share and enjoy: Now that your analog photos are digitized, you can easily share them with friends and family through various platforms like social media, email, or cloud storage. Enjoy your digitally preserved memories anytime and anywhere!
With these simple steps, you can effectively digitize your analog photos and ensure that they are preserved for future generations. Take the time to safeguard your precious memories and keep them alive in the digital world.
Digitizing VHS Tapes and Cassettes
If you have a collection of old VHS tapes or cassettes gathering dust in your attic, it’s time to give them a new lease on life by digitizing them. While it may seem like a daunting task, digitizing these analog formats is not as complicated as it might seem. With the right equipment and a little patience, you can preserve your precious memories and enjoy them in a digital format for years to come.
The first step in digitizing VHS tapes and cassettes is to gather the necessary equipment. You will need a VHS player or cassette deck that is in good working condition. If you don’t have one, you can easily find them online or in second-hand stores. Make sure to clean the heads of the player or deck to avoid any playback issues.
Next, you will need an analog-to-digital converter. This device will convert the analog signal from the VHS tape or cassette into a digital format that can be stored on your computer or external hard drive. There are various converter options available, so choose one that suits your needs and budget.
Once you have your equipment ready, it’s time to connect everything. Use RCA cables to connect the VHS player or cassette deck to the analog-to-digital converter. Then, connect the converter to your computer using a USB cable. Ensure that all connections are secure and check that your computer recognizes the converter as a connected device.
Now, it’s time to start the digitization process. Open the software that came with your analog-to-digital converter on your computer. Follow the instructions provided to select the input source (VHS or cassette) and adjust any settings, such as resolution or audio levels. Start playing the tape or cassette and click on the “record” button in the software to begin capturing the content.
While digitizing, it’s a good idea to monitor the process and make sure everything is running smoothly. Keep an eye out for any dropped frames, audio glitches, or other issues that may affect the quality of the digital copy. If you encounter any problems, pause the digitization process and troubleshoot the cause before resuming.
Once the entire VHS tape or cassette has been digitized, save the digital files to your computer or external hard drive. Organize the files in a logical manner, such as by date, event, or family member. Consider creating backup copies of the digital files to ensure their long-term preservation.
After digitizing your VHS tapes and cassettes, you can now enjoy your memories in a digital format. You can edit and enhance the videos or audio files, share them with friends and family, or even create compilations or montages. The possibilities are endless!
Remember, digitizing your VHS tapes and cassettes is not only about preserving your memories, but it also helps to future-proof them. Analog formats deteriorate over time, and the playback equipment becomes harder to come by. By digitizing, you ensure that your memories are safely stored in a digital format that can be easily accessed and enjoyed for generations to come.
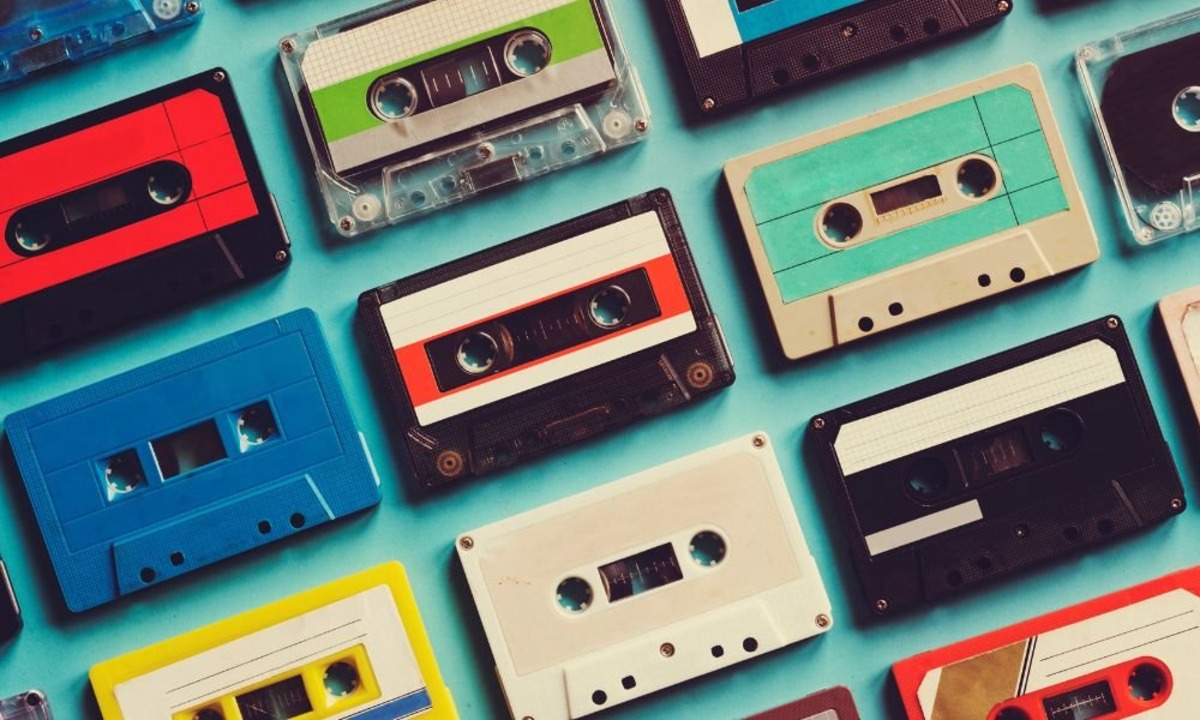
Preserving Music and Other Analog Formats
Preserving music from analog formats is a vital part of ensuring that your favorite tunes can be enjoyed for years to come. Whether you have vinyl records, cassette tapes, or even reel-to-reel tapes, converting them to digital files will not only help to safeguard the music but also make it more convenient for playback.
One of the most popular and effective ways to digitize music is by using a USB turntable or a cassette-to-MP3 converter. These devices allow you to connect your analog format directly to your computer and convert the audio into digital files. Once converted, you can store the music on your computer or portable devices, making it easier to listen to and share with others.
When digitizing music, it is important to use high-quality equipment and software to ensure the best possible audio reproduction. This includes using a turntable with a good stylus and a cassette deck with clean heads. Additionally, selecting the right software to capture and edit the audio files will greatly impact the final result.
Another option for preserving music from analog formats is to seek professional assistance. There are companies that specialize in audio preservation and digitization, offering expertise and access to advanced equipment for optimal results. Professionals can also clean and restore the audio, removing any imperfections and enhancing the overall quality of the recordings.
While digitizing your music collection is crucial, it is also essential to store the digital files properly. Backing up the files on external hard drives or cloud storage will provide additional protection and ensure that your music is not lost in the event of a computer failure or accidental deletion.
In addition to music, there are other analog formats that can be digitized to preserve memories. This includes formats such as VHS tapes, 8mm film, and even old photographs. The process of digitization allows you to convert these analog formats into digital files, making them easier to access, share, and preserve for future generations.
Preserving analog formats is not only about safeguarding the physical items but also about preserving the memories and experiences associated with them. The convenience of digital files allows for easier sharing with friends and family, as well as the ability to access and enjoy these memories anytime, anywhere.
Conclusion
Preserving your memories is a valuable and worthwhile endeavor. By digitizing your analog photos, VHS tapes, cassettes, and music, you can ensure that these precious moments and sentimental items last for generations to come. Not only will digitization protect your memories from physical deterioration and loss, but it will also make them more accessible and easier to share with loved ones.
With the advancements in technology, the process of digitizing has become more accessible and convenient than ever before. Whether you choose to do it yourself or enlist the help of professional digitization services, the end result will be a digital collection of your cherished memories that can be stored, organized, and enjoyed effortlessly.
So don’t let your memories fade away. Take the time to digitize your analog materials and preserve the stories they hold. Your future self and future generations will thank you for it.
FAQs
1. Why should I digitize my analog photos, VHS tapes, cassettes, and music?
Digitizing your analog media allows you to preserve your precious memories for years to come. Analog formats degrade over time, and digitizing them ensures that you can enjoy them in their original quality and prevent them from being lost or damaged. It also makes it easier to share and access your memories digitally.
2. What equipment do I need to digitize analog media?
The equipment you need depends on the type of media you want to digitize. For analog photos, you’ll need a scanner or a smartphone with a high-quality camera. For VHS tapes and cassettes, you’ll need a video cassette player or a cassette player connected to your computer. To digitize music, you can use a turntable connected to your computer or a specialized USB record player.
3. Can I do the digitization myself, or should I use a professional service?
Digitizing analog media can be done yourself if you have the necessary equipment and some technical know-how. However, for those who are not familiar with the process or want a higher level of quality and precision, it may be advisable to use a professional digitization service. They have the expertise and specialized equipment to ensure the best possible results.
4. What file formats should I use for digitized media?
For photos, JPEG is the most commonly used file format as it provides a good balance between quality and file size. For videos, MP4 is a popular choice due to its compatibility and compression capabilities. When it comes to music, formats like MP3 or WAV are commonly used, depending on your preference and intended use of the digitized files.
5. How long does it take to digitize analog media?
The time it takes to digitize analog media depends on various factors such as the quantity, condition, and complexity of the media. If you do it yourself, it may take longer as you’ll need to manually handle each item. Professional services can typically provide a turnaround time based on your specific requirements. It’s important to allocate sufficient time for the digitization process to ensure a thorough and accurate conversion.