
Welcome to our guide on how to install a PCI wireless card! If you’re looking to upgrade your desktop computer or add Wi-Fi functionality to a system that doesn’t already have it, a PCI wireless card is the perfect solution. With this device, you’ll be able to connect to wireless networks and enjoy high-speed internet without the need for a physical Ethernet cable.
In this article, we will walk you through the step-by-step process of installing a PCI wireless card in your computer. We will cover everything from choosing the right card to properly installing it in your machine. Whether you’re a seasoned tech enthusiast or a beginner with little experience in computer hardware, we’ve got you covered.
So, let’s dive in and learn how to install a PCI wireless card and unlock the power of wireless connectivity for your desktop computer!
Inside This Article
- Preparing for Installation
- Opening the Computer Case
- Inserting the PCI Wireless Card
- Connecting the Antennas
- Closing the Computer Case
- Installing Device Drivers
- Testing the Wireless Card
- Troubleshooting
- Conclusion
- FAQs
Preparing for Installation
Before you begin installing your PCI wireless card, it’s important to take a few essential steps to ensure a smooth and successful installation process. By following these preparations, you’ll be ready to proceed with confidence. Let’s dive in!
1. Check system requirements: The first step is to review the system requirements for your PCI wireless card. Ensure that your computer meets the necessary specifications such as available PCI slot, compatible operating system, and recommended processor speed. This will save you from any unexpected compatibility issues later on.
2. Gather the necessary tools: To make the installation process easier, gather the tools you’ll need. This may include a screwdriver, antistatic wrist strap, and any other equipment specified by the manufacturer. Having everything ready in advance will save you time and frustration during the installation.
3. Power down and unplug: Before opening your computer case, power down your computer and unplug all cables. This step is crucial to ensure your safety and protect your equipment from any electrical damage during installation. It’s always better to be safe than sorry!
4. Ground yourself: Static electricity can damage sensitive electronic components, so it’s important to ground yourself before handling any internal parts of your computer. Use an antistatic wrist strap or touch a grounded metal surface to discharge any static electricity from your body.
5. Read the instructions: Take the time to read the installation instructions provided by the manufacturer. Each wireless card may have specific installation steps or requirements, so familiarize yourself with the instructions beforehand. This will ensure that you don’t miss any important details during the installation process.
By taking these preparatory steps, you’ll be well-equipped to install your PCI wireless card with ease. Now that you’re fully prepared, let’s move on to opening the computer case in the next section!
Opening the Computer Case
To install a PCI wireless card, the first step is to open the computer case. This will provide access to the internal components where the card will be installed. Before proceeding, it’s important to ensure that you take necessary precautions, such as grounding yourself to avoid static electricity that could damage the sensitive electronics inside the case.
Start by turning off the computer and unplugging it from the power source. Place the computer on a stable surface with ample space to work. Look for screws or latches that secure the side panel of the computer case. These may vary depending on the make and model of your computer. Use a screwdriver or release the latches to remove the side panel.
Once the side panel is removed, you will have a clear view of the internal components of your computer. Take a moment to familiarize yourself with the layout and locate the available PCI slots. These are usually located towards the back of the computer and are used for expansion cards.
Before handling the PCI wireless card, it’s important to discharge any static electricity by touching a grounded metal object, such as the power supply unit or a metal part of the computer case. This will prevent any potential damage to the card or other components due to electrostatic discharge.
Now that you’re grounded and have identified the PCI slots, you can proceed to install the wireless card. Ensure that you have read the manufacturer’s instructions and are familiar with any specific installation requirements for the card you have purchased.
Inserting the PCI Wireless Card
Now that you have prepared your computer and opened the case, it’s time to insert the PCI wireless card. Follow these steps carefully to ensure a successful installation:
- Locate an available PCI slot on your computer’s motherboard. These slots are typically white or beige and are shorter than other expansion slots.
- Remove the metal plate covering the PCI slot. This plate is usually held in place by a screw or a clip. Gently unscrew the screw or unclip the plate and set it aside.
- Hold the PCI wireless card by the edges and align its gold connectors with the PCI slot. Make sure the card is facing the correct direction – the external connectors should be facing the back of the computer.
- With a firm but gentle pressure, insert the PCI card into the slot. The card should slide smoothly without any force. If there is resistance, double-check to ensure that it is properly aligned.
- Once the card is fully inserted, secure it in place by screwing it into the metal bracket on the back of the computer. This helps prevent any accidental disconnection or movement.
- Close the computer case by reattaching the side panel and tightening any screws or clips. Make sure the case is completely sealed to prevent any dust or debris from entering.
At this point, you have successfully inserted the PCI wireless card into your computer. Congratulations! The next step is to connect the necessary antennas to ensure a strong and stable wireless connection.
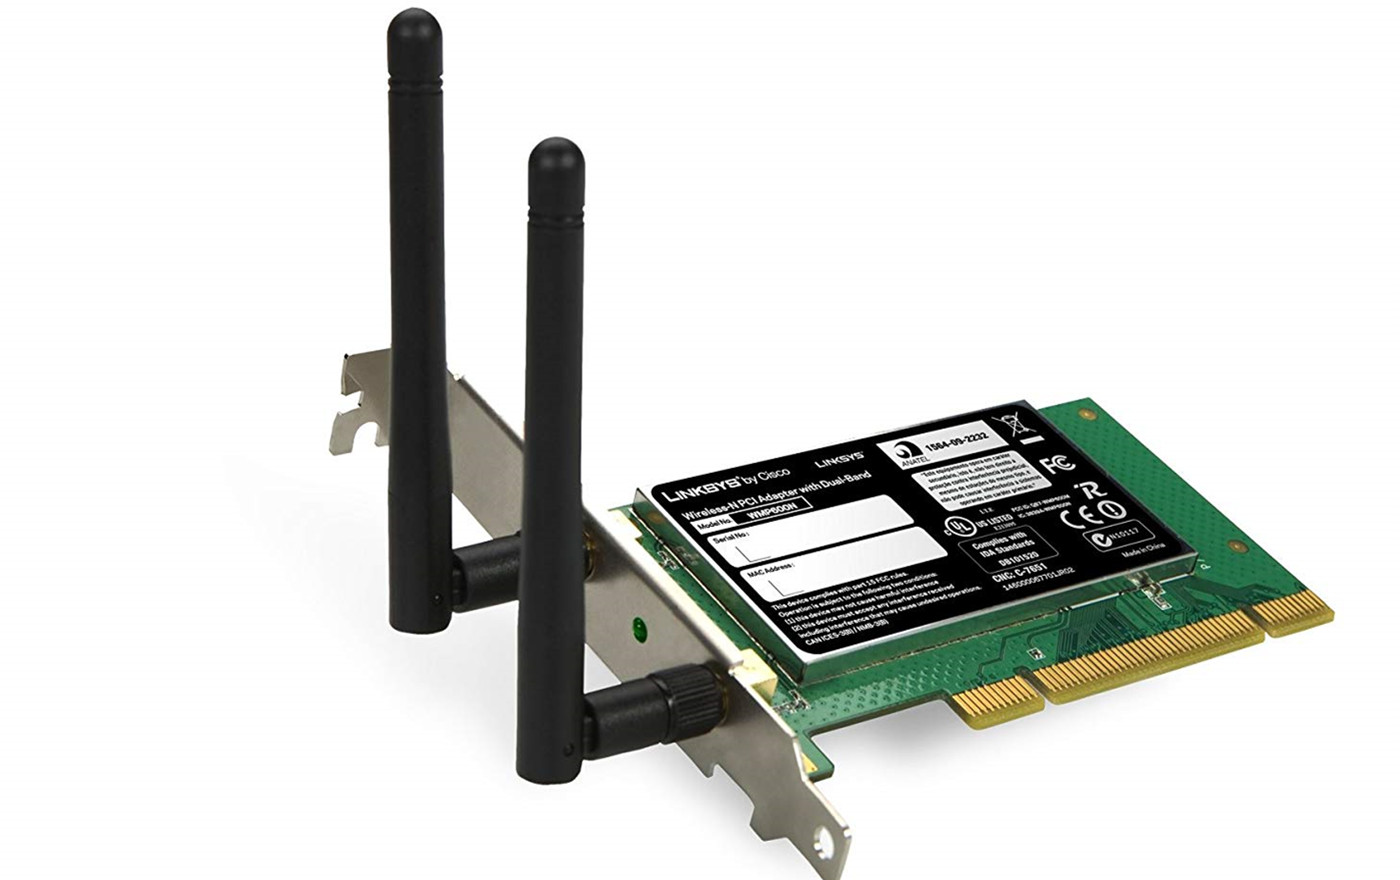
Connecting the Antennas
Once you have successfully inserted the PCI wireless card into the appropriate slot, it’s time to connect the antennas. Most PCI wireless cards come with two small antennas that need to be attached. These antennas are crucial for ensuring optimal signal strength and range for your wireless connection.
The antenna ports on the PCI wireless card are usually labeled as “ANT1” and “ANT2”. Take one of the antennas and find the corresponding antenna port on the wireless card. The antenna connector is typically a small round connector with a screw thread.
Align the antenna connector with the antenna port on the card and gently push it in. Once it’s securely attached, give it a slight twist clockwise to ensure a tight connection. Repeat the same process for the second antenna.
It’s important to note that the length of the antennas can affect the range and signal strength of your wireless connection. For example, if you are installing the wireless card in a desktop computer tower, you may want to position the antennas vertically for better signal reception. Experimenting with different antenna placements can help you find the optimal positioning for your specific setup.
Once the antennas are connected, you can now proceed to the next step of closing the computer case.
Closing the Computer Case
Once you have successfully inserted the PCI wireless card and connected the antennas, it is time to close the computer case. Follow the steps below to ensure a secure and properly sealed case:
- Double-check connections: Before closing the case, make sure that all the connections are secure. This includes the PCI wireless card, antenna cables, and any other components you may have installed during the process.
- Organize cables: Take a moment to tidy up any cables inside the computer case. This will improve airflow and prevent any accidental damage caused by loose cables. Use cable ties or Velcro straps to keep the cables neatly arranged.
- Align the case: Carefully align the edges of the computer case. Ensure that all the holes for the screws match up and that nothing is obstructing the closing process.
- Secure the case: Once the case is properly aligned, gently press it shut. Begin tightening the screws in a diagonal pattern to ensure even pressure distribution. Be careful not to overtighten the screws, as this could damage the case or strip the screw holes.
- Connect external peripherals: If you disconnected any peripheral devices such as a monitor, keyboard, or mouse, reconnect them to the appropriate ports on the computer.
- Power on the computer: Plug in the power cord and press the power button to turn on the computer. Wait for it to boot up and ensure that all the components, including the PCI wireless card, are functioning correctly.
Once you have completed these steps, you can now enjoy the benefits of your newly installed PCI wireless card. Whether you’ll be gaming, streaming, or simply browsing the internet, the wireless card will provide you with reliable and fast wireless connectivity.
Remember, if you encounter any issues or have difficulty closing the computer case, it is always best to consult the user manual for your specific computer model or seek assistance from a knowledgeable technician.
Installing Device Drivers
Once you have successfully inserted the PCI wireless card into your computer, the next step is to install the device drivers. These drivers allow your operating system to recognize and communicate with the wireless card, enabling it to function properly.
Most wireless cards come with a driver CD or a downloadable driver package from the manufacturer’s website. Here is a step-by-step guide on how to install the device drivers:
- Insert the driver CD into the CD/DVD drive of your computer. If you have downloaded the driver package, locate the downloaded file on your computer.
- Run the driver installation program from the CD or the downloaded file. Follow the on-screen instructions to proceed with the installation.
- Once the installation is complete, restart your computer to ensure that the changes take effect.
- After the restart, your operating system should detect the newly installed device drivers and automatically configure the wireless card.
- If the wireless card is not detected or is not functioning properly, you may need to manually update the device drivers. To do this, follow these steps:
- Open the Device Manager. In Windows, you can access the Device Manager by right-clicking on the Start button and selecting “Device Manager” from the menu.
- Locate the network adapters section and expand it to reveal the list of installed network devices.
- Right-click on the wireless card and select “Update driver” from the context menu.
- Choose the option to search automatically for updated driver software. Windows will then search for the latest driver software for your wireless card and install it.
- Once the driver update is complete, restart your computer to ensure that the changes are applied.
After installing the device drivers and restarting your computer, your PCI wireless card should be fully operational. You can now enjoy wireless connectivity and take advantage of all the benefits it offers.
Note: It’s recommended to periodically check for driver updates from the manufacturer’s website to ensure that your wireless card is running on the latest drivers, providing the best performance and compatibility.
Testing the Wireless Card
After successfully installing the PCI wireless card, it’s time to test its functionality and ensure that it is working properly. Testing the wireless card involves checking if it can detect and connect to available Wi-Fi networks. Follow these steps to test your newly installed PCI wireless card:
- Power on your computer: Start by turning on your computer and allowing it to boot up.
- Access the Network settings: Navigate to the network settings on your computer. This can usually be done by clicking on the network icon in the system tray or accessing the settings through the control panel.
- View available Wi-Fi networks: In the network settings window, you should be able to see a list of available Wi-Fi networks. This list may take a moment to populate, so be patient.
- Scan for networks: If your PCI wireless card is functioning properly, it should automatically scan for available networks. Click on the “Scan” button if necessary.
- Connect to a Wi-Fi network: Select the Wi-Fi network that you want to connect to from the list. If prompted, enter the network password or security key. Click “Connect” to establish the connection.
- Verify connection: Once connected, your computer should display a confirmation message or icon indicating a successful connection to the Wi-Fi network.
- Test internet connectivity: Open a web browser and try accessing a website to ensure that you have internet connectivity. If the webpage loads successfully, it means that your PCI wireless card is functioning properly.
If you encounter any issues during the testing process, refer to the previous section on troubleshooting for possible solutions. It is also a good idea to double-check that all connections are secure and that the device drivers are correctly installed.
Remember, testing the wireless card is an essential step to ensure that you can enjoy seamless wireless internet connectivity on your computer. By following the steps outlined above, you can verify that your PCI wireless card is working as expected.
Troubleshooting
Despite taking all the necessary steps, you may encounter some issues when installing a PCI wireless card. Don’t worry, as troubleshooting these problems can help you get your wireless card up and running smoothly. Here are some common troubleshooting tips:
- No wireless signal: If you’re not getting any wireless signal, make sure the card is properly connected to the motherboard and that the antennas are securely attached. Check your device manager to ensure the drivers are installed correctly. You may also try adjusting the position of the antennas for better reception.
- Intermittent connectivity: If you experience intermittent connectivity issues, try updating your wireless card drivers to the latest version. You can often find these drivers on the manufacturer’s website. Additionally, check for any interference from nearby electronic devices such as cordless phones or microwaves.
- Compatibility issues: In some cases, certain wireless cards may not be compatible with your computer’s operating system or motherboard. Before purchasing a PCI wireless card, double-check the system requirements and compatibility information to ensure it will work with your setup.
- Slow or weak signal: If your wireless card is providing a weak or slow signal, try repositioning the antennas to improve reception. You can also check if there are any physical obstructions, such as walls or furniture, blocking the signal. If all else fails, consider upgrading to a higher-gain antenna for better range and performance.
- Frequent disconnections: If you experience frequent disconnections from your wireless network, it could be due to interference or signal congestion. Try changing the channel on your wireless router to avoid any interference from other nearby networks. You can also try updating the firmware of your router to improve stability.
- Incompatible drivers: If you are experiencing issues with drivers, such as error messages or system crashes, it may be due to incompatible drivers. Make sure to download and install the correct drivers from the manufacturer’s website. If the problem persists, contact the manufacturer’s customer support for further assistance.
Remember, troubleshooting can be a process of trial and error. Don’t hesitate to reach out to customer support or online forums for specific issues or for additional guidance. With patience and persistence, you’ll be able to resolve any problems and enjoy a seamless wireless experience with your PCI wireless card.
Conclusion
Installing a PCI wireless card can provide a simple and effective way to upgrade and enhance the wireless capabilities of your desktop computer. Not only does it allow for convenient and seamless internet connectivity, but it also opens up a world of possibilities for online activities and productivity.
With the step-by-step guide provided in this article, you can confidently embark on the process of installing a PCI wireless card. Remember to carefully select a compatible card, ensure proper installation with the computer powered off, and follow the manufacturer’s instructions for the driver installation. By doing so, you can experience faster and more reliable wireless connections, enabling you to fully enjoy the benefits of a wireless-enabled desktop setup.
So why wait? Upgrade your desktop computer today with a PCI wireless card and enjoy the freedom of wireless connectivity!
FAQs
1. What is a PCI wireless card?
A PCI wireless card is a hardware component that can be installed in a desktop computer to enable wireless connectivity. It is inserted into a PCI slot on the computer’s motherboard and provides wireless networking capabilities.
2. Why should I install a PCI wireless card?
Installing a PCI wireless card allows you to connect your desktop computer to a Wi-Fi network without the need for an Ethernet cable. This gives you the flexibility to place your computer anywhere within the range of your wireless network.
3. How do I know if my computer has a PCI slot?
To determine if your computer has a PCI slot, you can open the computer case and visually inspect the expansion slots on the motherboard. A PCI slot is a white-colored slot that is longer than other expansion slots. Alternatively, you can refer to your computer’s specifications or consult the manufacturer’s documentation.
4. Do I need any tools to install a PCI wireless card?
No, you do not usually need any tools to install a PCI wireless card. The card is designed to fit easily into the PCI slot and usually requires only minimal force to insert. However, it is always a good idea to consult the manufacturer’s installation instructions for any specific requirements.
5. Can I install a PCI wireless card myself?
Yes, installing a PCI wireless card is a relatively straightforward process, and you can usually do it yourself. However, if you are not comfortable working with computer hardware or if you are unsure of the steps involved, it is recommended to seek assistance from a professional or consult the computer manufacturer’s support team.