
If you’re looking to upgrade the wireless capabilities of your desktop computer, installing a wireless card is the way to go. A wireless card, also known as a Wi-Fi adapter, allows you to connect your desktop to a wireless network, giving you the freedom to browse the internet, stream media, and connect with other devices without the need for Ethernet cables.
In this article, we will guide you through the process of installing a wireless card in your desktop computer. Whether you’re a tech-savvy guru or a novice DIY enthusiast, our step-by-step instructions and helpful tips will ensure that you can successfully install a wireless card and start enjoying the benefits of a wireless connection on your desktop.
Inside This Article
- What is a Wireless Card?
- Preparing for Installation
- Installing the Wireless Card
- Configuring the Wireless Card
- Troubleshooting and Common Issues
- Conclusion
- FAQs
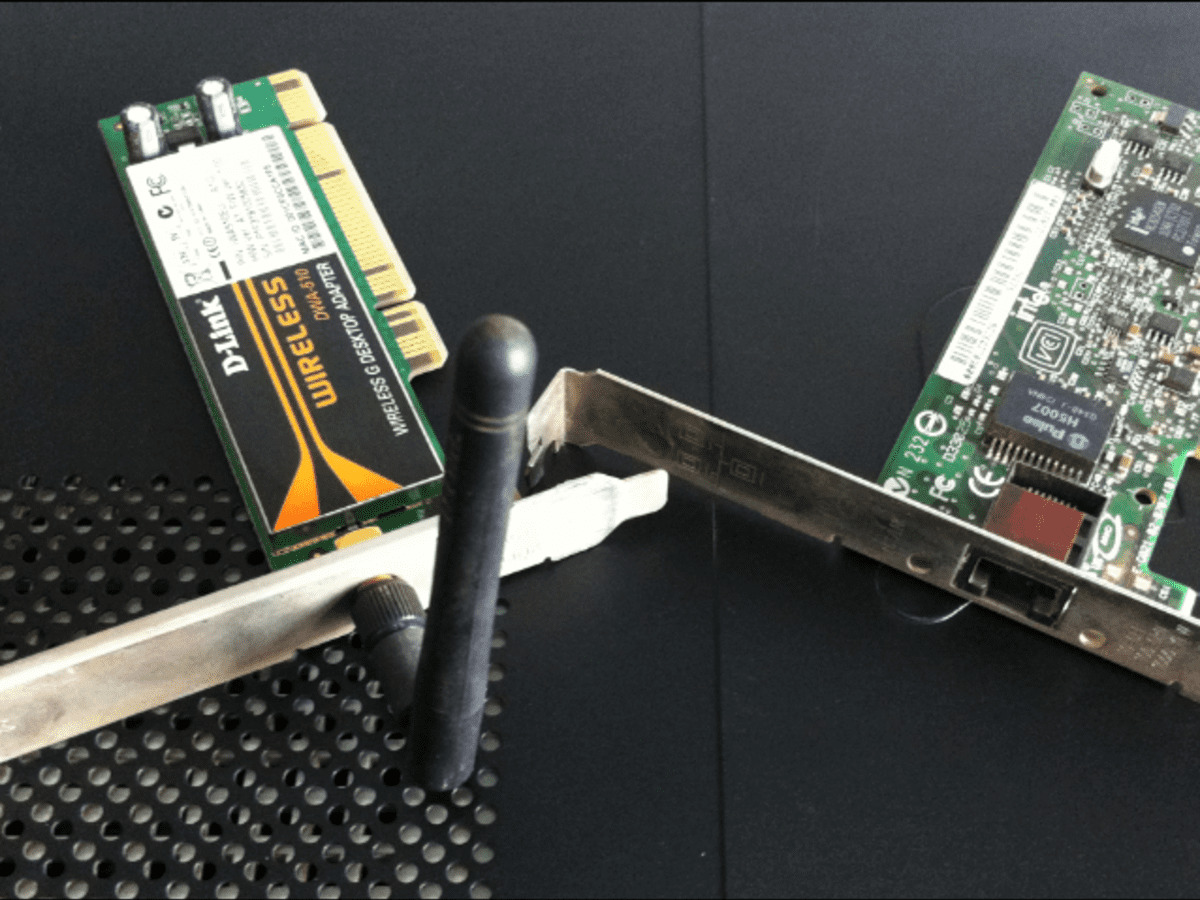
What is a Wireless Card?
A wireless card, also known as a wireless network adapter or wireless LAN card, is a hardware component that enables a computer to connect to a wireless network. It functions as a bridge between the computer and the wireless router or access point, allowing the computer to send and receive data over a wireless connection.
Wireless cards are commonly found in laptops, but they can also be installed in desktop computers to enable wireless connectivity. These cards come in various formats, such as PCIe (Peripheral Component Interconnect Express) and USB, and support different wireless standards like Wi-Fi 4 (802.11n), Wi-Fi 5 (802.11ac), and Wi-Fi 6 (802.11ax).
With a wireless card installed, you can enjoy the benefits of wireless connectivity, such as accessing the internet without the need for Ethernet cables, connecting to wireless printers or other devices, and having the flexibility to move your computer around within the range of the wireless network.
Wireless cards typically have an antenna or multiple antennas to improve the signal reception and transmission. They also have drivers that need to be installed on the computer to ensure compatibility and proper functioning.
Overall, a wireless card is an essential component for connecting a computer to a wireless network, providing convenience and flexibility in accessing the internet and other network resources without the constraints of wired connections.
Preparing for Installation
Before you jump into installing a wireless card in your desktop, there are a few important preparations you need to make. Taking the time to prepare properly will ensure a smooth and successful installation process. Here are some steps to follow:
1. Check compatibility: The first step is to check if your desktop is compatible with a wireless card. Look for an available PCI or PCIe slot on your motherboard. You can usually find this information in the motherboard manual or by searching online for the specifications of your particular model.
2. Gather the necessary tools: To install a wireless card, you will need some basic tools like a screwdriver and an anti-static wrist strap. The screwdriver will be used to open the desktop case and secure the wireless card in place, while the anti-static wrist strap will help protect the sensitive electronic components from static electricity.
3. Download the latest drivers: It is essential to have the latest drivers for your wireless card before you begin the installation. Visit the manufacturer’s website and search for the drivers specific to your card model. Download them onto a USB drive or another accessible location so you can easily install them later.
4. Power off and unplug: Before opening your desktop case, make sure to power off the computer and disconnect it from the power source. This will prevent any accidental damage or electrical shocks during the installation process.
5. Remove the desktop case: Use your screwdriver to remove the screws holding the desktop case in place. Carefully slide off the case to expose the internal components of your desktop. Take note of any static discharge precautions mentioned in the computer manual.
6. Locate the appropriate slot: Identify the available PCI or PCIe slot on your motherboard where you will install the wireless card. These slots are typically located near the back of the desktop and are marked with labels such as “PCI” or “PCIe”.
7. Ground yourself: Before handling any internal components, ground yourself by wearing an anti-static wrist strap or by touching a metal surface inside the computer case. This will help discharge any static electricity and prevent damage to the sensitive components.
8. Insert the wireless card: Carefully align the connector pins of the wireless card with the slot on the motherboard. Gently insert the card into the slot and apply even pressure until it is fully seated. It should fit snugly and be securely in place.
9. Secure the card: Use the screws provided with the wireless card to secure it in place. Tighten them just enough to ensure the card is held firmly but not too tight to risk damaging the slot or the card itself.
10. Close the case: Once the wireless card is secured, carefully put the desktop case back on and fasten the screws to secure it in place. Make sure all screws are tightened evenly to ensure a proper fit.
By following these preparation steps, you will be well-prepared to install a wireless card in your desktop. Next, we will guide you through the actual installation process.
Installing the Wireless Card
Now that you have prepared your desktop and gathered the necessary tools, it’s time to install the wireless card. Follow these steps to ensure a successful installation:
- Turn off your desktop and unplug it from the power source to avoid any electrical issues during the installation process. Safety always comes first!
- Open up your desktop case by removing the screws or any latches that hold the side panel in place. This will give you access to the motherboard and other internal components.
- Locate an available PCIe slot on the motherboard. These slots are usually longer in size and have a small plastic latch on one end to secure the card.
- Remove the metal slot cover plate adjacent to the PCIe slot you have chosen. This will create a space for the wireless card to be inserted. Keep the slot cover plate in a safe place, as you may need it in the future.
- Gently insert the wireless card into the PCIe slot, aligning the gold connectors on the card with the slot’s pins. Apply gentle pressure until the card clicks into place. Ensure that the plastic latch on the slot locks it securely.
- If you have an external antenna for your wireless card, connect it to the corresponding port on the back of the card. This will allow for better signal reception and transmission.
- Put the side panel of your desktop case back on and secure it with the screws or latches. Make sure it is snugly fit to avoid any loose connections.
- Plug your desktop back into the power source and turn it on. Wait for the operating system to detect the new hardware and automatically install the necessary drivers. It’s advisable to have the latest drivers downloaded and ready on a USB drive, just in case the automatic installation fails.
- Once the installation is complete, restart your computer to ensure proper functioning of the wireless card.
Congratulations! You have successfully installed the wireless card in your desktop. It’s time to enjoy the freedom of wireless connectivity and seamless internet access.
Configuring the Wireless Card
Once you have successfully installed the wireless card in your desktop, the next step is to configure it to connect to your wireless network. Configuring the wireless card involves a few simple steps:
1. Open the network settings: To begin the configuration process, go to the Control Panel or navigate to the network settings in your operating system. Look for the option that allows you to manage your network connections.
2. Locate the wireless card: In the network settings, you should see a section that displays all the available network connections. Look for the wireless card that you installed. It is generally labeled with the card’s make and model.
3. Connect to your network: Select the wireless card and click on the “Connect” or “Join” option. A list of available wireless networks in your vicinity will be displayed. Choose your network from the list and click on the “Connect” button.
4. Enter network credentials: If your network is secured, you will be prompted to enter the network credentials. This includes the network name (SSID) and the password. Make sure to enter the information correctly to connect to your network successfully.
5. Configure advanced settings: Depending on your requirements, you might need to configure advanced settings for your wireless card. This includes enabling or disabling features like IPv6, power-saving modes, or adjusting the wireless frequency band. These settings can usually be accessed by clicking on a “Settings” or “Advanced” button in the network configuration interface.
6. Test the connection: Once you have completed the configuration process, it is essential to test the connection. Open a web browser and try to access a website to ensure that your wireless card is connected to the network and has internet access.
7. Update drivers and firmware: It is always a good practice to keep your wireless card drivers and firmware up to date. Visit the manufacturer’s website or use a dedicated driver update software to check for any available updates. Installing the latest drivers and firmware can help improve performance and stability.
With these steps, you should be able to configure your wireless card and connect to your wireless network smoothly. If you encounter any difficulties during the process, refer to the user manual provided with your wireless card or check the manufacturer’s website for troubleshooting guides.
Troubleshooting and Common Issues
While installing a wireless card in a desktop may seem straightforward, there can be certain common issues and troubleshooting steps that you might encounter along the way. Here are some of the potential problems you might face and ways to resolve them:
1. Driver Compatibility: One of the common issues is driver compatibility. If your wireless card is not working or showing up in the device manager, it could be due to incompatible drivers. Ensure that you have the correct drivers for your operating system and version. You can usually find the drivers on the manufacturer’s website.
2. Incorrect Installation: Double-check if you have installed the wireless card properly. Sometimes, improper installation can cause connectivity issues or the card to not function at all. Make sure that the card is securely inserted into the PCI slot and that all the necessary cables are properly connected.
3. Interference: Wireless signals can sometimes be interrupted or weakened by interference from other electronic devices, such as cordless phones, microwave ovens, or even neighboring Wi-Fi networks. Try to move your desktop away from these sources of interference or change the channel settings on your router to minimize any potential disruptions.
4. Weak Signal Strength: If you are experiencing weak or intermittent signal strength, it could be due to the distance between your desktop and the router. Consider moving your desktop closer to the router or using a Wi-Fi range extender to improve the signal coverage in your home or office.
5. Network Connection Issues: Sometimes, the problem might not lie with the wireless card itself but with the network connection. Check if other devices can connect to the Wi-Fi network without any problems. If not, troubleshoot the network connection by power cycling the router, updating the firmware, or contacting your internet service provider.
6. Security Settings: If you are unable to connect to a Wi-Fi network, verify that you have entered the correct security settings, such as the network name (SSID) and password. Typos or incorrect settings can prevent your desktop from connecting to the network properly.
7. Outdated Firmware: In some cases, outdated firmware on either the wireless card or the router can cause compatibility issues. Make sure to keep both the card’s firmware and the router’s firmware up to date. Check the manufacturer’s website for any available firmware updates and follow the instructions to install them.
8. Hardware Incompatibility: Unfortunately, not all wireless cards are compatible with all desktop systems. Before purchasing a wireless card, ensure that it is compatible with your specific desktop model and meets the necessary requirements. Consult the manufacturer’s documentation or contact their support team for assistance.
9. Resetting Network Settings: If you have tried all the above troubleshooting steps and are still experiencing issues, you can try resetting the network settings on your desktop. This can help clear any conflicting settings and restore your Wi-Fi connection to its default state. Proceed with caution as resetting network settings will remove any saved Wi-Fi networks and require you to reconnect to them manually.
By addressing these common issues and following the troubleshooting steps, you can overcome hurdles and successfully install a wireless card in your desktop, ensuring a stable and reliable Wi-Fi connection.
Conclusion
Installing a wireless card in your desktop can be a great way to upgrade its connectivity and enjoy the freedom of a wireless network. With the right tools and a little know-how, you can easily install a wireless card yourself and start enjoying the benefits of wireless technology.
Remember to choose a wireless card that is compatible with your desktop and meets your specific needs. Follow the installation steps carefully, ensuring that you power off your computer and take necessary precautions to avoid damaging any components. Once installed, you can configure your wireless card and connect to your desired network.
Whether you’re a professional or a casual user, having a wireless card in your desktop can make a world of difference. Say goodbye to messy cables and enjoy seamless internet connectivity with a wireless card!
FAQs
Q: Can I install a wireless card in a desktop computer?
A: Yes, you can install a wireless card in a desktop computer to enable wireless connectivity.
Q: How do I know if my desktop computer supports wireless cards?
A: To determine if your desktop computer supports wireless cards, you can check the documentation that came with your computer or the specifications listed on the manufacturer’s website. Alternatively, you can open up your computer and look for available expansion slots, such as PCIe or PCI slots, where you can install a wireless card.
Q: What tools do I need to install a wireless card in a desktop computer?
A: The tools you will need to install a wireless card in a desktop computer typically include a screwdriver, as you may need to remove the computer’s case to access the expansion slots. Additionally, depending on the type of wireless card you are installing, you may need specific drivers or software provided by the manufacturer.
Q: How do I physically install a wireless card in my desktop computer?
A: The exact steps to physically install a wireless card can vary depending on the make and model of your computer, as well as the specific type of wireless card you are installing. However, in general, you will typically need to power down your computer, open the case, locate an available expansion slot, insert the wireless card into the slot, secure it with a screw or bracket, and then close the case. It is always recommended to consult the documentation provided with your wireless card for detailed installation instructions.
Q: How do I install drivers for my wireless card in a desktop computer?
A: To install drivers for your wireless card, you can either use the installation disc that came with the card or download the latest drivers from the manufacturer’s website. Often, the drivers will include an installer that guides you through the installation process. Once the drivers are installed, you may need to restart your computer for the changes to take effect. It is important to keep your wireless card drivers up to date to ensure optimal performance and compatibility.