
Are you tired of dealing with tangled wires and limited mobility while listening to music or taking calls on your cell phone? Look no further than Skullcandy wireless headphones, which offer the perfect solution to your audio needs. These stylish and innovative headphones provide the freedom to move around without any cables holding you back. Whether you’re at the gym, on a run, or simply enjoying some downtime, syncing your Skullcandy wireless headphones with your cell phone is a breeze. With a few simple steps, you can enjoy crystal-clear sound and seamless connectivity. In this article, we will guide you through the process of syncing your Skullcandy wireless headphones to your cell phone, ensuring you can enjoy your favorite tunes wirelessly and hassle-free.
Inside This Article
- Overview of Skullcandy Wireless Headphones
- Step 1: Turn on Skullcandy Wireless Headphones
- Step 2: Activate Bluetooth on your device
- Step 3: Pair your device with Skullcandy Wireless Headphones
- Step 4: Adjust settings and controls
- Step 5: Troubleshooting common issues
- Conclusion
- FAQs
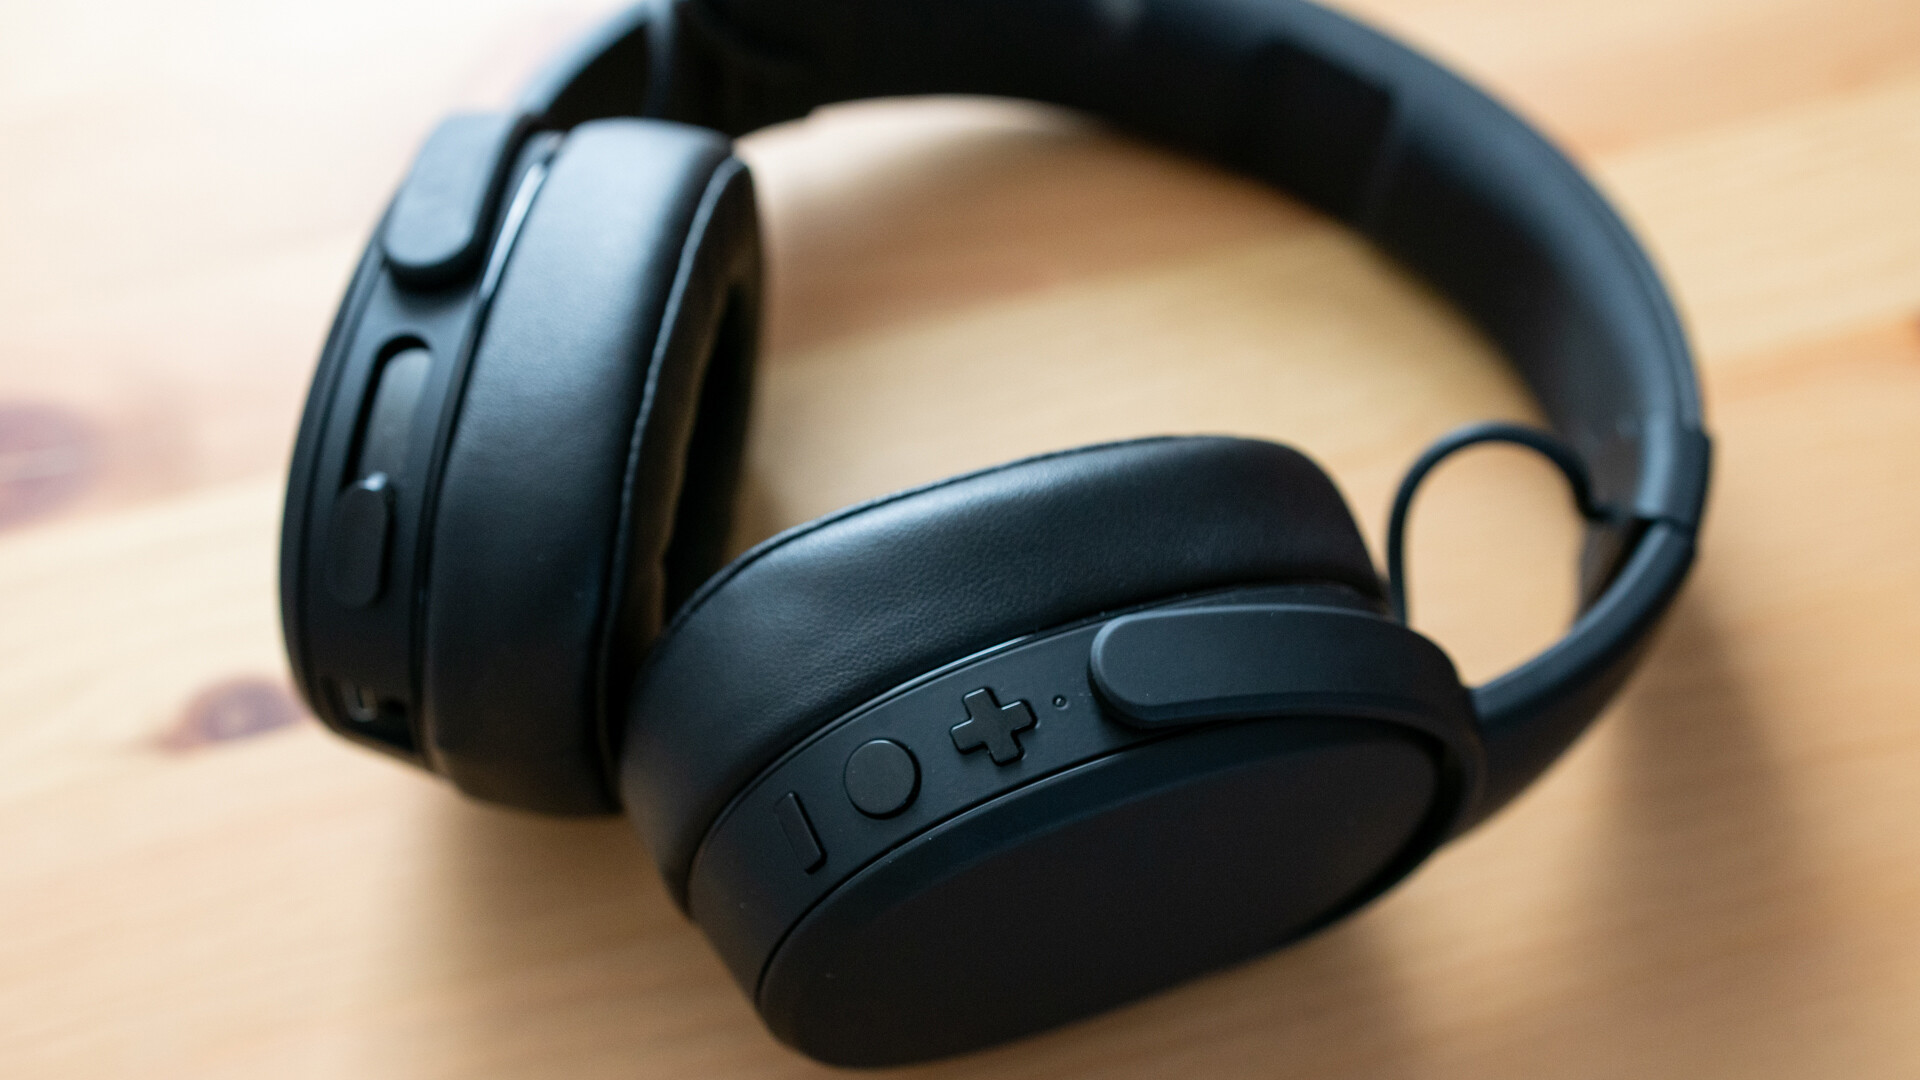
Overview of Skullcandy Wireless Headphones
Skullcandy is a popular brand known for its wide range of innovative and high-quality headphones. Among their offerings, Skullcandy wireless headphones have gained immense popularity due to their convenience and freedom from tangled wires. These headphones utilize Bluetooth technology, allowing you to connect them wirelessly to your devices such as smartphones, tablets, and laptops.
Skullcandy wireless headphones are designed with comfort in mind, featuring adjustable headbands, soft ear cushions, and lightweight materials. This ensures a comfortable fit, even during long listening sessions or workouts. The headphones provide an immersive audio experience, delivering impressive sound quality with enhanced bass and clear treble.
With a long battery life, Skullcandy wireless headphones can keep you entertained for hours without needing to recharge. Whether you are traveling, working out, or simply relaxing at home, these headphones offer the freedom and flexibility to enjoy your favorite music, podcasts, or videos without the hassle of wires.
Skullcandy wireless headphones also come equipped with convenient controls and features. Many models feature built-in microphones, allowing you to answer calls and control your device’s voice assistant hands-free. Some headphones also offer advanced features like noise-canceling technology, immersive sound modes, and customizable EQ settings.
When it comes to style, Skullcandy wireless headphones come in a variety of colors and designs to suit your personal taste. Whether you prefer a sleek and minimalistic look or a bold and vibrant style, you can find a pair of headphones that matches your personality and fashion sense.
In addition, Skullcandy provides excellent customer support and warranty options, ensuring that you can enjoy your wireless headphones with peace of mind. Whether you need assistance with setup, troubleshooting, or warranty claims, Skullcandy’s customer service team is readily available to help.
Step 1: Turn on Skullcandy Wireless Headphones
Skullcandy wireless headphones offer a convenient and tangle-free way to enjoy your music on the go. To get started, you’ll need to turn on your Skullcandy wireless headphones. Here’s how:
1. Locate the power button on your headphones. Depending on the model, it can be found on the ear cup or the control panel on the side of the headphones.
2. Press and hold the power button for a few seconds until you see an LED light or hear a tone indicating that the headphones are turning on. The specific indicator may vary depending on the model of Skullcandy headphones you have.
3. Release the power button once the headphones have been turned on. You should see the LED light remain solid or flash, depending on the model.
4. At this point, your Skullcandy wireless headphones should be powered on and ready to use. You can now proceed to connect them to your device via Bluetooth.
It’s worth noting that some Skullcandy models have additional features, such as noise cancellation or customizable EQ settings. If your headphones have any special functions, consult the user manual for instructions on how to activate them.
Remember to check the battery level of your Skullcandy wireless headphones before using them for an extended period. Charging your headphones regularly will ensure that you have uninterrupted listening sessions.
Now that your Skullcandy wireless headphones are turned on, let’s move on to the next step: activating Bluetooth on your device.
Step 2: Activate Bluetooth on your device
Once you have turned on your Skullcandy Wireless Headphones, the next step is to activate Bluetooth on your device. Bluetooth is a wireless technology that allows devices to connect and communicate with each other.
To activate Bluetooth on your device, follow these simple steps:
- Go to the settings menu on your device. This can usually be found by swiping down from the top of the screen and tapping on the gear icon.
- Look for the Bluetooth option in the settings menu and tap on it. On some devices, Bluetooth may be located under the “Connections” or “Wireless & Networks” section.
- Toggle the Bluetooth switch to the “On” position. This will enable Bluetooth on your device and allow it to search for nearby Bluetooth devices.
Once Bluetooth is enabled on your device, it will start searching for available devices to connect to. In the meantime, put your Skullcandy Wireless Headphones in pairing mode by following the instructions provided in the user manual.
It’s important to note that the process of activating Bluetooth may vary slightly depending on the device you are using. However, the general steps mentioned above should be applicable to most smartphones, tablets, and computers.
By activating Bluetooth on your device, you are now ready to pair it with your Skullcandy Wireless Headphones.
Step 3: Pair your device with Skullcandy Wireless Headphones
Pairing your device with Skullcandy Wireless Headphones is a simple process that allows you to enjoy your favorite music or take calls wirelessly. Follow these steps to successfully connect your device:
1. Make sure your Skullcandy Wireless Headphones are turned on and in pairing mode. To do this, locate the power button on your headphones and press and hold it until the LED light starts flashing. This indicates that the headphones are ready to be paired.
2. On your device, navigate to the Bluetooth settings. This is usually found in the settings menu, under the “Connections” or “Wireless & Networks” section. Turn on Bluetooth if it’s not already enabled.
3. Your device will now search for available Bluetooth devices. Look for the name of your Skullcandy Wireless Headphones in the list of available devices. It may be listed as “Skullcandy” followed by the model number or a custom name you have set.
4. Tap on the name of your Skullcandy Wireless Headphones to initiate the pairing process. Your device will now attempt to establish a connection with the headphones.
5. Once the pairing is successful, you will see a notification or an indicator on your device indicating that it is now paired with your Skullcandy Wireless Headphones. The LED light on the headphones may also turn solid or stop flashing.
6. Test the connection by playing some audio or making a test call. Make sure the sound is coming through the headphones and the microphone is picking up your voice. Adjust the volume and other settings as needed.
7. Congratulations! Your device is now paired with your Skullcandy Wireless Headphones. You can now enjoy the freedom of wireless music and hands-free calls.
Note: If you are having trouble pairing your device, make sure that the headphones are fully charged and within range of your device. Also, check the user manual or Skullcandy’s website for specific instructions for your model of headphones.
Step 4: Adjust settings and controls
Once you have successfully paired your device with your Skullcandy wireless headphones, you can start adjusting the settings and controls to enhance your audio experience. Here are some tips to help you get the most out of your headphones:
1. Volume control: Most Skullcandy wireless headphones have built-in volume controls. You can easily increase or decrease the volume by using the designated buttons or sliders on the headphones themselves.
2. EQ settings: Many Skullcandy wireless headphones offer customizable EQ (equalizer) settings. This allows you to adjust the audio frequencies to your preference. You can experiment with different EQ presets or manually adjust the bass, midrange, and treble levels to suit your taste.
3. Track control: Depending on the model of your Skullcandy headphones, you may have the ability to control the playback of your music directly from the headphones. This includes options such as skipping tracks, pausing, or playing the previous track. Familiarize yourself with the specific controls available on your headphones.
4. ANC (Active Noise Cancellation): If your Skullcandy wireless headphones come with ANC technology, you can activate it to minimize background noise and enjoy a more immersive listening experience. ANC is particularly beneficial in noisy environments such as airplanes or busy city streets.
5. Mic and call controls: Many Skullcandy wireless headphones come with an integrated microphone and call controls. This allows you to answer calls, end calls, or adjust the call volume directly from your headphones without needing to take out your device.
6. Battery status: Some Skullcandy wireless headphones feature an LED indicator that shows the remaining battery life. This is useful to help you manage the battery usage and ensure that you recharge the headphones in a timely manner.
7. Firmware updates: It’s worth checking if there are any firmware updates available for your Skullcandy wireless headphones. These updates can, at times, provide performance improvements, bug fixes, and even introduce new features. Visit the official Skullcandy website or use the Skullcandy app, if available, to check for updates.
8. Personalization options: Depending on the model, you may have additional personalization options such as customizing the LED lights or configuring the headphone’s sensitivity. Explore the user manual or support resources to discover the full range of customization features at your disposal.
By familiarizing yourself with the settings and controls of your Skullcandy wireless headphones, you can tailor the audio experience to your liking and make the most of the features available. Experiment with different settings and configurations to find the perfect balance of sound quality and functionality.
Step 5: Troubleshooting common issues
Even with the best wireless headphones, you may encounter some common issues. Don’t worry; we’re here to help you troubleshoot and resolve them. Here are some solutions to the most frequently encountered problems:
1. Headphone not connecting: If your Skullcandy wireless headphones are not connecting to your device, try the following:
- Make sure your headphones are in pairing mode. Refer to the user manual for instructions on how to do this.
- Check if your device’s Bluetooth is turned on and in range of the headphones. Sometimes, a simple reconnection or resetting the Bluetooth connection can solve the issue.
- Ensure that your device is not already connected to another Bluetooth device. Disconnect any other devices that might interfere with the connection.
- Try forgetting the existing pairing on your device and then repair your headphones.
2. Poor audio quality: If you’re experiencing poor audio quality or sound distortion, follow these steps:
- Check the distance between your device and the headphones. Sometimes, being too far away can cause weak sound quality. Try moving closer to improve the signal.
- Make sure there are no obstacles or interference between the headphones and your device, such as walls or other electronic devices. These can disrupt the Bluetooth signal.
- Check the battery level of your headphones. Low battery can affect audio quality. Charge them fully or replace the batteries if necessary.
- Clean the headphone’s audio ports. Dust and debris can accumulate over time, affecting sound quality.
3. Headphones not charging: If your Skullcandy wireless headphones are not charging, try these troubleshooting steps:
- Make sure you are using the correct charging cable and adapter for your headphones.
- Check the charging cable for any damage or fraying. A faulty cable can prevent proper charging.
- Verify that the charging port on the headphones is clean and free from debris. Use a soft brush or compressed air to clean it if necessary.
- Try charging the headphones with a different power source, such as a different USB port or wall socket.
- If none of the above steps work, try resetting your headphones to their factory settings and then attempt to charge them again.
4. Intermittent connectivity: If you’re experiencing intermittent connection issues, try the following:
- Move closer to the device you are connecting to. Being too far away from your device can cause connection drops.
- Ensure that there are no other devices in close proximity that might interfere with the Bluetooth signal. Other wireless devices can disrupt the connection.
- Restart both your device and the headphones. Sometimes a simple restart can resolve connectivity issues.
- Check for any firmware updates for your Skullcandy headphones. Manufacturers often release updates to improve connectivity and performance.
5. Ear discomfort: If you experience discomfort while wearing your Skullcandy wireless headphones, consider the following:
- Adjust the headphone’s fit. Some models have adjustable headbands and ear cups to provide a more comfortable fit.
- Ensure that the ear cups are clean and free from any debris. Dirt or sweat accumulation can cause discomfort.
- If you wear glasses, make sure they are not causing pressure against the headphone’s ear cups. Adjust the position of your glasses if necessary.
By following these troubleshooting tips, you should be able to resolve the most common issues you may encounter with your Skullcandy wireless headphones. If the problem persists, check the manufacturer’s website or reach out to their customer support for further assistance.
Conclusion
Syncing your Skullcandy wireless headphones is a seamless process that allows you to enjoy your favorite tunes without any cords holding you back. Whether you have Bluetooth-enabled earbuds or over-ear headphones, the steps to sync them are relatively simple and straightforward.
By following the instructions provided by Skullcandy or the specific model’s user manual, you can quickly pair your headphones with your smartphone, tablet, or other compatible devices. Once synced, you’ll be able to enjoy the freedom of wireless listening, whether you’re working out, commuting, or simply relaxing at home.
Remember to keep your headphones fully charged to ensure optimal performance, and troubleshoot any connectivity issues using the methods mentioned earlier. With a little patience and practice, you’ll be syncing your Skullcandy wireless headphones effortlessly, immersing yourself in a world of high-quality sound.
So go ahead, grab your Skullcandy headphones, follow the instructions, and get ready to experience the joy of wireless audio like never before!
FAQs
1. How do I sync Skullcandy wireless headphones?
2. What devices are compatible with Skullcandy wireless headphones?
3. Can I connect my Skullcandy wireless headphones to multiple devices simultaneously?
4. How far is the wireless range of Skullcandy headphones?
5. How do I troubleshoot connectivity issues with my Skullcandy wireless headphones?