
Sure, here's the introduction wrapped in the
tag:
html
Are you a proud owner of a Moto G Play and unfortunately find yourself facing a cracked or malfunctioning screen? Fret not, as we’ve got you covered! In this comprehensive guide, we’ll walk you through the process of replacing the screen on your Moto G Play. Whether you’re a tech-savvy individual or a complete novice, we’ll provide you with clear, step-by-step instructions to help you successfully restore your device to its former glory. Say goodbye to the frustration of dealing with a damaged screen and get ready to embark on a rewarding journey of rejuvenating your beloved Moto G Play!
Inside This Article
- Preparing for the Screen Replacement
- Disassembling the Moto G Play
- Removing the Old Screen
- Installing the New Screen
- Conclusion
- FAQs
Preparing for the Screen Replacement
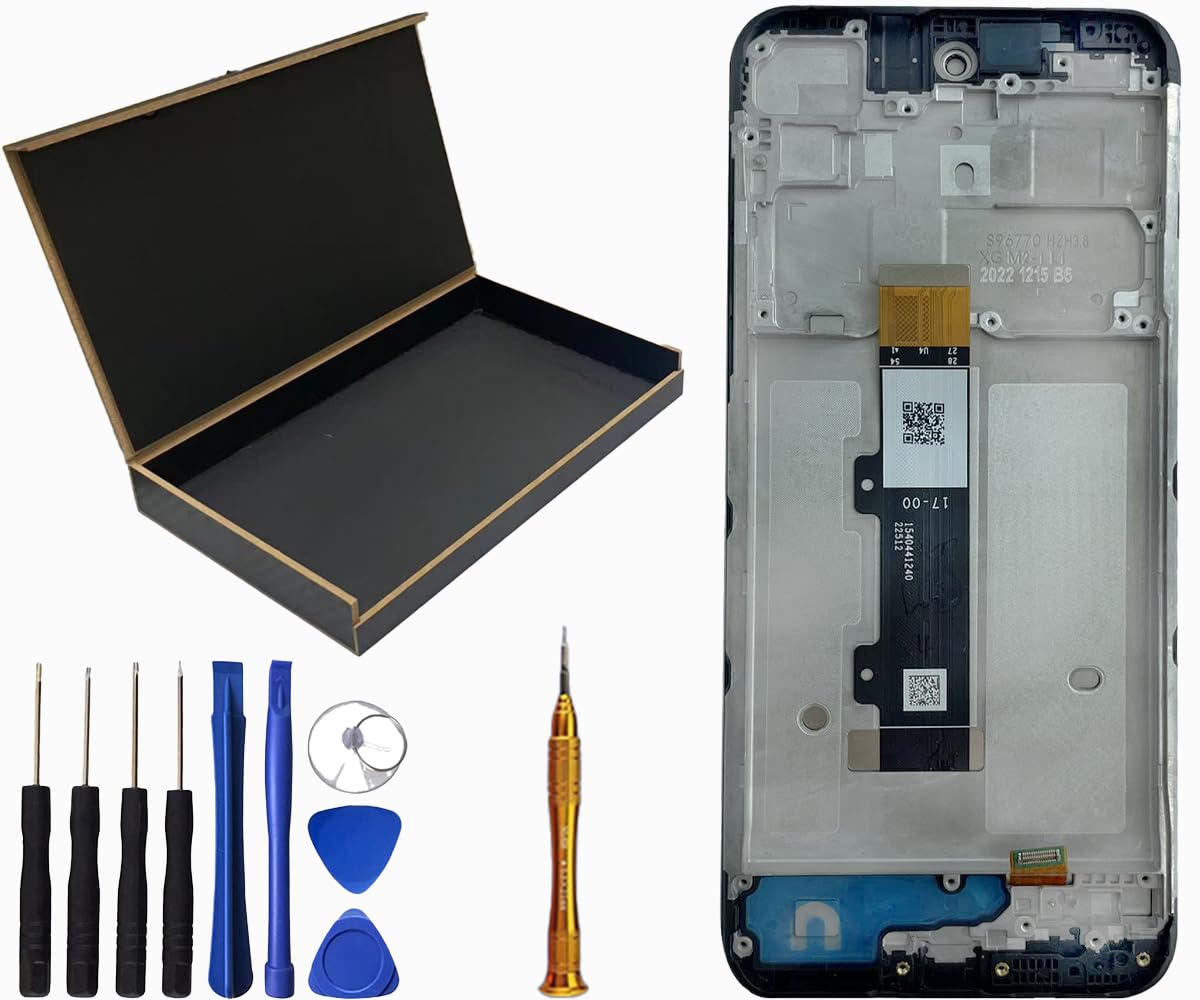
Before diving into the screen replacement process, it’s crucial to gather all the necessary tools and components. You’ll need a replacement screen specifically designed for the Moto G Play, along with a set of precision screwdrivers, a plastic opening tool, and adhesive strips or glue to secure the new screen in place.
Additionally, it’s wise to have a clean, well-lit workspace to carry out the repair. A clutter-free environment will help prevent misplacing small components and aid in keeping track of the disassembly process. It’s also beneficial to have a container or organizer to store the screws and small parts removed during the disassembly.
Furthermore, having a guide or tutorial specific to the Moto G Play screen replacement can be immensely helpful. Whether it’s a detailed video tutorial or a step-by-step written guide, having a reference to follow along with can significantly streamline the replacement process and minimize the likelihood of errors.
Disassembling the Moto G Play
Before diving into disassembling your Moto G Play, ensure that you have the necessary tools at hand, such as a precision screwdriver set, opening picks, and a heat gun or hairdryer. These tools are essential for safely and effectively disassembling the device without causing damage.
Start by powering off the Moto G Play and removing the SIM card tray. Next, use the heat gun or hairdryer to gently warm the edges of the back cover. This heat application helps loosen the adhesive securing the back cover, making it easier to remove without causing any cracks or damage.
Once the adhesive is sufficiently warmed, carefully insert an opening pick between the back cover and the frame of the phone. Slowly slide the opening pick around the edges to release the clips holding the back cover in place. Take your time to avoid bending or damaging the cover during this process.
After successfully removing the back cover, you will gain access to the internal components of the Moto G Play. At this point, it’s crucial to exercise caution and precision to avoid causing any harm to the delicate internal parts of the device. With the back cover removed, the next step is to proceed with removing the internal components to access the screen assembly.
Removing the Old Screen
Now that the Moto G Play is disassembled, it’s time to remove the old screen. This is a delicate process that requires patience and precision. Start by locating the adhesive that secures the screen to the frame. Gently pry the old screen away from the frame, taking care not to damage the delicate ribbon cables underneath.
As you lift the old screen, be mindful of any connectors or adhesive that may still be attached. Slowly and carefully detach these, ensuring that no unnecessary force is applied. Once all the connectors and adhesive are detached, you can safely remove the old screen from the device.
Remember to keep track of any screws, brackets, or components that may come loose during this process. These will need to be reattached when installing the new screen. With the old screen removed, you’re one step closer to revitalizing your Moto G Play with a brand-new display.
Installing the New Screen
Once you have successfully removed the old screen, it’s time to install the new one. Carefully position the new screen in place, ensuring that it aligns perfectly with the frame of the phone.
Once the screen is aligned, gently press it into place, ensuring that it fits snugly. Take your time with this step to avoid any potential damage to the new screen.
After securing the new screen, reattach the connectors to the phone’s motherboard. Be meticulous in this process, ensuring that each connector is firmly and correctly attached.
Once the connectors are in place, carefully reassemble the phone, following the disassembly steps in reverse order. Ensure that each component fits back into place securely.
Finally, power on the phone to test the new screen. If everything is functioning properly, congratulate yourself on successfully replacing the screen of your Moto G Play!
In conclusion, replacing the screen on a Moto G Play is a feasible task that can save you time and money compared to seeking professional assistance. With the right tools, a replacement screen, and a clear guide, you can successfully restore your device to its former functionality. Remember to approach the process with patience and attention to detail, ensuring that each step is executed accurately. By following the provided instructions and taking necessary precautions, you can revive your Moto G Play and continue to enjoy its features without the hindrance of a damaged screen. Taking on this repair project not only empowers you to take control of your device's maintenance but also provides a sense of accomplishment upon its successful completion. With a new screen in place, your Moto G Play will be ready to serve you once again.
html
In conclusion, replacing the screen on a Moto G Play is a feasible task that can save you time and money compared to seeking professional assistance. With the right tools, a replacement screen, and a clear guide, you can successfully restore your device to its former functionality. Remember to approach the process with patience and attention to detail, ensuring that each step is executed accurately. By following the provided instructions and taking necessary precautions, you can revive your Moto G Play and continue to enjoy its features without the hindrance of a damaged screen. Taking on this repair project not only empowers you to take control of your device’s maintenance but also provides a sense of accomplishment upon its successful completion. With a new screen in place, your Moto G Play will be ready to serve you once again.
FAQs
Q: Is it possible to replace the screen on a Moto G Play at home?
A: Yes, it is possible to replace the screen on a Moto G Play at home. With the right tools and a bit of patience, you can successfully replace the screen without having to visit a repair shop.
Q: What tools are needed to replace the screen on a Moto G Play?
A: To replace the screen on a Moto G Play, you will need a set of precision screwdrivers, a plastic opening tool, a heat gun or hair dryer, a replacement screen, and adhesive for reassembly.
Q: How long does it take to replace the screen on a Moto G Play?
A: The time it takes to replace the screen on a Moto G Play can vary depending on your experience with phone repairs. On average, it may take anywhere from 30 minutes to an hour to complete the replacement.
Q: Can I use any replacement screen for my Moto G Play?
A: It is essential to use a compatible replacement screen specifically designed for the Moto G Play. Using a screen designed for a different model may result in compatibility issues and functionality problems.
Q: Will replacing the screen on my Moto G Play void the warranty?
A: In most cases, replacing the screen on your Moto G Play yourself may void the warranty. It is recommended to check the warranty terms and conditions before proceeding with the replacement.