
If you are a proud owner of a Fitbit Zip, one of the most popular fitness trackers in the market, you may be wondering how to charge it properly. The Fitbit Zip is a small wearable device that tracks your steps, distance traveled, and calories burned, helping you stay motivated and achieve your fitness goals. However, like any electronic device, it requires regular charging to ensure it stays powered up and ready to track your activity. In this article, we will guide you through the process of charging your Fitbit Zip and provide some tips to make sure you get the most out of your device. Whether you are a new Fitbit Zip user or someone who needs a refresher, read on to learn how to charge your Fitbit Zip effectively.
Inside This Article
- Overview
- Charging the Fitbit Zip with a USB cable
- Using a charging dock or cradle to charge the Fitbit Zip
- Tips for optimal charging of the Fitbit Zip
- Conclusion
- FAQs
Overview
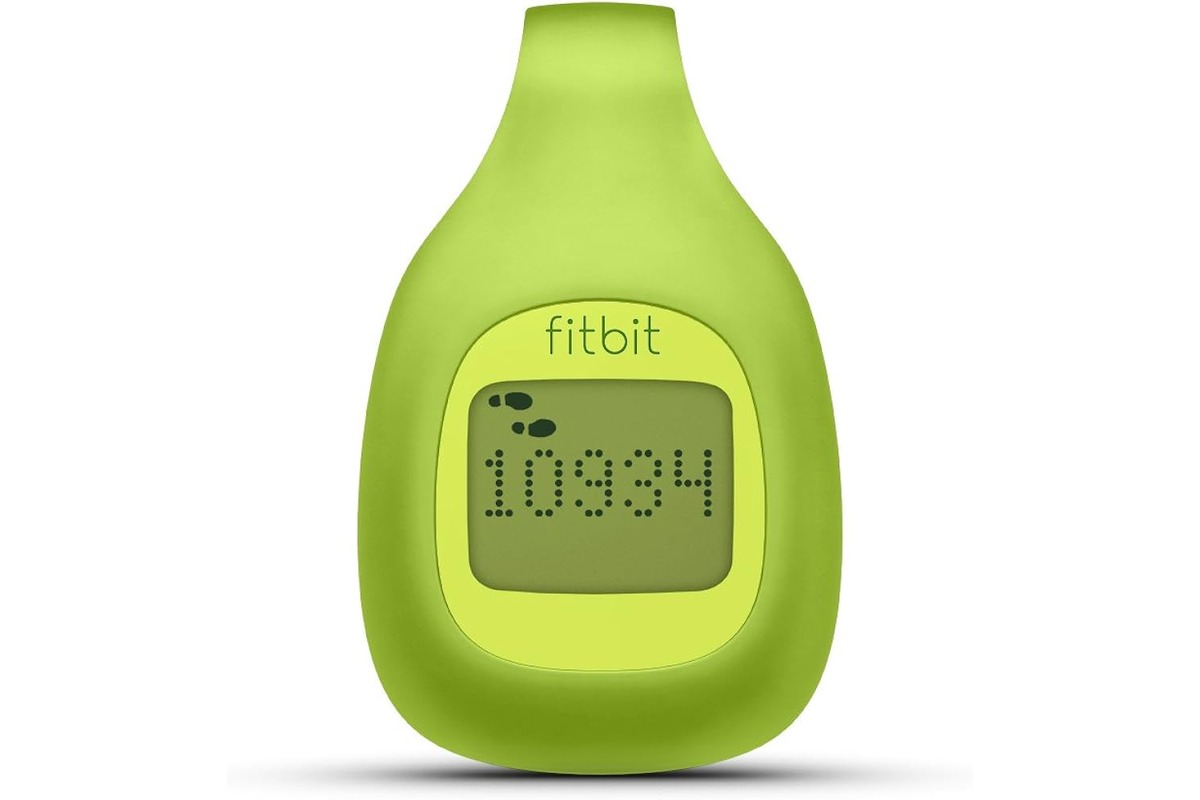
The Fitbit Zip is a popular fitness tracker that helps users monitor their daily activities, track their steps, distance covered, and calories burned. One important aspect of using the Fitbit Zip is ensuring that it remains charged so that you can continue to enjoy the benefits of this handy device. In this article, we will provide you with a comprehensive guide on how to charge your Fitbit Zip and address some common charging issues you may encounter.
Before we dive into the details of how to charge your Fitbit Zip, let’s first understand the basics of charging. The Fitbit Zip comes with a small charging cable that connects to the device. This cable is USB-enabled, which means you can charge your Fitbit Zip by connecting it to a computer, laptop, or a USB wall charger.
To charge your Fitbit Zip, simply insert the charging cable into the charging port located on the back of the device. Ensure that the cable is securely connected to the device before proceeding. Once the connection is established, you will notice a battery icon on the screen, which indicates that the Fitbit Zip is charging.
The charging duration of the Fitbit Zip varies depending on the battery level. On average, it takes approximately 1-2 hours to fully charge the device. While the Fitbit Zip is charging, you can stay updated on the charging progress by referring to the battery icon on the screen. Once the battery is fully charged, the icon will display a solid battery symbol.
However, it is important to note that sometimes you may encounter certain issues while charging your Fitbit Zip. One common issue is when the device fails to charge even when connected to a power source. In such cases, try the following troubleshooting steps:
- Ensure that the charging cable is properly connected to the Fitbit Zip and the power source.
- Try using a different USB cable or wall charger to rule out any issues with the charging equipment.
- Restart your Fitbit Zip by pressing and holding the button on the device for 10-15 seconds.
- If the above steps don’t resolve the issue, consider contacting Fitbit customer support for further assistance.
Charging the Fitbit Zip with a USB cable
If you own a Fitbit Zip, you may be wondering how to properly charge it. Fortunately, Fitbit has made it easy to keep your device powered up and ready for use. One of the most convenient methods is using a USB cable to charge your Fitbit Zip.
To get started, you’ll need a USB cable that is compatible with the Fitbit Zip. This is typically included with your device when you purchase it, but if you need a replacement, you can easily find one online or at your local electronics store.
To charge your Fitbit Zip with a USB cable, follow these simple steps:
- Locate the charging port on the back of your Fitbit Zip. It’s a small, rectangular slot.
- Take your USB cable and insert the larger end into a USB port on your computer, laptop, or USB wall charger.
- Insert the smaller end of the USB cable into the charging port on the back of your Fitbit Zip, making sure it is securely connected.
- Once connected, your Fitbit Zip should start charging. You may see a battery icon or charging symbol on the device’s screen to indicate that it is receiving power.
- Leave your Fitbit Zip connected to the USB cable until it reaches a full charge. This typically takes around 1-2 hours.
- Once fully charged, you can disconnect the USB cable from your Fitbit Zip and use it as usual. Remember to keep the USB cable in a safe place for future charging needs.
Charging your Fitbit Zip with a USB cable is a convenient and easy way to ensure that your device stays powered up. Whether you’re at home, in the office, or on the go, you can easily connect your Fitbit Zip to any USB port to charge it. Just make sure to use a compatible USB cable and give it enough time to reach a full charge before disconnecting.
Using a charging dock or cradle to charge the Fitbit Zip
When it comes to charging your Fitbit Zip, one convenient option is to use a charging dock or cradle. These accessories provide a stable and secure platform for your Fitbit Zip while it’s being charged. Here’s a step-by-step guide on how to use a charging dock or cradle to charge your Fitbit Zip:
1. Connect the charging cable: Start by connecting the charging cable to the USB port on the dock or cradle. Make sure the cable is securely plugged in.
2. Place the Fitbit Zip on the dock or cradle: Gently place your Fitbit Zip on the charging dock or cradle, ensuring that the metal contacts on the device align with the charging pins on the dock.
3. Ensure proper alignment: Take a moment to check that the Fitbit Zip is properly aligned with the charging dock or cradle. This will ensure a solid connection and effective charging.
4. Check the charging indicator: Once your Fitbit Zip is placed on the charging dock or cradle, it should start charging automatically. Look for the charging indicator on the Fitbit Zip’s display. It may show a battery icon or a charging symbol to indicate that it’s receiving power.
5. Charging precautions: While your Fitbit Zip is charging, it’s recommended to keep the area clean and free from any obstructions. Avoid placing any other objects on top of the charging dock or cradle to prevent interference with the charging process.
6. Charging duration: The charging duration for the Fitbit Zip may vary depending on the remaining battery level. On average, it takes about 1-2 hours to fully charge the device. However, if the battery is critically low, it may take longer to reach a full charge.
7. Remove the Fitbit Zip: Once your Fitbit Zip is fully charged, carefully remove it from the charging dock or cradle. Gently lift it off, ensuring that you don’t strain or damage the charging contacts.
Using a charging dock or cradle to charge your Fitbit Zip is a simple and hassle-free method. It provides a stable and efficient way to charge your device, ensuring that you’re always ready to track your activities and monitor your fitness progress.
Tips for optimal charging of the Fitbit Zip
The Fitbit Zip is a convenient and stylish activity tracker that helps you stay on top of your fitness goals. To ensure that your Fitbit Zip continues to perform at its best, it’s essential to charge it properly. Here are some tips for optimal charging of your Fitbit Zip:
1. Use the original charging cable: It’s always recommended to use the original charging cable that came with your Fitbit Zip. This ensures compatibility and reduces the risk of any damage to the device.
2. Connect securely: Make sure that the charging cable is securely connected to both the Fitbit Zip and the power source. A loose connection can lead to incomplete charging or interrupted power flow.
3. Clean the charging port: Over time, dirt, dust, and debris can accumulate in the charging port, hindering the charging process. Clean the charging port regularly using a soft, dry cloth to ensure a reliable connection.
4. Avoid extreme temperatures: Exposing your Fitbit Zip to extreme temperatures can affect its battery performance. Avoid charging your device in overly hot or cold environments, as this can shorten the battery life or cause damage.
5. Charge with care: It’s important to handle your Fitbit Zip with care during the charging process. Avoid bending or twisting the charging cable excessively, as this can weaken the wires and lead to charging issues.
6. Avoid overcharging: Although the Fitbit Zip is equipped with overcharge protection, it’s still a good practice to avoid leaving your device plugged in for extended periods after it’s fully charged. Disconnect the charger once the battery is sufficiently charged to prolong its lifespan.
7. Keep the firmware updated: Fitbit regularly releases firmware updates that can improve battery performance and optimize charging. Check for firmware updates regularly through the Fitbit app and install them to ensure the best charging experience.
8. Use a wall adapter: When possible, use a wall adapter instead of charging your Fitbit Zip through a computer or other devices. Wall adapters typically provide a more stable and consistent power supply, resulting in faster and more efficient charging.
By following these tips, you can ensure that your Fitbit Zip remains charged and ready to track your activities throughout the day. Taking proper care of your device will not only optimize its performance but also extend its overall lifespan.
Conclusion
Charging a Fitbit Zip is a simple and straightforward process that ensures uninterrupted usage and accurate tracking of your daily activities. By following the steps outlined in this guide, you can easily keep your Fitbit Zip powered up and ready to go.
Remember to use the original charging cable and plug it into a reliable power source. Always ensure that the contacts on the tracker and charging cable are clean and properly aligned for a secure connection. Keep an eye on the battery icon on your Fitbit Zip’s display to gauge the battery level and charge it as needed.
By taking proper care of your Fitbit Zip and following the recommended charging practices, you can enjoy its full functionalities and stay motivated on your fitness journey. Don’t let a drained battery hold you back – keep your Fitbit Zip charged and stay on track towards a healthier lifestyle!
FAQs
Here are some frequently asked questions about charging a Fitbit Zip:
-
How do you charge a Fitbit Zip?
To charge a Fitbit Zip, you need to follow these steps:
1. Remove the tracker from the clip.
2. Plug the charging cable into a USB port or a wall adapter.
3. Connect the other end of the charging cable to the charging port on the back of the tracker.
4. Make sure the pins on the charging cable are aligned with the contacts on the tracker.
5. Once connected, the tracker’s battery icon should appear, indicating that it is charging.
6. After the tracker is fully charged, remove it from the charging cable and reattach it to the clip. -
How long does it take to charge a Fitbit Zip?
The charging time for a Fitbit Zip depends on its current battery level. On average, it takes approximately 1-2 hours to fully charge the device. However, charging times may vary slightly.
-
Can I charge my Fitbit Zip without the charging cable?
No, you cannot charge your Fitbit Zip without the charging cable. The charging cable is specifically designed to connect to the charging port on the back of the device. It is essential for powering up the tracker and ensuring its battery is replenished.
-
What type of charging cable does the Fitbit Zip use?
The Fitbit Zip uses a specialized charging cable that is unique to the device. It has a USB connector on one end, which can be plugged into a computer or a wall adapter, and a proprietary connector on the other end that attaches to the charging port on the back of the tracker.
-
Can I charge my Fitbit Zip overnight?
Yes, it is safe to charge your Fitbit Zip overnight. The device is designed to automatically stop charging once the battery is fully replenished, preventing overcharging. However, it is always a good practice to regularly monitor the charging process and remove the tracker from the charger once it reaches full charge.