
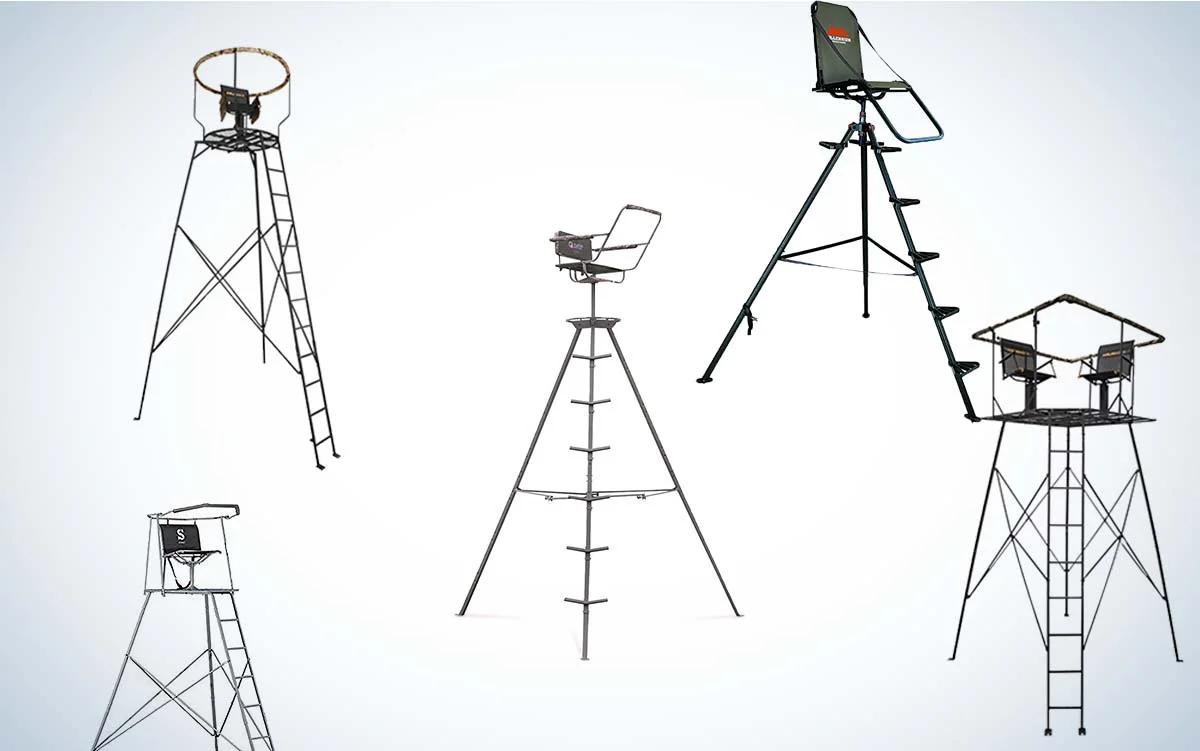
Are you an avid hunter looking to enhance your hunting experience? One essential tool that can significantly improve your success in the field is a tripod deer stand. A tripod deer stand provides hunters with a solid and secure platform from which to observe and target their prey.
But how do you go about building a tripod deer stand? In this comprehensive guide, we will walk you through the step-by-step process of constructing your own tripod deer stand. From gathering the necessary materials to assembling the components, we will cover everything you need to know to create a sturdy and functional hunting stand.
Whether you are a seasoned DIY enthusiast or a novice in woodworking, this guide will provide you with the insights and instructions you need to build a tripod deer stand that will elevate your hunting game. So, let’s get started and put you on the path to an enhanced hunting experience!
Inside This Article
- Choosing the Right Location
- Gathering the Necessary Materials
- Constructing the Tripod Frame
- Adding the Platform and Seat
- Conclusion
- FAQs
Choosing the Right Location
When it comes to building a tripod deer stand, one of the most critical factors to consider is choosing the right location. The location you select will greatly impact your hunting success and overall experience. Here are some key points to keep in mind:
1. Scout the Area: Before you start constructing your deer stand, spend some time scouting the area. Look for signs of deer activity, such as tracks, trails, and droppings. Identifying these signs will help you determine the best location for your stand.
2. Consider Wind Direction: The wind plays a crucial role in deer hunting. You want to position your stand downwind from where you expect the deer to approach, so your scent doesn’t alert them. Take note of prevailing wind patterns in the area and select a location that works with the wind direction.
3. Look for Strategic Cover: Deer prefer areas with natural cover where they can hide and feel secure. Look for locations with brush, trees, or tall grass that can provide camouflage for your deer stand. This will increase your chances of remaining undetected by approaching deer.
4. Evaluate Line of Sight: It’s important to have a clear line of sight from your deer stand to the areas where deer are likely to pass by. Trim any branches or vegetation that may obstruct your view and impede your shot. This will ensure that you have a good vantage point and can react quickly when a deer comes into range.
5. Accessibility: Consider how you will access your deer stand. Ideally, you want a location that is easily accessible and provides a safe route to and from your stand. Avoid areas with steep terrain or dense underbrush that may make it challenging to navigate.
By carefully selecting the right location for your tripod deer stand, you can significantly increase your chances of encountering deer and having a successful hunting experience. Take your time to evaluate different options and choose a spot that meets all the necessary criteria to maximize your hunting opportunities.
Gathering the Necessary Materials
Before you begin constructing your tripod deer stand, it’s important to gather all the necessary materials. This will ensure a smooth and efficient building process. Here are the key materials you will need:
1. Steel Tubing: Choose sturdy and durable steel tubing for the frame of your deer stand. This will provide stability and support for the platform and seat.
2. Wooden Planks: Opt for pressure-treated wooden planks to build the platform and seat. Pressure treatment helps to protect the wood from rotting and prolong its lifespan.
3. Bolts and Nuts: You will need various sizes of bolts and nuts to secure the different components of your tripod deer stand. Make sure to choose high-quality ones that are weather-resistant.
4. Angle Iron or Metal Brackets: Angle iron or metal brackets are essential for reinforcing the joints and connections of the steel tubing. These will enhance the overall stability and safety of your deer stand.
5. Screws: Use screws to fasten the wooden planks to the steel frame and to secure any additional features, such as a shooting rail or ladder. Make sure to choose screws that are suitable for outdoor use.
6. Ratchet Straps: Ratchet straps are necessary for securely attaching the tripod legs to the tree. They provide an extra level of stability and help to prevent any wobbling or movement of the deer stand.
7. Tools: Don’t forget to gather all the necessary tools for the construction process. This may include a drill, saw, tape measure, wrenches, and pliers.
By having all these materials ready beforehand, you can avoid any unnecessary delays or interruptions during the construction of your tripod deer stand. It’s always a good idea to double-check your materials list before starting the project to ensure that you have everything you need.
Constructing the Tripod Frame
Once you have selected the ideal location for your tripod deer stand, it’s time to start constructing the frame. The tripod frame is the backbone of your deer stand, providing stability and support for the platform and seat. Follow these steps to build a sturdy and reliable tripod frame:
- Gather the materials: Before you begin, make sure you have all the necessary materials on hand. This includes three long wooden poles or metal pipes, measuring around 8-10 feet in length, depending on the desired height of your stand. You will also need nuts, bolts, and washers to secure the frame together.
- Position the poles: Lay the three poles on the ground, forming a triangle shape. Make sure the poles are evenly spaced and aligned. This will determine the stability and balance of your tripod frame.
- Connect the poles: Using the nuts, bolts, and washers, secure the poles together at the top and bottom. Start by attaching the top ends of the poles, ensuring they are tightly fastened. Then, move down to the bottom ends and repeat the process. This will create a strong and secure connection, minimizing any wobbling or movement.
- Test for stability: Once the poles are connected, carefully lift the frame off the ground and check for stability. Shake the frame gently to see if there is any excessive movement or wobbling. If the frame feels unstable, reinforce the connections with additional nuts, bolts, or braces.
- Adjust the height: If you want to adjust the height of your tripod frame, you can do so by adding or removing sections of the poles. Keep in mind that the higher the stand, the better visibility you will have. However, be cautious not to make the stand too tall, as it may compromise stability.
- Prepare the ground: Before you set up the tripod frame at your chosen location, ensure that the ground is level and free from any obstructions or debris. Packed down the dirt or grass to create a solid foundation for the frame.
- Secure the frame: Once you have positioned the tripod frame at the desired location, use ropes or straps to secure it to nearby trees or sturdy objects. This will provide additional stability and prevent the frame from toppling over during use.
Constructing the tripod frame is a crucial step in building a reliable and safe deer stand. Proper construction and attention to detail will ensure that your frame can withstand the elements and provide a sturdy platform for hunting.
Adding the Platform and Seat
Now that you have successfully constructed the tripod frame, it’s time to focus on adding the platform and seat to complete your tripod deer stand. This section will guide you through the process of creating a sturdy and comfortable platform for your hunting needs.
The first step is to measure and cut the boards or plywood for the platform. Start by measuring the dimensions of the tripod frame and determining the size of the platform you want to build. Ensure that the boards are cut accurately to fit the dimensions and provide enough space for you to stand or sit comfortably.
Once you have the boards or plywood cut to size, it’s essential to secure them onto the frame. To do this, position the boards evenly across the frame and use screws or nails to attach them securely. Make sure to space the screws or nails evenly along each board to ensure maximum stability.
After securing the platform, it’s time to focus on adding a comfortable seat. Depending on your preference, you can choose to attach a seat directly to the platform or opt for a separate seat that can be attached later. Consider using a foldable or adjustable seat for added convenience and flexibility.
If you choose to attach a seat directly to the platform, ensure that it is positioned at a comfortable height and securely fastened. Use appropriate screws or bolts to attach the seat, taking into account your weight and any additional gear you might have while hunting.
Alternatively, if you prefer a separate seat, you can attach brackets or straps to the platform, allowing you to easily attach and detach the seat as needed. This option provides flexibility if you want to use different types of seats or remove the seat for transportation.
Regardless of the seat attachment method you choose, always prioritize safety. Double-check that all screws, bolts, and attachments are securely fastened, and test the stability of the seat and platform before using the tripod deer stand.
Remember to consider adding cushioning or padding to the seat for enhanced comfort during long hours of hunting. A cushioned seat can help reduce fatigue and provide better support for extended periods of sitting.
With the platform and seat securely in place, your tripod deer stand is now complete. Take the time to inspect all the components thoroughly before using it in the field. Make any necessary adjustments or reinforcements to ensure your safety while hunting.
Now that you’ve successfully built your tripod deer stand from scratch, it’s time to head out into the wilderness and enjoy the benefits of your hard work. Stay safe, comfortable, and focused while hunting from your elevated vantage point, thanks to your custom-built tripod deer stand.
Conclusion
Building a tripod deer stand can be a rewarding and satisfying project for hunters of all skill levels. Whether you’re a seasoned hunter looking to improve your hunting experience or a beginner seeking a cost-effective solution, constructing your own tripod deer stand allows you to customize it to your specific needs and budget.
Throughout this guide, we have covered the essential steps and considerations to keep in mind when building a tripod deer stand. From selecting the right materials and tools to ensuring stability and safety, each aspect contributes to creating a sturdy and reliable hunting perch.
Remember to thoroughly plan your project, take accurate measurements, and follow the building instructions diligently. Always prioritize safety and make sure to use proper protective gear while working with tools and materials. Additionally, consult local regulations and obtain any necessary permits before erecting your tripod deer stand.
Once your stand is complete, you can look forward to experiencing the advantages it offers, such as improved visibility, stability, and comfort during your hunting sessions. Building a tripod deer stand not only enhances your hunting experience but also provides a sense of personal accomplishment and satisfaction. So, get started on your project and enjoy the benefits of your custom-built hunting perch!
FAQs
1. What is a tripod deer stand?
A tripod deer stand, also known as a tripod hunting stand, is a portable hunting platform designed to elevate a hunter off the ground. It typically consists of a tripod base with a platform or seat at the top, providing an elevated position for improved visibility and shooting accuracy while hunting deer or other game.
2. Why should I use a tripod deer stand?
Using a tripod deer stand offers several advantages for deer hunting. Firstly, it provides an elevated vantage point that increases your field of view, allowing you to spot deer from a distance. Additionally, being higher off the ground improves your scent control and minimizes the chances of being detected by deer. Lastly, a tripod deer stand offers stability and support, making it easier to take accurate shots.
3. How do I choose the right tripod deer stand?
When selecting a tripod deer stand, consider factors like height, weight capacity, comfort features, and ease of assembly. Opt for a stand tall enough to provide a good field of vision and sturdy enough to support your weight. Look for a stand that offers a comfortable seat or platform to sit on for long periods. It’s also essential to choose a stand that is easy to transport and set up, especially if you plan to move it frequently.
4. Can I use a tripod deer stand for other types of hunting?
While a tripod deer stand is primarily designed for deer hunting, it can also be used for other types of hunting, such as turkey hunting or varmint hunting. The elevated position provided by a tripod stand can give you an advantage in spotting and targeting game during these hunts as well.
5. Are there any safety precautions I should take when using a tripod deer stand?
Yes, safety should always be a top priority when using a tripod deer stand. Before using the stand, make sure to inspect it for any damages or defects. Always follow the manufacturer’s instructions for assembly and usage. It’s important to securely fasten the stand to ensure stability and avoid any accidental falls. Additionally, use appropriate safety gear like a harness or safety straps to prevent falls and always exercise caution when climbing up or down the stand.