
Fitbit Blaze is a popular fitness tracker that allows users to monitor their activity levels, track their workouts, and even receive notifications from their smartphones. One of the standout features of the Fitbit Blaze is its ability to change bands, allowing users to customize their device and match it with their style and preferences.
Changing bands on the Fitbit Blaze is a straightforward process that anyone can do with just a few simple steps. Whether you want to switch to a new color or want a different type of band for a specific activity, knowing how to change bands can enhance both the functionality and the aesthetics of your Fitbit Blaze.
In this article, we will provide you with a detailed guide on how to change bands on the Fitbit Blaze, along with some helpful tips and FAQs to assist you throughout the process. So, let’s get started and give your Fitbit Blaze a fresh new look!
Inside This Article
After exploring the process of changing bands on the Fitbit Blaze, it is clear that this simple procedure can unlock a world of customization and personalization for your fitness tracker. With a wide range of stylish and functional bands available, you can easily switch up your look to match your outfit or mood. Whether you choose a silicon band for your intense workouts or a metal band for a sleek and sophisticated aesthetic, the ability to easily change bands allows you to truly make your Fitbit Blaze your own.
By following the step-by-step instructions outlined in this guide, you can confidently swap out bands and enjoy the versatility and flexibility that the Fitbit Blaze provides. So go ahead, get creative, and transform your Fitbit Blaze into a stylish accessory that reflects your unique personality and lifestyle.
FAQs
1. How do I change bands on my Fitbit Blaze?
To change bands on the Fitbit Blaze, follow these steps:
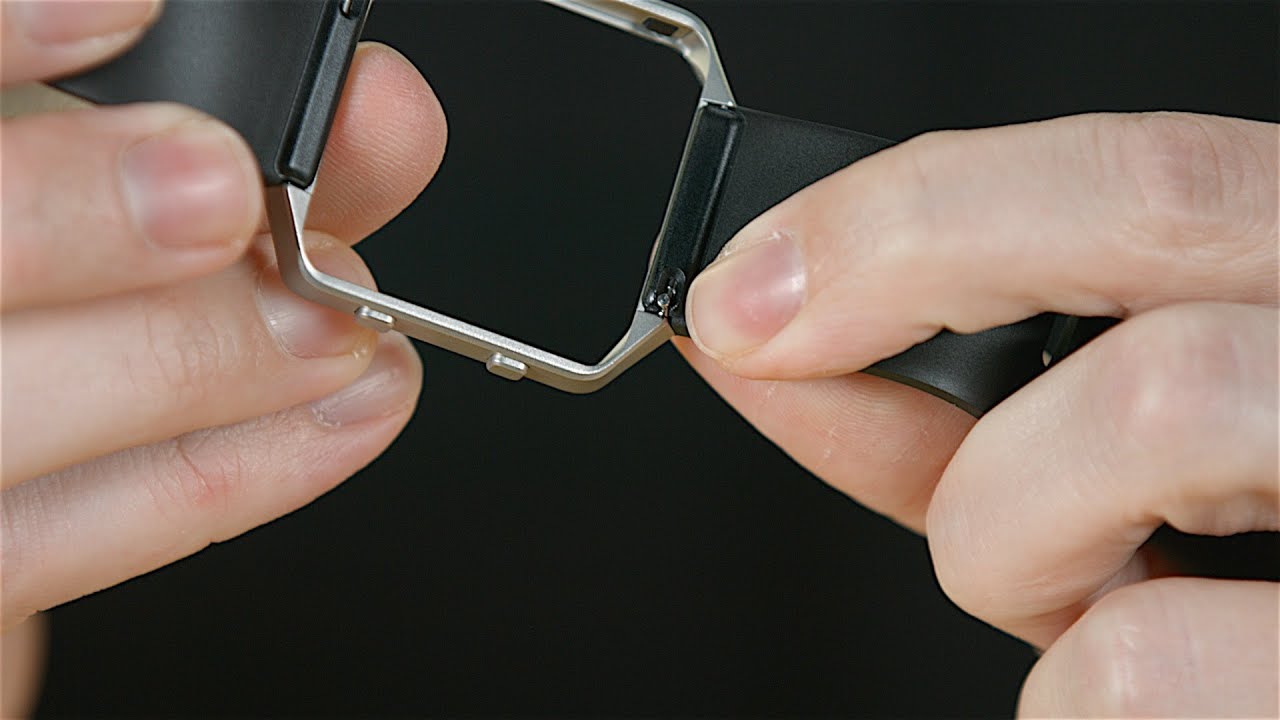
1. Turn the Fitbit Blaze over and locate the quick-release pins on the back of the device near the bottom.
2. Using a small tool or your fingernail, press the pins inward to release the current band.
3. Once the pins are released, slide the band out from the side of the device.
4. To attach a new band, align the pins on the new band with the slots on the device and slide it in until it clicks into place.
5. Repeat the process for the other side of the device if you are changing both bands.
Remember to ensure that the band is securely attached before wearing your Fitbit Blaze again.
2. Can I use any band with my Fitbit Blaze?
Fitbit Blaze is compatible with a range of bands available in the market, including Fitbit’s own bands and third-party options. However, it is important to make sure that the band you choose is specifically designed for the Fitbit Blaze model to ensure a proper fit and proper functioning of the device.
3. What materials are the Fitbit Blaze bands made of?
The Fitbit Blaze bands are made of a variety of materials to suit different preferences and needs. Fitbit offers bands made from elastomer, stainless steel, leather, and other materials. Third-party bands may also be available in a wide range of materials such as silicone, metal, fabric, and more.
4. Can I change the bands on my Fitbit Blaze regularly?
Yes, you can change the bands on your Fitbit Blaze as often as you like. The quick-release pins make it easy to swap bands, allowing you to customize the look of your device to match your style or occasion. However, it is recommended to handle the bands with care and follow the instructions provided to ensure a secure attachment.
5. Are there any special care instructions for the Fitbit Blaze bands?
While the Fitbit Blaze bands are designed to be durable and resistant to wear and tear, it is still important to take care of them to maximize their lifespan. Avoid exposing the bands to extreme temperatures or chemicals, as this may cause damage. Clean the bands regularly with mild soap and water, and make sure to dry them properly before attaching them to the device to prevent moisture build-up.