
Gaming headsets have become an essential accessory for gamers, providing them with an immersive audio experience and a competitive edge in their gaming adventures. However, after hours of intense gaming sessions, these headsets can accumulate dirt, sweat, and grime, which can affect both their performance and hygiene. Cleaning your gaming headset regularly is crucial to maintain its functionality and extend its lifespan. In this article, we will guide you through the step-by-step process of effectively cleaning your gaming headset to ensure optimal audio quality and comfort. Whether you have a wired or wireless headset, we have the tips and tricks to help you keep it in pristine condition. So, grab your cleaning supplies and let’s get started on giving your gaming headset the TLC it deserves.
Inside This Article
- Step 1: Gather the necessary materials
- Step 2: Remove detachable parts
- Step 3: Wipe down the headset
- Step 4: Clean the Ear Cushions
- Step 5: Clean the microphone
- Step 6: Clean the cables and connectors
- Step 7: Dry the headset
- Step 8: Reassemble the headset
- Conclusion
- FAQs
Step 1: Gather the necessary materials
Before you start cleaning your gaming headset, it’s important to gather all the necessary materials to ensure a thorough and effective cleaning process. Here are the materials you’ll need:
- Mild soap or cleaning solution: Choose a gentle cleaning solution that is suitable for the material of your headset. Avoid using harsh chemicals or abrasive cleaners, as they can damage the headset.
- Microfiber cloth: This soft cloth is ideal for wiping down the surface of the headset without scratching or leaving lint behind.
- Cotton swabs: These are useful for cleaning hard-to-reach areas, such as the crevices around buttons and controls.
- Isopropyl alcohol: If your headset has particularly stubborn stains or built-up grime, you can use isopropyl alcohol in moderation to help dissolve and remove them.
- Water: Depending on the cleaning solution you’re using, you may need water to dilute it or rinse off the headset.
- Blow dryer or cloth: After cleaning, you’ll need something to dry the headset. A blow dryer on low heat or a clean, dry cloth can be used for this purpose.
Gathering these materials beforehand will ensure that you have everything you need to clean your gaming headset effectively and safely. With the right tools at your disposal, you can give your headset a refreshed look and maintain its performance for a long time.
Step 2: Remove detachable parts
When cleaning a gaming headset, it’s important to remove any detachable parts before proceeding. This will ensure that you can clean each component thoroughly. Most gaming headsets have detachable ear cups, padding, and sometimes even a detachable microphone. Follow these steps to remove the detachable parts:
1. Start by checking the user manual or the manufacturer’s website for specific instructions on how to remove the detachable parts. Different headsets may have different methods of detachment, so it’s crucial to refer to the correct guidelines.
2. Carefully unscrew or unclip any ear cups or padding that are designed to be removable. Pay close attention to any small screws or release buttons that may secure these parts in place.
3. If your gaming headset has a detachable microphone, find the attachment point and gently unplug or unscrew it. Be careful not to apply excessive force, as delicate connectors can get damaged easily.
4. As you remove each part, take the opportunity to inspect them for any damage or excessive wear and tear. This will give you an idea of whether any parts need replacement or repair.
5. Place the detachable parts aside in a safe and clean location while you clean the rest of the headset. Keeping them separate will prevent them from getting dirty or damaged during the cleaning process.
Once you have successfully removed the detachable parts from your gaming headset, you can now proceed to the next step of the cleaning process.
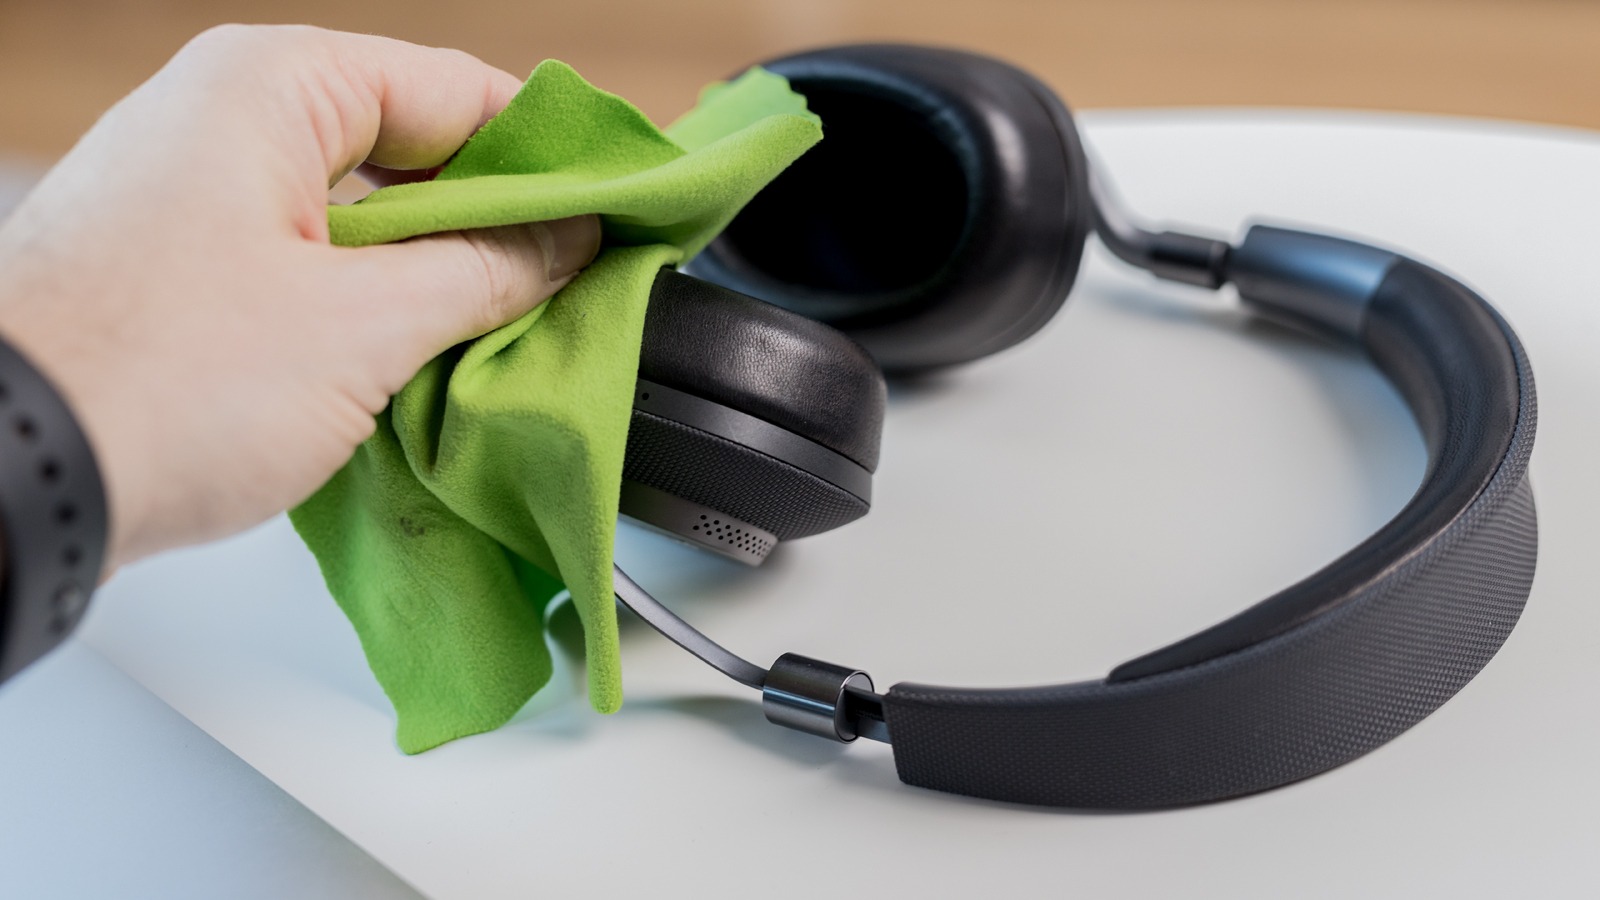
Step 3: Wipe down the headset
After removing the detachable parts, it’s time to give your gaming headset a thorough wipe down. This step is crucial for removing dirt, oil, and other debris that may have accumulated on the surface. Here’s how to do it:
1. Start by using a soft, dry cloth to gently wipe the exterior of the headset. This will help to remove any loose dust or dirt particles. Be sure to pay attention to corners, crevices, and any textured areas.
2. If there are visible stains or smudges on the headset, dampen the cloth slightly with water or a mild cleaning solution. Wring out any excess liquid to prevent it from seeping into the headset’s sensitive components.
3. Gently wipe the headset’s surface using the damp cloth, being careful not to apply too much pressure. Use small, circular motions to ensure thorough cleaning. For stubborn stains, you can apply a small amount of gentle soap or alcohol-based cleaner to the cloth.
4. Avoid using harsh chemicals or abrasive materials, as these can damage the headset’s finish or cause discoloration. Stick to gentle cleaning solutions and soft, non-abrasive cloths to protect your headset.
5. Pay special attention to areas where sweat or oils may accumulate, such as the ear cups and headband. These areas may require a bit more cleaning to remove buildup and ensure a hygienic gaming experience.
6. Once you have wiped down the entire headset, take a dry cloth or towel to remove any remaining moisture. It’s important to ensure that the headset is completely dry before moving on to the next step.
By following these steps, you can effectively wipe down your gaming headset and remove dirt and grime, keeping it clean and ready for your next gaming session.
Step 4: Clean the Ear Cushions
One of the most important aspects of maintaining your gaming headset is keeping the ear cushions clean. Over time, sweat, oil, and dirt can accumulate on the cushions, leading to an unpleasant and unhygienic gaming experience. Follow these steps to effectively clean the ear cushions of your gaming headset:
1. Start by removing the ear cushions from the headphone cups. Most gaming headsets have detachable cushions that can be easily removed. Check the user manual or manufacturer’s website for instructions on how to detach the cushions properly.
2. Once the cushions are removed, inspect them for any visible dirt or debris. Gently shake or tap them to dislodge any loose particles.
3. Fill a bowl with warm water and add a small amount of mild soap or detergent. Swirl the water to create a soapy solution.
4. Dip a soft cloth or sponge into the soapy water and wring out any excess moisture. You want the cloth or sponge to be slightly damp, not dripping wet.
5. Gently wipe the ear cushions with the damp cloth or sponge. Use circular motions to clean the entire surface, paying extra attention to any areas with visible stains or build-up. Avoid using excessive force, as it could damage the cushions.
6. If the ear cushions have stubborn stains or odors, you can use a mixture of equal parts water and vinegar as a natural cleaning solution. Dip a clean cloth into this mixture and gently dab it onto the affected areas. Let it sit for a few minutes before wiping it off with a damp cloth.
7. After cleaning, rinse the ear cushions thoroughly with clean water to remove any soap or vinegar residue. Make sure to squeeze out any excess water and gently pat them dry with a clean towel. Leaving them to air dry is also a good option.
8. Once the ear cushions are completely dry, reattach them to the headphone cups. Make sure they are securely fitted and aligned properly with the speakers.
By regularly cleaning the ear cushions of your gaming headset, you can maintain their comfort, hygiene, and overall lifespan. It’s important to follow these steps carefully and avoid using harsh chemicals or abrasive materials that could damage the cushions. With proper care, your gaming headset will continue to provide you with an immersive and enjoyable gaming experience.
Step 5: Clean the microphone
The microphone is an important component of your gaming headset, as it allows you to communicate with teammates and immerse yourself in the gaming experience. However, over time, the microphone can accumulate dirt, dust, and even bacteria from prolonged use. To ensure clear and hygienic communication, it’s essential to regularly clean the microphone. Follow these steps to clean your gaming headset’s microphone:
- Unplug the microphone: Start by disconnecting the microphone from the headset. Most gaming headsets have a detachable microphone for convenience. If yours is not detachable, be careful while cleaning to avoid damaging it.
- Inspect for debris: After removing the microphone, examine it closely for any visible dirt or debris. Use a small flashlight if necessary to get a better view. Gently tap or blow on the microphone to dislodge any loose particles.
- Clean the grill: The microphone grill is the part that captures your voice. It can easily accumulate dust, oils, and bacteria. To clean it, dip a cotton swab in isopropyl alcohol or a mild cleaning solution, and carefully wipe the grill in a circular motion. Avoid using excessive pressure to prevent damage.
- Disinfect the microphone: Due to regular use, the microphone can become a breeding ground for bacteria. To disinfect it, dampen another cotton swab or a soft cloth with isopropyl alcohol and gently wipe the entire surface of the microphone, including the grill, body, and connector.
- Dry thoroughly: After cleaning and disinfecting the microphone, make sure it is completely dry before reattaching it to the headset. You can use a clean, dry cloth or simply leave it to air dry for a few minutes.
By following these steps, you can maintain the cleanliness and functionality of your gaming headset’s microphone. Regular cleaning not only ensures optimum sound quality but also promotes good hygiene and extends the lifespan of your gaming headset.
Step 6: Clean the cables and connectors
Cleaning the cables and connectors of your gaming headset is an essential step in maintaining its optimum performance and longevity. Over time, dust, dirt, and debris can accumulate on these components, affecting the signal quality and overall functionality of your headset.
To clean the cables and connectors, gently wipe them down with a soft, lint-free cloth dampened with a mild cleaning solution. Avoid using harsh chemicals or abrasive materials as they can damage the cables and connectors. If there are any stubborn stains or buildup, you can use a cotton swab dipped in rubbing alcohol to carefully clean the affected areas.
When wiping down the cables and connectors, pay special attention to the contact points where the cables connect to the headset and any input/output jacks. These areas are prone to collecting dirt and may require a bit more cleaning. Make sure to remove any visible debris or dust that could interfere with the connection.
It’s important to be gentle when cleaning the cables and connectors to avoid loosening or damaging them. Avoid excessive bending or pulling, as this can weaken the cables or cause them to become disconnected from the connectors. Take your time and be thorough, ensuring that you clean both ends of the cables and all the connectors.
Once you have finished cleaning the cables and connectors, allow them to air dry completely before reconnecting them to the headset and other devices. This will help prevent any moisture from causing damage to the electrical components.
In addition to regular cleaning, it’s important to handle the cables and connectors with care during everyday use. Avoid twisting or yanking on them, and try to keep them away from sharp objects or excessive heat. Taking these precautions can help prolong the lifespan of your gaming headset and ensure optimal performance.
Step 7: Dry the headset
After cleaning the gaming headset thoroughly, it’s important to allow it to dry completely before using it again. Drying the headset properly helps to prevent any potential damage or malfunctions.
Here are some tips on how to effectively dry your gaming headset:
- First, ensure that all the components of the headset, including the ear cushions, detachable parts, and cables, are completely dry. Use a clean microfiber cloth to gently pat them dry or leave them in a well-ventilated area to air dry.
- Avoid using heat sources, such as hairdryers or heaters, to speed up the drying process. Excessive heat can damage the materials or components of the headset.
- If the headset has any moisture trapped in hard-to-reach areas, such as the ear cup hinges or microphone holes, you can use a can of compressed air to blow out any excess moisture. Be careful not to apply too much pressure, as this can cause damage.
- Alternatively, you can use a cotton swab or a soft, dry toothbrush to gently remove any remaining moisture from the nooks and crannies of the headset.
- Allow the headset to air dry for at least 24 to 48 hours to ensure that all the moisture has evaporated. This will help prevent any potential damage or corrosion to the internal components.
- Once the headset is completely dry, you can reassemble the detachable parts, attach the ear cushions, and connect the cables.
Remember, proper drying is essential to maintain the longevity and performance of your gaming headset. Taking the time to dry it thoroughly ensures that you can enjoy a clean and functional headset for hours of immersive gaming.
Step 8: Reassemble the headset
Now that you have cleaned all the components of your gaming headset, it’s time to put it back together. Follow these easy steps to reassemble your headset:
- Start with the detachable parts: Begin by reattaching any detachable parts like ear cups, headband padding, or microphone. Make sure they are securely connected and properly aligned.
- Connect the cables: Take the headphone cables and carefully plug them back into their respective ports. Ensure a firm connection and check that they are properly seated.
- Adjust the headband: If your gaming headset has an adjustable headband, adjust it to fit your head comfortably. Ensure that the headband is properly aligned and securely in place.
- Attach the ear cushions: Place the cleaned ear cushions back onto the ear cups, aligning them properly. Gently press them down to secure them in place, ensuring a snug fit.
- Test the microphone: Once the headset is reassembled, test the microphone to ensure it is working properly. Speak into the microphone and check if your voice is clear and audible.
- Check for proper functionality: Before you start using your gaming headset again, check if all the components are working correctly. Put on the headset, adjust the volume, and test the audio quality to ensure everything is in order.
- Store and protect: Finally, store your gaming headset in a safe and clean place to prevent it from getting damaged or accumulating dirt. A protective case or a dedicated storage area can help keep your headset in top condition.
By following these steps, you can reassemble your gaming headset with ease and have it ready for your next gaming session.
Conclusion
In conclusion, cleaning your gaming headset is crucial for maintaining its longevity and ensuring optimal performance. By following the steps outlined in this guide, you can effectively remove dirt, grime, and bacteria from your headset, improving both its aesthetic appeal and functionality.
Remember to regularly clean the ear pads, headband, and microphone, using gentle cleaning solutions and soft brushes or cloths. Avoid using abrasive materials or harsh chemicals that could damage the headset’s components.
Additionally, storing your gaming headset properly when not in use can help prevent dust accumulation and potential damage. Be sure to keep it in a safe and dry place, preferably in a dedicated case or storage pouch.
By incorporating regular cleaning into your gaming routine, you can enjoy a comfortable and hygienic gaming experience, while prolonging the lifespan of your beloved gaming headset.
FAQs
Q: How often should I clean my gaming headset?
A: It is recommended to clean your gaming headset at least once every few months. However, if you use it extensively or notice a build-up of dirt and grime, it’s best to clean it more frequently.
Q: What is the best way to clean a gaming headset?
A: The best way to clean a gaming headset is to start by using a soft, dry cloth to remove any surface dust and debris. Then, lightly dampen a microfiber cloth with water or a mixture of water and mild soap. Gently wipe down the headset, paying attention to the ear cups, headband, and microphone. Be cautious not to soak the headset or get water into any openings or electronic components.
Q: Can I use cleaning solutions or alcohol to clean my gaming headset?
A: It is generally not recommended to use cleaning solutions or alcohol on your gaming headset, as they can potentially damage the materials or electronic components. Stick to using a damp microfiber cloth with water or a mild soap solution for effective and safe cleaning.
Q: How do I clean the ear cushions on my gaming headset?
A: For removable ear cushions, gently detach them from the headset and clean them separately. Depending on the material, you can either hand wash them with mild soap and water, or wipe them down with a damp cloth. Make sure to completely dry the cushions before reattaching them to the headset. If the ear cushions are not removable, use a damp cloth to wipe them down, being careful not to saturate them.
Q: Can I clean the microphone on my gaming headset?
A: Yes, you can clean the microphone on your gaming headset. Use a soft, dry cloth or a cotton swab lightly dampened with water and gently wipe down the microphone. Avoid applying excessive pressure or getting moisture into any openings. If your microphone has a foam cover, you can remove it and clean it separately by rinsing it with water or using a mild soap solution. Allow it to fully dry before reattaching it.