
Do you want to enhance your audio experience while using your PC? One great way to achieve that is by connecting a Digital-to-Analog Converter, or DAC, to your computer. A DAC is a device that converts digital audio signals into analog signals, allowing you to enjoy high-quality audio output from your PC.
In this article, we will guide you through the process of connecting a DAC to your PC step by step. We’ll cover the necessary cables, connections, and settings to ensure a seamless audio experience. Whether you’re a music enthusiast, a gamer, or someone who simply appreciates high-fidelity sound, integrating a DAC into your PC setup can significantly enhance your audio quality and overall listening experience.
Inside This Article
- Common Types of DACs
- Required Cables and Connections
- Setting up DAC Software
- Troubleshooting and Tips
- Conclusion
- FAQs
Common Types of DACs
When it comes to connecting a Digital-to-Analog Converter (DAC) to your PC, there are several types of DACs available on the market. Each type has its own unique features and benefits, catering to different needs and preferences. Here are some common types of DACs to consider:
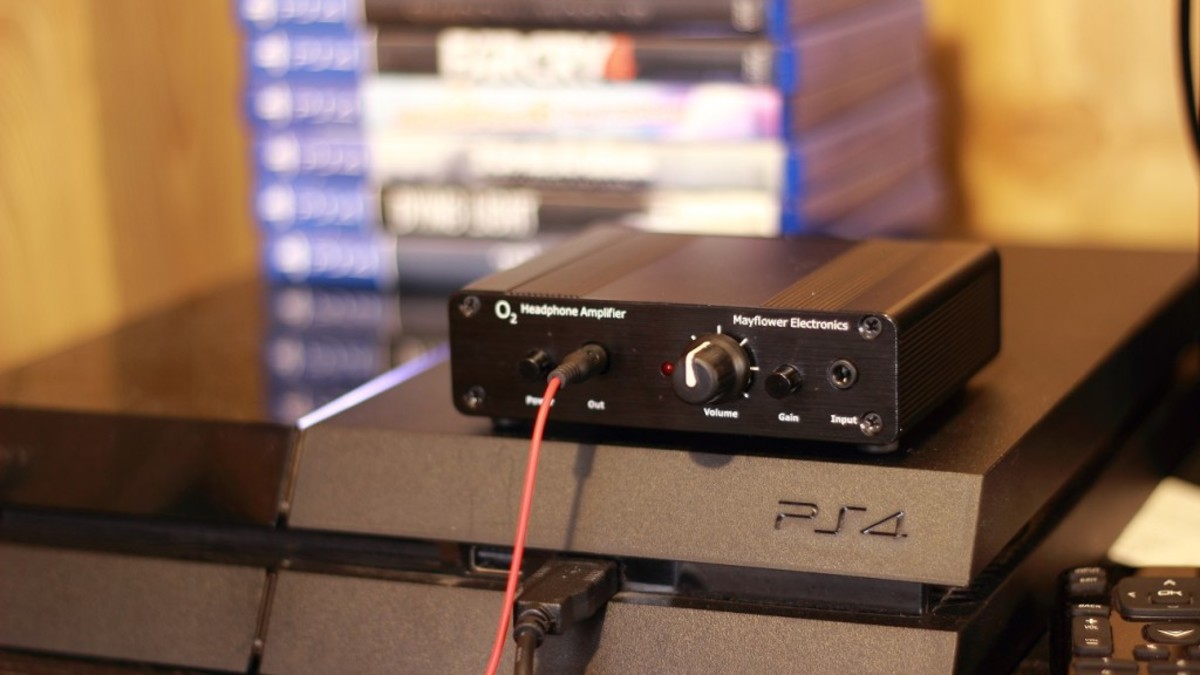
USB DAC: USB DACs are the most popular type of DACs for connecting to a PC. They are connected via a USB cable and can provide high-quality audio output. USB DACs are often compact and portable, making them a convenient option for on-the-go use.
Bluetooth DAC: Bluetooth DACs allow you to connect wirelessly to your PC, eliminating the need for cables. They use Bluetooth technology to stream audio from your PC to the DAC, delivering clear and high-fidelity sound. Bluetooth DACs are great for those who value convenience and a clutter-free setup.
Optical DAC: Optical DACs, also known as TOSLINK DACs, are designed to connect to your PC using an optical cable. These DACs convert the digital audio signal into an analog signal, delivering excellent audio quality. Optical DACs are popular among audiophiles who want the best possible sound reproduction.
Coaxial DAC: Coaxial DACs, also known as SPDIF DACs, utilize a coaxial cable to connect to your PC. They offer similar audio quality to optical DACs but use a different type of connection. Coaxial DACs are commonly used in professional audio setups and can provide a reliable and stable audio connection.
Audio Interface DAC: Audio interface DACs are specifically designed for professional audio recording and production. They typically offer a range of input and output options, including XLR and TRS connections, allowing for the use of microphones, instruments, and studio monitors. Audio interface DACs are ideal for musicians, producers, and audio engineers.
Integrated DAC: Some PC motherboards and sound cards come with built-in DACs. These integrated DACs can provide decent audio quality for casual listening. However, for higher fidelity and better audio performance, dedicated external DACs are often recommended.
It’s worth noting that some DACs come with additional features such as headphone amplification, multiple output options, and adjustable gain settings. Consider your specific requirements and budget when choosing the right DAC for your PC setup.
Required Cables and Connections
When it comes to connecting a DAC (Digital-to-Analog Converter) to your PC, there are a few essential cables and connections that you need to consider. These connections play a vital role in ensuring a seamless and high-quality audio experience. Let’s take a closer look at the necessary cables and how to connect them:
1. USB Cable: The USB cable is typically the primary connection between your DAC and PC. Ensure that you have a high-quality USB cable that supports the appropriate data transfer rates for optimal performance. Some DACs come with their own dedicated USB cable, while others may require you to purchase one separately.
2. RCA Cables: RCA cables are commonly used to connect the output of the DAC to your audio system or headphones. These cables have red and white connectors that correspond to the right and left audio channels respectively. Ensure that the RCA cables are shielded to minimize interference and maximize audio fidelity.
3. Optical or Coaxial Cable: Some DACs provide alternative input options, such as optical or coaxial digital connections. These cables allow you to connect your DAC to devices like TVs, gaming consoles, or CD players. Determine the appropriate cable based on the available input options on your DAC and the device you want to connect it to.
4. Power Cable: Most DACs require an external power source. Ensure that you have the appropriate power cable and connect it to a power outlet. Some DACs also offer the option of being powered via USB, eliminating the need for an external power cable.
5. PC Connection: Finally, ensure that you have a USB port available on your PC to connect the DAC. If your PC has a USB-C port, you may need to use an adapter or a USB-C to USB-A cable to connect the DAC.
Before connecting your DAC, make sure to turn off both your PC and the DAC to avoid any potential damage. Once you have all the required cables, follow the manufacturer’s instructions to connect your DAC to your PC properly.
Remember, the quality of your cables and connections can significantly impact the overall audio performance. Investing in high-quality cables and ensuring secure connections will help you achieve the best sound quality from your DAC.
Setting up DAC Software
Once you have physically connected your DAC to your PC, the next step is to set up the software to ensure proper functionality. Follow these steps to successfully set up the DAC software:
- Install the DAC driver: Start by installing the necessary driver software for your DAC. This can usually be found on the manufacturer’s website or included with the DAC itself. Download the driver and follow the installation prompts to complete the process.
- Restart your PC: After installing the driver, it’s a good idea to restart your PC. This will allow the driver to fully integrate into your system and ensure smooth operation of the DAC.
- Open the DAC software: Locate the software that came with your DAC or use the manufacturer’s recommended software for controlling the DAC. Open the software and ensure that your DAC is recognized and connected.
- Check the settings: Once the software is open, you will have access to various settings and customization options. Take some time to explore these settings and configure them according to your preferences. Common settings include sample rate, bit depth, and output format.
- Configure audio playback settings: Depending on your operating system, you may need to configure the audio playback settings to route the audio output through your DAC. In Windows, for example, you can access the sound settings by right-clicking on the volume icon in the taskbar and selecting “Playback devices.” From there, select your DAC as the default playback device.
- Test the DAC: To ensure that the DAC is working properly, play some audio through your preferred media player or streaming service. Listen for any improvements in audio quality and make any necessary adjustments to the settings if needed.
Tip: Some DAC software may offer additional features such as equalization, room correction, or headphone amplifier adjustment. Take advantage of these features to further enhance your audio experience.
Setting up the software for your DAC is a crucial step in maximizing its performance. By following these steps and exploring the available settings, you can customize your audio playback to suit your preferences and enjoy a superior listening experience.
Troubleshooting and Tips
Connecting a digital-to-analog converter (DAC) to your PC can sometimes come with its fair share of challenges. But fear not! In this section, we’ll explore some common troubleshooting issues and provide helpful tips to ensure a smooth and successful connection.
No Sound Output: If you’re experiencing no sound output after connecting your DAC to your PC, there are a few steps you can take to resolve the issue. First, ensure that your DAC is powered on and connected properly to your PC. Check the volume settings on both your PC and DAC to ensure they are not muted or set to low levels. Additionally, make sure that the correct audio output is selected in your PC’s settings.
Poor Sound Quality: If you’re hearing distorted or low-quality sound, it could be due to a few factors. Start by checking the audio settings on your PC and ensure that the sample rate and bit depth are set to match the capabilities of your DAC. Some DACs have specific driver software that needs to be installed on your PC for optimal performance. Check the manufacturer’s website for any available updates or driver downloads.
Interference or Noise: If you notice unwanted noise or interference in your audio output, it could be caused by electrical interference from nearby devices or improper grounding. Try relocating your DAC away from other electronic devices such as routers, speakers, or monitors. Additionally, ensure that your DAC is properly grounded and the cables are securely connected.
Incompatible Drivers: Compatibility issues between your DAC and your PC’s operating system can sometimes arise. If you’re experiencing driver errors or compatibility issues, visit the manufacturer’s website to check for updated drivers that are compatible with your operating system. Installing the latest drivers can often resolve these types of issues.
USB Power Limitations: Some DACs draw power solely from the USB connection, which can sometimes lead to power limitations. If you notice that your DAC is not functioning properly or experiencing intermittent issues, try connecting it to a powered USB hub or using a USB Y-cable to draw power from two USB ports simultaneously. This can provide a more stable power supply and help resolve any power-related issues.
Testing with Multiple Devices: If you have access to multiple devices, such as a laptop or smartphone, try connecting your DAC to different devices to see if the issue persists. This can help determine if the problem lies with your PC or the DAC itself. If the issue is isolated to one device, proceed with troubleshooting specifically for that device, such as checking drivers or software settings.
Resetting your DAC: In some cases, performing a factory reset on your DAC can help resolve persistent issues. Refer to the manufacturer’s instructions on how to perform a reset, as the process may vary depending on the model. Keep in mind that performing a factory reset will erase any custom settings or configurations you have made, so be sure to backup any important data.
By following these troubleshooting steps and implementing our tips, you’ll be well on your way to connecting your DAC to your PC without any hiccups. Remember, patience is key, and don’t hesitate to reach out to the manufacturer’s support team if you need further assistance.
Conclusion
Connecting a DAC (Digital-to-Analog Converter) to your PC can greatly enhance your audio listening experience. With a DAC, you can enjoy high-quality sound reproduction, ensuring that every note and nuance is crisp and clear.
By following the steps outlined in this article, you can easily connect your DAC to your PC and start enjoying better audio right away. Remember to choose a DAC that suits your needs and preferences, and ensure that you have the necessary cables and adapters.
Whether you’re a music enthusiast, a gamer, or a content creator, the addition of a DAC to your PC setup can take your audio experience to new heights. Say goodbye to the limitations of onboard audio and embrace the power of a dedicated DAC.
So don’t hesitate – connect your DAC to your PC and immerse yourself in the rich, high-fidelity audio that you deserve!
FAQs
FAQ 1: What is a DAC?
A DAC, or Digital-to-Analog Converter, is a device that converts digital audio signals into analog signals. It is commonly used to improve the audio quality of devices such as computers, smartphones, and music players by bypassing the internal DAC and using a dedicated external DAC for better sound reproduction.
FAQ 2: Can I connect a DAC to my PC?
Absolutely! Connecting a DAC to your PC is a straightforward process. You will need to ensure that your PC has the appropriate output port for the DAC, such as USB, optical, or coaxial. Once you have identified the correct port, you can simply connect the DAC to your PC using the appropriate cable and configure your computer’s audio settings to output audio through the DAC.
FAQ 3: What are the benefits of using a DAC with a PC?
Using a DAC with a PC can provide several benefits. Firstly, it can significantly improve the audio quality of your PC by bypassing the built-in DAC, which is often of lower quality. This can result in clearer, more detailed, and more dynamic sound reproduction. Additionally, a DAC can also support higher bit rates and sample rates, allowing for a more immersive audio experience when listening to high-resolution audio files.
FAQ 4: Do I need special drivers to connect a DAC to my PC?
In most cases, you will not need any special drivers to connect a DAC to your PC. Many DACs are plug-and-play, meaning they are automatically recognized by your computer’s operating system. However, there may be some DAC models that require specific drivers or firmware updates. It is advisable to check the manufacturer’s website or user manual for any specific driver requirements before connecting your DAC to your PC.
FAQ 5: Can I connect multiple DACs to my PC?
Yes, it is possible to connect multiple DACs to your PC. However, it is important to note that you will typically need additional software or audio routing tools to manage and configure multiple DACs simultaneously. This allows you to select which DAC you want to use for different audio output devices or applications. Keep in mind that the number of DACs you can connect to your PC may also depend on the available ports and your computer’s audio capabilities.