
Are you looking to learn how to crimp SMA connectors like a pro? Whether you’re a seasoned technician or an enthusiastic DIYer, being able to crimp SMA connectors can elevate your cell phone accessory game to the next level. SMA connectors are commonly used to attach antennas, cables, and other accessories to mobile devices, providing a secure and reliable connection.
In this comprehensive guide, we will walk you through the step-by-step process of crimping SMA connectors to ensure a professional and durable connection. From understanding the anatomy of an SMA connector to choosing the right tools and techniques, we’ve got you covered. So let’s dive in and discover how to master the art of crimping SMA connectors.
Inside This Article
- Choosing the Right SMA Connector
- Necessary Tools and Materials
- Step-by-Step Guide to Crimping an SMA Connector
- Testing and Troubleshooting
- Conclusion
- FAQs
Choosing the Right SMA Connector
When it comes to crimping an SMA connector, one of the most crucial steps in the process is choosing the right connector for your specific needs. The SMA (SubMiniature Version A) connector is a popular choice for various applications, including mobile accessories and wireless communication devices. However, there are several factors to consider when selecting the appropriate SMA connector.
The first factor to consider is the gender of the connector. SMA connectors are available in both male and female versions. The male connector has a pin in the center, while the female connector has a receptacle for the pin. Your choice will depend on the equipment you are connecting and whether you need a plug or a jack.
Another important consideration is the impedance of the connector. SMA connectors typically come in two impedance options: 50 Ohm and 75 Ohm. The 50 Ohm connectors are commonly used in telecommunications and wireless applications, while the 75 Ohm connectors are more suitable for video and audio applications. Make sure to match the impedance of the connector to the impedance requirements of your equipment.
Additionally, it is essential to pay attention to the frequency range of the connector. SMA connectors are designed to work within specific frequency ranges, and choosing the right connector for your application ensures optimal signal transmission. Be sure to check the specifications of your equipment and select an SMA connector that can handle the required frequency range.
Lastly, consider the physical characteristics of the connector. SMA connectors are available in different sizes, such as SMA, SMA RP (Reverse Polarity), SMA-905, and SMA-906. Each size has specific features and applications, so it is important to understand your equipment’s requirements and choose the appropriate connector size accordingly.
By considering these factors – gender, impedance, frequency range, and physical characteristics – you can ensure that you choose the right SMA connector for your specific application. This will result in a proper and reliable connection, allowing for seamless transmission of signals in your mobile accessories or wireless communication devices.
Necessary Tools and Materials
Before you begin crimping an SMA connector, it’s important to gather the necessary tools and materials. Here’s a list of what you’ll need:
- SMA Connector: Make sure you have the appropriate SMA connector for your specific application. There are different types of SMA connectors, such as SMA male and SMA female, so ensure you have the correct one.
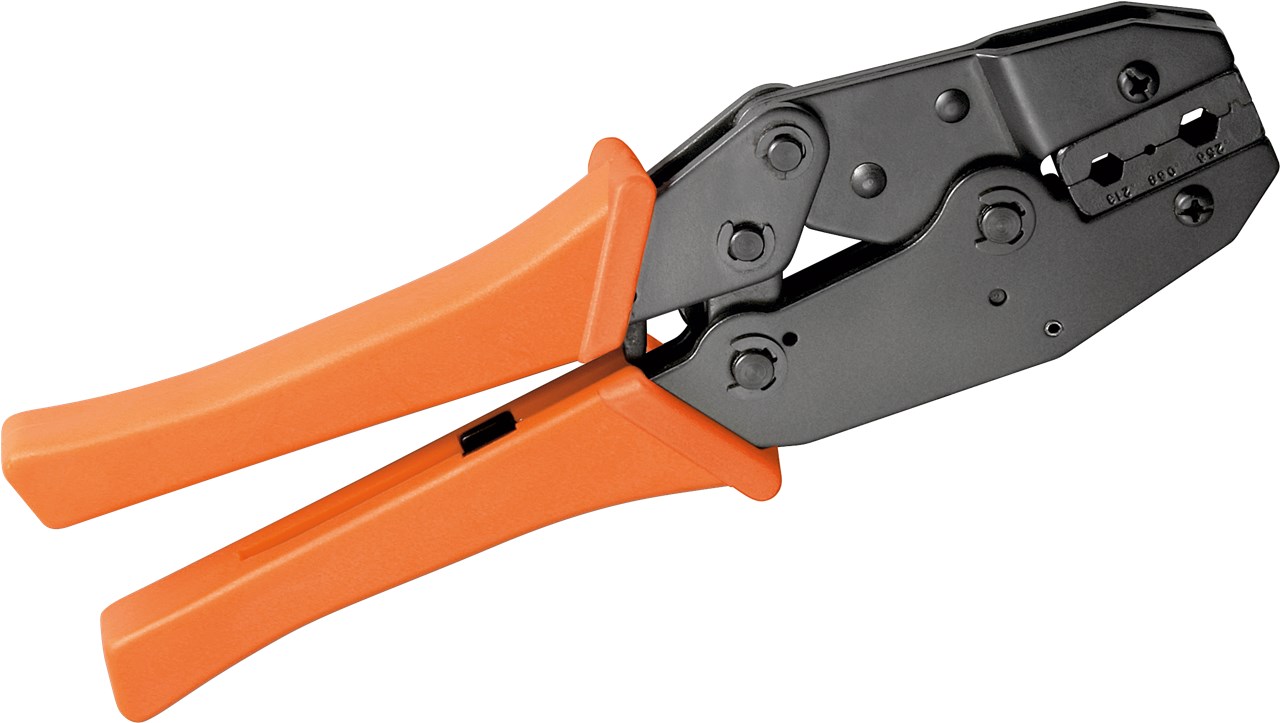
- Crimp Tool: Invest in a high-quality crimp tool designed specifically for SMA connectors. Look for one with a precision ratchet mechanism for consistent and reliable crimps.
- Coaxial Cable: Choose a high-quality coaxial cable that matches the specifications of your SMA connector. The most common types of coaxial cables used with SMA connectors are RG-316 and RG-174.
- Cable Cutter: Use a cable cutter to trim the coaxial cable to the required length. Ensure that the cutter is sharp and capable of cleanly cutting through the cable without causing damage.
- Wire Strippers: Opt for wire strippers designed for coaxial cables to remove the outer jacket and expose the inner conductor. These should have adjustable blades to accommodate different cable sizes.
- Heat Shrink Tubing: Heat shrink tubing is used to provide insulation and protection to the crimped area. Choose the appropriate size of heat shrink tubing based on the diameter of your coaxial cable.
- Heat Gun: A heat gun is necessary to shrink the heat shrink tubing and create a secure and durable connection. Make sure it has different heat settings to avoid melting or damaging the tubing.
- Marker: Have a marker or pen handy to label the connector and cable for easy identification, especially if you’re working on multiple connections.
- Optional: Connector Assembly Tool: If you frequently work with SMA connectors, consider investing in a connector assembly tool. This tool simplifies the process of attaching the connector to the coaxial cable and ensures consistent results.
Having these tools and materials ready before you start crimping will help you work efficiently and ensure a successful connection between your SMA connector and coaxial cable.
Step-by-Step Guide to Crimping an SMA Connector
Are you looking to crimp an SMA connector for your mobile accessories? Follow this step-by-step guide to ensure a secure and reliable connection.
Step 1: Gather the Necessary Tools and Materials
To begin, make sure you have all the essential tools and materials ready. You will need:
- An SMA connector
- A coaxial cable
- SMA crimping tool
- Wire stripper
- Small knife or scalpel
- Heat shrink tubing
- Heat gun or lighter
Step 2: Prepare the Cable
Start by stripping approximately 1 inch of the outer jacket from the coaxial cable using the wire stripper. Be careful not to damage the inner insulation or shielding.
After removing the outer jacket, you will see a braided shielding. Gently fold it back over the outer jacket, exposing the inner insulation. Trim the excess shielding using a small knife or scalpel. Make sure not to cut into the inner insulation.
Step 3: Expose the Inner Conductor
Once the shielding is folded back, you will see the inner conductor. Strip approximately 1/8 inch of the insulation from the inner conductor using a wire stripper. This will expose the bare conductor, ensuring a proper connection.
Step 4: Insert the Cable into the SMA Connector
Take the SMA connector and carefully insert the prepared end of the coaxial cable into the connector. Make sure the inner conductor goes into the central pin of the connector, and the shielding surrounds the outer barrel.
Step 5: Crimp the Connector
Place the connector and cable into the SMA crimping tool, ensuring that the connector aligns with the appropriate crimping slot. Squeeze the crimping tool firmly to compress the connector onto the cable. This will create a secure and reliable connection.
Step 6: Insulate the Connection
Slide a piece of heat shrink tubing over the crimped connector, ensuring it covers the entire connection. Use a heat gun or a lighter to apply heat evenly to the tubing, causing it to shrink and form a tight seal around the connector. This will provide additional protection against moisture and physical damage.
Step 7: Test and Troubleshoot
Once the crimping and insulation are complete, it’s time to test the connection. Connect the other end of the coaxial cable to the appropriate device and verify if the connection is secure and providing a strong signal.
If you encounter any issues, double-check the crimping and insulation. Ensure that the inner conductor is properly seated in the central pin and that the shielding is correctly connected to the outer barrel.
That’s it! You have successfully crimped an SMA connector to your coaxial cable. Now you can enjoy a reliable and high-quality connection for your mobile accessories.
Testing and Troubleshooting
Once you have successfully crimped your SMA connector onto the cable, it’s important to perform thorough testing and troubleshooting to ensure optimal performance. Here are some steps to follow:
1. Visual Inspection: Start by visually inspecting the crimped connector and cable. Look for any signs of physical damage, loose connections, or improper crimping. Ensure that the center pin is securely attached and properly aligned with the inner conductor.
2. Continuity Test: Use a multimeter or continuity tester to check for continuity between the center pin and the inner conductor, as well as between the outer shield and the cable’s outer conductor. This will help verify that the connections are properly established.
3. Signal Transmission Test: Connect one end of the cable to a testing device or equipment, such as an antenna or a signal analyzer. Send a test signal through the cable and check for any deviations or disruptions in the signal transmission. This will help identify any potential issues with the crimped connector.
4. Signal Strength Test: Measure the signal strength at various points along the cable using an appropriate measuring device. This will help ensure that the signal is not attenuated or weakened due to any faulty connections or impedance mismatches caused by the crimped connector.
5. Antenna Alignment Test: If the crimped connector is being used for an antenna, perform an antenna alignment test. Ensure that the antenna is properly aligned and oriented for maximum signal reception or transmission. Make adjustments as necessary to optimize the antenna’s performance.
6. Troubleshooting: If any issues are detected during the testing process, troubleshoot the problem by inspecting the cable, connector, and any other related components. Look for loose connections, bent pins, or damaged cables. Replace any faulty parts and retest the system to ensure proper functionality.
Remember that testing and troubleshooting are crucial steps to ensure the reliability and performance of your crimped SMA connector. By following these steps and addressing any issues that arise, you can ensure that your connector provides optimal signal transmission and maintains a secure connection.
Conclusion
In conclusion, learning how to crimp an SMA connector is a valuable skill for anyone involved in the world of electronics or telecommunications. With the right tools and technique, you can easily create reliable connections that ensure optimal performance and signal transmission. Whether you’re a professional technician or an amateur enthusiast, mastering the art of crimping SMA connectors will open up a world of possibilities for you.
Remember to follow the step-by-step process, double-check your work, and practice regularly to become proficient in crimping SMA connectors. With patience and practice, you’ll be able to confidently handle any cabling or connector needs, whether it’s for your cell phone, computer, or any other electronic device.
So don’t be intimidated by the process – go ahead and give it a try! You’ll soon discover that crimping SMA connectors is a skill that is not only rewarding but also essential in today’s mobile-driven world.
FAQs
1. What is a crimp SMA connector?
A crimp SMA connector is a type of connector used in the field of telecommunications and electronics. It is designed to securely connect and terminate coaxial cables with SMA (SubMiniature version A) connectors. The crimping process involves compressing the connector onto the cable using a specialized crimping tool, ensuring a reliable and stable connection.
2. Why would I need to crimp an SMA connector?
Crimping an SMA connector is necessary when you want to attach or replace a connector on a coaxial cable. It is commonly done to create custom-length cables or to repair damaged connectors. Crimping allows for a strong and consistent connection that minimizes signal loss and interference, making it essential in various applications such as wireless communication and RF testing.
3. What tools do I need to crimp an SMA connector?
To crimp an SMA connector, you will need a few essential tools:
- Coaxial cable with an SMA connector
- Wire strippers
- Crimp tool specifically designed for SMA connectors
- Connector pins (center and outer)
These tools work in tandem to prepare the cable, strip the outer insulation, insert the pins, and finally crimp the connector onto the cable.
4. How do I crimp an SMA connector?
The process of crimping an SMA connector involves several steps:
- Measure and cut the coaxial cable to your desired length.
- Use wire strippers to remove the outer insulation of the cable, exposing the inner conductor and shielding.
- Insert the center connector pin onto the inner conductor and ensure it is securely attached.
- Slide the outer connector pin onto the shield of the cable until it is flush with the cable’s outer surface.
- Place the connector onto the crimp tool and align it with the connector pins.
- Apply uniform pressure to the crimp tool, ensuring that the connector is securely crimped onto the cable.
It’s important to follow the specific instructions provided with your crimp tool for the best results.
5. Are there any common mistakes to avoid when crimping an SMA connector?
While crimping an SMA connector, it’s important to avoid common mistakes to ensure a reliable connection:
- Incorrectly stripping the cable: Ensure that the cable is stripped to the appropriate length and that the inner conductor is not exposed too far.
- Using the wrong crimp tool: Using a crimp tool that is not specifically designed for SMA connectors may result in a poor connection.
- Not crimping evenly: Applying uneven pressure during crimping can lead to an unstable connection and signal loss.
- Not using high-quality connectors: Using low-quality connectors can result in poor signal quality and vulnerability to interference.
Taking care to avoid these mistakes will help you achieve a successful crimped SMA connector.