
Welcome to our comprehensive guide on how to cut a SIM card to a Micro SIM! If you have recently upgraded your cell phone and your new device requires a smaller SIM card, don’t fret. In this article, we will walk you through the step-by-step process of trimming your current SIM card to fit into a Micro SIM slot. Whether you’re a tech-savvy individual or a newbie in the world of mobile accessories, we’ve got you covered. By following our instructions, you’ll be able to successfully modify your SIM card and continue using your existing number and data plan with your new device. So, grab your scissors and join us as we dive into the exciting world of SIM card modification!
Inside This Article
- What You Will Need
- Step 1: Measure and Mark
- Step 2: Cut the SIM Card
- Step 3: Smooth the Edges
- Step 4: Test the Micro SIM Card
- Additional Tips and Considerations
- Conclusion
- FAQs
What You Will Need
Before you begin cutting your SIM card to a micro SIM, there are a few essential tools and materials that you will need to ensure a successful outcome. Here’s a list of what you will need:
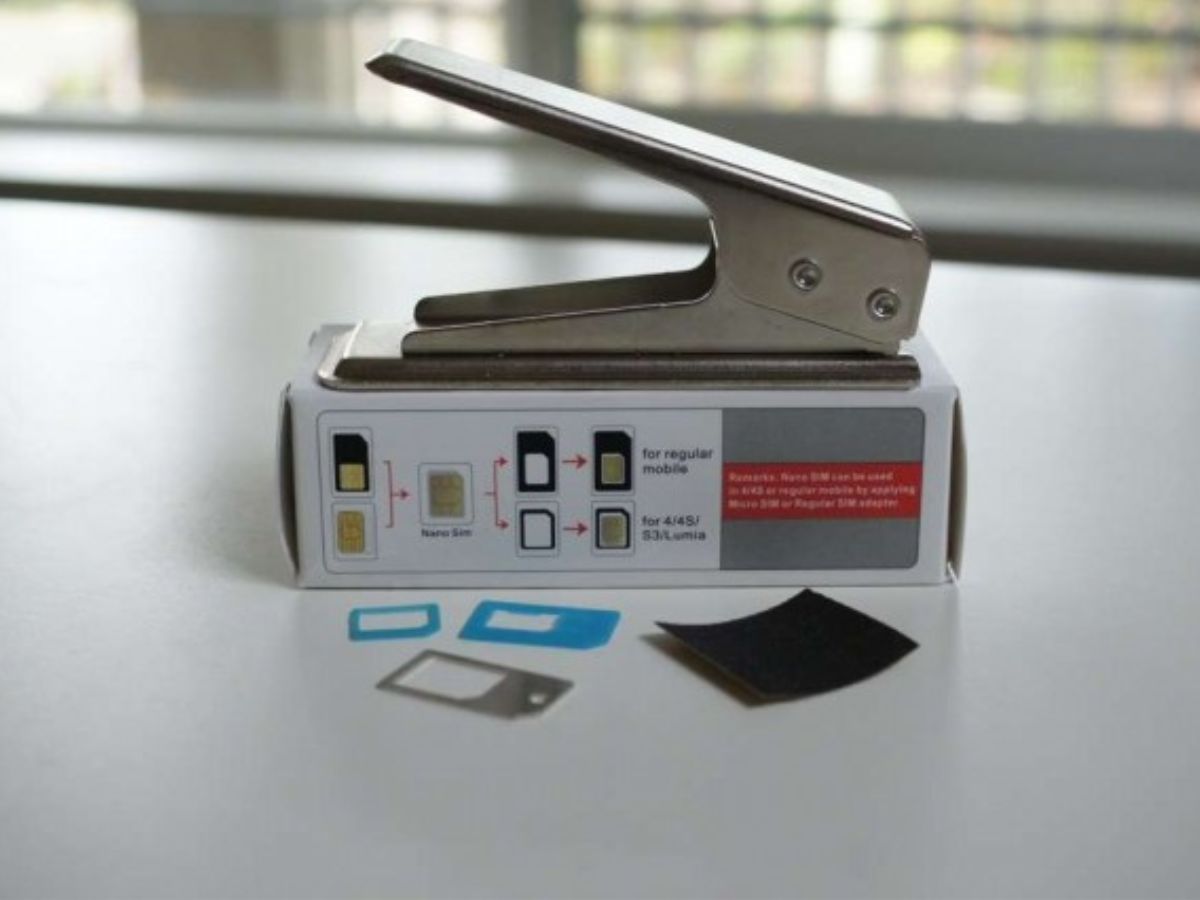
- A SIM Card Punch: This tool is specifically designed to cut SIM cards into smaller sizes. It provides precise cuts and is easy to use. You can find a SIM card punch online or at your local electronics store.
- A Micro SIM Template: This template will serve as a guide to help you correctly measure and mark the necessary cuts on your SIM card. You can find printable micro SIM templates online, or you can create one yourself using accurate measurements.
- A Ruler or Measuring Tape: You’ll need a ruler or measuring tape to ensure accurate measurements while marking the cuts on your SIM card. It’s crucial to be precise with your measurements to avoid damaging the card.
- A Fine Grit Sandpaper or Emery Board: This will come in handy for smoothing the edges of the cut SIM card. By gently sanding the rough edges, you can prevent any potential issues when inserting the micro SIM into your device.
- A Pair of Scissors: While a SIM card punch is the preferred tool for cutting SIM cards, a pair of sharp scissors can be used as an alternative. However, it’s important to exercise caution and make clean, precise cuts to avoid any damage to the card.
- A SIM Card Adapter: If you plan on switching back and forth between using the micro SIM and a standard SIM card, having a SIM card adapter will allow you to easily switch between the two sizes without any hassle.
- A Clean and Stable Work Surface: It’s essential to work on a clean and stable surface to minimize the risk of losing any small components or damaging the SIM card during the cutting process. Find a well-lit area with ample space to work comfortably.
Having all these tools and materials ready before you start cutting your SIM card will make the process more efficient and ensure that you achieve the desired result.
Step 1: Measure and Mark
One of the most important steps when cutting a SIM card to a Micro SIM size is to accurately measure and mark the correct dimensions. This will ensure that the final result fits seamlessly into your device without any issues.
To begin, gather the necessary tools: a ruler or measuring tape, a pencil or fine-tip marker, and of course, the SIM card itself. Make sure you have a stable surface to work on, such as a table or desk.
Take your ruler or measuring tape and carefully measure the dimensions of a Micro SIM card, which should be 15mm × 12mm. It’s crucial to be as precise as possible during this step, as any discrepancies may result in a misfit or damage to your SIM card.
Once you have determined the correct dimensions, gently place the SIM card on the table and use your pencil or fine-tip marker to mark the outline of the Micro SIM card. Be careful not to press too hard or leave any smudges that may affect the accuracy of the cutting line.
Double-check your markings to ensure they align with the measurements of a Micro SIM card. It’s always better to spend a few extra moments verifying the measurements rather than rushing and potentially ruining your SIM card.
Remember, precision is key during this step, so take your time to measure and mark the SIM card accurately. This will set the foundation for a successful and well-fitted Micro SIM card.
Step 2: Cut the SIM Card
Now that you have measured and marked the SIM card, it’s time to proceed with the cutting process. Before you begin, ensure that you have a sharp pair of scissors or a SIM card cutter specifically designed for this purpose. Remember, precision is key here, so be cautious while cutting to avoid any damage to the SIM card.
Start by aligning the marked lines on the SIM card with the cutting guides on the SIM card cutter or template. This will help you achieve accurate cuts and prevent any errors. If you’re using scissors, carefully cut along the marked lines, maintaining a steady hand to ensure a clean cut.
Remember to follow the guidelines precisely. Cutting too much or too little could result in an unusable SIM card. Take your time and cut slowly, focusing on maintaining the shape and size of the Micro SIM card.
Once you have made the necessary cuts, remove any excess material and double-check the edges to ensure they are smooth. Irregular or jagged edges can cause issues when inserting the Micro SIM card into your phone or other mobile devices.
It’s important to note that cutting a SIM card to a Micro SIM size may void any warranties associated with the card. If you are unsure or uncomfortable with performing this process, it is recommended to consult a professional or contact your mobile network provider for assistance.
After you have successfully cut the SIM card, it’s time to move on to the next step of smoothing the edges to ensure a perfect fit and optimal functionality.
Step 3: Smooth the Edges
After successfully cutting your SIM card down to the desired size, the next step is to smooth out the edges to ensure a proper fit in your device. The edges of the card may feel rough or jagged after cutting, which can lead to insertion issues and potential damage to your device’s SIM card slot. Here’s how you can easily smooth the edges:
1. Use sandpaper or a nail file: Gently rub the edges of the cut SIM card with fine-grit sandpaper or a nail file. This will help remove any sharp or uneven edges. Be careful not to apply too much pressure or you may accidentally damage the contacts on the SIM card.
2. Smooth in circular motions: When using sandpaper or a nail file, work in circular motions to gradually smooth out the edges. This will help create a more rounded and even surface, ensuring a snug fit in the SIM card slot.
3. Check the edges: After sanding or filing, inspect the edges of the SIM card to ensure they are smooth and free from any rough spots. Run your fingers along the edges to feel for any roughness or sharpness. If needed, continue sanding or filing until the edges feel smooth to the touch.
4. Clean the SIM card: Once you are satisfied with the smoothness of the edges, use a clean microfiber cloth or a lint-free cloth to wipe away any dust or debris that may have accumulated during the sanding or filing process. This will help prevent any particles from interfering with the functioning of the SIM card.
5. Test the SIM card again: Before inserting the SIM card back into your device, double-check that the edges are smooth and that they fit properly into the SIM card slot. If everything looks good, proceed to the final step of testing the micro SIM card.
By taking the time to smooth the edges of your cut SIM card, you can ensure a seamless and secure fit when inserting it into your device. This step is crucial in maintaining the functionality and longevity of your SIM card as it minimizes the risk of damage to both the card and the device. Remember to handle the SIM card with care to avoid any accidental bends or excessive pressure during the smoothing process.
Step 4: Test the Micro SIM Card
Once you have successfully cut your SIM card into a micro SIM card size, it is crucial to test it before inserting it into your mobile device. Testing the micro SIM card ensures that it fits properly and functions correctly. Here are a few steps to follow to ensure a successful test:
1. Inspect the Micro SIM Card: Carefully examine the micro SIM card for any visible damage or irregularities, such as cracks or missing pieces. These issues can hinder its functionality, so it’s important to ensure that the card is in good condition.
2. Verify the Fit: Try inserting the micro SIM card into the SIM card slot of your mobile device. It should fit snugly and securely. If it doesn’t, do not force it in, as this can damage both the SIM card slot and the micro SIM card itself.
3. Power On Your Device: Once the micro SIM card is inserted, power on your mobile device. If the device recognizes the SIM card and displays a signal, it indicates that the micro SIM card is compatible and properly functioning. However, if there is no signal or an error message stating “SIM card not detected” appears, there may be an issue with the cutting process.
4. Perform a Test Call: To further confirm the functionality of the micro SIM card, make a test call. Choose a reliable contact and dial their number. If the call goes through without any issues and you are able to communicate clearly, it indicates that the micro SIM card is working correctly.
5. Test Data Connectivity: To ensure that the micro SIM card can access mobile data, browse the internet or use an app that requires an internet connection. If you are able to browse the web or use the app seamlessly, it confirms the data connectivity of the micro SIM card.
6. Check Compatibility with Other Features: Depending on your mobile device, there may be additional features that require a working SIM card, such as location services or contact synchronization. Test these features to ensure they are functioning properly with the micro SIM card.
7. Monitor for Any Issues: After testing the micro SIM card, keep an eye out for any unusual behavior or malfunctions. If you notice any problems, such as intermittent signal loss, frequent disconnections, or errors while making calls, it may indicate an issue with the cutting process.
Remember, testing the micro SIM card is essential to ensure compatibility and functionality. If you encounter any problems during the testing process, it’s advisable to seek professional help or consider obtaining a new micro SIM card from your service provider.
Additional Tips and Considerations
When cutting a SIM card to a micro SIM, there are a few additional tips and considerations that you should keep in mind:
1. Use the right tools: It is important to use sharp and precise tools when cutting your SIM card. A good quality SIM cutter or sharp scissors will ensure clean and accurate cuts, minimizing the risk of damaging the SIM card.
2. Take your time: Cutting a SIM card requires patience and precision. Rushing through the process may result in mistakes or uneven cuts. Take your time to measure, mark, and cut the SIM card carefully to ensure the best results.
3. Practice on an old SIM card: If you are unsure about cutting your primary SIM card, consider practicing the process on an old or unused SIM card first. This will allow you to familiarize yourself with the steps and gain confidence before attempting it on your active SIM card.
4. Ensure proper alignment: When placing the SIM card into the cutting tool or aligning it for manual cutting, make sure it is properly aligned with the guide markings. A misaligned SIM card may result in an incorrect cut and render it unusable.
5. Check compatibility: Before cutting your SIM card, ensure that your device supports the use of a micro SIM card. While most modern smartphones and devices use micro SIMs, it is always a good idea to double-check the compatibility to avoid any issues.
6. Backup your data: Before making any changes to your SIM card, remember to backup any important data stored on it. This will prevent the loss of contacts, messages, or other valuable information in case any issues arise during the cutting process.
7. Consider professional assistance: If you are not confident in your DIY skills or are concerned about the risks involved, it may be best to seek professional assistance. Many phone service providers or SIM card retailers offer SIM card cutting services, ensuring a precise and reliable outcome.
By following these additional tips and considerations, you can increase your chances of success when cutting a SIM card to a micro SIM. Remember to always handle your SIM card with care and take the necessary precautions to avoid any damage.
In conclusion, cutting a SIM card to a micro SIM can be a simple and cost-effective solution for those looking to use their existing SIM card with a device that requires a micro SIM. However, it is essential to proceed with caution and follow the correct procedure to avoid damaging the SIM card or the device. By using appropriate tools, measuring accurately, and taking necessary precautions, users can successfully convert their SIM cards to micro SIMs without any issues. Remember to back up important data before attempting any modifications and consider consulting a professional if you are unsure. With careful planning and execution, you can enjoy the benefits of using your SIM card on various devices without the need for purchasing a new one.
FAQs
1. Can I cut a SIM card to a micro SIM myself?
Yes, it is possible to cut a SIM card to a micro SIM size yourself. However, it is a delicate process that requires precision and caution. It is recommended to use a SIM card cutting tool or template to ensure accurate cutting.
2. What tools do I need to cut a SIM card to a micro SIM?
To cut a SIM card to a micro SIM, you will need a SIM card cutting tool or a SIM card cutting template. These tools are specifically designed to guide the cutting process and ensure the proper size and shape of the micro SIM card.
3. Are there any risks involved in cutting a SIM card to a micro SIM?
Yes, there are risks involved in cutting a SIM card to a micro SIM yourself. If the cutting process is not done accurately, it can damage the SIM card and render it unusable. It is important to follow instructions carefully and use the proper cutting tools to minimize the risk of damage.
4. Can I still use the original SIM card after cutting it to a micro SIM?
No, once you have cut a SIM card to a micro SIM, it cannot be reverted back to its original size. The extra material that has been removed cannot be replaced. However, you can use the micro SIM card with devices that require a micro SIM slot.
5. What should I do if I am not confident in cutting the SIM card myself?
If you are not confident in cutting the SIM card yourself, it is recommended to seek professional assistance. Many mobile service providers offer SIM card cutting services or can provide you with a pre-cut micro SIM card. This ensures that the cutting is done accurately and reduces the risk of damaging the SIM card.