
Are you tired of dealing with a broken headset? Perhaps your favorite pair of headphones has stopped working, or the microphone on your gaming headset has suddenly become silent. Whatever the case may be, a broken headset can be frustrating and inconvenient, especially if you rely on it for work calls, gaming sessions, or simply enjoying your favorite music.
The good news is that fixing a broken headset is often possible, and you don’t necessarily have to rush out and buy a new one. With a little know-how and some simple troubleshooting, you can often get your headset back in working order without breaking the bank.
In this article, we will explore some common issues that may cause a headset to break and provide you with step-by-step instructions on how to fix them. Whether you have a wired or wireless headset, we’ve got you covered. So, put on your handyman hat and let’s dive into the world of headset repairs!
Inside This Article
- Assess the Issue
- Check for Loose Connections
- Replace the Cable
- Repair or Replace the Earpieces
- Conclusion
- FAQs
Assess the Issue
When faced with a broken headset, the first step is to thoroughly assess the issue. This involves understanding the specific problem and identifying the areas that may need attention. It’s important to take a close look at both the cable and the earpieces to determine the extent of the damage.
Start by examining the cable for any visible signs of wear and tear. Look for frayed or exposed wires, kinks, or bends in the cable. This can often be the culprit behind audio issues or connectivity problems. If you notice any damage, it may be necessary to replace the cable entirely.
Next, focus on the earpieces. Check for any physical damage, such as cracks, loose parts, or disconnections. These issues can impact the sound quality and overall functionality of the headset. In some cases, the earpieces may need to be repaired or replaced.
It’s also important to assess if the issue lies with the headset itself or with the device it’s connected to. Test the headset with different devices to see if the problem persists. If the issue is specific to one device, it could be a compatibility issue or a problem with the device’s audio settings.
By taking the time to assess the issue thoroughly, you can determine the best course of action and ensure that you address the root cause of the problem.
Check for Loose Connections
One of the most common causes of a broken headset is loose connections. Over time, the cables and connectors can become loose, leading to audio issues or complete loss of sound. Follow these steps to check for loose connections and fix them:
- Disconnect the headset: Unplug the headset from your device.
- Inspect the audio jack: Take a close look at the audio jack on your device and the connector on the headset. Look for any visible signs of damage, such as bent pins or dirt accumulation.
- Clean the audio jack: If you notice any dirt or debris in the audio jack, use a cotton swab or compressed air to clean it gently. Make sure to remove any obstructions that could hinder a proper connection.
- Check the headset cable: Examine the cable for any frayed or damaged areas. If you spot any issues, it might be necessary to replace the cable.
- Reconnect the headset: Plug the headset back into your device securely. Ensure that it is fully inserted into the audio jack.
- Test the connection: Play some audio on your device and check if the sound comes through the headset properly. Move the cable around gently to see if there are any intermittent audio interruptions, which could indicate a loose connection.
By following these steps, you can identify and resolve any loose connection issues with your headset. If the problem persists, it may be necessary to explore other troubleshooting options or seek professional assistance.
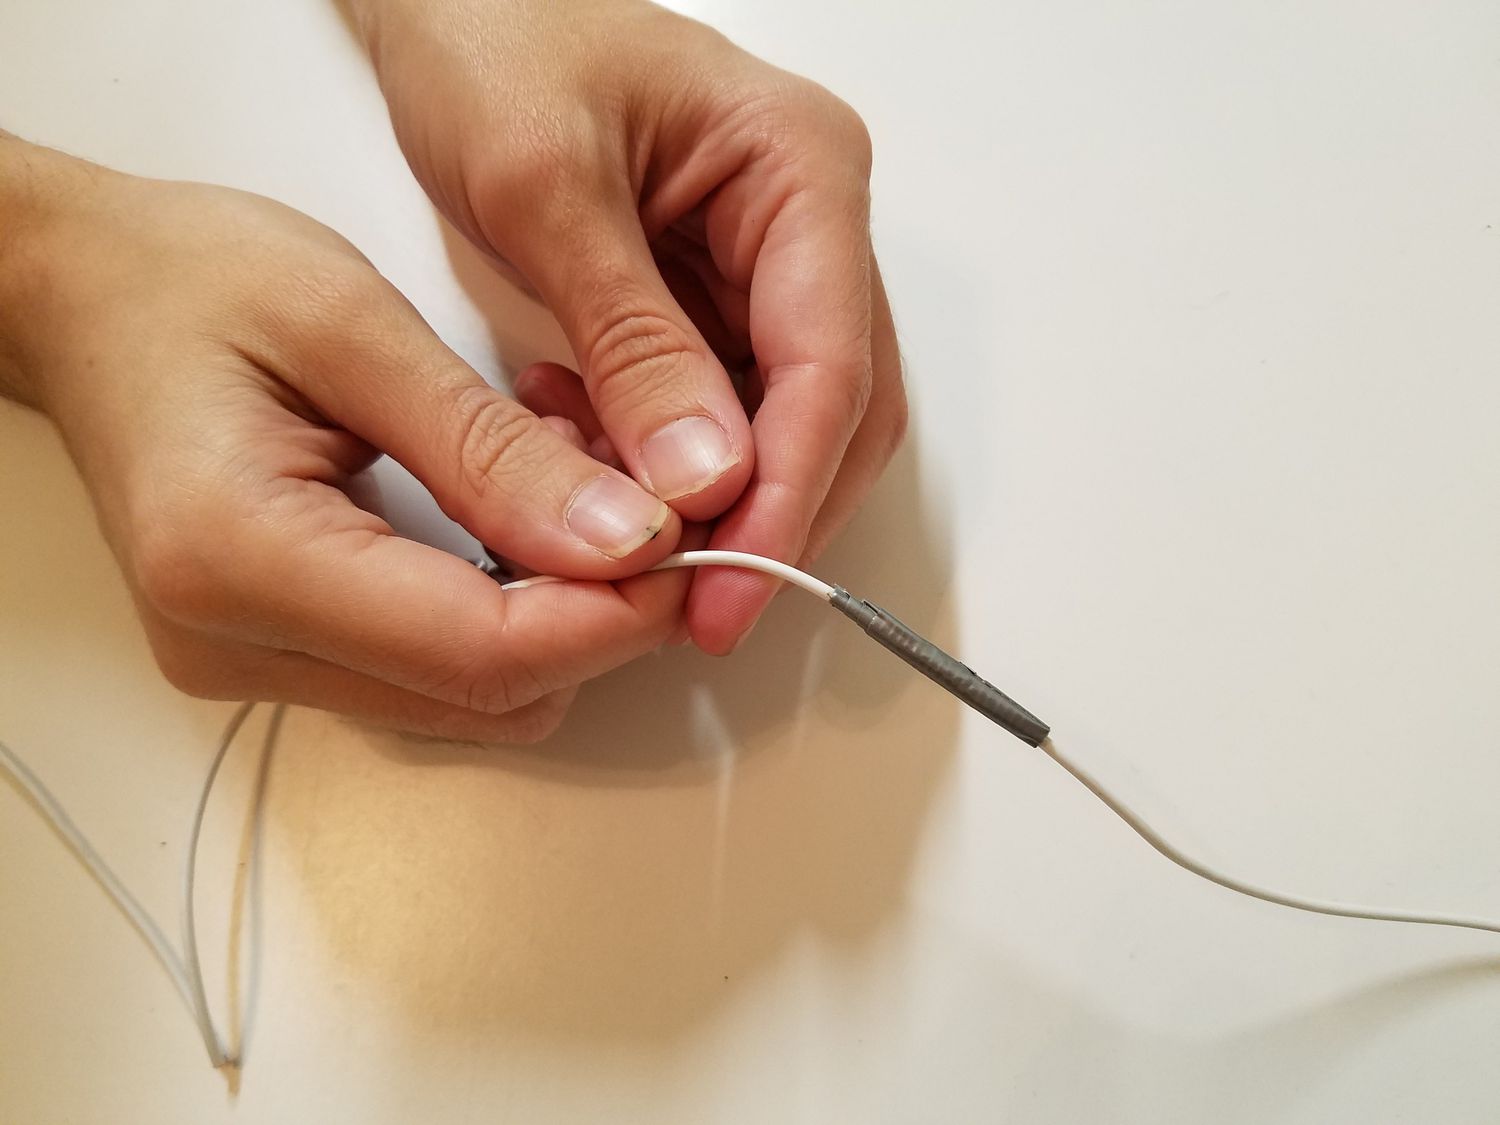
Replace the Cable
If you have determined that the cable is the source of the problem with your broken headset, don’t worry – replacing it is a fairly simple process. Here are the steps you can follow:
- Identify the type of cable: Before you purchase a new cable, you need to know what type is compatible with your headset. Most headsets use either a 3.5mm jack or a USB connection. Check the specifications of your headset or consult the manufacturer’s website to determine the type of cable you need.
- Order a replacement cable: Once you know the type of cable required, you can order a replacement online or visit a local electronics store. Make sure to choose a high-quality cable that is compatible with your headset model.
- Unplug the old cable: Carefully unplug the old cable from your headset. Depending on the design of your headset, it may have a detachable cable or a fixed cable. If the cable is detachable, it should easily disconnect from the headset. If it is fixed, you may need to unscrew or unclip it from the ear cups.
- Connect the new cable: Take the replacement cable and plug it into the corresponding port on your headset. Ensure that it is securely connected and in the correct orientation. If it is a 3.5mm jack, make sure it is fully inserted into the audio jack. If it is a USB cable, insert it into the USB port.
- Test the new cable: Once you have connected the new cable, test the headset to ensure that the issue has been resolved. Play some audio or make a call to confirm that both the audio and microphone functions are working properly.
Replacing the cable is a cost-effective way to fix your broken headset without having to replace the entire device. If you are unsure about how to replace the cable, it is recommended to consult the manufacturer’s instructions or seek assistance from a professional.
Repair or Replace the Earpieces
When it comes to a broken headset, one of the most common issues is damage to the earpieces. Whether it’s due to wear and tear or a specific incident, such as dropping your headphones, the earpieces can become damaged and affect the overall performance of your headset.
If you suspect that the earpieces are the cause of the problem, here are some steps you can take to repair or replace them:
- Inspect the Earpieces: Carefully examine the earpieces for any visible damage, such as cracks or loose components. If you notice any physical damage, it’s likely that you’ll need to replace the earpieces.
- Check for Internal Issues: Sometimes, the problem may not be immediately visible. In this case, you can try connecting the headset to a different device and see if the issue persists. If the problem occurs across multiple devices, it’s a strong indication that the earpieces need repair or replacement.
- Find Replacement Parts: If you determine that the earpieces need to be replaced, you’ll need to find the appropriate replacement parts. Check with the manufacturer of your headset or search online for compatible earpieces. Make sure to choose earpieces that match the brand and model of your headset for optimal compatibility.
- Replacing the Earpieces: Once you have the replacement earpieces, carefully follow the manufacturer’s instructions on how to replace them. This can involve removing the old earpieces and attaching the new ones using connectors or screws. Take your time and be gentle to avoid causing further damage.
- Professional Repair: If you’re not confident in your ability to repair or replace the earpieces yourself, consider taking your headset to a professional technician. They will have the knowledge and expertise to handle the repair properly and ensure the best possible outcome.
By repairing or replacing the earpieces of your broken headset, you can restore its functionality and enjoy your audio experience once again. Whether you choose to tackle the repair yourself or seek professional help, it’s important to address the issue promptly to prevent further damage and prolong the lifespan of your headset.
Conclusion
Fixing a broken headset can be a frustrating experience, but with the right knowledge and tools, it is possible to restore your device to working condition. By following the steps outlined in this guide, you can troubleshoot common issues such as sound problems, broken cables, and faulty mic connections.
Remember to start by identifying the specific problem and then proceed with the appropriate solution. Whether it’s replacing the ear pads, soldering a broken wire, or cleaning the audio jack, be sure to exercise caution and precision throughout the repair process.
If you find yourself facing a more complex issue or lack the necessary skills and tools, it’s always a good idea to seek professional help. Investing in high-quality headsets and regularly maintaining them can also help prevent future problems.
With the tips provided in this guide, hopefully, you can get your broken headset up and running again, allowing you to continue enjoying your music, gaming, or phone conversations without any interruptions.
FAQs
1. What are the common issues that cause a headset to break?
There are several common issues that can cause a headset to break. These include physical damage from drops or impacts, worn-out cables or connectors that result in poor or no audio, water or moisture damage, and internal component failures.
2. Can I fix a broken headset myself?
Fixing a broken headset can be possible in some cases, depending on the type of damage. For minor issues like loose cables or connectors, you may be able to repair them yourself by reattaching or replacing the damaged parts. However, for more complex issues, such as internal component failures, it might be best to seek help from a professional.
3. How can I prevent my headset from breaking?
To prevent your headset from breaking, it is important to handle it with care. Avoid dropping or mishandling the headset, and store it in a safe place when not in use. Additionally, be mindful of the cables and connectors, as excessive bending or pulling can lead to damage over time. Using a headset case or protective cover can also provide an extra layer of protection.
4. Are there any temporary fixes for a broken headset?
Yes, there are some temporary fixes you can try if your headset is broken. If the issue is with the audio connection, you can try using an audio splitter to bypass the damaged section of the cable. Additionally, if only one side of the headset is working, you can try adjusting the balance settings on your device to redirect the audio to the functioning side.
5. When should I consider replacing my broken headset?
If your headset is repeatedly experiencing issues or if the damage is severe, it might be more cost-effective to replace it rather than attempting to repair it. Additionally, if your headset is outdated or no longer meets your needs in terms of audio quality or features, it may be a good time to consider upgrading to a new one.