
If you’re an avid gamer, you know the frustration of dealing with technical issues, especially when it comes to your Turtle Beach headset. These high-quality gaming headsets are known for their immersive sound and crisp communication capabilities. However, there may come a time when you encounter the frustrating issue of your Turtle Beach headset not working properly. Don’t worry, as we’re here to help! In this article, we’ll explore the common reasons why your Turtle Beach headset may not be functioning as expected. From connectivity issues to software glitches, we’ll provide you with troubleshooting tips and solutions to get your headset back in action. So, put on your virtual battle gear and let’s dive into the world of Turtle Beach headset troubleshooting!
Inside This Article
- Possible Causes for Turtle Beach Headset Not Working
- Troubleshooting Steps for Turtle Beach Headset Issues
- How to Update Firmware for Turtle Beach Headset
- How to Replace Turtle Beach Headset Mic Boom
- Conclusion
- FAQs
Possible Causes for Turtle Beach Headset Not Working
If you’re experiencing issues with your Turtle Beach headset not working, there could be several possible causes. Let’s explore some of the most common reasons why your headset might be malfunctioning:
1. Loose connections or cables: One of the first things you should check is whether all the connections and cables are secure. Make sure that the headset is properly plugged into the audio output on your device or console. Additionally, double-check that the cables are not frayed or damaged, as this can affect the headset’s functionality.
2. Configuration issues with the device or console: It’s possible that the settings on your device or console are not properly configured for the Turtle Beach headset. In this case, you should consult the user manual or the manufacturer’s website for instructions on how to set up the headset correctly. Ensure that the correct audio output is selected and that any necessary software or firmware updates have been installed.
3. Firmware or software updates needed: Speaking of updates, it’s essential to keep your headset’s firmware and any accompanying software up to date. Manufacturers often release updates to improve compatibility and fix any bugs or issues. Visit the Turtle Beach website or use the dedicated software application to check for any available updates and install them accordingly.
4. Hardware damage or wear and tear: If none of the above solutions resolve the problem, it’s possible that your headset may have incurred hardware damage or is simply worn out. Check for any visible signs of damage, such as cracks or breaks in the headset or cables. If the headset has been subjected to physical trauma, it may need to be repaired or replaced.
Remember, troubleshooting headset issues can vary depending on the specific make and model. If you’re unsure about the cause of the problem or how to fix it, referring to the user manual or reaching out to customer support can provide valuable assistance.
Troubleshooting Steps for Turtle Beach Headset Issues
If you are facing issues with your Turtle Beach headset not working properly, don’t worry! There are several troubleshooting steps you can take to resolve the problem. Here are some common solutions to help you get your headset back up and running.
1. Check for Loose Connections or Cables: Start by checking all the connections. Ensure that both ends of the audio cable are securely plugged into the headset and the device you are using. If you are using a wireless headset, make sure that the wireless dongle is properly inserted into the device and is getting a strong signal.
2. Verify Configuration with the Device or Console: Sometimes, your headset may not work due to incorrect settings on your device or console. Check the audio settings and make sure the headset is selected as the primary audio device. Ensure that the volume is turned up and any mute switches are disabled. If you are using an Xbox or PlayStation, refer to their respective support guides for specific instructions.
3. Update Firmware and Software: Outdated firmware or software can also cause compatibility issues with your Turtle Beach headset. Visit the Turtle Beach website or the manufacturer’s official website to check for any available updates. Download and install these updates to ensure optimal performance.
4. Inspect for Hardware Damage or Wear and Tear: It’s important to examine your Turtle Beach headset for any visible signs of damage. Check the cables for any fraying or breakage and ensure that the headset is not physically damaged. If you notice any issues, such as loose parts or damaged cables, it may be necessary to contact Turtle Beach support for further assistance.
5. Perform a Hard Reset: In some cases, performing a hard reset can help resolve the issue. To do this, disconnect the headset from the device or console, remove any batteries or power source, and leave it unplugged for a few minutes. Then, reconnect everything and power it back on. This can help clear any temporary glitches or conflicts.
6. Consult the User Manual or Online Resources: If you have tried all the above troubleshooting steps and are still experiencing issues, refer to the user manual that came with your Turtle Beach headset. Alternatively, you can visit the official Turtle Beach support website or their online forums to find more specific troubleshooting advice or contact their customer support for further assistance.
By following these troubleshooting steps, you should be able to address most common issues with your Turtle Beach headset. If all else fails, don’t hesitate to reach out to the manufacturer for further assistance. Happy gaming!
How to Update Firmware for Turtle Beach Headset
If you are confronting issues with your Turtle Beach headset, such as audio problems, connectivity issues, or compatibility errors, it may be time to update the firmware. Updating the firmware not only fixes bugs and glitches but also enhances the overall performance of your headset. In this guide, we will walk you through the step-by-step process of updating the firmware for your Turtle Beach headset, ensuring you have the latest software for a seamless gaming experience.
Step 1: Check for Compatibility
Before you begin the firmware update process, ensure that your Turtle Beach headset model is compatible with firmware updates. Visit the official Turtle Beach website and navigate to the support section, where you will find a list of compatible headsets along with their respective firmware update files.
Step 2: Download the Firmware Update
Once you have verified the compatibility of your headset, proceed to download the latest firmware update file. Make sure to choose the correct firmware update file for your specific headset model. It is advisable to download the update directly from the official Turtle Beach website to avoid any compatibility or security issues.
Step 3: Connect the Headset
Connect your Turtle Beach headset to your computer or gaming console using the appropriate cables. Ensure that the headset is properly connected and recognized by the system.
Step 4: Run the Firmware Update Tool
Locate the downloaded firmware update file and run the firmware update tool provided by Turtle Beach. This tool will guide you through the process of updating the firmware on your headset. Follow the on-screen instructions carefully to avoid any errors or interruptions during the update process.
Step 5: Wait for the Update to Complete
Once you initiate the firmware update, be patient and allow the process to complete. Avoid disconnecting the headset or interrupting the update process as it may lead to irreversible damage to your headset.
Step 6: Test and Verify
After the firmware update is complete, disconnect the headset from your device or console. Reconnect it and test it to ensure that the update was successful. Verify that the audio is clear, that there are no connectivity issues, and that the new features or improvements included in the update are functioning as expected.
Step 7: Troubleshoot if Needed
If you encounter any issues after the firmware update, such as audio distortion or connectivity problems, refer to the troubleshooting section in the Turtle Beach user manual or visit the support page on their website for further assistance. They may have additional steps or solutions to address any post-update issues.
By following these steps, you can easily update the firmware for your Turtle Beach headset and ensure optimal performance and functionality. Regularly checking for firmware updates and keeping your headset’s software up to date will help you stay ahead of any issues and enjoy an immersive and uninterrupted gaming experience.
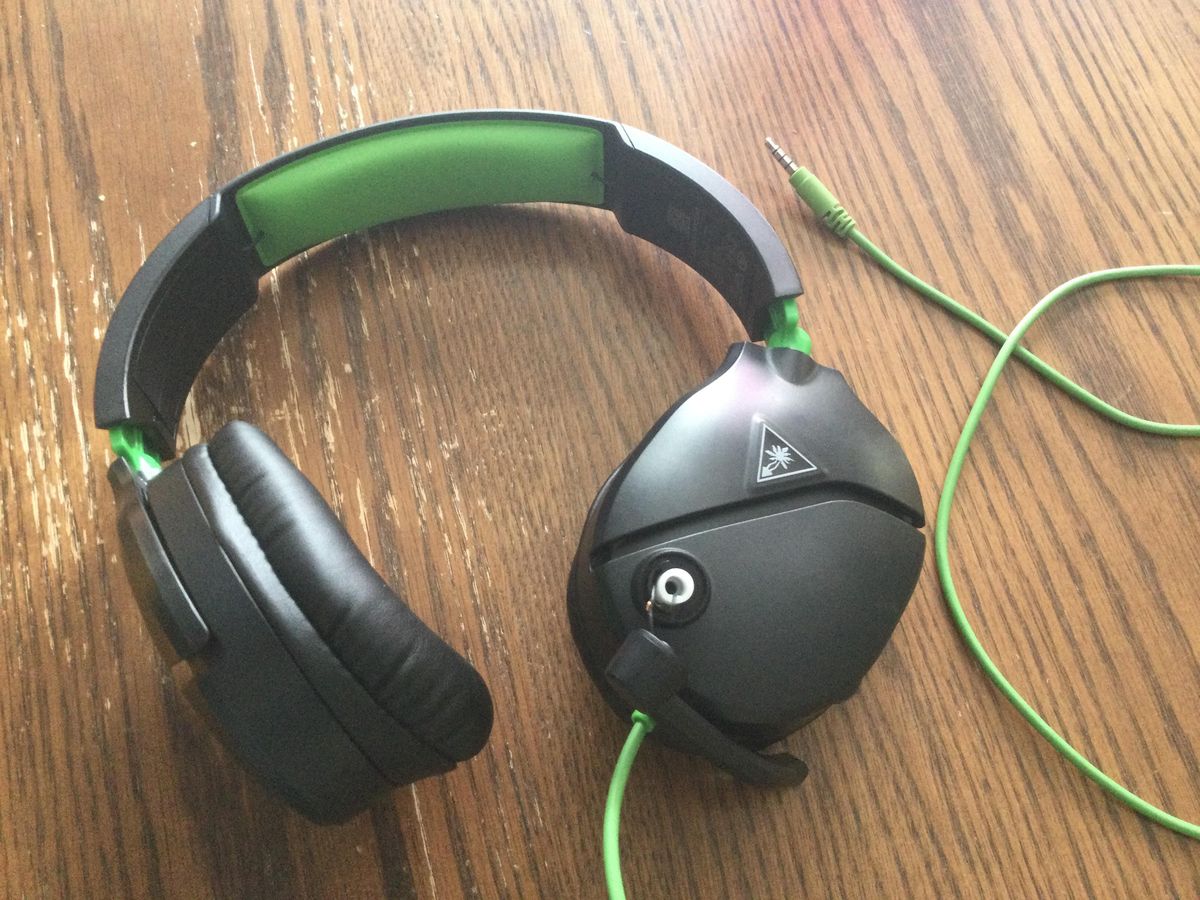
How to Replace Turtle Beach Headset Mic Boom
The mic boom on your Turtle Beach headset is an essential component that allows you to communicate with other players during gaming sessions. However, over time, it may become damaged or broken, requiring a replacement. If you’re experiencing issues with your mic boom and need to replace it, here’s a step-by-step guide to help you through the process.
1. Determine the compatibility: Before purchasing a new mic boom for your Turtle Beach headset, make sure it is compatible with your specific headset model. Check the product specifications or consult the manufacturer’s website to ensure a proper fit.
2. Gather the necessary tools: You will need a small screwdriver, such as a Phillips or Torx screwdriver, to remove the old mic boom and install the new one. Have the appropriate tool ready before proceeding.
3. Disconnect the old mic boom: Locate the connection point of the mic boom on your headset. This is typically on the left earcup. Gently disconnect the old mic boom from the headset by firmly gripping the base of the boom and pulling it out of the connection point.
4. Inspect the connection: Take a moment to inspect the connection point on the headset. Ensure that there are no loose wires or debris that may hinder the installation of the new mic boom. If necessary, clean the connection area before proceeding.
5. Attach the new mic boom: Take the new mic boom and align the connector with the connection point on the headset. Firmly press the base of the new mic boom into place until it is securely attached. Give it a gentle tug to ensure it is properly seated.
6. Test the new mic boom: Once the new mic boom is attached, test it to ensure it is working correctly. Plug in your headset and perform a microphone test on your device or console. Speak into the microphone and check if the sound is clear and audible.
7. Tighten any screws: If your headset has any screws holding the mic boom in place, use your screwdriver to securely tighten them. This will help prevent the mic boom from becoming loose during use.
8. Enjoy your restored functionality: With the new mic boom successfully installed, you can now enjoy clear and effective communication during your gaming sessions. Whether you’re playing online with friends or coordinating strategies with your team, your Turtle Beach headset will be back in action.
Remember to follow these steps carefully and be gentle when handling the mic boom to avoid causing further damage. If you encounter any difficulties during the replacement process, it’s advisable to consult the manufacturer’s support team or seek professional assistance.
Conclusion
In conclusion, troubleshooting issues with your Turtle Beach headset can seem frustrating, but by following the steps outlined in this guide, you can potentially resolve the problem and get your headset working again. Whether it’s a simple connectivity issue, an audio problem, or a software glitch, there are usually solutions available that can help you get back in the game.
Remember to check the connections, update your drivers, adjust your audio settings, and ensure that the headset is compatible with your device. Exploring the Turtle Beach support resources and reaching out to their customer support team can also provide additional assistance if needed.
By taking the time to understand and troubleshoot the issue, you can continue to enjoy the immersive gaming experience that Turtle Beach headsets are known for. So don’t get disheartened if your headset is not working as expected – with a little patience and the right troubleshooting steps, you can get back to enjoying crystal clear sound and seamless communication with your teammates in no time!
FAQs
1. Why is my Turtle Beach headset not working?
There could be several reasons why your Turtle Beach headset is not working. It could be due to a faulty connection, incorrect audio settings, low battery, or compatibility issues with your device. Additionally, verifying that the headset is properly connected and checking for any firmware updates may help resolve the issue. If the problem persists, reaching out to Turtle Beach customer support for further assistance is recommended.
2. How do I troubleshoot my Turtle Beach headset?
Troubleshooting your Turtle Beach headset can help identify and address any issues you may be facing. Start by checking the connections to ensure everything is securely plugged in. Make sure the audio settings on your device are correctly configured for the headset. If using wireless, ensure the headset is charged and within range of the transmitter. Additionally, updating the headset firmware and drivers can often solve software-related problems. If these steps do not resolve the issue, consulting the Turtle Beach support page or contacting their customer support team would be the next recommended course of action.
3. Why is there no sound coming from my Turtle Beach headset?
If you are experiencing no sound coming from your Turtle Beach headset, there are a few potential reasons. First, check the volume level on both the headset and the device it is connected to. Ensure that the audio output settings on your device are correctly set to route sound through the headset. If using a wired headset, double-check the cable connections for any damage or loose connections. If none of these steps work, there may be an issue with the headset’s audio drivers or firmware, in which case updating them or contacting Turtle Beach support is advised.
4. Why is the microphone on my Turtle Beach headset not working?
If the microphone on your Turtle Beach headset is not working, there are a few things to check. First, verify that the microphone is unmuted and properly positioned. Ensure that the microphone volume level is turned up in your device’s audio settings. If using a wired headset, check the microphone cable for any damage or loose connections. If your headset has a removable microphone, try disconnecting and reconnecting it. If the issue persists, updating the headset’s drivers or firmware, or contacting Turtle Beach support, may be necessary.
5. How can I improve the audio quality of my Turtle Beach headset?
To enhance the audio quality of your Turtle Beach headset, there are a few steps you can take. First, ensure that the volume levels on both the headset and the connected device are properly balanced. Adjusting the equalizer settings on your device or using any available audio enhancements can also help optimize the sound. If using a wired headset, positioning the cable away from any potential sources of interference can reduce static or distortion. Additionally, keeping the headset firmware and drivers up to date is recommended to take advantage of any audio improvements provided by Turtle Beach.