
If you’ve ever found yourself with a dead battery and a sense of panic, you know the importance of having a battery charger on hand. Whether it’s for your car, motorcycle, boat, or other electronic device, knowing how to hook up a battery charger correctly can save you time, money, and frustration.
In this article, we will guide you step by step on how to hook up a battery charger safely and efficiently. We will cover the necessary equipment you’ll need, the different types of battery chargers available, and provide useful tips to ensure a successful charging process.
So, grab your charger and get ready to become a battery charging expert. Let’s dive in and explore the world of battery charging together!
Inside This Article
- Safety Precautions
- Gathering the Necessary Equipment
- Connecting the Battery Charger
- Charging the Battery
- Conclusion
- FAQs
Safety Precautions
When it comes to hooking up a battery charger, safety should be your top priority. Batteries contain chemicals and can generate potentially hazardous gases during the charging process. To avoid accidents and ensure your well-being, follow these safety precautions:
1.1. Choose a well-ventilated area: Before starting, make sure you are in a well-ventilated space. Charging batteries can release flammable gases, so it’s essential to have proper airflow to avoid any potential risks.
1.2. Wear protective gear: To protect yourself from any accidental splashes or spills, wear safety goggles, gloves, and a long-sleeved shirt. These items will shield your eyes and skin from any corrosive substances that may be present on the battery or charger.
1.3. Turn off the ignition: Before connecting the battery charger, ensure that the ignition is turned off. This step prevents any electrical surges or sparks that could cause a fire or damage to the charger or battery.
1.4. Inspect the battery and charger: Before proceeding, carefully inspect the battery and charger for any visible damage such as cracks, leaks, or exposed wires. Using a damaged battery or charger can lead to hazardous situations, so it’s crucial to fix or replace any faulty equipment before continuing.
1.5. Disconnect all electronic devices: Remove any electronic devices or accessories that are connected to the battery, such as cell phones, laptops, or car stereos. Disconnecting these devices will prevent any damage to them during the charging process and ensure a more efficient charge for the battery.
1.6. Read the user manual: Every battery charger comes with a user manual that provides specific instructions and safety guidelines. Take the time to read and understand the manual before proceeding with the charging process. Following the manufacturer’s recommendations will ensure proper usage and minimize any potential risks or damages.
By adhering to these safety precautions, you can protect yourself, your environment, and the equipment involved in the battery charging process. Safety should always be a top priority when working with batteries, ensuring a smooth and worry-free experience.
Gathering the Necessary Equipment
Before you begin hooking up a battery charger, it’s essential to gather all the necessary equipment. Having everything you need in one place will make the process much smoother. Here’s a list of items you’ll need:
- Battery Charger: You’ll obviously need a battery charger for this task. Make sure you choose the right charger for your specific battery type and voltage.
- Safety Equipment: It’s vital to prioritize safety when working with batteries. Therefore, ensure you have safety goggles, gloves, and a fire extinguisher nearby.
- Clean Cloth or Brush: A clean cloth or brush will come in handy when removing any dirt or corrosion from the battery terminals.
- Vaseline or Battery Terminal Spray: Applying a thin coat of Vaseline or using a battery terminal spray can help prevent corrosion and ensure good connectivity.
- Wrench or Socket Set: Depending on your battery’s configuration, you may need a wrench or socket set to loosen or tighten the battery clamps.
- Battery Post Cleaner: This tool is designed to clean the battery posts, ensuring a better electrical connection.
- Battery Terminal Puller: If the battery terminals are stuck or difficult to remove, a terminal puller tool can be very useful.
Once you have gathered all the necessary equipment, you’re ready to move on to the next step – connecting the battery charger.
Connecting the Battery Charger
Connecting the battery charger is a crucial step in the process of charging your battery effectively. Follow these steps to ensure a safe and proper connection:
- Step 1: Find a Suitable Location
- Step 2: Disconnect Power
- Step 3: Identify the Battery Terminals
- Step 4: Connect the Charger Cables
- Step 5: Tighten the Connections
- Step 6: Verify Polarity
- Step 7: Plug in the Charger
- Step 8: Switch on the Charger
Start by locating a well-ventilated area to connect your battery charger. Ensure that the charger is placed on a stable and non-flammable surface, away from any sparks or open flames.
Prior to connecting the battery charger, make sure that the power source is turned off. This extra precaution will prevent any electrical shock or damage to the charger or battery.
Take a moment to identify the positive (+) and negative (-) terminals on your battery. The positive terminal is usually marked with a (+) sign, while the negative terminal may have a (-) sign or be labeled as “NEG” or “GND”.
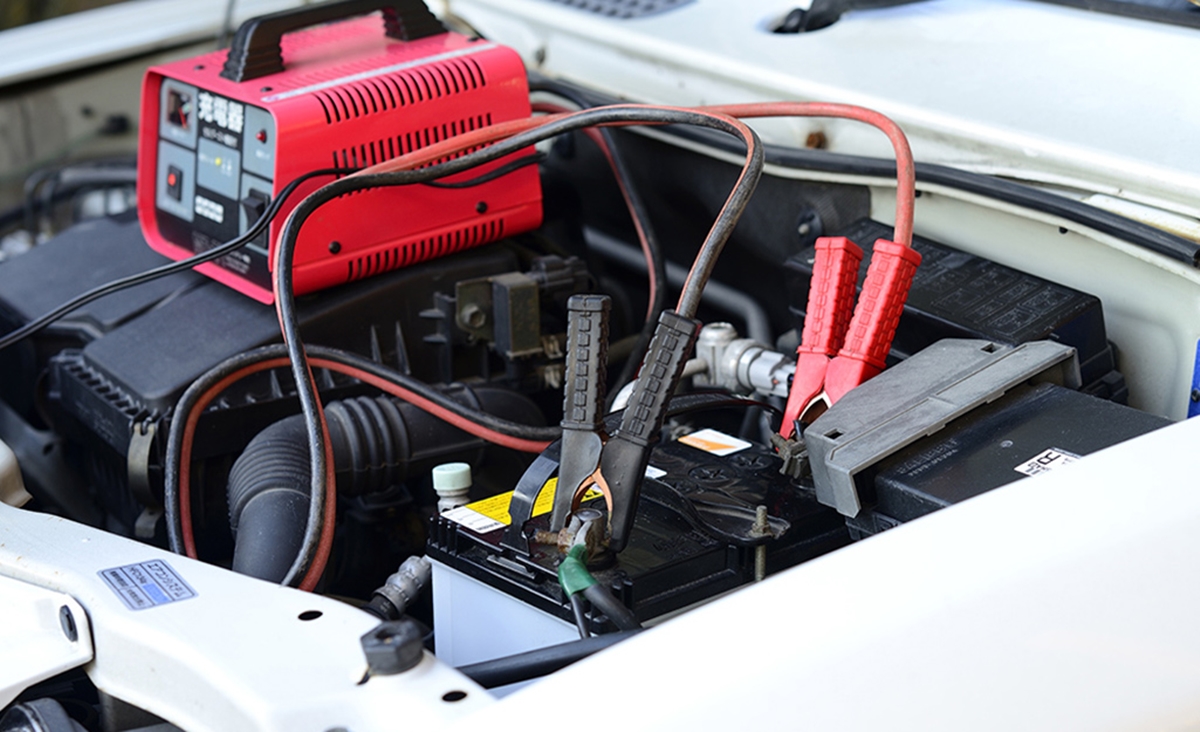
Attach the charger cables to the corresponding battery terminals. The red cable should be connected to the positive terminal, while the black cable should be connected to the negative terminal.
Ensure that the charger cables are securely tightened to the battery terminals. Loose connections can lead to ineffective charging or even spark hazards.
Double-check that the charger cables are correctly connected to the battery terminals, ensuring that positive is connected to positive and negative is connected to negative. Reversing the polarity can damage the battery and the charger.
Once the connections are secure and the polarity is verified, plug in the charger to a power outlet. It is recommended to use a grounded outlet for added safety.
Finally, switch on the charger and set it to the appropriate charging mode or voltage as specified by the battery manufacturer. Refer to the charger’s manual for specific instructions on selecting the correct settings.
By following these steps, you can confidently connect your battery charger and initiate the charging process. Making sure the connections are secure and observing safety precautions will help ensure a safe and efficient charging experience.
Charging the Battery
Once you have successfully connected the battery charger to the battery, it’s time to start charging. Follow these steps to ensure a safe and effective charging process:
1. Set the charger voltage – Before initiating the charging process, make sure to set the charger voltage to the appropriate level. This information can usually be found in the battery manufacturer’s specifications or on the battery itself. Adjust the charger voltage accordingly to avoid overcharging or damaging the battery.
2. Select the charging mode – Many battery chargers have different charging modes to accommodate various battery types and conditions. Depending on the charger model, you may need to select a specific mode such as “Fast Charge” or “Trickle Charge.” Consult the charger’s user manual to determine the most suitable charging mode for your battery.
3. Monitor the charging progress – Keep a close eye on the charging process to ensure it is progressing smoothly. Some battery chargers have built-in indicators or displays that show the charging status, such as the current voltage or the level of charge. Monitoring this information will help you determine how much longer the battery needs to charge and if any adjustments are necessary.
4. Prevent overcharging – Overcharging a battery can lead to irreversible damage and reduce its lifespan. To prevent overcharging, consider using a charger with a built-in automatic shut-off feature. This feature is designed to stop the charging process once the battery reaches its optimal charge level. If your charger doesn’t have this feature, make sure to set a timer or regularly check the charging progress to avoid overcharging.
5. Ensure proper ventilation – Charging batteries can produce heat and gas. It is important to charge the battery in a well-ventilated area to prevent the build-up of gases and to dissipate any excess heat. Avoid charging batteries in enclosed spaces or near flammable materials to reduce the risk of accidents.
6. Disconnect the charger – Once the battery is fully charged, it is essential to disconnect the charger from the battery and the power source. Leaving the charger connected for prolonged periods can lead to overcharging and damage the battery. Safely disconnecting the charger will help extend the battery’s lifespan and ensure its optimal performance.
7. Recheck the battery – After disconnecting the charger, take a moment to inspect the battery for any signs of damage, leakage, or abnormal behavior. If you notice any issues, it is recommended to consult a professional or replace the battery if necessary.
By following these steps, you can ensure a safe and effective charging process for your battery. Remember to always refer to the specific instructions provided by the battery charger manufacturer and the battery itself. Regular maintenance and proper charging will help maximize the lifespan and performance of your battery.
Next, we will conclude our guide on how to hook up a battery charger with some final thoughts and FAQs
In conclusion, understanding how to hook up a battery charger is essential for maintaining the health and performance of your batteries. By following the proper steps and precautions, you can ensure that your batteries are charged safely and efficiently. Whether you are charging the battery of your car, smartphone, or other electronic devices, it is important to select the appropriate charger and connect it correctly to avoid any damage or accidents. Don’t forget to refer to the user manual of your specific device or charger for any additional instructions or recommendations. With the knowledge and guidance provided in this article, you can confidently handle your battery charging needs and prolong the lifespan of your batteries. So, go ahead and give your batteries the power they need to keep you connected and powered up!
FAQs
1. What is a battery charger?
A battery charger is a device used to recharge rechargeable batteries. It applies an electric current to the battery, gradually restoring its energy and allowing it to be used again.
2. How do I hook up a battery charger?
To hook up a battery charger, follow these steps:
- Ensure that both the battery charger and battery are turned off.
- Locate the positive and negative terminals (+ and -) on the battery.
- Connect the positive (red) charger clamp to the positive terminal on the battery.
- Connect the negative (black) charger clamp to the negative terminal on the battery.
- Plug in the charger to a power source.
- Turn on the charger and select the appropriate charging mode.
- Allow the battery to charge until it reaches the desired level.
- Once fully charged, disconnect the charger clamps from the battery terminals, taking care to remove the negative clamp first.
3. Can I charge any type of battery with a battery charger?
No, not all battery chargers are compatible with all types of batteries. It is important to choose a battery charger that is designed for the specific type and voltage of battery you are using. Using the wrong charger can damage the battery or pose a safety risk.
4. How long does it take to recharge a battery?
The time it takes to recharge a battery depends on various factors including the battery capacity, the charger’s charging rate, and the battery’s current charge level. In general, it can take several hours to fully recharge a battery, but some chargers offer fast charging capabilities that can significantly reduce charging time.
5. Are there any safety precautions I should follow when using a battery charger?
Yes, it is important to follow certain safety precautions when using a battery charger. These include:
- Using the charger in a well-ventilated area to avoid the buildup of potentially flammable gases.
- Avoiding charging a battery that is damaged or leaking.
- Ensuring that the charger is compatible with the battery type and voltage.
- Using the charger according to the manufacturer’s instructions.
- Avoiding overcharging the battery, as it can lead to overheating or damage.
- Disconnecting the charger from the power source when not in use.