
Are you looking to expand your workspace and increase productivity? Hooking up dual monitors to an HP docking station can be a game-changer. Whether you’re a professional who needs extra screen real estate for multitasking or a gamer who wants an immersive gaming experience, dual monitors offer a range of benefits.
In this article, we will guide you through the process of setting up dual monitors on an HP docking station. From connecting the monitors to configuring the display settings, we will cover everything you need to know to make the most out of your dual monitor setup. So, let’s dive in and unlock the potential of your workspace with the power of two monitors!
Inside This Article
- Overview of Dual Monitor Setup
- Compatibility of HP Docking Station
- Step-by-Step Guide for Connecting Dual Monitors to HP Docking Station
- Adjusting Display Settings on Windows
- Troubleshooting Common Issues with Dual Monitor Setup
- Conclusion
- FAQs
Overview of Dual Monitor Setup
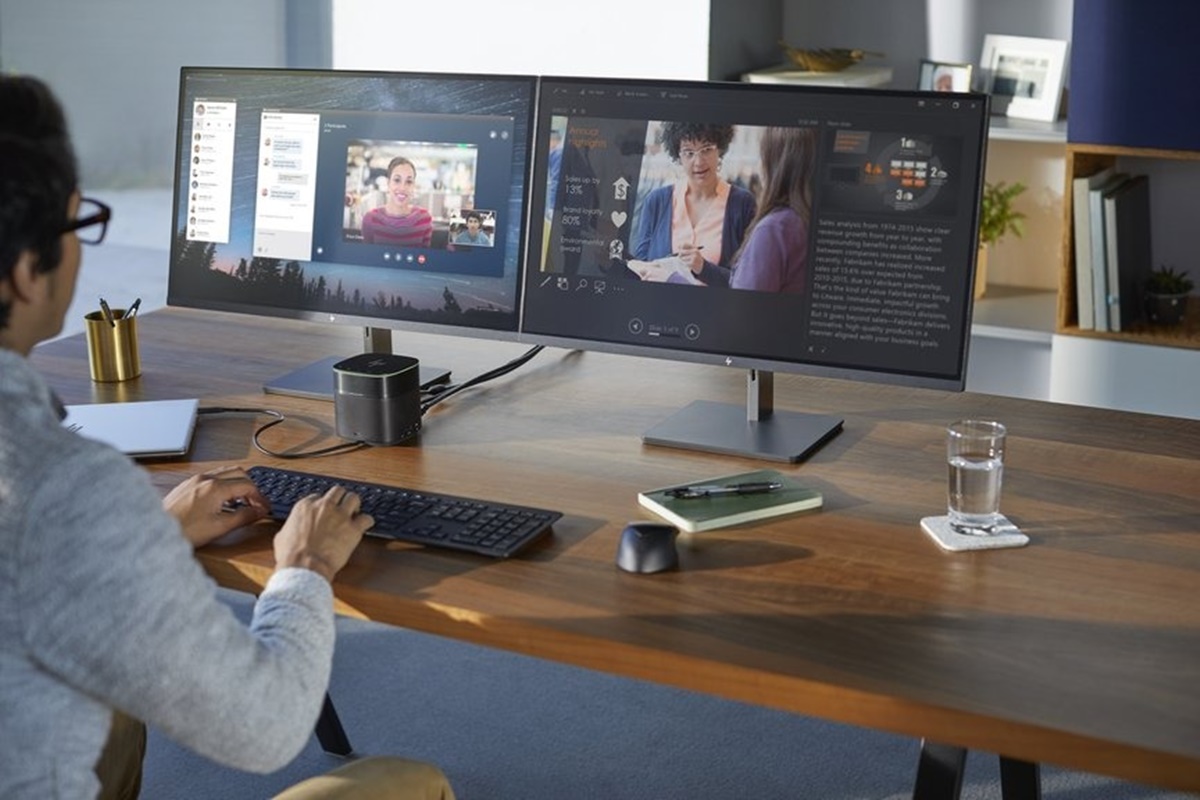
A dual monitor setup is a popular choice for those looking to enhance their productivity and increase screen real estate. With two monitors connected to your HP docking station, you can have multiple windows open simultaneously, multitask efficiently, and enjoy a more immersive computing experience.
By extending your display across two monitors, you can have different applications running on each screen, allowing for smoother workflows and seamless transitions between tasks. Whether you’re a professional who needs to have multiple documents and spreadsheets open at once or a gamer who wants a wider field of view, a dual monitor setup can greatly enhance your daily computing experience.
Moreover, a dual monitor setup can also be beneficial for creative professionals who work with applications like graphic design software, video editing tools, or music production software. It allows for greater visibility of project timelines, tools, and reference materials, making the creative process more streamlined and efficient.
It’s worth noting that not all HP docking stations support dual monitor setups. It is essential to ensure that your specific docking station has the necessary ports and capabilities to connect two monitors simultaneously. Compatibility is key to ensure a successful setup.
In the next sections, we will explore the compatibility of HP docking stations and provide a step-by-step guide to help you connect dual monitors to your HP docking station seamlessly.
Compatibility of HP Docking Station
When setting up a dual monitor configuration, it is crucial to ensure that your HP docking station is compatible with the task at hand. The compatibility of your docking station determines whether it can support multiple displays or not. Fortunately, most HP docking stations are designed to handle dual monitor setups, providing a seamless and efficient experience.
HP docking stations are engineered to work with a wide range of HP laptops and desktops. They connect to your device through a USB-C or Thunderbolt port, allowing you to extend your desktop across multiple monitors or mirror the displays. Whether you are using a business laptop, gaming laptop, or a home desktop, HP docking stations offer the versatility and compatibility you need.
It is worth noting that the compatibility of your HP docking station might depend on the specific model and version you have. Some older models may have limitations when it comes to supporting dual monitors with high resolutions or refresh rates. Therefore, it is always recommended to check the specifications of your docking station or consult with the manufacturer to ensure compatibility.
HP provides detailed documentation, including user manuals and support resources, to help you determine the compatibility of your docking station with dual monitor setups. It is important to review these materials and understand the capabilities of your specific docking station before attempting to connect multiple monitors.
In addition to the compatibility of the docking station itself, you should also consider the compatibility of your laptop or desktop with dual monitor configurations. Ensure that your device supports multiple displays and has the necessary graphics card or drivers to handle the increased workload. This will help you achieve optimal performance and visual quality when using dual monitors with your HP docking station.
Overall, HP docking stations are highly compatible with dual monitor setups, offering a hassle-free way to expand your workspace and increase productivity. However, it is always important to verify the compatibility of your docking station and device to ensure seamless integration and an optimal user experience.
Step-by-Step Guide for Connecting Dual Monitors to HP Docking Station
Setting up a dual monitor configuration can greatly enhance your productivity and make multitasking a breeze. If you own an HP docking station and want to connect dual monitors to it, follow these step-by-step instructions to get started.
Step 1: Check compatibility
Before proceeding, ensure that your HP docking station supports dual monitor setup. Check the product specifications or the manufacturer’s website to confirm compatibility.
Step 2: Connect the first monitor
Start by locating the display ports on your HP docking station. Most docking stations have DisplayPort, HDMI, or VGA ports. Choose one of these ports to connect your first monitor.
If your monitor has a DisplayPort connection, you can use a DisplayPort to DisplayPort cable for the best quality. For HDMI or VGA connections, use the respective cables to connect your monitor to the docking station.
Step 3: Connect the second monitor
Once the first monitor is connected and working properly, it’s time to connect the second monitor. Locate another available display port on the docking station and connect the second monitor using the appropriate cable.
Step 4: Adjust monitor positioning
After connecting both monitors, ensure that they are positioned correctly to suit your needs. Adjust the monitor positions according to your desired layout, whether it’s side by side, extended desktop, or mirrored display.
Step 5: Configure display settings
Next, you’ll need to configure the display settings on your computer. Right-click anywhere on the desktop and select “Display settings” from the context menu.
In the settings window, you’ll see both monitors listed. You can customize the resolution, orientation, and other display options for each monitor. Make sure to set the correct order and arrangement of the monitors based on their physical placement.
Step 6: Test and adjust
After adjusting the display settings, test the setup by dragging windows or applications across both monitors. If everything works smoothly, congratulations! You have successfully connected dual monitors to your HP docking station.
Step 7: Troubleshooting
If you encounter any issues, troubleshooting can help resolve them. Check the cable connections, update the drivers for the docking station and graphics card, and make sure the monitors are powered on.
Additionally, ensure that both monitors are recognized by your computer and that the display settings are correctly configured. If problems persist, consult the user manual or contact the HP support team for further assistance.
By following these step-by-step instructions, you can enjoy the benefits of a dual monitor setup with your HP docking station. Enhance your work efficiency, expand your screen real estate, and take your productivity to the next level.
Adjusting Display Settings on Windows
After successfully connecting your dual monitors to the HP docking station, the next step is to adjust the display settings on Windows to ensure optimal performance and a seamless viewing experience. Here’s a step-by-step guide on how to do it:
- Access the Display Settings: Right-click on the desktop and select “Display settings” from the context menu. Alternatively, you can go to the “Settings” app and navigate to “System” and then “Display.”
- Identify and arrange the monitors: Under the “Display settings” page, you will see a graphic representation of your monitors. Each monitor will be labeled with a number to help you identify them. Click on “Identify” to see the corresponding number on each monitor. Drag and drop the monitors in the desired arrangement to match your physical setup.
- Adjust the resolution: By default, Windows will try to set the recommended resolution for your monitors. However, you can manually adjust the resolution if needed. Scroll down to the “Display resolution” section and use the drop-down menu to select the desired resolution for each monitor. Keep in mind that the resolution should be supported by both your monitors and your graphics card.
- Set the orientation: If you prefer your monitors to be arranged in a different orientation (e.g., landscape, portrait), you can change it under the “Orientation” section. Simply select the desired orientation from the drop-down menu.
- Select the primary display: If you want one of your monitors to be the main display where your desktop icons and taskbar appear, go to the “Multiple displays” section and check the box next to “Make this my main display.” This will set the selected monitor as the primary display.
- Adjust the scaling: Windows offers a scaling option to resize the content on your dual monitors. This is especially helpful if you have monitors with different pixel densities. Scroll down to the “Scale and layout” section and use the drop-down menu to select the desired scaling option. You can choose between 100%, 125%, 150%, and more.
- Apply the changes: Once you have made all the necessary adjustments, click on the “Apply” button to save the changes. Windows will apply the new display settings, and you will be able to see the changes take effect on your dual monitors.
Ensure that you have the latest graphics drivers installed on your computer to ensure compatibility and optimal performance when adjusting the display settings. It’s also worth mentioning that some HP docking stations may come with proprietary software that allows you to further fine-tune the display settings and control additional features.
Remember that the display settings can vary slightly depending on the version of Windows you are using. However, the general steps outlined above should be applicable to most versions and should help you adjust the display settings for your dual monitors connected to an HP docking station.
Troubleshooting Common Issues with Dual Monitor Setup
Setting up a dual monitor configuration can greatly enhance your productivity and multitasking capabilities. However, like any technology setup, you may encounter some common issues along the way. In this section, we will discuss and provide solutions for troubleshooting these common issues to ensure a smooth dual monitor experience.
1. No Display on Second Monitor: If you have connected both monitors but one of them is not displaying anything, first check the cables and make sure they are properly connected. If that doesn’t solve the issue, try restarting your computer. Additionally, ensure that the second monitor is recognized by your computer by going to the display settings.
2. Incorrect Display Orientation: Sometimes, the displays may be oriented incorrectly, with one monitor appearing upside down or in the wrong position. To fix this, right-click on the desktop and select Display Settings. From there, you can change the orientation settings and arrange the monitors according to your preference.
3. Different Resolutions on Monitors: If the resolutions of your dual monitors are not matching, it can lead to display issues. To align the resolutions, go to the Display Settings, select the appropriate monitor, and adjust the resolution settings to match the other monitor. This will ensure a consistent and seamless visual experience.
4. Screen Flickering or Blinking: If you notice a consistent flickering or blinking on one or both monitors, the issue might be related to outdated or incompatible graphics drivers. Update your graphics drivers to the latest version to resolve this problem. You can visit the manufacturer’s website or use automatic driver update tools for this purpose.
5. No Signal Detected: If you encounter a “No Signal” message on your dual monitor setup, it could be due to a loose connection or incompatible cables. Check that all cables are securely connected and consider replacing them if the issue persists. Additionally, ensure that the input source is correctly selected on the monitor itself.
6. Duplicate Screens Instead of Extended Display: If you find that both your monitors are displaying the same content instead of extending the display, go to the Display Settings and make sure the “Extend these displays” option is selected. Adjust the position of the monitors if necessary to achieve the desired extended display setup.
7. Mouse Cursor or Windows Moving Between Monitors: If you’re experiencing difficulty in keeping the mouse cursor or windows within one screen, it might be because the monitors are not properly aligned. Go to the Display Settings and drag the monitors into the correct position in the arrangement section to resolve this issue.
8. Graphics Card Limitations: Keep in mind that certain graphics cards have limitations on the maximum number of monitors they can support or the maximum resolution they can handle. If you are experiencing issues with your dual monitor setup, check the specifications of your graphics card to ensure it is capable of supporting your desired configuration.
9. Inconsistent Color or Image Quality: If you notice variations in color or image quality between the dual monitors, it may be due to differences in calibration. Use the display settings to adjust the color profiles and calibration settings of each monitor to achieve a consistent visual experience.
By following these troubleshooting steps, you can overcome common issues that may arise during the setup and use of dual monitors. Remember to refer to the user manual or online resources specific to your HP docking station and monitors for detailed instructions and additional troubleshooting tips.
In conclusion, hooking up dual monitors to an HP docking station can greatly enhance your productivity and multitasking capabilities. By following the step-by-step guide provided in this article, you can easily set up and configure your dual monitor setup. Whether you are a professional seeking a larger workspace or a gamer looking to immerse yourself in stunning visuals, dual monitors offer a myriad of benefits. With the flexibility to extend your desktop and have multiple windows open simultaneously, you can streamline your workflow and accomplish tasks more efficiently. So don’t hesitate to explore the possibilities of a dual monitor setup and unlock a whole new level of productivity and enjoyment.
FAQs
Q: Can I hook up dual monitors to an HP docking station?
A: Yes, you can connect dual monitors to an HP docking station. Most HP docking stations are equipped with multiple video ports that support dual monitor setups. Simply connect the monitors to the video ports on the docking station, and you should be able to extend or duplicate your display across both monitors.
Q: How do I connect the dual monitors to an HP docking station?
A: To connect dual monitors to an HP docking station, you will need the appropriate video cables. Most HP docking stations feature a combination of HDMI, DisplayPort, VGA, and DVI ports. Connect the video cables from your monitors to the corresponding ports on the docking station. Then, connect the docking station to your HP laptop or desktop using a USB or Thunderbolt cable.
Q: What if my HP docking station doesn’t have enough video ports for dual monitors?
A: If your HP docking station doesn’t have enough video ports for dual monitors, you can try using a video splitter or a USB graphics adapter. A video splitter allows you to connect one video port on the docking station to multiple monitors, duplicating the display across them. A USB graphics adapter, on the other hand, connects to a USB port on your laptop or desktop and provides an additional video output for connecting an extra monitor.
Q: Do I need any additional software or drivers to use dual monitors with an HP docking station?
A: In most cases, you don’t need any additional software or drivers to use dual monitors with an HP docking station. The docking station should automatically recognize the monitors once they are connected. However, it’s always a good idea to check for any firmware or driver updates for your docking station and graphics card to ensure optimal performance. You can visit the HP support website or check the manufacturer’s website for any available updates.
Q: Can I adjust the screen arrangement and resolution when using dual monitors with an HP docking station?
A: Yes, you can adjust the screen arrangement and resolution when using dual monitors with an HP docking station. Once the monitors are connected and recognized by your operating system, you can go to the display settings and configure the screen arrangement, such as extending the desktop or duplicating the display. You can also adjust the resolution and orientation of each monitor to suit your preferences.