
Welcome to our comprehensive guide on installing a seat docking station on a 2005 Dyna Lowrider! If you own a Dyna Lowrider and are looking to add a seat docking station to your bike, you’ve come to the right place. In this article, we will walk you through the step-by-step process, providing you with all the information you need to successfully install a seat docking station on your 2005 Dyna Lowrider. Whether you’re a seasoned DIY enthusiast or a beginner, this guide is designed to help you complete the installation with confidence. So, let’s dive in and get started on transforming your bike to the next level of convenience and functionality!
Inside This Article
- Background Information
- Tools and Materials Needed
- Step 1: Prepare the Dyna Lowrider
- Step 2: Remove the Stock Seat
- Step 3: Install the Seat Docking Station
- Step 4: Secure the Docking Station
- Step 5: Reinstall the Seat
- Step 6: Adjust and Test the Seat Docking Station
- Troubleshooting Tips
- Conclusion
- FAQs
Background Information
Before you begin the process of installing a seat docking station on your 2005 Dyna Lowrider, it’s essential to understand the purpose and benefits of this accessory. A seat docking station serves as a secure attachment point for different types of seats, allowing for easy seat swaps and customization.
The ability to switch seats effortlessly is especially useful for riders who prefer different seats for various riding conditions or who want to personalize their bike’s appearance. Whether you’re looking to install a solo seat for a sleek and streamlined look or a two-up seat for comfortable rides with a passenger, a seat docking station is the key to easy installation and removal.
When considering a seat docking station, it’s crucial to select one that is specifically designed for your bike model and year, such as a docking station compatible with your 2005 Dyna Lowrider’s mounting points. This will ensure a proper fit and secure attachment, providing peace of mind while riding.
Most seat docking stations are made from sturdy materials like steel or aluminum, ensuring durability and longevity. Additionally, they often feature a quick-release mechanism or hardware that allows for straightforward installation and removal, without the need for excessive tools or complicated procedures.
By understanding the background information about seat docking stations, you can proceed confidently with the installation process, knowing that you are enhancing both the functionality and style of your 2005 Dyna Lowrider.
Tools and Materials Needed
Before you begin installing the seat docking station on your 2005 Dyna Lowrider, it’s important to gather all the necessary tools and materials. Having everything on hand will make the installation process smoother and more efficient. Below is a list of the tools and materials you will need:
- Torque wrench
- Socket set
- Screwdrivers (flathead and Phillips)
- Allen wrench set
- Marker or chalk
- Clean cloth or rag
- Grease or lubricant
- Seat docking station kit (specific to your motorcycle model)
The torque wrench is essential for tightening the bolts to the manufacturer’s specified torque settings, ensuring a secure and safe installation. A socket set with various sizes will come in handy for different bolt sizes throughout the process.
The screwdrivers, both flathead and Phillips, will be needed to remove and install screws and other fasteners. An Allen wrench set is necessary for loosening and tightening certain bolts that have hexagonal heads.
To mark or chalk specific parts during removal, such as the seat mounting points, a marker or chalk will be useful for proper reassembly. A clean cloth or rag is handy for wiping away any dirt or debris that may accumulate during the installation.
Applying grease or lubricant to the bolts and mounting points can help prevent rust and ensure smooth operation of the seat docking station. Make sure to use a suitable lubricant for your specific motorcycle model.
Lastly, and most importantly, you will need a seat docking station kit that is designed for your 2005 Dyna Lowrider. These kits typically include all the necessary hardware and instructions for a seamless installation process.
Having all these tools and materials ready before you start will save you time and frustration. So gather everything you need and let’s move on to the next step of installing the seat docking station!
Step 1: Prepare the Dyna Lowrider
Before you begin installing the seat docking station on your 2005 Dyna Lowrider, it’s important to ensure that the bike is prepared properly. This will help make the installation process smoother and more efficient. Here are a few steps to follow to prepare your Dyna Lowrider:
- Clean the bike: Start by giving your Dyna Lowrider a thorough cleaning. This will help remove any dirt, grime, or debris that may interfere with the installation process. Use a mild detergent and water to clean the surface of the bike, making sure to dry it thoroughly before proceeding.
- Inspect the frame: Carefully inspect the frame of your Dyna Lowrider for any signs of damage or wear. Look for any cracks, rust, or structural issues. If you notice any problems, it’s best to address them before proceeding with the installation.
- Check the seat mounting points: Take a close look at the seat mounting points on your bike. Make sure they are free of dirt and debris and that there are no obstructions that could prevent the docking station from fitting properly. If you notice any issues, clean the mounting points carefully, or address any obstructions before continuing.
- Consider weight distribution: Keep in mind the weight distribution of your Dyna Lowrider when installing the seat docking station. Ensure that the weight will be evenly distributed to maintain balance and stability while riding. This will help enhance your riding experience and ensure the safety of both you and your bike.
- Take measurements: Measure the distance between the seat mounting points on your Dyna Lowrider. This will help you ensure that the seat docking station you purchase is the correct size and will fit properly. Take accurate measurements and consult the product specifications to find the suitable docking station for your bike.
By taking the time to properly prepare your Dyna Lowrider before installing the seat docking station, you will minimize the chances of encountering any issues during the installation process. This will ensure a smoother and more successful installation, allowing you to enjoy the convenience and comfort of your new seat docking station.
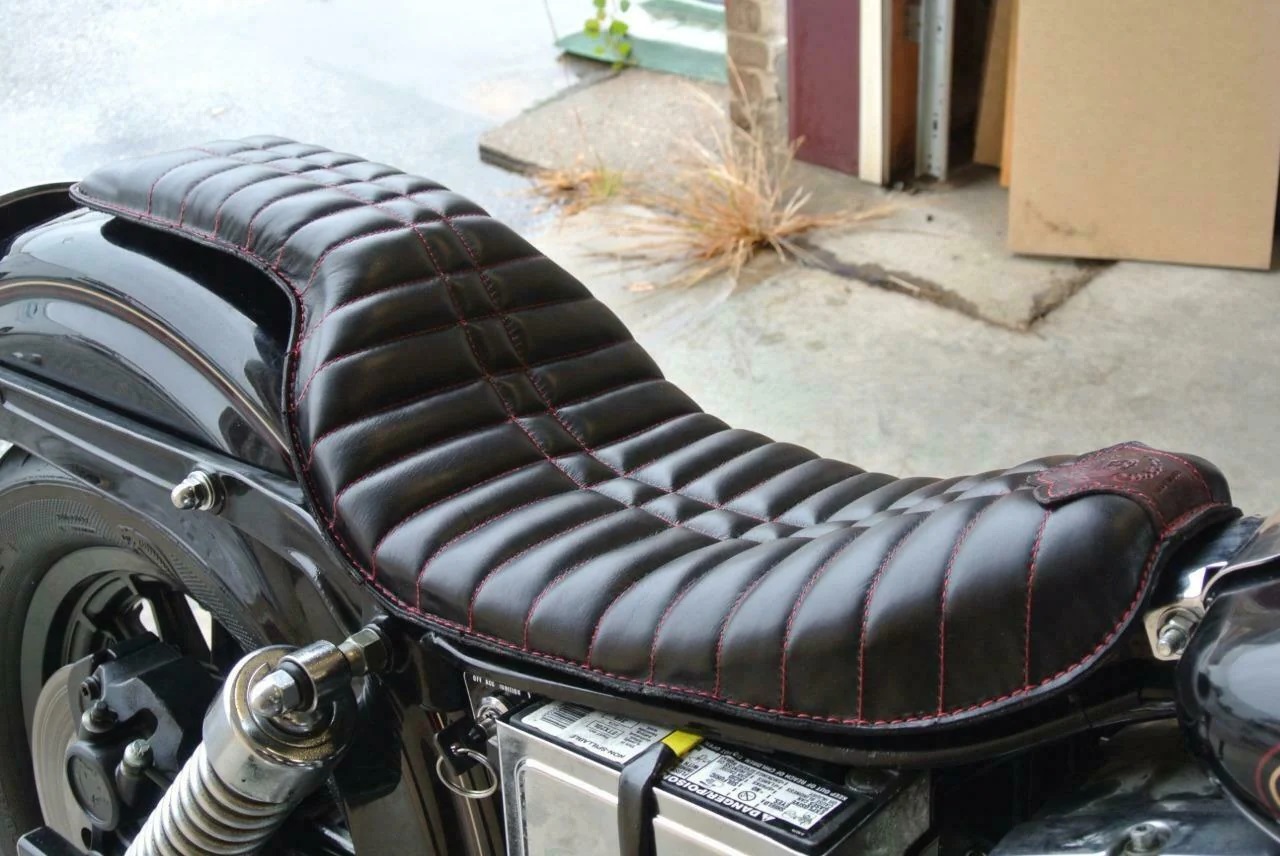
Step 2: Remove the Stock Seat
Once you have gathered your tools and materials, you are ready to move on to removing the stock seat from your Dyna Lowrider. Follow these steps to complete this process:
1. Start by locating the mounting points of the seat. These are typically located at the rear end of the seat and may be secured with bolts or screws.
2. Using the appropriate tool, such as a wrench or screwdriver, carefully loosen and remove the bolts or screws that secure the seat to the frame of the bike. Be sure to keep track of these fasteners as you will need them later when installing the new seat.
3. Once the bolts or screws are removed, gently lift the seat off the bike. Take care not to damage any wiring or other components that may be attached to the seat.
4. With the seat removed, take a moment to inspect the underlying area for any debris or loose parts. It’s always a good idea to clean and tidy up the area before installing the new seat for optimal fit and performance.
By following these steps, you should be able to successfully remove the stock seat from your Dyna Lowrider. Remember to keep the bolts or screws in a safe place to ensure they are readily available when you move on to installing the seat docking station.
Step 3: Install the Seat Docking Station
Installing a seat docking station on your 2005 Dyna Lowrider is a crucial step in ensuring a secure and stable seat attachment. The docking station acts as the mounting point for the seat, providing a solid foundation and preventing any movement while riding. Follow these steps to effectively install the seat docking station:
1. Start by locating the mounting points on your Dyna Lowrider’s frame. These are usually located towards the rear of the bike, underneath the passenger seat area. Make sure to refer to your bike’s manual for specific instructions.
2. Once you’ve located the mounting points, align the seat docking station with them. Take care to ensure that the docking station is positioned correctly and level before proceeding.
3. Use the appropriate tools to fasten the docking station securely to the bike’s frame. This may involve using bolts or screws, depending on the specific design of your seat docking station. Make sure to tighten the fasteners adequately, but be cautious not to overtighten and damage any components.
4. Double-check the stability of the seat docking station. Give it a gentle tug to ensure it is firmly attached to the frame and does not wobble or move. This step is crucial for safety and comfort while riding.
5. Inspect the docking station for any signs of loose or damaged parts. Pay attention to the fasteners, hinge, and any other components that may require regular maintenance. Tighten or replace any parts as necessary to ensure the longevity and structural integrity of the docking station.
6. Once the seat docking station is securely installed and inspected, move on to the next step of the installation process, which involves securing the docking station to the seat itself.
By following these steps carefully, you can successfully install the seat docking station on your 2005 Dyna Lowrider, providing a stable and secure attachment point for your seat. It is essential to double-check all the fasteners and ensure that the docking station is tightly secured, as a loose or unstable seat attachment can compromise your safety while riding.
Step 4: Secure the Docking Station
Once you have successfully installed the docking station onto your 2005 Dyna Lowrider, the next crucial step is to ensure that it is securely fastened. This will prevent any wobbling or movement of the seat while riding, providing you with a safe and comfortable experience.
Here are the steps to securely fasten the docking station:
- Double-check the docking station alignment: Make sure the docking station is properly aligned with the mounting points on your Dyna Lowrider. Aligning it correctly will help ensure a tight and secure fit.
- Tighten the bolts: Use the appropriate tools and carefully tighten the bolts that secure the docking station to the motorcycle frame. Be sure not to overtighten, as this can cause damage to the bolts or the frame.
- Check for stability: After tightening the bolts, gently rock the seat back and forth to check for any movement or play. If you notice any looseness, recheck the alignment and tighten the bolts further if necessary.
- Inspect for any loose components: Take a close look at the docking station, bolts, and any connecting hardware to ensure that everything is properly secured. Tighten any loose components as needed.
- Apply threadlocker (optional): For an added layer of security, you can consider applying threadlocker to the bolts that secure the docking station. This will help prevent them from loosening due to vibrations while riding.
Remember, the key is to have a secure and stable docking station, as it directly impacts your safety on the road. Take the time to perform these steps carefully and thoroughly before proceeding to the next step.
Step 5: Reinstall the Seat
Now that you have successfully installed the seat docking station on your 2005 Dyna Lowrider, it’s time to proceed with reattaching the seat. Follow the steps below to ensure a secure and proper reinstallation:
1. Take the seat and carefully align it with the docking station. Make sure the mounting holes on the seat align with the studs on the docking station.
2. Once aligned, gradually lower the seat onto the docking station and make sure that it sits snugly in place. Apply gentle pressure to ensure a secure fit.
3. With the seat in position, locate the bolts or screws that you removed earlier during the seat removal process. These bolts or screws are used to secure the seat to the motorcycle frame.
4. Take the bolts or screws and insert them back into their respective holes on the seat. Make sure to tighten them properly, but be careful not to overtighten as it may cause damage.
5. Use the appropriate tools to tighten the bolts or screws, ensuring that they are securely fastened. Double-check each bolt or screw to ensure they are all tightened evenly.
6. Once you have tightened all the bolts or screws, give the seat a firm push to ensure that it is securely attached to the docking station and the motorcycle frame. It should feel stable and not move or shift when pressure is applied.
7. Finally, visually inspect the seat to make sure it is properly aligned and the lines and contours match the overall aesthetic of the motorcycle.
Now that you have successfully reinstalled the seat, give it a test by sitting on it and checking for any signs of discomfort or instability. If everything feels secure and comfortable, you’re ready to hit the road with your newly installed seat docking station!
Step 6: Adjust and Test the Seat Docking Station
After installing the seat docking station on your 2005 Dyna Lowrider, it’s important to properly adjust and test it to ensure optimal comfort and functionality. Follow these steps to complete the process:
1. Adjusting the Seat Position: Start by sitting on the bike and getting a feel for the seat position. Slide it forward or backward along the docking station rails until you find the most comfortable position. Make sure the seat is securely locked into place.
2. Adjusting the Seat Height: Some seat docking stations allow you to adjust the seat height. If yours has this feature, find the adjustment mechanism (usually a lever or knob) and modify the height according to your preference. Experiment with different heights to find the one that suits you best.
3. Testing the Seat Stability: Once you’ve adjusted the seat position and height, it’s crucial to test its stability. Apply gentle pressure on different areas of the seat to ensure it doesn’t wobble or shift. If you notice any instability, recheck the docking station installation to make sure it’s securely fastened.
4. Test Ride: Now it’s time to take your 2005 Dyna Lowrider for a test ride. Start with a short ride around your neighborhood or a parking lot to get a feel for the seat’s comfort and stability while in motion. Pay attention to any discomfort or unusual movements and make further adjustments if needed.
5. Fine-Tuning: If you encounter any issues during the test ride, such as a seat that’s too firm or one that’s leaning to one side, make necessary adjustments. Refer to the seat docking station’s manual or consult with the manufacturer for guidance on how to fine-tune specific adjustments.
Keep in mind that adjusting the seat docking station may require some trial and error to find the perfect fit. Take your time during this process to ensure maximum comfort and safety while riding your 2005 Dyna Lowrider.
Troubleshooting Tips
Installing a seat docking station on your 2005 Dyna Lowrider can be a great way to enhance the comfort and convenience of your ride. However, like any installation process, there may be some challenges along the way. Here are some troubleshooting tips to help you overcome common issues and ensure a successful installation:
- Measurements: Double-check the measurements of the docking station and seat to ensure compatibility with your Dyna Lowrider. Even a slight difference in size can cause installation problems and affect the stability of the seat.
- Alignment: When installing the docking station, make sure it is properly aligned with the mounting points on your bike. Misalignment can cause the seat to sit unevenly or not lock into place securely.
- Bolts and Fasteners: Ensure that all bolts and fasteners are tightened securely. Loose or missing bolts can lead to wobbling or instability of the seat, compromising your safety and riding experience.
- Electrical Connections: If your seat docking station includes electrical components such as lights or heaters, check the wiring connections carefully. Loose or improperly connected wires can cause malfunctions or even short circuits.
- Testing: Before taking your Dyna Lowrider out for a ride, give the seat docking station a thorough test. Check for any signs of instability, unusual noises, or movements while sitting on the seat. Fix any issues before hitting the road.
- Documentation: Consult the installation manual provided with your seat docking station. It may contain specific troubleshooting advice that is tailored to your bike model and the docking station you are installing.
By following these troubleshooting tips, you can overcome common issues that may arise during the installation of a seat docking station on your 2005 Dyna Lowrider. Remember, if you encounter any persistent problems or are unsure about any step of the process, it’s always best to consult a professional or seek assistance from a knowledgeable bike mechanic.
Conclusion
In conclusion, installing a seat docking station on a 2005 Dyna Lowrider can greatly enhance its functionality and convenience. This accessory allows you to securely attach various accessories, such as a phone mount or a cup holder, to your motorcycle, making your riding experience more enjoyable and practical.
By following the step-by-step installation process and ensuring proper alignment and tightness, you can easily install the seat docking station on your Dyna Lowrider without any professional assistance. Not only does it provide a secure attachment for your accessories, but it also adds a stylish and practical touch to your motorcycle.
Remember to choose a high-quality seat docking station that is compatible with your Dyna Lowrider model to ensure a perfect fit and reliable performance. With this simple yet effective addition to your motorcycle, you can take your riding experience to the next level, enjoying the convenience of having your essential items easily accessible while on the road.
FAQs
Q: What is a seat docking station?
A: A seat docking station is a mobile accessory that allows you to securely mount your mobile phone on your motorcycle’s seat. It provides a safe and convenient way to access your phone’s features while riding.
Q: Can I install a seat docking station on my 2005 Dyna Lowrider?
A: Yes, you can install a seat docking station on your 2005 Dyna Lowrider. There are various options available in the market that are compatible with different motorcycle models, including the 2005 Dyna Lowrider. Make sure to choose a docking station that is specifically designed for your bike and follow the manufacturer’s instructions for installation.
Q: How do I install a seat docking station on my 2005 Dyna Lowrider?
A: The installation process may vary depending on the specific seat docking station you choose. However, most docking stations come with detailed instructions that guide you through the installation steps. Generally, you will need to remove your bike’s seat, attach the docking station securely, and then reattach the seat. It is important to carefully follow the instructions provided by the manufacturer to ensure proper installation and avoid any damage to your bike.
Q: What are the benefits of using a seat docking station on my motorcycle?
A: Using a seat docking station on your motorcycle offers several benefits. Firstly, it allows you to safely access your phone’s navigation, music, and communication features while riding, without having to handle your device directly. This enhances convenience and reduces distractions. Secondly, a properly installed docking station keeps your phone secure, preventing it from falling or getting damaged during the ride. Lastly, it adds a touch of modernity and functionality to your bike’s design, enhancing its overall appeal.
Q: Are seat docking stations compatible with all mobile phone models?
A: Seat docking stations come in different sizes and designs to accommodate various mobile phone models. However, it is important to check the compatibility of the docking station with your specific phone model before purchasing. Most docking stations have adjustable arms or clamps that can hold different phone sizes securely. It is recommended to review the product specifications or consult with the manufacturer to ensure compatibility with your mobile phone.