
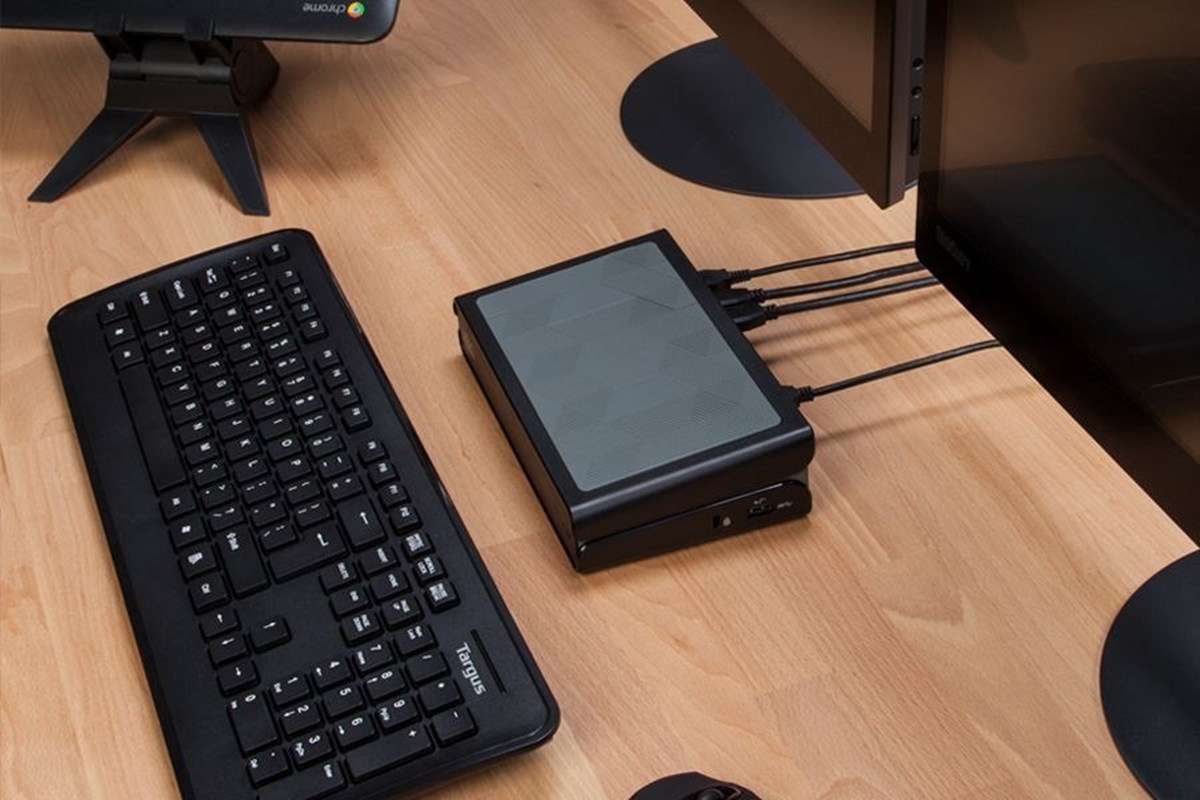
Welcome to our comprehensive guide on how to hook up the Targus Acp&1Us1 docking station! If you’re looking to enhance the functionality of your laptop or mobile device, a docking station can be a game-changer. The Targus Acp&1Us1 offers a range of features and connectivity options, making it a popular choice among tech-savvy individuals.
In this article, we will walk you through the step-by-step process of setting up and connecting your Targus Acp&1Us1 docking station. Whether you need to connect multiple monitors, transfer data, or charge your devices simultaneously, this guide has got you covered. We’ll also provide some tips and troubleshooting techniques to ensure a smooth and hassle-free experience.
So, grab your Targus Acp&1Us1 docking station and let’s dive into the world of seamless connectivity and enhanced productivity!
Inside This Article
- Connecting the Docking Station to your Laptop
- Connecting External Monitors
- Connecting USB Devices
- Connecting Ethernet and Audio Devices
- Conclusion
- FAQs
Connecting the Docking Station to your Laptop
When it comes to expanding your laptop’s capabilities, a docking station is a game-changer. It allows you to connect multiple peripherals and accessories to your laptop with ease. Here’s a step-by-step guide on how to connect a Targus ACP&1US1 docking station to your laptop:
1. Before you begin, make sure your laptop is powered off and disconnected from the power source. This will ensure a safe and smooth connection.
2. Locate the docking station’s USB cable. This cable is the main connection between the docking station and your laptop. Plug one end of the USB cable into the USB port on the docking station.
3. Now, locate an available USB port on your laptop. Connect the other end of the USB cable to this port. Make sure the connection is secure.
4. Once the USB connection is established, you can proceed to connect the docking station to the power source. Plug the power adapter into the docking station and connect it to a power outlet. Ensure that the power cable is securely plugged in.
5. Turn on your laptop and wait for it to boot up. The docking station should automatically be recognized by your laptop’s operating system. If not, you may need to install drivers or software provided by the docking station manufacturer.
6. Congratulations! Your laptop is now connected to the docking station. You can start enjoying the benefits of expanded connectivity and additional features.
Remember to consult the user manual of your specific Targus ACP&1US1 docking station for any additional instructions or troubleshooting tips. With a properly connected docking station, you can effortlessly connect your laptop to external monitors, keyboards, mice, and other peripherals, making your work and entertainment experience even better.
So, why limit yourself to the built-in features of your laptop when you can unlock its full potential with a docking station? Follow these steps and experience the convenience and versatility it brings to your digital life.
Connecting External Monitors
One of the most useful features of the Targus ACP&1US1 Docking Station is the ability to connect multiple external monitors to your laptop. This allows you to expand your screen real estate and enjoy a more immersive and productive work experience.
To connect external monitors, you will need to first identify the available display ports on your docking station. The Targus ACP&1US1 typically provides several options, such as HDMI ports, DisplayPort, and VGA ports. Check the specifications of your particular model to determine the available options.
Once you have identified the appropriate display ports, use the appropriate cables or adapters to connect your external monitors. For HDMI connections, use HDMI cables to connect the monitors to the HDMI ports on the docking station. Similarly, for DisplayPort connections, use DisplayPort cables, and for VGA connections, use VGA cables.
After connecting the cables, power on your external monitors and ensure that they are set to the correct input source. This may involve using the monitor’s on-screen display (OSD) menu to select the appropriate input source, such as HDMI or DisplayPort.
Once your monitors are properly connected and set up, you may need to configure your laptop’s display settings to extend or mirror the screen onto the external monitors. On Windows laptops, you can do this by right-clicking on the desktop and selecting “Display settings” from the context menu. On Mac laptops, go to “System Preferences” and choose “Displays.”
In the display settings, you should see the external monitors listed. Select each monitor and choose the desired display mode, such as extending the desktop or mirroring it. You may also need to adjust the screen resolution and orientation to ensure the best visual experience.
Once you have configured the display settings, you should now be able to use your external monitors seamlessly with your laptop through the Targus ACP&1US1 Docking Station. Enjoy the expanded screen real estate and enhanced productivity!
Connecting USB Devices
One of the great benefits of using a Targus Acp&1Us1 Docking Station is the ability to connect multiple USB devices to your laptop conveniently. To make the most of this feature, follow these simple steps:
1. Locate the USB Type-A ports on the dock. These ports are typically indicated by the USB symbol. The Targus Acp&1Us1 Docking Station usually has multiple USB ports for connecting various devices.
2. Take your USB device, such as a keyboard, mouse, or external hard drive, and insert the USB connector into one of the available USB ports on the docking station. Ensure that the connector is inserted securely.
3. Once connected, your laptop should detect the USB device automatically. However, in some cases, you may need to install the appropriate drivers or software provided by the device manufacturer.
4. Repeat the process for any additional USB devices you wish to connect. The Targus Acp&1Us1 Docking Station allows you to connect multiple USB devices simultaneously, making it easier to manage and access your peripherals.
5. Ensure that the USB devices are recognized by your laptop by checking the device manager or the system tray on your computer. If any devices are not showing up or are displaying errors, try reconnecting them or troubleshooting the drivers.
6. Enjoy the convenience of having all your USB devices connected and easily accessible through the Targus Acp&1Us1 Docking Station. The docking station not only provides a neat and organized setup but also enables efficient data transfer and device management.
Remember to check the compatibility of your USB devices with the docking station and make sure you have the necessary drivers to ensure smooth functionality. With the Targus Acp&1Us1 Docking Station, you can enhance your productivity and expand the capabilities of your laptop effortlessly.
Connecting Ethernet and Audio Devices
Once you have successfully connected your laptop to the Targus Acp&1Us1 Docking Station and set up the external monitors and USB devices, it’s time to connect the Ethernet and audio devices. These connections play a crucial role in expanding the functionality and versatility of your workstation.
1. Ethernet Connection:
To connect your laptop to a wired internet connection, locate the Ethernet port on the Targus Acp&1Us1 Docking Station. It is usually labeled with an “Ethernet” symbol. Take an Ethernet cable and plug one end into the Ethernet port of the docking station. Then, insert the other end into the Ethernet port of your modem or router. This will establish a direct, high-speed internet connection on your laptop, allowing for seamless browsing, downloads, and online gaming.
2. Audio Connection:
The Targus Acp&1Us1 Docking Station also allows you to connect audio devices, such as headphones or external speakers, to enhance your audio experience. Look for the audio jack on the docking station, typically labeled with a headphone icon. Plug the audio cable into the jack, ensuring a secure connection. Then, insert the other end of the cable into the corresponding audio input on your audio device. Now, you can enjoy high-quality audio output from your laptop.
Pro tip: If your audio device uses Bluetooth connectivity, you can also pair it with your laptop by enabling Bluetooth on both devices. This will enable wireless audio streaming, giving you more freedom to move around without worrying about cables.
3. Testing the Connections:
After connecting the Ethernet and audio devices, it’s essential to test these connections to ensure everything is functioning as expected. Open a web browser on your laptop and visit a website to confirm that the Ethernet connection is established and you have internet access. Additionally, play some audio or video content on your laptop to verify that the audio output is working through the connected devices.
By successfully connecting Ethernet and audio devices to the Targus Acp&1Us1 Docking Station, you can enjoy a complete multimedia experience while staying connected to the internet. Whether you’re streaming your favorite movies, participating in online meetings, or immersing yourself in gaming sessions, these connections will enhance your productivity and entertainment.
Make sure to check the compatibility of your specific audio devices with the docking station to ensure seamless integration and optimal performance.
Conclusion
In conclusion, the Targus ACP&1US1 Docking Station is a versatile and convenient accessory for enhancing your mobile device experience. With its easy setup and comprehensive connectivity options, it allows you to transform your smartphone into a powerful workstation. Whether you need to connect multiple devices, transfer data, or extend your display, this docking station has got you covered. Its sleek design and compact size make it perfect for on-the-go professionals or anyone looking to streamline their mobile setup.
So, why settle for a limited mobile experience when you can expand your capabilities with the Targus ACP&1US1 Docking Station? Say goodbye to messy cables and endless device swapping. With this docking station, you can enjoy seamless connectivity and productivity wherever you are. Take control of your mobile accessories and unleash the full potential of your devices with the Targus ACP&1US1 Docking Station.
FAQs
Q: Can I use the Targus ACP&1US1 Docking Station with any laptop?
A: No, the Targus ACP&1US1 Docking Station is designed to be compatible with specific laptops and may not work with all models. It is important to check the compatibility of your laptop with the docking station before purchasing.
Q: How do I connect the Targus ACP&1US1 Docking Station to my laptop?
A: To connect the Targus ACP&1US1 Docking Station to your laptop, follow these steps:
1. Connect the docking station’s power adapter to a power source.
2. Connect the docking station to your laptop using the provided USB-C cable.
3. Once connected, your laptop should recognize the docking station and install any necessary drivers.
Note: The specific steps may vary depending on your laptop model, so it is always recommended to consult the user manual or manufacturer’s website for detailed instructions.
Q: What ports are available on the Targus ACP&1US1 Docking Station?
A: The Targus ACP&1US1 Docking Station usually features a variety of ports to expand the connectivity of your laptop. These may include:
– USB ports: for connecting peripherals like a keyboard, mouse, and external storage devices.
– HDMI or DisplayPort: for connecting external monitors or projectors.
– Ethernet port: for connecting to a wired network.
– Audio ports: for connecting headphones, speakers, or a microphone.
– SD card reader: for transferring data to and from SD memory cards.
Note: The number and type of ports may vary depending on the specific model of the docking station.
Q: Can the Targus ACP&1US1 Docking Station charge my laptop?
A: Yes, the Targus ACP&1US1 Docking Station is capable of charging some laptops that support Power Delivery (PD) charging. However, it is important to check the power requirements of your laptop and the capabilities of the docking station to ensure compatibility and proper charging functionality.
Q: Can I use multiple monitors with the Targus ACP&1US1 Docking Station?
A: Yes, the Targus ACP&1US1 Docking Station typically supports multiple monitors. You can connect one or more external displays, depending on the available video ports and the specifications of your laptop. Keep in mind that you may need to adjust your laptop’s display settings or install additional drivers to properly utilize the multiple monitor setup.