
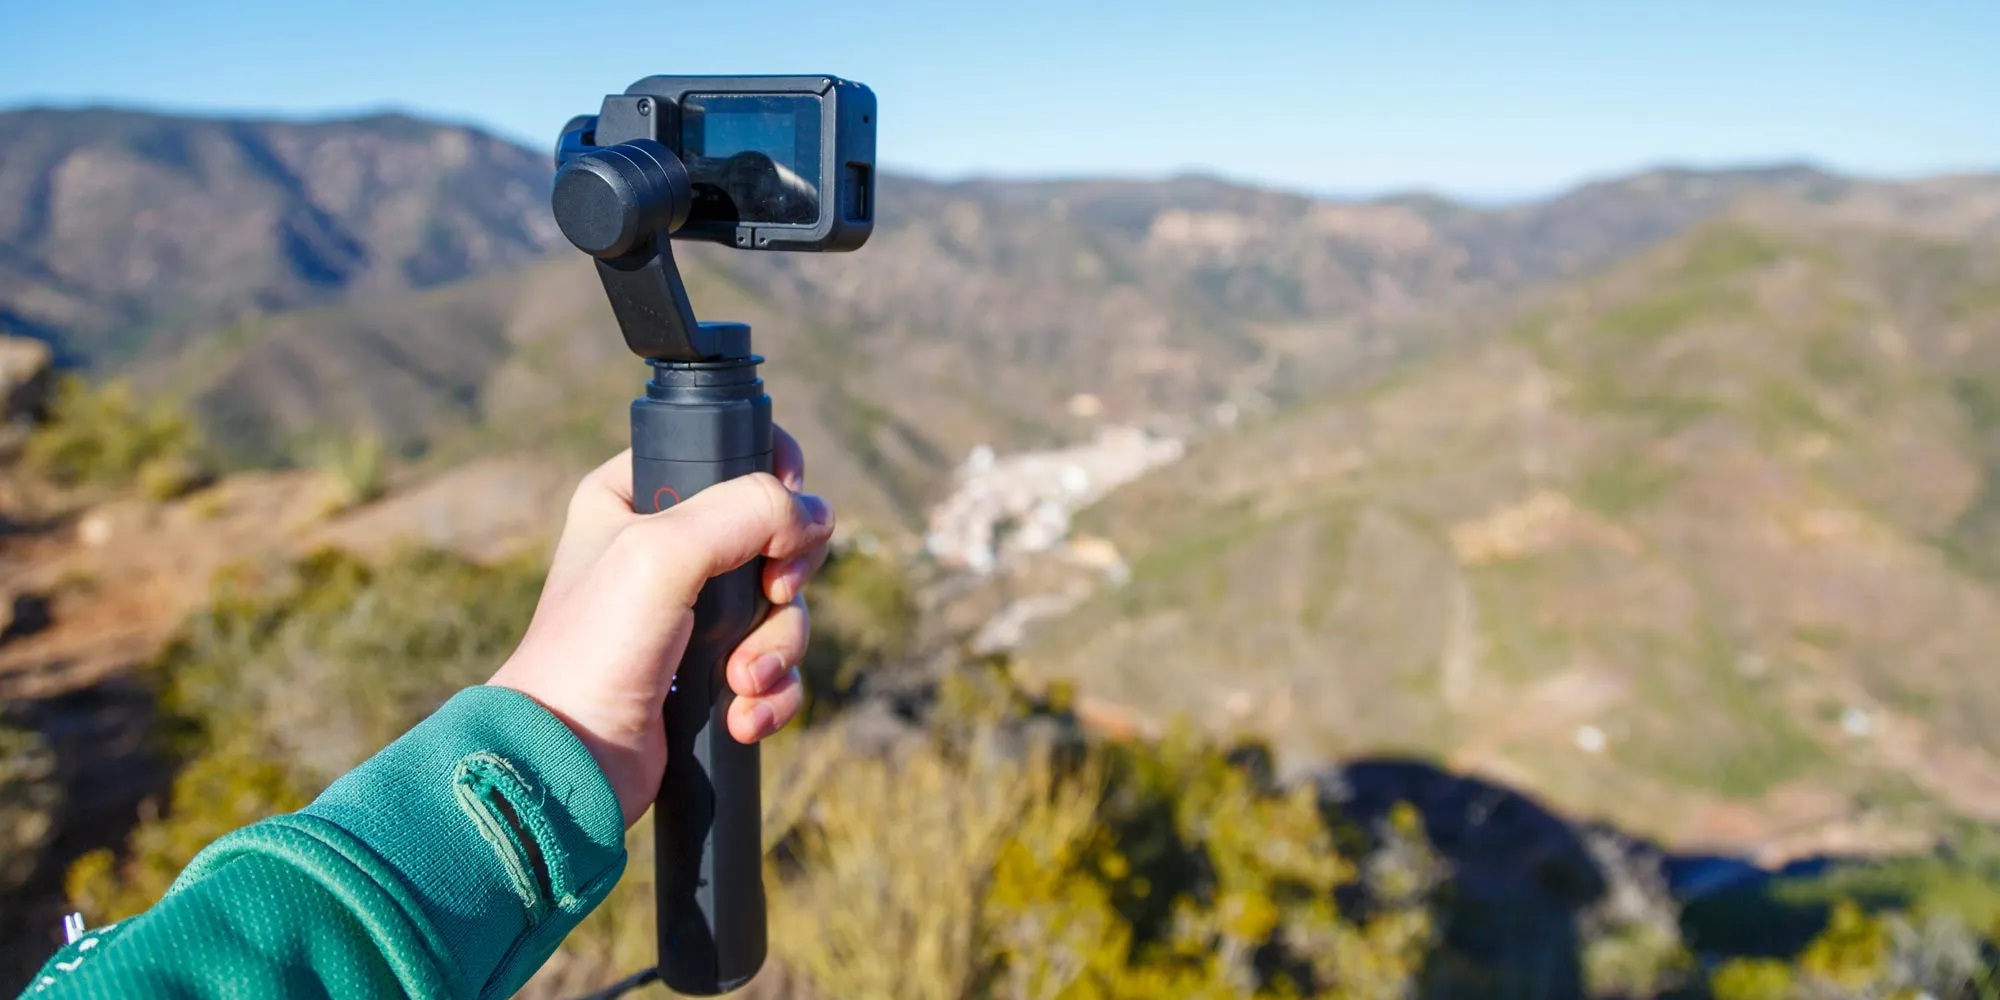
Are you an adventure enthusiast who loves capturing thrilling moments with your GoPro camera? If so, you probably understand the importance of having a stable and smooth footage while shooting. This is where a gimbal comes in handy. A gimbal is a device that helps to stabilize your GoPro camera and eliminate shaky footage, ensuring that your videos are professional-quality.
In this article, we will explore how to make a gimbal for your GoPro camera. Whether you are a do-it-yourself enthusiast or simply looking for a cost-effective alternative to expensive commercial gimbals, we have got you covered. You don’t need to be an engineering genius or spend a fortune to create your own gimbal. With a few basic tools and materials, you can easily build a gimbal that will greatly enhance the stability and smoothness of your GoPro footage. So, let’s get started and create your own gimbal for your GoPro camera today!
Inside This Article
- Materials Needed
- Step 1: Gathering the Parts
- Step 2: Assembling the Gimbal Frame
- Step 3: Mounting the Motors
- Step 4: Connecting the Electronics
- Step 5: Attaching the GoPro
- Step 6: Calibrating the Gimbal
- Step 7: Testing and Adjusting
- Conclusion
- FAQs
Materials Needed
Before you begin building your own gimbal for the GoPro, it’s important to gather all the necessary materials. Here is a list of what you will need:
- 3-axis brushless motors
- IMU (Inertial Measurement Unit)
- Arduino board
- Breadboard
- Jumper wires
- 5V voltage regulator
- Lithium Polymer (LiPo) battery
- Battery charger
- Carbon fiber sheets
- Mounting brackets
- Screws and nuts
- GoPro mounting plate
- Electrical tape
- Heat shrink tubing
- Soldering iron
- Wire cutters
- Wire strippers
- Hot glue gun
- Zip ties
These materials will allow you to build a basic gimbal for your GoPro. Make sure to gather everything before starting the assembly process to ensure a smooth and uninterrupted workflow.
Step 1: Gathering the Parts
Before you can start building your own gimbal for your GoPro, you will initially need to gather all the necessary parts and components. Here is a list of the essential items you will need:
- Brushless motors: Look for high-quality brushless motors that are compatible with your GoPro’s weight and size. Aim for smooth and precise movement.
- IMU (Inertial Measurement Unit): This is a sensor that measures the gimbal’s orientation and movement. Make sure to choose a reliable IMU for accurate tracking.
- Controller board: You will require a controller board to process the data from the IMU and send commands to the motors. Opt for a controller board that suits your specific needs.
- Frame: The frame plays a crucial role in holding the motors, IMU, and other components together. Choose a lightweight and sturdy frame design to ensure stability and durability.
- Bearings: Bearings are necessary to provide smooth rotation for the gimbal. Look for high-quality bearings for optimal performance.
- Wires and connectors: You will need various wires and connectors to connect the different components of the gimbal. Make sure to have the appropriate sizes and types.
- Mounting hardware: To secure the gimbal to your GoPro, you will need mounting hardware like screws, nuts, and brackets. Choose hardware that fits your specific gimbal and GoPro model.
- Power source: Don’t forget about the power source for your gimbal. Depending on the type of gimbal and motors you use, you may need a battery pack or power supply.
It is important to ensure that all the parts you gather are compatible with each other and suitable for your specific gimbal design. Taking the time to gather the right components will greatly contribute to the overall performance and functionality of your DIY gimbal.
Step 2: Assembling the Gimbal Frame
Once you have gathered all the necessary parts for your DIY gimbal, it’s time to start assembling the frame. The frame is the skeleton of the gimbal that holds all the components together. Follow these steps to assemble the gimbal frame:
1. Begin by identifying the main frame plates. These are typically made of lightweight materials like carbon fiber or aluminum. Lay them out in front of you and make sure you have all the required plates.
2. Next, attach the motor mounts to the corresponding holes on the frame plates. The motor mounts are designed to securely hold the brushless motors in place. Use the screws provided with your kit or appropriate sized screws to fasten the motor mounts.
3. Once the motor mounts are attached, carefully place the brushless motors into the mounts. Ensure that the motors are aligned properly and securely fastened using the screws or clamps provided.
4. Now, move on to attaching the camera plate to the main frame plates. The camera plate is where the GoPro or any other action camera will be mounted. Align the holes on the camera plate with the corresponding holes on the main frame plates and use screws to secure it in place.
5. It’s important to make sure that all the components are securely fastened and there is no unnecessary movement or play. Double-check all the screws and connections to ensure a stable and sturdy frame.
6. Lastly, inspect the assembled frame and make any necessary adjustments. Check the alignment of the motor mounts and the camera plate. Make sure everything is level and balanced. This will ensure smooth and steady footage when the gimbal is in use.
With the gimbal frame assembled, you have completed an essential step in building your own gimbal for your GoPro or action camera. The frame provides the foundation for the rest of the components, allowing the gimbal to stabilize and control the camera’s movements. Now, it’s time to move on to the next step and mount the motors.
Step 3: Mounting the Motors
Mounting the motors is a crucial step in building your DIY gimbal for your GoPro. The motors are responsible for stabilizing the camera and ensuring smooth movements while capturing footage. Follow these steps to properly mount the motors on your gimbal frame:
1. First, identify the motor mounts on your gimbal frame. These are usually pre-designed holes or brackets specifically meant for attaching the motors.
2. Take one of the motors and align it with the designated motor mount on the frame. Ensure the motor shaft is facing towards the center of the gimbal to allow for proper rotation.
3. Use screws or bolts, depending on the design of the gimbal frame, to secure the motor in place. Make sure the screws or bolts are tight enough to hold the motor securely but not too tight to restrict its movement.
4. Repeat the process for the remaining motors, ensuring each one is mounted securely and aligned correctly.
5. Once all the motors are mounted, double-check their alignment and make any necessary adjustments. It’s important to ensure all the motors are parallel to each other and level with the gimbal frame to maintain proper balance.
6. Additionally, make sure the motors are centered on the frame to avoid any tilting or imbalance issues. Proper motor placement is crucial for the stability and performance of your gimbal.
Mounting the motors correctly is essential for the smooth operation of your homemade gimbal. Take your time to align and secure the motors properly to achieve the best results when using your GoPro.
Step 4: Connecting the Electronics
Now that you have assembled the gimbal frame and mounted the motors, it’s time to connect the electronics. This step is crucial to ensure that your gimbal functions properly and communicates with your GoPro.
Here are the steps to connect the electronics:
- Identify the motor controller board: Look for the motor controller board in your gimbal kit. It is usually a small circuit board that controls the movement of the motors.
- Locate the connection ports: On the motor controller board, you will find several labeled connection ports. These ports are where you will connect the wires from the motors and other electronic components.
- Connect the motor wires: Take the wires from each motor and connect them to the corresponding ports on the motor controller board. Pay attention to the labeling on the board to ensure proper connection. Use small connectors or solder the wires for a secure connection.
- Connect the power source: Locate the power input port on the motor controller board. Connect the positive and negative wires from your power source, usually a Li-ion battery, to the appropriate terminals on the board. Double-check the polarity to avoid any electrical mishaps.
- Connect the control board: If your gimbal kit includes a separate control board, connect it to the motor controller board using the provided cables. This control board allows you to adjust the gimbal’s settings and control its movements.
- Connect the GoPro: Take the GoPro’s HDMI and power cables and connect them to the corresponding ports on the control board. These cables allow the gimbal to receive video feed from the GoPro and provide power to the camera.
Make sure all the connections are secure and properly seated. Take your time to carefully route the wires and avoid any tangling or strain on the connections. Remember, a clean and organized wiring setup will make troubleshooting and maintenance easier in the future.
Once you have connected all the electronics, proceed to the next step to learn how to attach the GoPro to the gimbal frame.
Step 5: Attaching the GoPro
Once you have successfully assembled the gimbal frame and mounted the motors, it’s time to attach the GoPro camera. Properly securing the camera is essential to ensure stability and smooth footage. Follow these steps to attach your GoPro:
1. Start by locating the mounting plate on the gimbal frame. This plate is designed to hold the GoPro securely in place.
2. Take your GoPro camera and remove it from any protective housing or casing it may be in. You want to attach the bare camera to the gimbal for optimal balance and stability.
3. On the bottom of the GoPro camera, you will find a mounting screw hole. This is where the camera will be attached to the gimbal frame.
4. Align the mounting screw hole on the GoPro with the corresponding hole on the mounting plate of the gimbal frame. Make sure the camera is centered and level.
5. Insert the mounting screw through the holes, connecting the GoPro to the gimbal frame. Use a screwdriver or Allen wrench to tighten the screw securely.
6. Double-check that the camera is securely attached and there is no wobbling or looseness. You want the GoPro to be firmly in place to prevent any unwanted movement during operation.
7. Once the GoPro is securely attached, power on the gimbal system and make sure the camera remains stable. If you notice any shaking or instability, recheck the tightness of the mounting screw.
8. Finally, give the gimbal and camera a gentle shake to ensure there is no excessive movement. The goal is to have a secure and stable connection between the camera and the gimbal frame.
By following these steps, you can confidently attach your GoPro camera to the gimbal frame and prepare it for capturing smooth and stable footage. Now that your camera is securely in place, you can move on to the next step of calibrating the gimbal to ensure optimal performance.
Step 6: Calibrating the Gimbal
Calibrating the gimbal is a crucial step in ensuring optimal performance and stability. This process allows the gimbal to accurately measure and compensate for any imbalances or misalignments. By properly calibrating the gimbal, you can ensure smooth and seamless footage while using your GoPro.
Here are the steps to calibrate your gimbal:
- Power on the gimbal: Make sure the gimbal is powered on and that all the connections are secure.
- Place the gimbal on a flat surface: Set the gimbal on a stable, level surface, such as a table or the ground. This will provide a solid reference point for calibration.
- Access the gimbal settings: Depending on your gimbal model, you will need to access the calibration settings. This is usually done through a smartphone app or a dedicated control panel.
- Choose the calibration option: Look for the calibration option in the settings menu. It may be labeled as “Calibrate” or “Gimbal Calibration”. Select this option to start the calibration process.
- Follow the on-screen instructions: The calibration process may vary depending on the gimbal model. Generally, you will be prompted to keep the gimbal still and in certain positions. Follow the on-screen instructions carefully to complete the calibration.
- Confirm the calibration: After completing the calibration process, the gimbal will provide a confirmation message. This indicates that the calibration was successful.
It is important to note that proper calibration should be done periodically or whenever you notice any issues with the gimbal’s performance. By recalibrating the gimbal regularly, you can ensure that it maintains optimum stability and accuracy.
Calibrating your gimbal is a simple yet essential step in optimizing its performance. By following these steps, you can ensure that your gimbal is accurately calibrated, allowing you to capture smooth and professional-looking footage with your GoPro.
Step 7: Testing and Adjusting
Once you have successfully assembled your homemade gimbal for your GoPro, it’s time to test and adjust its performance. This step is crucial to ensure that your footage will be smooth and stable. Here’s how you can test and fine-tune your gimbal:
1. Power on your gimbal and make sure it is properly balanced. Check if the motors are running smoothly without any strange noises or vibrations. If everything seems fine, proceed to the next step.
2. Connect your GoPro to the gimbal and turn on both devices. Make sure the GoPro is securely attached and balanced on the gimbal mount. Adjust the position if needed.
3. Slowly move the gimbal in different directions, testing its stability and responsiveness. Pay attention to any jerky movements or drifting. If you notice any issues, you will need to make adjustments.
4. Most gimbals have control interfaces or apps that allow you to adjust settings such as motor sensitivity, stabilization mode, and follow speed. Familiarize yourself with these settings and make necessary adjustments to achieve the desired smoothness and stability.
5. Test different shooting scenarios, such as walking, running, or panning. Evaluate the footage to see if the gimbal effectively eliminates any shaking or vibrations. Adjust the settings as needed to improve the results.
6. Keep experimenting and fine-tuning your gimbal settings until you achieve the optimal performance. It may take a bit of trial and error, but the results will be worth it.
7. Once you are satisfied with the performance of your homemade gimbal, it’s time to start capturing stunning, stable videos with your GoPro!
Remember, testing and adjusting the gimbal is an ongoing process. As you gain more experience and encounter different shooting scenarios, you may need to make further refinements to optimize its performance.
Enjoy the smooth and professional-looking footage that your homemade gimbal for GoPro can deliver!
Conclusion
Creating your own gimbal for GoPro can be a rewarding and cost-effective solution for capturing smooth and professional-looking footage. With the right tools and a bit of DIY spirit, you can assemble a gimbal that meets your specific needs and elevates your videography to the next level.
By following the step-by-step instructions provided in this guide, you can explore the world of gimbal stabilization and unleash your creativity in capturing stunning shots. Remember to prioritize safety by using proper tools and materials, and always test your gimbal before putting your expensive GoPro on it.
Whether you’re a seasoned videographer or an aspiring content creator, a homemade gimbal can be a game-changer. It allows you to achieve smoother and more professional-looking footage without breaking the bank. So, why wait? Grab your tools, get creative, and embark on a journey to build your very own gimbal for GoPro. Happy filming!
FAQs
1. What is a gimbal?
A gimbal is a device that helps to stabilize the camera and eliminate shakiness during video recording. It uses motors and sensors to detect and counteract movements, ensuring smooth and steady footage.
2. Why do I need a gimbal for my GoPro?
A gimbal is particularly useful for action cameras like GoPros because it allows you to capture steady and professional-looking footage even in challenging environments or during fast-paced activities like sports, biking, or snowboarding.
3. Can I make a gimbal for my GoPro myself?
Yes, it is possible to make a gimbal for your GoPro at home. However, it requires some technical skills, knowledge of electronics, and access to certain tools and materials. There are various DIY tutorials available online that can guide you through the process.
4. What materials do I need to make a gimbal for my GoPro?
The materials required to make a gimbal for your GoPro usually include a 3-axis brushless gimbal controller, brushless motors, IMU sensor module, a frame or support structure, and mounting hardware. You may also need a battery, wiring, and connectors to power and control the gimbal.
5. Are there any alternatives to making a DIY gimbal?
If you’re not comfortable with building your own gimbal, or if you prefer a more professional and ready-to-use solution, there are plenty of commercial gimbal options available for GoPros. These gimbals are specifically designed and optimized for GoPro cameras, offering advanced features and ease of use.