
Are you tired of using your fingers to navigate your touchscreen device? Have you ever thought about making your own stylus? A stylus can come in handy when you prefer a more precise and accurate way of interacting with your smartphone or tablet. In this article, we will guide you through the process of making your own stylus using simple materials that you may already have lying around your home. Not only will you be able to save money by creating your own stylus, but you’ll also have the satisfaction of customizing it to suit your preferences. So, let’s dive in and discover how to make a stylus that will enhance your mobile experience!
Inside This Article
- Materials Needed
- Step 1: Choosing the Base
- Step 2: Preparing the Base
- Step 3: Creating the Tip
- Step 4: Attaching the Tip to the Base
- Conclusion
- FAQs
Materials Needed
To make your own stylus, you will need a few basic materials that are easily accessible. Here’s what you’ll need:
- A Pen or Pencil: You can use an old pen or pencil as the base for your stylus. Make sure it’s a pen or pencil that you no longer need or use.
- Aluminum Foil: You’ll need a small piece of aluminum foil to create the tip of the stylus. Aluminum foil is a conductive material that works well for touch screens.
- A Small Piece of Conductive Foam: This is optional but recommended. Conductive foam helps enhance the functionality of the stylus by providing better conductivity. You can find conductive foam in many electronic stores or online.
- Tape: You will need tape to secure the aluminum foil and the conductive foam (if you choose to use it) onto the pen or pencil.
- Scissors: Scissors will be necessary to cut the aluminum foil and the conductive foam into the desired shapes and sizes.
- A Touchscreen Device: Lastly, you will need a touchscreen device (such as a smartphone or tablet) to test and use your homemade stylus.
Once you have gathered all of these materials, you’re ready to start making your own stylus! Follow the steps below to create your personalized stylus that will allow you to interact with your touchscreen device with ease.
Step 1: Choosing the Base
When it comes to making your own stylus, the first step is to choose a suitable base for your stylus. The base is the part of the stylus that you will hold and use to interact with your device’s touch screen.
There are a few options you can consider when selecting a base for your stylus. The most common choices include pens, pencils, and even chopsticks. Each option has its own advantages and disadvantages, so it’s important to choose based on your personal preference and what feels comfortable in your hand.
If you choose a pen as your base, make sure it has a smooth, cylindrical shape without any sharp edges that could scratch your device’s screen. Pencils are another popular choice, as they offer a more lightweight and ergonomic option. Chopsticks can be a fun and unique choice for a stylus base, providing a different grip and feel.
Consider the size and weight of the base as well. You want to choose a base that feels balanced and comfortable in your hand, allowing you to have precise control over your movements on the touch screen.
It’s also worth noting that some stylus bases come with additional features, such as built-in buttons or grips for added convenience. These features can enhance your overall user experience, so keep them in mind when selecting your base.
Once you have chosen your base, you can move on to the next step of preparing it for the stylus assembly. Remember, the base is an essential part of the stylus, so take your time to choose the one that suits your needs and preferences.
Step 2: Preparing the Base
Once you have chosen the base for your DIY stylus, it’s time to prepare it for the next steps. Here are a few essential tips to help you get started:
1. Clean the base: Before you begin, make sure to clean the surface of the base. This will remove any dirt, debris, or oils that could interfere with the adhesive or affect the functionality of your stylus.
2. Sand the base: Sanding the base will help create a smooth and even surface for your stylus. Use a fine-grit sandpaper to gently sand the entire base, paying close attention to any rough or uneven areas. This will ensure that your stylus glides smoothly across your device’s screen.
3. Apply a primer (optional): If you want to enhance the durability and longevity of your DIY stylus, you can apply a primer to the base. A primer will provide better adhesion and protect the surface from wear and tear. Follow the manufacturer’s instructions for applying the primer and allow it to dry completely before proceeding.
4. Choose a grip material: Consider adding a grip material to your stylus base for better handling and control. You can use materials like rubber, foam, or even heat-shrink tubing to create a comfortable grip. Cut the material to size, wrap it around the base, and secure it with adhesive or tape.
5. Seal the base (optional): To prevent any moisture or debris from seeping into the base and causing damage, you may choose to seal it. Use a clear sealant or epoxy to coat the entire base, taking care to avoid covering the tip area. Allow the sealant to cure according to the manufacturer’s instructions before moving on.
By following these preparation steps, you’ll ensure that the base of your DIY stylus is clean, smooth, and ready to go for the next phase of creating your own stylus.
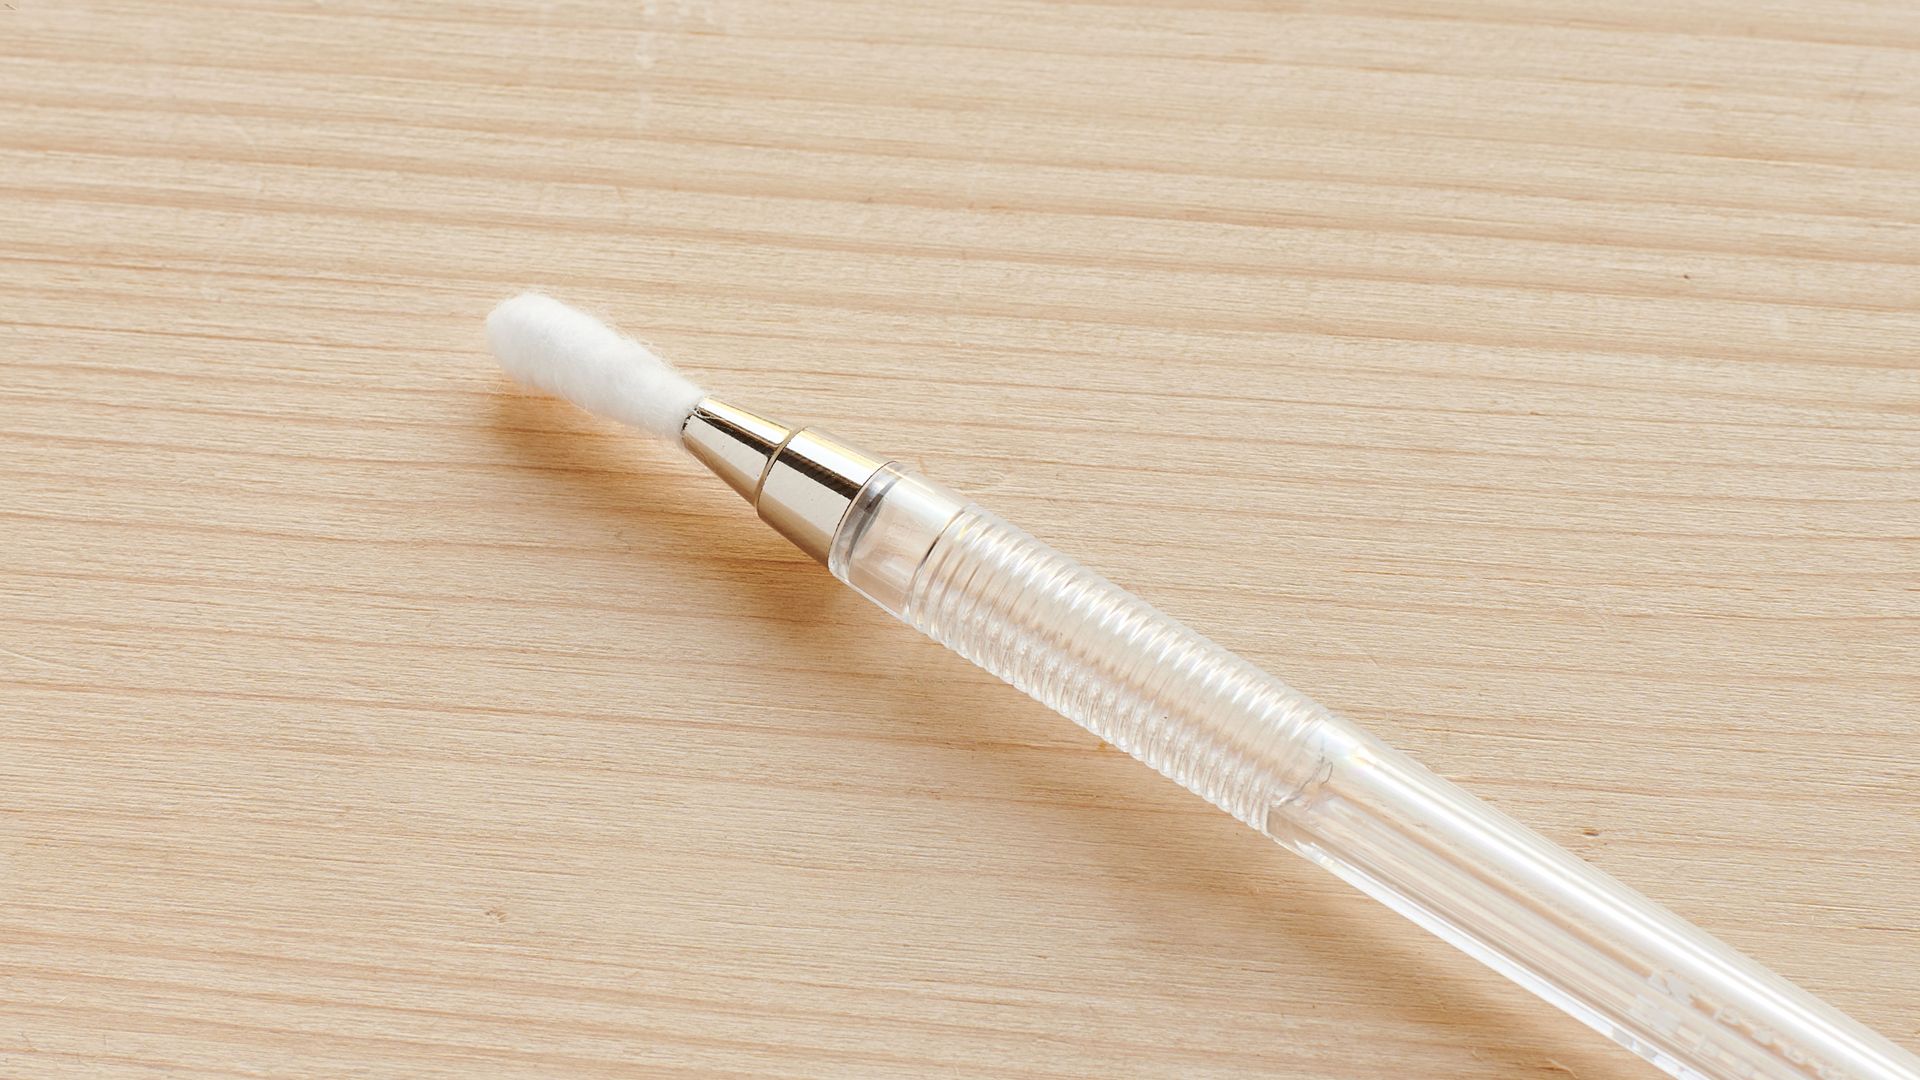
Step 3: Creating the Tip
Creating the tip is a crucial step in making a stylus. The tip is the part that comes into contact with the screen of your device, so it needs to be precise and sensitive enough to mimic the touch of your finger. Here’s how you can create a DIY stylus tip:
1. Choose the material: The type of material you use for the tip will determine its effectiveness. One popular option is conductive foam, which can be easily shaped and provides good responsiveness. Another option is a conductive fabric, which can be cut into a small shape and attached to the base. You can also experiment with other materials like conductive rubber or even aluminum foil.
2. Shape the material: Once you have chosen the material, you will need to shape it into a tip. If you are using conductive foam, you can simply cut it into a small, round shape. If you are using a conductive fabric or rubber, you can cut it into a small square or rectangle, making sure it fits the base tightly.
3. Test the sensitivity: Before attaching the tip to the base, it’s important to test its sensitivity. You can do this by gently tapping or swiping it on the screen of your device. Make sure it registers the touch accurately and smoothly. If not, you may need to adjust the size or shape of the tip until you are satisfied with its responsiveness.
4. Attach the tip to the base: Once you are happy with the tip’s sensitivity, it’s time to attach it to the base. Depending on the type of base you chose, you can use glue or adhesive tape to secure the tip in place. Ensure that the tip is firmly attached and aligned with the base for optimal performance.
Creating the tip for your DIY stylus requires precision and experimentation. Take your time to shape and test different materials until you find the perfect combination that works best for your device. With a well-crafted tip, you’ll be able to navigate your touchscreen with ease and precision, just like using your finger.
Step 4: Attaching the Tip to the Base
Now that you have successfully chosen the base for your DIY stylus and created the tip, it’s time to attach the tip to the base. This step is crucial as it ensures that your stylus will work effectively on touch screen devices.
To start, gather your materials including the base and the tip. Double-check their compatibility and ensure that the tip is properly sized to fit onto the base. This will ensure a snug fit and optimal functionality.
Carefully align the tip with the top of the base and place it in position. Make sure the tip is centered and level, as any misalignment can affect the accuracy and responsiveness of the stylus on the touch screen.
Once you have positioned the tip correctly, use a strong adhesive to secure it to the base. Apply the adhesive evenly to the bottom of the tip and press it firmly against the base. Hold it in place for a few seconds to allow the adhesive to bond effectively.
After attaching the tip, give it some time to dry and set. This will ensure that the tip is securely attached to the base and won’t come loose during use. Follow the recommended drying time specified by the adhesive manufacturer.
Once the adhesive has fully dried, check the attachment to ensure it is secure. Gently tug on the tip to test its stability. If it feels loose or moves easily, you may need to reapply adhesive or consider using a stronger bonding agent.
Finally, inspect the overall construction of your DIY stylus. Check for any excess adhesive that may have dripped onto the base or the tip. Use a clean cloth or a cotton swab dipped in rubbing alcohol to remove any excess adhesive and clean up the stylus.
Once you have completed these steps, your DIY stylus is now ready to be used with your touch screen devices. Enjoy the convenience of a personalized stylus that you can create from common household items!
Conclusion
In conclusion, making your own stylus can be a fun and cost-effective way to enhance your mobile device experience. With just a few simple materials and tools, you can create a functional stylus that allows for precise and smooth touchscreen navigation. Not only does this save you money, but it also gives you the opportunity to customize your stylus to suit your individual needs and preferences.
Whether you prefer a DIY approach or simply enjoy the satisfaction of creating something with your own hands, making a stylus can be a rewarding endeavor. So, go ahead and give it a try! Unlock the full potential of your mobile device and elevate your mobile accessories game by crafting your very own stylus.
Remember, practice makes perfect, so don’t be discouraged if your first attempt isn’t flawless. Experiment with different materials and techniques until you find the perfect combination for your needs. With a bit of creativity and patience, you’ll be navigating your touchscreen like a pro in no time!
FAQs
1. Can I make a stylus at home?
Yes, you can make a stylus at home using everyday materials. There are several DIY methods available that involve using materials such as aluminum foil, cotton swabs, and conductive foam. These methods are cost-effective and can be a fun project to try.
2. How do I make a stylus with aluminum foil?
To make a stylus with aluminum foil, you will need a cotton swab, aluminum foil, and tape. First, wrap a small piece of aluminum foil tightly around one end of the cotton swab. Make sure the foil is securely attached. Trim any excess foil. Finally, secure the foil in place with a small piece of tape. Your homemade aluminum foil stylus is now ready to use!
3. What is the purpose of a stylus?
A stylus is a pen-like device that is used to interact with touchscreens, especially on smartphones and tablets. It provides a more precise and accurate input compared to using fingers, making it ideal for tasks such as drawing, writing, and navigating through apps. It can also help prevent fingerprints and smudges on the screen.
4. Can I use any material to make a stylus?
While there are several materials that can be used to make a stylus, it is important to ensure that the material is conductive. Conductive materials allow the stylus to interact with the touchscreens effectively. Materials such as aluminum foil, conductive foam, and copper wire are commonly used due to their conductivity.
5. Are there any risks in making a DIY stylus?
Making a DIY stylus is generally safe, as long as you follow the instructions carefully and use materials responsibly. However, it is important to note that homemade styluses may not provide the same level of precision and responsiveness as commercially manufactured ones. Additionally, using a stylus on a touchscreen for an extended period of time may cause minor scratches or wear on the screen surface.