
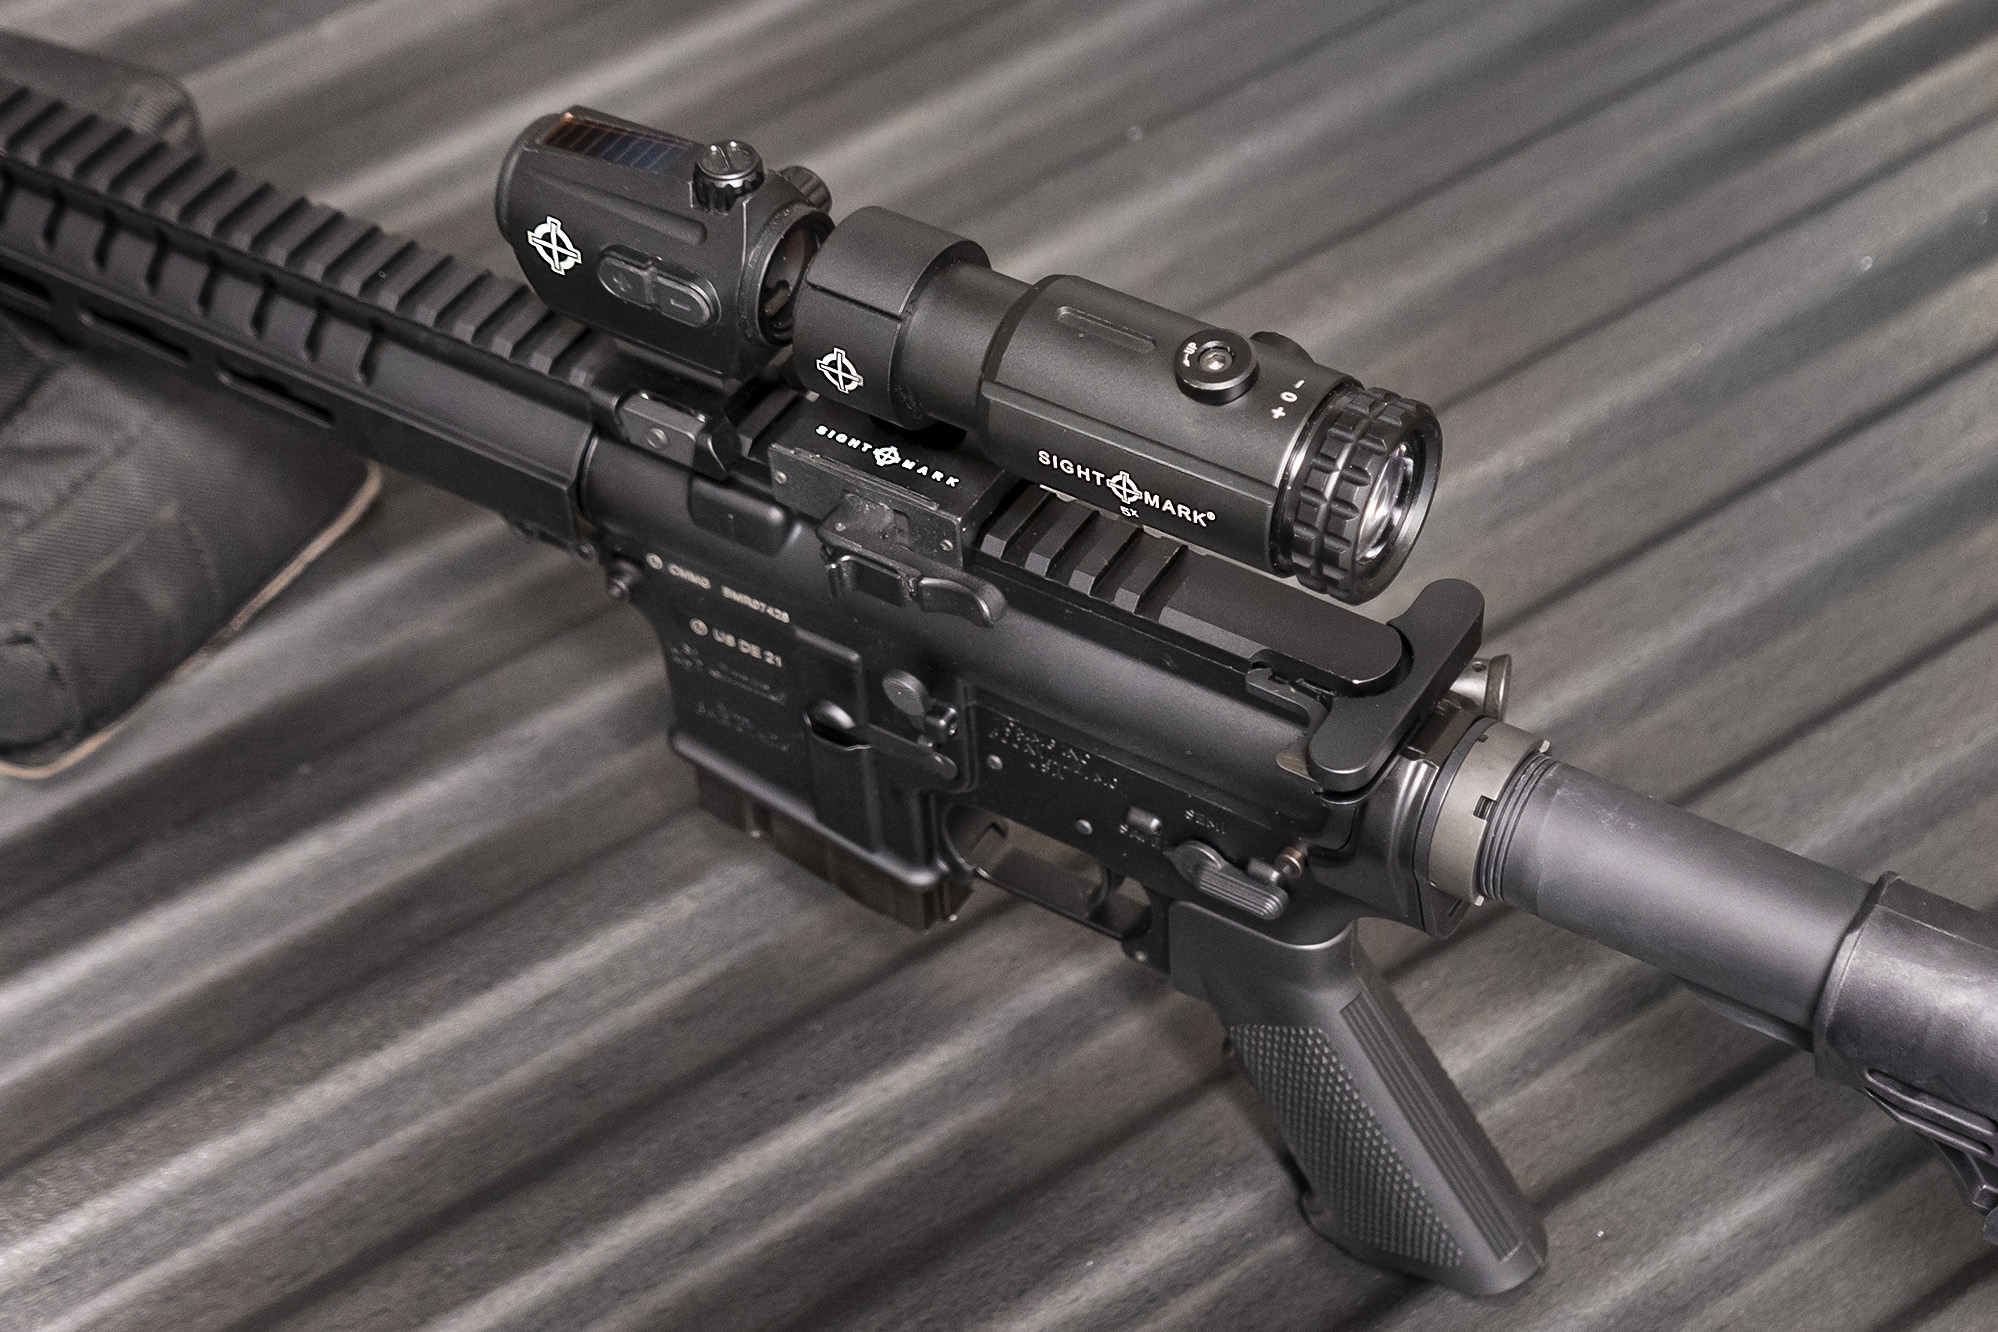
When it comes to maximizing the accuracy and functionality of your rifle, having the right set of accessories is crucial. One popular combination that many shooters opt for is a magnifier with a red dot sight. This dynamic duo allows for quicker target acquisition at close to medium ranges while still providing the ability to extend your shooting capabilities.
However, mounting a magnifier with a red dot may seem like a daunting task for those new to firearms or optics. Fortunately, with the right guidance and a little know-how, it can be a straightforward process. In this article, we will walk you through the steps of mounting a magnifier with a red dot sight, covering everything from choosing the right mounting option to ensuring proper alignment and zeroing in on your target.
Inside This Article
- Choosing the Right Mounting System
- Installing the Magnifier on the Red Dot Sight
- Adjusting Magnifier and Red Dot Alignment
- Zeroing the Magnifier for Accurate Targeting
- Conclusion
- FAQs
Choosing the Right Mounting System
When it comes to mounting a magnifier with a red dot sight, choosing the right mounting system is crucial. The mounting system you choose will determine the stability and accuracy of your setup. Here are some factors to consider when selecting a mounting system:
1. Compatibility: Ensure that the mounting system is compatible with both your magnifier and your red dot sight. Check the specifications of both accessories to ensure they can be securely attached to the selected mount.
2. Material and Construction: Look for a mounting system made from high-quality materials such as aluminum or steel. These materials offer durability and stability, which are essential for maintaining zero and withstanding recoil.
3. Height and Eye Relief: Consider the height of the mounting system and its impact on the eye relief of the magnifier. The mounting system should position the magnifier at a comfortable distance from your eye while maintaining proper alignment with the red dot sight.
4. Quick-Detach Mechanism: A quick-detach mechanism allows for easy attachment and removal of the magnifier without compromising the zero. This feature is especially useful if you frequently switch between magnified and non-magnified shooting setups.
5. Reviews and Recommendations: Take the time to read reviews and seek recommendations from experienced shooters. Their insights can help you make an informed decision and avoid potential compatibility or performance issues.
By considering these factors, you can choose a mounting system that ensures a secure and reliable connection between the magnifier and the red dot sight. This will enhance your shooting experience by providing accurate target acquisition and improved versatility in various shooting scenarios.
Installing the Magnifier on the Red Dot Sight
Mounting a magnifier on a red dot sight can greatly enhance the versatility and effectiveness of your firearm. However, it is essential to ensure a proper installation to achieve optimal performance. Here are the steps to follow when installing a magnifier on a red dot sight:
Step 1: Choose the Right Mounting System: Before you begin the installation process, it is crucial to select a mounting system that is compatible with both the magnifier and the red dot sight. There are various mounting options available, such as flip-to-side mounts, quick-detach mounts, and fixed mounts. Consider factors such as durability, ease of use, and the ability to maintain zero when making your selection.
Step 2: Prepare the Mounting Surfaces: Ensure that the mounting surfaces on both the magnifier and the red dot sight are clean and free from debris. Use a microfiber cloth or lens cleaning solution to remove any dirt or smudges that may affect the installation or performance of the magnifier.
Step 3: Attach the Mounting System to the Red Dot Sight: Follow the manufacturer’s instructions to attach the chosen mounting system to the red dot sight. This typically involves securing the mount to the sight using the provided screws or levers. Ensure that the mount is firmly in place and aligned with the sight’s rail or mounting point.
Step 4: Secure the Magnifier to the Mounting System: Once the mounting system is securely attached to the red dot sight, carefully align the magnifier with the mounting system. Insert the magnifier into the mount and tighten any screws or levers to hold it in place. Be sure to follow the manufacturer’s instructions to ensure proper alignment and secure attachment.
Step 5: Test and Adjust: With the magnifier mounted on the red dot sight, test the alignment and functionality by looking through the magnifier. Verify that the red dot and magnified sight picture are co-witnessed and that the magnification adjustment works smoothly. Make any necessary adjustments to ensure a clear and precise sight picture.
Step 6: Recheck Zero: Whenever a new attachment is added to your firearm, it is important to recheck the zero of your red dot sight. Follow the zeroing procedure for your specific red dot sight to ensure accurate and reliable targeting with the magnified sight picture.
By following these steps and ensuring a proper installation, you can effectively mount a magnifier on your red dot sight, providing enhanced magnification and target acquisition capabilities for your firearm.
Adjusting Magnifier and Red Dot Alignment
Once you have successfully mounted the magnifier onto the red dot sight, the next step is to ensure proper alignment between the two. This alignment is crucial for optimal performance and accuracy in target acquisition. Here’s a step-by-step guide on how to adjust the magnifier and red dot alignment:
1. Start by focusing on the red dot sight. Ensure that the dot is clear and well-centered in the sight window. Adjust the brightness and intensity settings according to your preference and the lighting conditions.
2. Look through the magnifier lens and overlay the red dot sight’s reticle on top of the target you are aiming at. Note any discrepancies in alignment between the reticle and the target. This could indicate the need for adjustment.
3. Many magnifiers come with windage and elevation adjustment knobs. These knobs allow you to make precise adjustments to the horizontal and vertical alignment of the magnifier. Refer to the manufacturer’s instructions for specific details on how to access these adjustment knobs.
4. To correct horizontal alignment, use the windage adjustment knob. Turn the knob in the appropriate direction to move the magnifier’s reticle horizontally until it aligns with the target. Be sure to make incremental adjustments to avoid overcompensating.
5. Similarly, use the elevation adjustment knob to correct vertical alignment. Turn the knob to move the reticle up or down until it aligns perfectly with the target. Again, make small adjustments to achieve the desired alignment without going too far.
6. After making adjustments, continue to check the alignment by looking through the magnifier and verifying that the reticle overlays the target accurately. Repeat the adjustment process if necessary until the alignment is spot on.
7. Once you are satisfied with the alignment, it’s essential to lock the adjustment knobs in place. This prevents any unintentional movements that could throw off the alignment. Refer to your magnifier’s manual for instructions on how to secure the adjustment knobs securely.
8. Finally, take the time to test the magnifier and red dot alignment under various shooting scenarios. This will help verify that the adjustments made are reliable and consistent, allowing for accurate targeting at different distances and shooting conditions.
By following these steps and taking the time to properly adjust the magnifier and red dot alignment, you can ensure that your shooting experience is enhanced with improved accuracy and target acquisition.
Zeroing the Magnifier for Accurate Targeting
Once you have installed and aligned your magnifier with the red dot sight, it’s time to zero the magnifier for accurate targeting. Zeroing refers to adjusting the magnifier so that it aligns perfectly with the point of impact of the red dot sight. This ensures that your shots will be on target when using the magnifier.
The process of zeroing the magnifier involves making adjustments to the windage and elevation settings. Windage refers to adjusting the horizontal alignment, while elevation refers to adjusting the vertical alignment. By making precise adjustments to these settings, you can fine-tune the magnifier to achieve optimal accuracy.
Before you start zeroing the magnifier, it’s important to have a solid shooting platform and a suitable target at the desired distance. It’s recommended to start zeroing at a relatively close range, such as 25 yards, and then adjust as necessary for longer distances.
To begin the zeroing process, fire a group of shots using the red dot sight while aiming at the center of the target. Take note of the grouping and where it is in relation to the bullseye. This will give you an initial reference point for making adjustments.
Next, use the windage and elevation adjustment knobs on the magnifier or the red dot sight (depending on the specific setup) to move the magnifier’s point of impact closer to the bullseye. Each click of the adjustment knob typically corresponds to a specific distance increment, usually measured in MOA (Minutes of Angle).
Make small, incremental adjustments and fire additional shots to assess the impact on the target. Continue making adjustments until the grouping of shots is centered on the bullseye or the desired point of impact. Remember to make equal adjustments for both windage and elevation to maintain proper alignment.
Keep in mind that zeroing the magnifier may require multiple iterations of adjustments and test shots. It’s important to be patient and take your time during this process to ensure accuracy. Additionally, external factors such as wind, target distance, and ammunition type may also impact the zeroing process, so be prepared to make additional adjustments as necessary.
Once you have achieved the desired zero for your magnifier, it’s a good practice to confirm the zero periodically, especially if you have made any modifications or changes to your setup. Regularly checking and re-zeroing ensures that your magnifier will consistently provide accurate targeting in any shooting scenario.
Conclusion
Mounting a magnifier with a red dot is a great way to enhance the versatility and effectiveness of your firearms. Whether you are a hunter, a competitive shooter, or a tactical enthusiast, the combination of a magnifier and red dot sight can provide you with clear target identification and improved accuracy.
In this article, we have covered the step-by-step process of mounting a magnifier with a red dot sight, from selecting the appropriate mount to adjusting the eye relief and zeroing the sights. By following these guidelines, you can ensure a secure and precise setup for optimal performance.
Remember, practice and experimentation are key to finding the perfect setup that suits your needs and shooting style. So, don’t be afraid to make adjustments and fine-tune your magnifier and red dot combination until you achieve the desired results.
With the right mount and proper installation, you can take advantage of the benefits offered by a magnifier and red dot sight, enabling you to engage targets at varying distances with confidence and precision. So go out there, mount your magnifier, and take your shooting skills to the next level!
FAQs
FAQ 1: What is a magnifier with a red dot?
FAQ 2: How does a magnifier with a red dot work?
FAQ 3: Can I mount a magnifier with a red dot on any firearm?
FAQ 4: What are the benefits of using a magnifier with a red dot?
FAQ 5: How do I mount a magnifier with a red dot on my firearm?