
Are you tired of struggling to remove a hose connector? Well, you’ve come to the right place! Removing a hose connector may seem like a frustrating and daunting task, but with the right technique and a little bit of know-how, it can be a breeze. Whether you’re dealing with a stubborn garden hose or a stuck showerhead, this article will provide you with the steps and tips you need to successfully remove any type of hose connector. From using lubricants to applying gentle pressure, we’ll cover all the tricks of the trade to ensure a seamless and hassle-free hose connector removal process. So, let’s dive in and get your project started!
Inside This Article
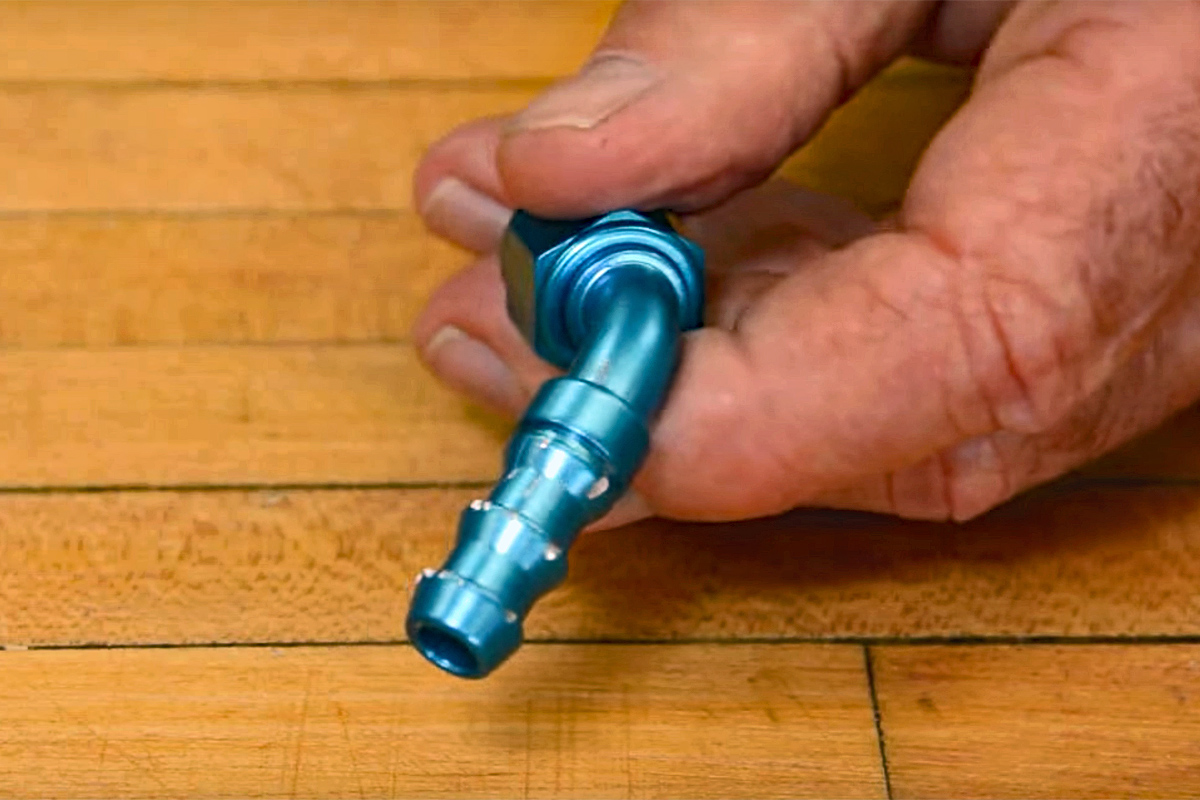
- Importance of Removing Hose Connectors Properly
- Tools Required for Removing Hose Connectors
- Step-by-Step Guide to Remove Hose Connectors
- Conclusion
- FAQs
Importance of Removing Hose Connectors Properly
Proper removal of hose connectors is crucial for maintaining the functionality and efficiency of your plumbing system. When you need to disconnect hoses from faucets, sprinklers, or other appliances, it is important to do so carefully and correctly to avoid any potential damage or leaks.
One of the main reasons why removing hose connectors properly is important is to prevent water leaks. Improper removal can cause damage to the threads or seals of the hose connector, leading to leaks when it is reattached. These leaks can result in wasted water, increased water bills, and potentially damage to your property.
Furthermore, removing hose connectors properly also helps to preserve the lifespan of your hoses. Hoses that are forcefully disconnected or twisted during the removal process can develop kinks or even break, rendering them unusable. By taking the time to remove the connectors properly, you can extend the life of your hoses and avoid the need for frequent replacements.
Another important reason to remove hose connectors properly is to ensure a secure and tight connection when reattaching them. When connectors are not removed correctly, they can become misaligned, causing a loose connection. A loose connection can lead to water leakage, reduced water pressure, and possibly even damage to the appliances the hose is connected to. Proper removal ensures that the connectors are in good condition and properly aligned for a tight fit when reattached.
Additionally, removing hose connectors properly is essential for ease and efficiency when reusing and storing your hoses. A damaged or improperly removed connector can make it difficult to reattach the hose, wasting valuable time and effort. By removing the connectors correctly, you can ensure a smooth reconnection process and make it easier to store your hoses neatly and compactly.
Overall, taking the time to remove hose connectors properly is essential for maintaining the integrity of your plumbing system, preventing leaks, preserving the lifespan of your hoses, ensuring a secure connection, and promoting efficient hose reusability and storage. By following the proper techniques and using the appropriate tools, you can effectively remove hose connectors without causing any damage, ensuring the smooth operation of your plumbing system for years to come.
Tools Required for Removing Hose Connectors
When it comes to removing hose connectors, having the right tools can make the process much easier and efficient. Here are the essential tools you will need:
- Adjustable Wrench: A good quality adjustable wrench is a must-have tool for removing hose connectors. It allows you to get a firm grip on the connector, making it easier to loosen and remove.
- Pliers: Pliers come in handy when dealing with stubborn or stuck hose connectors. They provide extra leverage and grip, making it easier to twist and remove the connector from the hose.
- Hose Clamp Pliers: In some cases, hose connectors may be secured with hose clamps. Hose clamp pliers are specifically designed to remove and install these clamps. They have a unique design that allows you to compress the clamp and slide it off the connector.
- Socket Wrench: If the hose connector is attached to a certain component, such as a radiator or an engine block, a socket wrench is essential. It allows you to access hard-to-reach areas and provides a strong grip to loosen and remove the connector.
- Screwdriver: A flat-head or Phillips screwdriver can come in handy if the hose connector is secured with screws. You can use the screwdriver to remove the screws and detach the connector from the hose.
- Lubricant: In some cases, hose connectors may become stuck due to corrosion or rust. Applying a lubricant such as WD-40 can help loosen the connector and make it easier to remove.
Having these tools readily available will ensure that you are equipped to tackle any hose connector removal task efficiently. Remember to use the appropriate tool for the specific type of connector and always follow safety precautions to avoid any mishaps.
Step-by-Step Guide to Remove Hose Connectors
Removing hose connectors may seem like a daunting task, but with the right tools and a step-by-step approach, it can be a simple and straightforward process. Whether you need to replace a damaged connector or disconnect a hose for storage or maintenance, the following guide will walk you through the necessary steps.
1. Gather the Required Tools: Before starting, make sure you have all the necessary tools on hand. This typically includes a pair of pliers or adjustable wrench, a flathead screwdriver, and possibly a hose clamp removal tool.
2. Turn off the Water Supply: Before removing any hose connectors, it is essential to turn off the water supply to prevent any water from spilling out and causing a mess. Locate the main water valve and shut it off.
3. Release any Built-up Pressure: After turning off the water supply, relieve any built-up pressure in the hose by squeezing the trigger or valve on the nozzle end. This will prevent any unexpected bursts of water when removing the connector.
4. Loosen the Hose Clamp: If the hose connector is secured with a hose clamp, use a screwdriver or hose clamp removal tool to loosen the clamp. Rotate the screw counterclockwise to release the grip on the hose.
5. Disconnect the Hose: Once the hose clamp is loose, gently pull the hose away from the connector. If it feels stuck, use a pair of pliers or adjustable wrench to twist and loosen the connector while pulling the hose simultaneously.
6. Inspect for Damage: After removing the hose connector, take a moment to inspect it for any signs of wear or damage. This is especially important if you are replacing the connector to ensure it doesn’t have any issues that could lead to leaks or malfunctioning.
7. Clean and Lubricate: Before installing a new hose connector or reattaching the old one, clean the connector and the hose thoroughly. Remove any debris or dirt and apply a light layer of lubricant to ensure smooth installation and easy removal in the future.
8. Attach a New Connector: If you are replacing a damaged connector, simply follow the manufacturer’s instructions to install the new one. Make sure it is securely fastened and tight to prevent any leaks.
9. Reconnect the Hose: If you are reattaching the hose to the same connector, align the hose with the connector and push it firmly until it is securely in place. Ensure that it is fully inserted and the hose clamp is tight to prevent any water leaks.
10. Turn on the Water Supply: Once the hose is securely connected, turn on the water supply and check for any leaks. If everything looks good, congratulations! You have successfully removed and replaced a hose connector.
By following these step-by-step instructions, you can easily remove hose connectors and maintain your plumbing system without any hassle. Remember to always follow safety precautions and consult a professional if you encounter any difficulties or complex situations.
Conclusion
Overall, removing a hose connector can be a simple task when you have the right tools and follow the correct steps. Whether you need to replace a damaged connector or clean a clogged one, knowing the proper technique can save you time, effort, and frustration.
Remember to start by turning off the water supply and releasing any pressure in the hose. Then, use pliers or an adjustable wrench to loosen the connector. By turning it counterclockwise, you can easily detach it from the hose or faucet.
If you encounter any resistance, try applying some lubrication or using a strap wrench for a better grip. And always make sure to inspect the connector for any damage before reattaching or replacing it.
With these tips and tricks, you’ll be able to remove hose connectors with ease, ensuring smooth water flow and hassle-free maintenance for your outdoor equipment.
FAQs
1. What is a hose connector?
A hose connector is a device used to join two or more hoses together or to connect a hose to a faucet or sprinkler. It ensures a secure and leak-proof connection, allowing water or other fluids to flow smoothly.
2. Why would I need to remove a hose connector?
There are several reasons why you might need to remove a hose connector. It could be damaged and in need of replacement, you may want to attach a different accessory to the hose, or you may need to pack it away for storage. Whatever the reason, knowing how to remove a hose connector can be useful.
3. How do I remove a standard hose connector?
To remove a standard hose connector, start by turning off the water source. Then, grip the hose connector firmly and twist it counterclockwise to loosen it. Be careful not to apply excessive force, as this can damage the connector or the hose. Once it’s loose, slide the connector off the end of the hose.
4. What if the hose connector is stuck?
If the hose connector is stuck and won’t come off easily, try using pliers or an adjustable wrench for extra leverage. Grip the connector securely with the tool and twist it counterclockwise. If it still won’t budge, you can try soaking it in warm, soapy water or applying a lubricant like WD-40 to help loosen the connection. Just be sure to rinse the connector thoroughly before reattaching it to a hose.
5. Are there different types of hose connectors?
Yes, there are different types of hose connectors, including threaded connectors, quick-connect connectors, and push-fit connectors. Each type has its own specific method of removal, so it’s important to identify the type of connector you have before attempting to remove it. Be sure to consult the manufacturer’s instructions or seek guidance from a knowledgeable professional if you’re unsure how to remove a specific type of connector.