
Push-fit connectors are commonly used in plumbing systems to join pipes securely and efficiently. However, at times, it becomes necessary to remove a pipe from a push-fit connector, whether due to repairs, replacement, or reconfiguration of the plumbing network. While it may seem like a daunting task, removing a pipe from a push-fit connector can be done with the right technique and tools. In this article, we will guide you through the step-by-step process of removing a pipe from a push-fit connector, ensuring that you can carry out this task effectively and safely. Whether you are a seasoned DIY enthusiast or a beginner in plumbing, this article will provide you with the necessary knowledge and tips to successfully remove a pipe from a push-fit connector.
Inside This Article
- Overview
- Importance of Removing a Pipe from a Push Fit Connector
- Tools Required for Removing a Pipe from a Push Fit Connector
- Step-by-Step Guide to Remove a Pipe from a Push Fit Connector
- Conclusion
- FAQs
Overview
Removing a pipe from a push fit connector can be a tricky task, especially if you’re new to plumbing or DIY projects. However, with the right tools and a step-by-step guide, you can successfully detach the pipe without causing any damage or leaks. Whether you need to replace a faulty pipe or make adjustments to your plumbing system, understanding how to remove a pipe from a push fit connector is essential.
In this comprehensive article, we will provide you with the necessary information and guidance to properly remove a pipe from a push fit connector. We will explain why it’s important to remove a pipe correctly, highlight the tools you’ll need for the process, and take you through each step involved. By the end of this article, you’ll have all the knowledge and confidence you need to tackle this task effectively.
So, let’s dive in and learn how to remove a pipe from a push fit connector!
Importance of Removing a Pipe from a Push Fit Connector
Removing a pipe from a push fit connector is an essential skill for anyone working with plumbing or pipe installations. There are several reasons why you might need to remove a pipe from a push fit connector, ranging from making repairs, replacing a faulty component, or reconfiguring the plumbing layout. Understanding the importance of this process ensures you can effectively maintain or modify your plumbing system.
One of the primary reasons for removing a pipe from a push fit connector is to carry out repairs. Over time, pipes can develop leaks or become damaged, requiring immediate attention. By removing the pipe from the push fit connector, you can accurately assess the issue and take the necessary steps to fix it. Prompt repairs not only prevent further damage but also help maintain the integrity of the entire plumbing system.
In some cases, you may need to replace a faulty push fit connector. These connectors are designed to provide a secure and watertight seal, but they can wear out or fail over time. If you notice any signs of a defective push fit connector, such as water leakage or loosening connections, it is crucial to remove the pipe from the connector and replace it with a new one. This ensures that your plumbing system remains safe and efficient.
Another scenario where removing a pipe from a push fit connector is necessary is when you want to reconfigure your plumbing layout. Whether you are remodeling your home or simply optimizing your plumbing system, being able to disconnect and reconnect pipes allows you to make the necessary adjustments. By removing pipes from push fit connectors, you can easily reroute or extend plumbing lines to suit your specific needs.
Moreover, removing a pipe from a push fit connector also allows for easier cleaning and maintenance. Over time, debris, sediment, or mineral build-up can accumulate inside pipes, hindering the flow and reducing efficiency. By disconnecting the pipe from the push fit connector, you can clean and flush out the debris more effectively. Regular maintenance ensures that your plumbing system continues to operate smoothly and prevents potential clogs or blockages.
Tools Required for Removing a Pipe from a Push Fit Connector
When it comes to removing a pipe from a push fit connector, having the right tools on hand can make the job much easier. Here are some essential tools you’ll need:
- Pipe Cutter: A pipe cutter is a must-have tool for cleanly and accurately cutting through the pipe. It ensures a smooth edge, which is crucial for a proper fit when reattaching the pipe.
- Adjustable Wrench: An adjustable wrench will come in handy for loosening and tightening the connector. It gives you the necessary leverage to securely grip and turn the connector as needed.
- Pipe Deburrer: After cutting the pipe, using a pipe deburrer is essential to remove any rough or uneven edges. This tool helps create a clean surface for the connector to fit onto.
- Cleaning Brush: A cleaning brush is useful for removing debris, dirt, or any leftover residue inside the connector. It ensures a clean and snug fit when reattaching the pipe.
- Protective Gloves and Goggles: Safety should always be a priority when working with pipes and connectors. Wearing protective gloves and goggles will protect your hands and eyes from any potential accidents or injuries.
By having these tools readily available, you’ll be well-equipped to tackle the task of removing a pipe from a push fit connector with ease and precision.
Step-by-Step Guide to Remove a Pipe from a Push Fit Connector
Removing a pipe from a push fit connector may seem daunting, but with the right tools and a step-by-step approach, it can be a simple task. Whether you need to replace a damaged pipe or make adjustments to your plumbing system, here is a guide to help you remove a pipe from a push fit connector.
Step 1: Shut off the water supply
The first and most crucial step is to shut off the water supply before you begin any work. Locate the water shut-off valve and turn it clockwise until the water is completely off. This will prevent any leaks or accidents while you are removing the pipe.
Step 2: Release the pressure
If there is any residual pressure in the system, you need to release it to avoid any sudden bursts of water. To do this, open a faucet or valve downstream from where you will be working and let the water drain out completely.
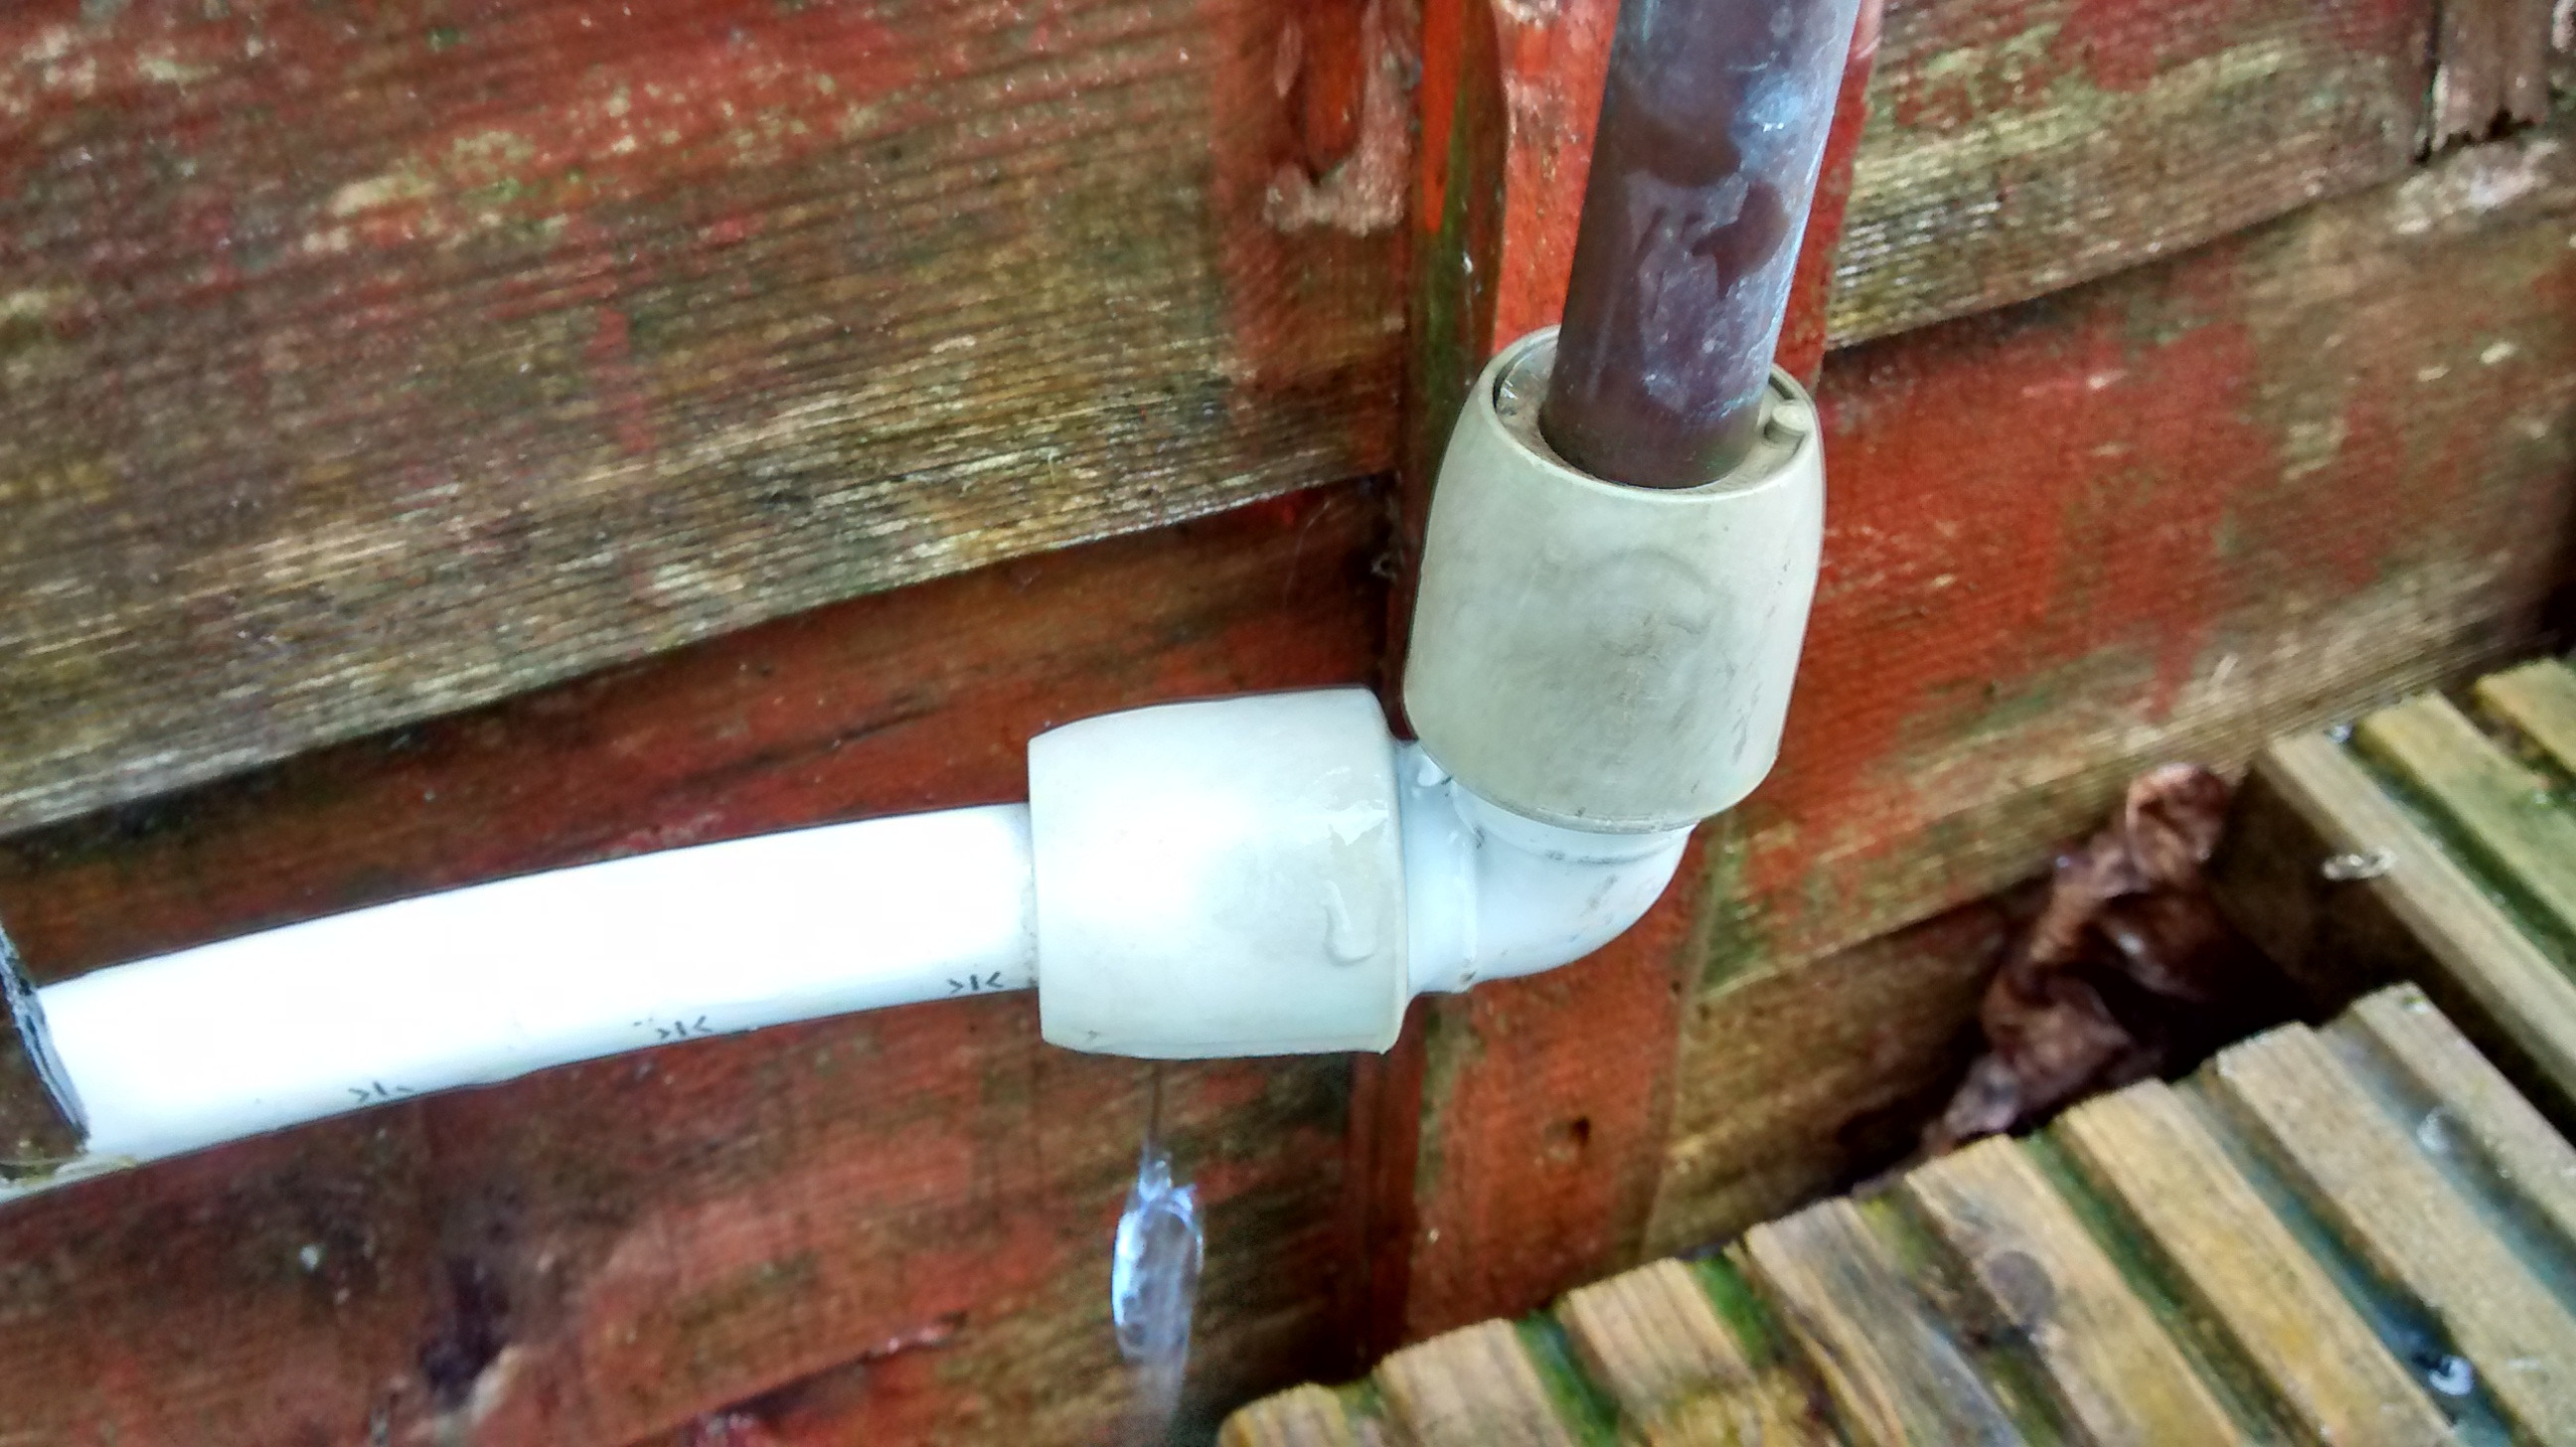
Step 3: Identify the push fit connector
The push fit connector is a type of fitting that allows you to connect pipes without the need for any additional tools or soldering. It has a collet and an O-ring inside that grip the pipe and create a watertight seal. Identify the push fit connector that you want to detach the pipe from.
Step 4: Depressurize the push fit connector
To remove the pipe from the push fit connector, you first need to depressurize the connector. Locate the release collar on the connector. This is a small circular collar that you need to press down on while simultaneously pulling the pipe out of the connector. The release collar will open the collet and release the pipe.
Step 5: Pull out the pipe
With the release collar depressed, gently pull the pipe out of the push fit connector. It should come out smoothly without any excessive force. If the pipe is stuck, you can wiggle it back and forth while pulling to help loosen it. Avoid twisting or yanking the pipe, as this can cause damage to the connector.
Step 6: Inspect the pipe and connector
Once you have removed the pipe, inspect both the pipe and the push fit connector for any damage or wear. If the pipe is damaged, replace it with a new one. If the push fit connector is damaged or worn out, it is recommended to replace it as well to ensure a proper seal.
Step 7: Reconnect or replace
If you are planning to reconnect the pipe to the same push fit connector, clean the end of the pipe to remove any debris or dirt. Make sure the O-ring is in good condition and reinsert the pipe into the connector by pressing it firmly until you hear a click or feel a secure connection.
If you need to replace the push fit connector, simply follow the manufacturer’s instructions for installation. It typically involves cutting the pipe, preparing the ends, and inserting them into the new connector.
That’s it! By following these step-by-step instructions, you can successfully remove a pipe from a push fit connector. Remember to always exercise caution and turn off the water supply before starting any plumbing work.
Conclusion
In conclusion, removing a pipe from a push fit connector may seem like a daunting task, but with the right techniques, it can be easily accomplished. Whether you’re replacing a worn-out pipe or making adjustments to your plumbing system, understanding how to remove pipes from push fit connectors is essential.
By following the steps outlined in this article, you can confidently tackle this task and ensure a smooth and hassle-free pipe removal process. Remember to use the appropriate tools, take your time, and double-check your work to avoid any potential leaks or damage.
With a little bit of patience and practice, you’ll become proficient in removing pipes from push fit connectors, saving you time and money on plumbing repairs or modifications. So next time you find yourself needing to disconnect a pipe, refer back to this guide and get the job done effectively.
FAQs
Q: How do I remove a pipe from a push-fit connector?
A: Removing a pipe from a push-fit connector is a relatively simple process. First, you need to ensure that the water supply to the pipe is turned off. Then, using a pair of pliers or an adjustable wrench, firmly grip the release collar on the push-fit connector and push it towards the fitting. While holding the collar in this position, gently pull the pipe out of the connector. It is important to note that some push-fit connectors may require additional steps or tools, so it’s always a good idea to consult the manufacturer’s instructions before attempting to remove a pipe.
Q: Can I reuse a push-fit connector after removing the pipe?
A: In most cases, push-fit connectors are designed to be reusable. However, it is important to inspect the connector for any signs of damage or wear before reusing it. If the connector appears to be in good condition and the release collar still operates smoothly, you can safely reuse it. However, if there are any signs of damage or if the release collar is not functioning properly, it is recommended to replace the connector to ensure a secure and leak-free connection.
Q: Are there any precautions I should take when removing a pipe from a push-fit connector?
A: Yes, there are a few precautions to keep in mind when removing a pipe from a push-fit connector. Firstly, make sure to turn off the water supply to the pipe before attempting to remove it. This will prevent any water flow and minimize the risk of leaks or accidents. Additionally, be cautious not to apply excessive force when pulling the pipe out of the connector, as this could damage either the pipe or the connector. Lastly, always wear appropriate protective gear, such as gloves or goggles, to ensure your safety during the process.
Q: Can I remove a pipe from a push-fit connector without any tools?
A: Yes, it is possible to remove a pipe from a push-fit connector without using any tools. Most push-fit connectors feature a release collar that can be easily operated by hand. Simply press the release collar inward towards the fitting while gently pulling the pipe out of the connector. However, for stubborn or hard-to-reach connectors, using a pair of pliers or an adjustable wrench may provide additional leverage and make the removal process easier.
Q: What should I do if the pipe is stuck in the push-fit connector and won’t come out?
A: If you’re encountering difficulty in removing a pipe from a push-fit connector, there are a few steps you can try. First, ensure that you have turned off the water supply to the pipe. Then, spray a small amount of lubricant, such as WD-40, around the joint between the pipe and the connector. Let it sit for a few minutes to penetrate and loosen any debris or buildup that may be causing the pipe to stick. After allowing time for the lubricant to work, attempt to remove the pipe again using the appropriate techniques. If the pipe still won’t come out, it may be necessary to consult a professional plumber for further assistance.