
Welcome to our comprehensive guide on how to swap an iPhone SIM card. If you’re looking to upgrade your iPhone or switch carriers, one of the things you’ll need to do is change your SIM card. Swapping a SIM card is a relatively simple process, but it can be intimidating if you’ve never done it before. That’s where we come in! In this article, we’ll walk you through the step-by-step process of swapping your iPhone SIM card, ensuring a smooth transition to your new device or network. We’ll cover everything from finding the SIM card slot to activating the new SIM card. So, whether you’re an iPhone newbie or a seasoned user, read on to learn how you can effortlessly swap your iPhone SIM card and stay connected.
Inside This Article
- Step 1: Power off the iPhone
- Step 2: Locate the SIM card tray
- Step 3: Eject the old SIM card
- Step 4: Insert the new SIM card
- Step 5: Power on the iPhone
- Step 6: Activate the new SIM card
- Troubleshooting tips
- Conclusion
- FAQs
Step 1: Power off the iPhone
In order to safely swap the SIM card on your iPhone, the first step is to power off the device. This ensures that no damage or disruption occurs during the process. To do this, press and hold the power button located on the side or top of your iPhone (depending on the model) until you see the “Slide to Power Off” option on the screen.
Once the “Slide to Power Off” option appears, simply swipe it to the right to turn off your iPhone. It’s important to wait a few seconds as the shut down process completes, ensuring that the device is completely powered off. This will prevent any potential data loss or damage to the SIM card or device itself.
After the iPhone is powered off, you can proceed to the next step of the SIM card swapping process. Remember, it’s crucial to follow these steps carefully to ensure a seamless and successful transition to the new SIM card.
Step 2: Locate the SIM card tray
Once you have powered off your iPhone, the next step is to locate the SIM card tray. The SIM card tray is a small rectangular slot on the side or top of your iPhone, depending on the model. It is usually located near the volume buttons or on the opposite side of the power button.
If you have an iPhone with a physical home button, you will find the SIM card tray on the right side of the device. On the other hand, if you have a newer iPhone model with Face ID, the SIM card tray is typically located on the left side of the device.
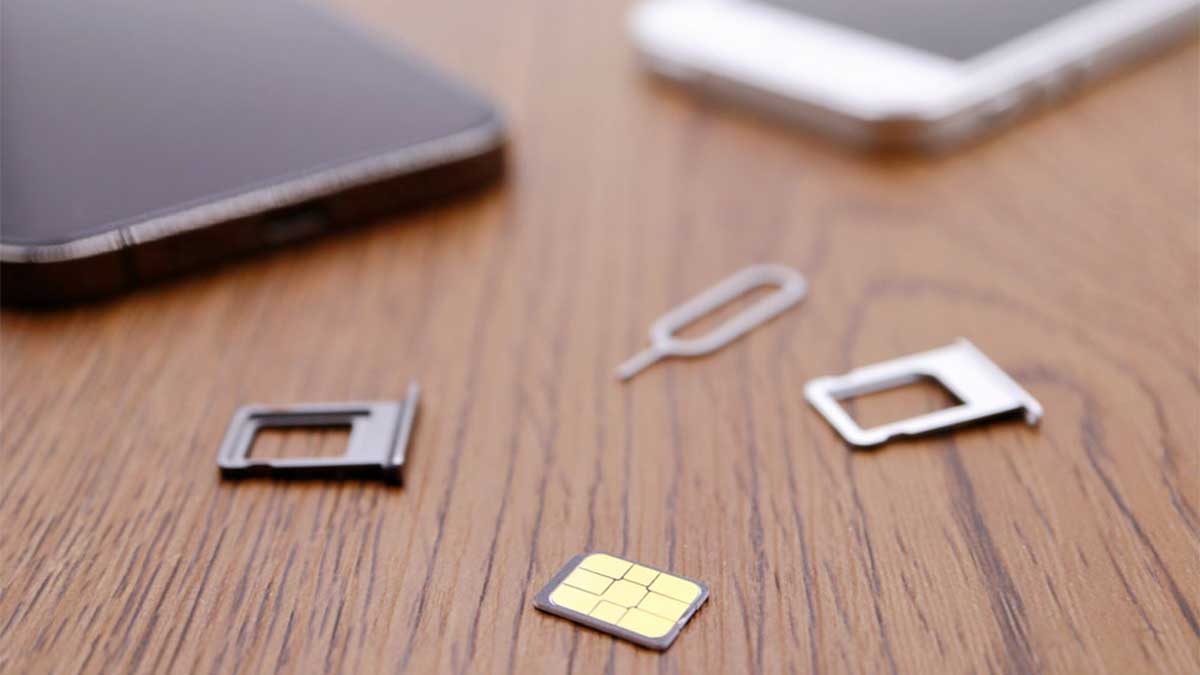
To locate the SIM card tray, take a close look at the sides of your iPhone. You may notice a small hole or a tiny notch. This is the access point to the SIM card tray. You will need a SIM card ejector tool or a small paperclip to open the tray.
If you have misplaced or lost your SIM card ejector tool, don’t worry. You can use a pointed object like a paperclip or the end of an earring to gently press into the hole or notch. Apply a small amount of pressure until you feel the tray pop out.
Step 3: Eject the old SIM card
Once you have identified the SIM card tray on your iPhone, it’s time to eject the old SIM card. Before proceeding, make sure your iPhone is powered off to avoid any damage or loss of data.
Take a SIM card ejector tool, or a small paperclip, and insert it into the small hole located next to the SIM card tray. Gently push until you feel a slight resistance.
Apply a little pressure and the SIM card tray will pop out. Carefully remove the tray from the iPhone and place it aside.
Now, you can see the SIM card resting in the tray. Use your fingertips or a pair of tweezers to carefully lift and remove the old SIM card from its slot. Take note of its position and orientation, as you will need to insert the new SIM card in the same manner.
Inspect the old SIM card for any signs of damage or wear. If it appears to be damaged, it’s best to contact your carrier to get a replacement SIM card before proceeding.
Ensure that the SIM card slot and tray are clean and free from any debris or dust. A quick blow or wipe with a clean cloth should suffice.
Remember to handle the old SIM card and tray with care to avoid any accidental damage. Keep them in a safe place until you have completed the SIM card swap.
Now that you have successfully ejected the old SIM card, let’s move on to the next step: inserting the new SIM card.
Step 4: Insert the new SIM card
Once you have successfully ejected the old SIM card, it’s time to insert the new one. Follow these steps to securely insert the new SIM card into your iPhone:
1. Take the new SIM card out of its packaging and hold it with the metal contacts facing down.
2. Align the notched corner of the SIM card with the SIM card tray and make sure it fits correctly.
3. Gently slide the SIM card into the SIM card tray until it fits snugly. Avoid using excessive force to prevent damage to the SIM card or the SIM card tray.
4. Carefully insert the SIM card tray back into the iPhone. Ensure that it is aligned properly and inserted all the way in.
5. Push the tray gently until it clicks into place. This confirms that the tray is securely closed.
6. Once the SIM card is inserted, you can power on your iPhone and wait for it to start up.
Remember, the SIM card is responsible for establishing the connection between your phone and your cellular network. It’s crucial to ensure that the SIM card is inserted correctly to avoid any network-related issues.
Note: If you are experiencing difficulty inserting the SIM card, double-check that you have the correct size SIM card for your specific iPhone model. iPhones typically use a nano-SIM card, but older models may require a micro-SIM or standard SIM card. If you’re unsure, consult your iPhone’s user manual or contact your cellular service provider for assistance.
Step 5: Power on the iPhone
Now that you have successfully inserted the new SIM card into your iPhone, it’s time to power it on and get ready to enjoy your mobile experience with a new carrier. Here’s how to power on your iPhone:
1. Press and hold the power button located on the side or top of your iPhone. The power button is usually a small circular button with the word “power” or a symbol resembling a power icon.
2. Keep holding the power button until the Apple logo appears on the screen. This indicates that your iPhone is powering on.
3. Release the power button once you see the Apple logo. Your iPhone will now boot up and go through its initialization process.
4. Wait patiently as your iPhone boots up. This may take a few seconds, depending on the model and any updates it may need to install.
5. Once your iPhone is fully powered on and ready to use, you will see the home screen. Congratulations, you have successfully powered on your iPhone with the new SIM card!
It’s important to note that after powering on your iPhone, you may need to activate the new SIM card to ensure that it is properly registered with your new carrier. This process may vary depending on your carrier’s requirements, so follow any on-screen prompts or contact your carrier’s customer support for assistance.
If you encounter any issues during the power-on process, such as your iPhone not turning on or getting stuck at the Apple logo screen, try the following troubleshooting tips:
Step 6: Activate the new SIM card
Once you have successfully inserted the new SIM card into your iPhone, the next step is to activate it. Activating the SIM card will allow you to use the services provided by your cellular network provider. Here’s how you can activate your new SIM card:
1. Power on your iPhone by pressing and holding the power button until the Apple logo appears on the screen.
2. If prompted, enter your PIN code to unlock the iPhone. The PIN code is typically provided by your network provider and is used to protect your SIM card from unauthorized use.
3. Wait for a few moments as your iPhone establishes a connection with the cellular network. This process may take a few minutes, so be patient.
4. Once the connection is established, you may receive a message from your network provider confirming the activation of your new SIM card. If you don’t receive any message, don’t worry – sometimes it can take a bit longer for the activation to be completed.
5. To ensure that your iPhone has successfully activated your new SIM card, try making a phone call or sending a text message. If you are able to make calls and send/receive messages, it means that the activation process was successful.
6. If you experience any issues with the activation or if your iPhone doesn’t recognize the new SIM card, try restarting your device and repeating the activation process. If the problem persists, contact your network provider for further assistance.
Note: Keep in mind that activating a new SIM card may involve additional steps or requirements, depending on your network provider. It is always a good idea to consult the instructions provided by your network provider or contact their customer support for any specific activation instructions.
By following these steps, you should be able to successfully activate your new SIM card and start enjoying the services provided by your network provider on your iPhone.
Troubleshooting tips
If you encounter any issues while swapping your iPhone SIM card, don’t worry! Here are some troubleshooting tips to help you resolve common problems:
1. Check the SIM card: Make sure the new SIM card is properly inserted into the SIM card tray. Ensure it is aligned correctly and securely in the tray slot.
2. Restart your iPhone: Sometimes, a simple reboot can fix any temporary glitches. Turn off your iPhone and turn it back on to see if the SIM card is recognized.
3. Check for compatibility: Confirm that the new SIM card is compatible with your iPhone model. Some older iPhone models may not support certain SIM card types. Consult your phone’s user manual or contact your service provider for compatibility information.
4. Clean the SIM card and tray: Over time, dust or debris can accumulate on the SIM card or in the tray slot, causing connectivity issues. Gently clean the SIM card and tray with a soft cloth or cotton swab to ensure proper contact.
5. Reset network settings: If you’re still experiencing issues, you can try resetting the network settings on your iPhone. Go to Settings > General > Reset > Reset Network Settings. Note that this will remove saved Wi-Fi passwords and VPN settings.
6. Contact your network provider: If all else fails, reach out to your network provider for assistance. They can help troubleshoot any network-related issues and ensure that your new SIM card is activated and functioning properly.
Remember, swapping SIM cards can be a straightforward process, but occasional hiccups can arise. By following these troubleshooting tips, you can quickly resolve any issues and enjoy seamless connectivity on your iPhone with the new SIM card.
Conclusion
Swapping your iPhone SIM card is a simple and convenient task that allows you to easily switch carriers or use your device with a different SIM card. By following the step-by-step guide outlined in this article, you can confidently remove and insert your SIM card without any hassle.
Remember to choose the correct SIM card size for your iPhone model and ensure that you have a compatible SIM card from your desired carrier. Take care when handling the delicate SIM card and ensure that it is properly inserted into the SIM tray.
Whether you want to upgrade your mobile plan, travel internationally, or switch carriers, knowing how to swap your iPhone SIM card gives you the flexibility and freedom to stay connected wherever you go.
So, don’t hesitate to explore the world of possibilities and embrace the convenience of swapping your iPhone SIM card whenever the need arises.
FAQs
1. How do I swap my iPhone SIM card?
To swap your iPhone SIM card, follow these steps:
1. Locate the SIM card tray on your iPhone (usually on the right-hand side or the top of the device).
2. Insert a SIM card eject tool or a paperclip into the small hole next to the tray to pop it open.
3. Remove the old SIM card from the tray.
4. Place the new SIM card into the tray, making sure it’s properly aligned and seated.
5. Carefully push the tray back into the iPhone until it clicks into place.
It’s important to note that not all iPhones have removable SIM cards. iPhones with built-in eSIM technology may not require physical SIM card swapping, as you can simply activate a new SIM card using the eSIM capabilities of your device. Check your iPhone model and specifications to determine if it supports removable SIM cards or uses eSIM technology.
2. Do I need to turn off my iPhone before swapping the SIM card?
It is generally recommended to turn off your iPhone before swapping the SIM card. This ensures that the device recognizes the new SIM card properly when it powers back on. However, some iPhones may have a hot-swappable SIM card tray, allowing you to change the SIM card without powering off the device. Refer to your specific iPhone model’s documentation or do a quick online search to confirm if hot-swapping is supported.
3. Will I lose my data when swapping the SIM card?
Swapping your iPhone SIM card should not result in any data loss. The SIM card primarily stores information related to your cellular service, such as your phone number and network settings. Your photos, contacts, applications, and other personal data are stored within the internal storage of your iPhone and are not linked to the SIM card. However, it is always a good practice to create a backup of your iPhone before making any changes, just to be on the safe side.
4. Can I use any SIM card in my iPhone?
The compatibility of SIM cards with your iPhone depends on the model and carrier restrictions. iPhones sold by specific carriers may be locked to that carrier’s network, meaning they will only work with SIM cards provided by that carrier or its authorized partners. However, many iPhones are sold as unlocked or can be unlocked for use with other carriers. It’s essential to check the compatibility of the SIM card with your iPhone model and ensure that it is compatible with your desired carrier.
5. Can I swap SIM cards between iPhones?
In most cases, you can easily swap SIM cards between iPhones, as long as the iPhones are compatible with the same carrier or are unlocked. The SIM card contains your phone number and carrier information, so if you switch the SIM card from one iPhone to another, the new iPhone should recognize it and connect to the carrier’s network. However, it’s worth noting that newer iPhone models may require different SIM card sizes (nano, micro, or standard), so you may need an appropriate SIM card adapter or request a new SIM card from your carrier to ensure compatibility.