
Are you experiencing difficulty starting your motorcycle? One possible culprit could be a faulty battery. A motorcycle battery is crucial for providing the necessary power to start your bike and keep it running smoothly. However, over time, batteries can lose their charge or become damaged, leading to issues with starting and operating your motorcycle.
In this article, we will guide you through the process of testing a motorcycle battery. Whether you are a seasoned rider or new to the world of motorcycles, understanding how to test your battery is a valuable skill that can save you time, money, and frustration. By following these steps, you can determine if your battery is still in good condition or if it requires further attention or replacement.
Inside This Article
- Testing the voltage of the motorcycle battery
- Checking the battery’s load capacity
- Inspecting the battery’s physical condition
- Testing the battery’s cranking power
- Conclusion
- FAQs
Testing the voltage of the motorcycle battery
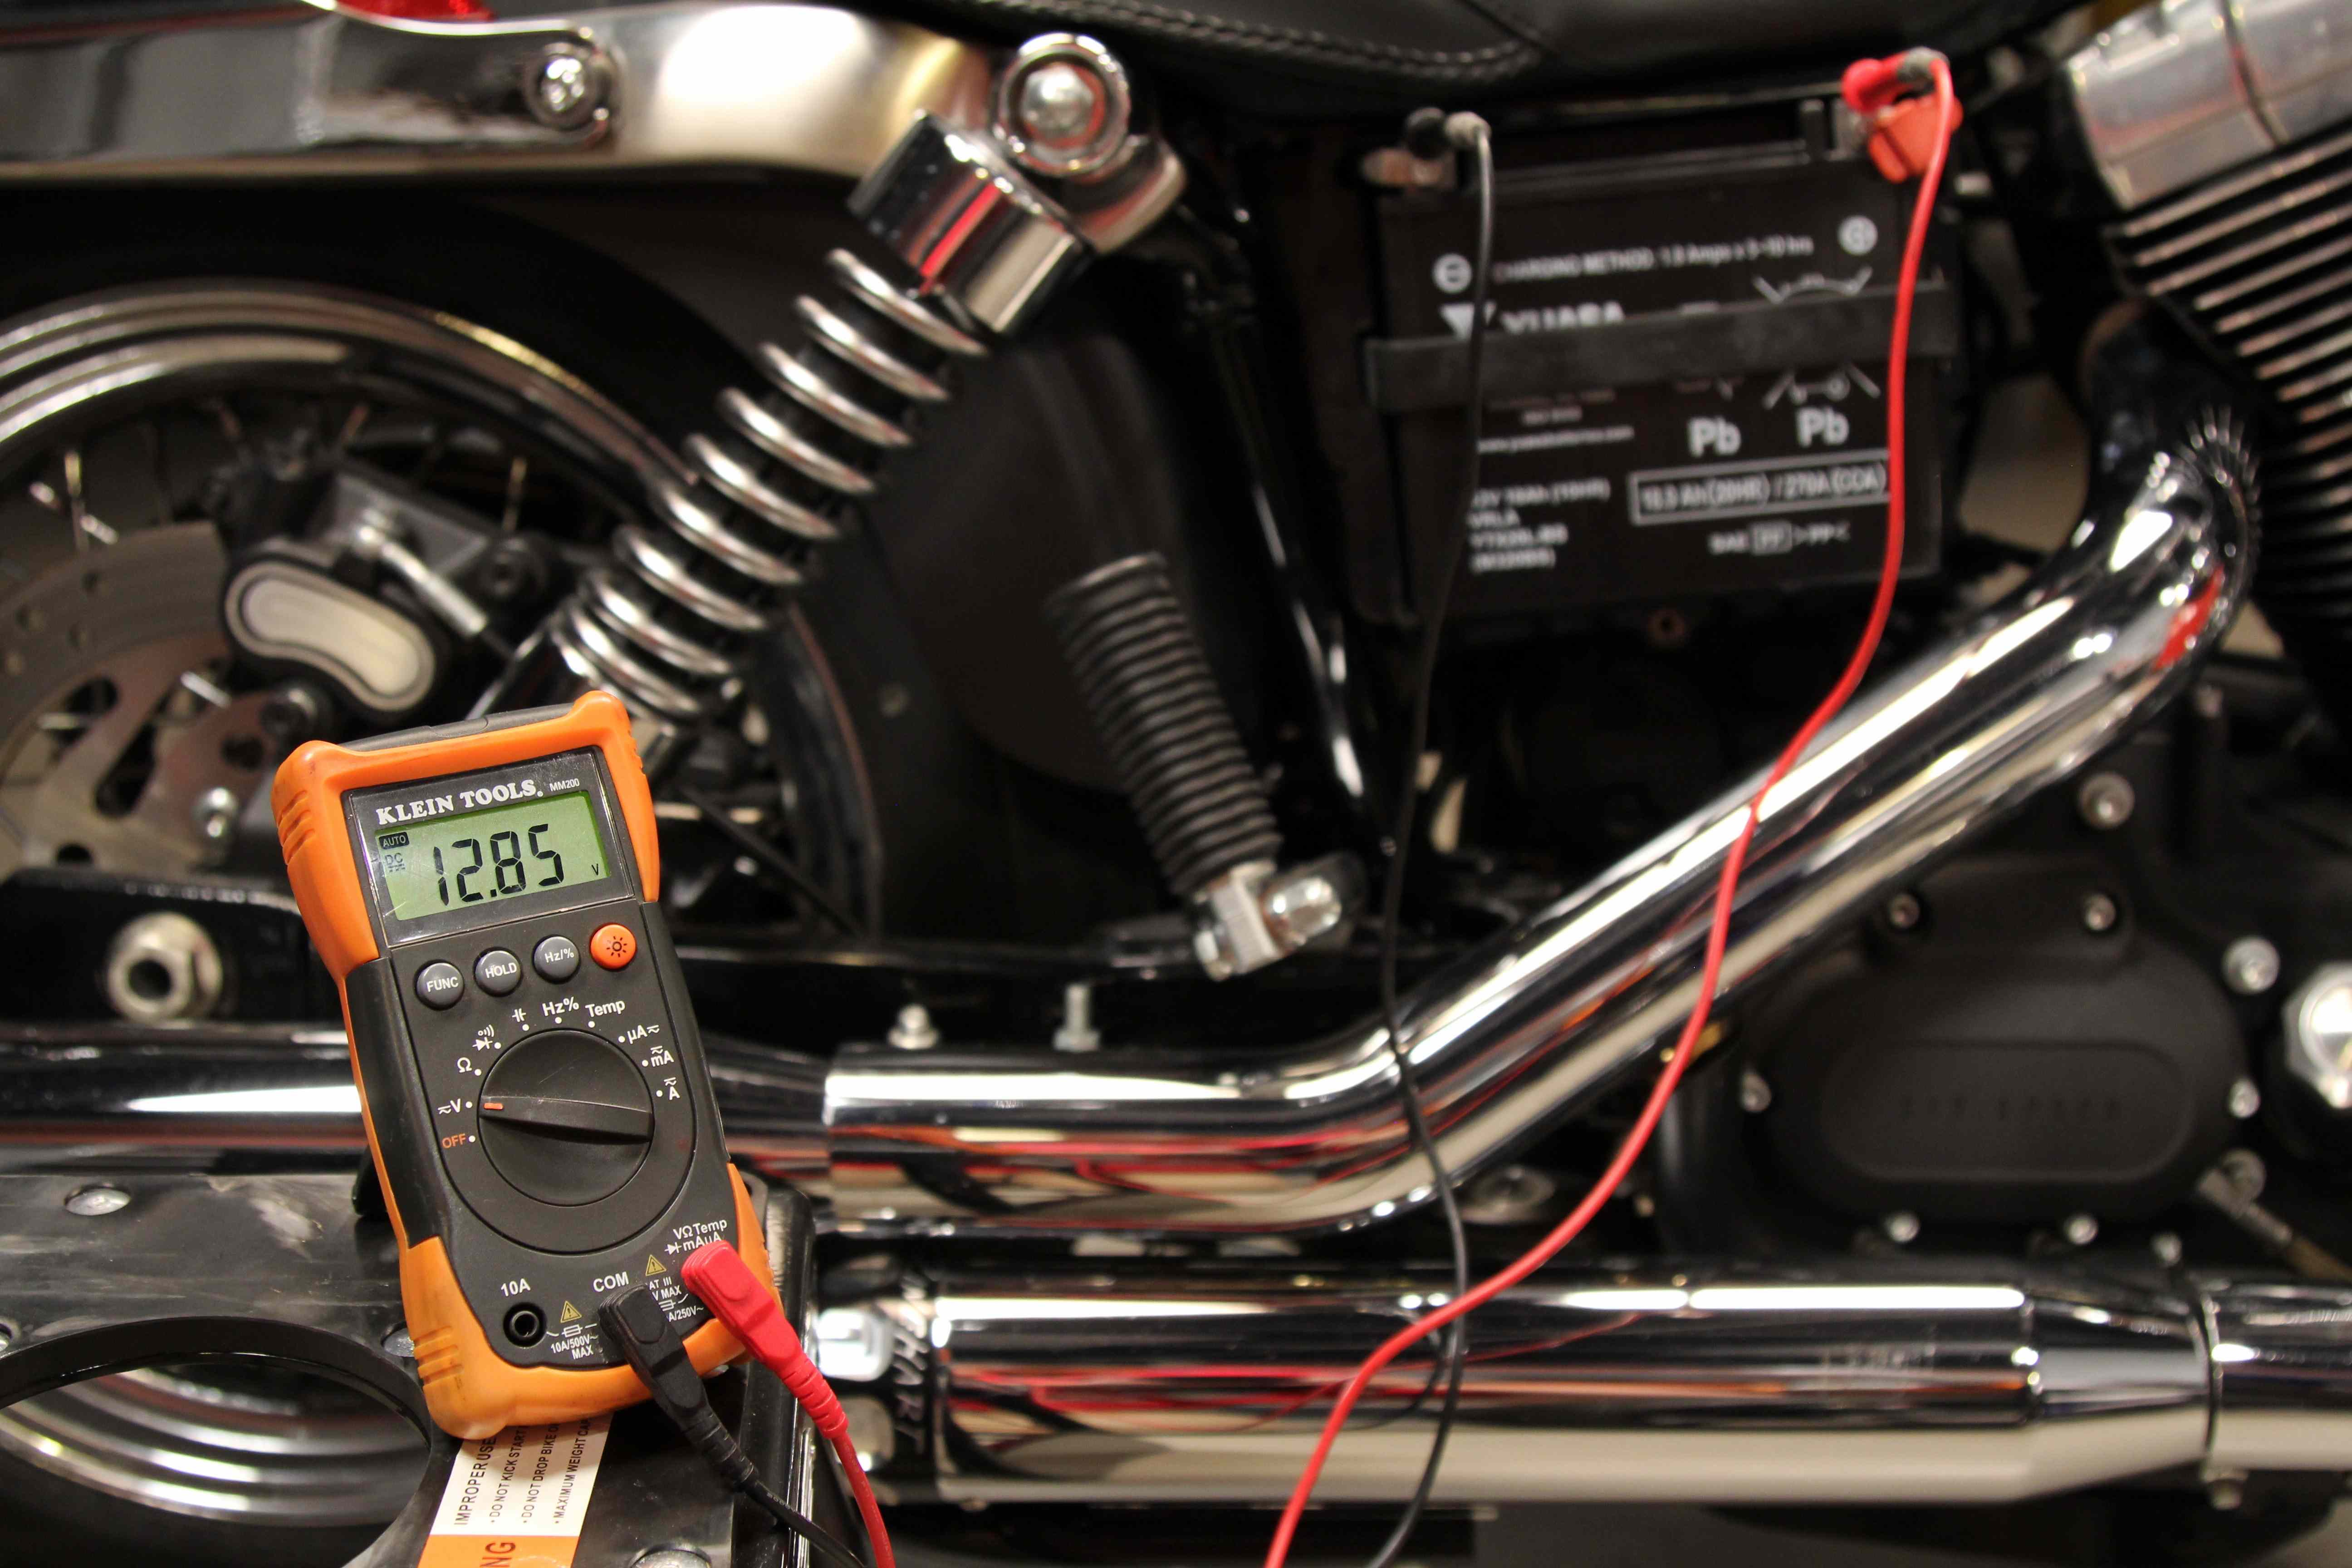
One of the essential steps in testing a motorcycle battery is measuring its voltage. This simple yet crucial test can provide valuable information about the battery’s health and electrical capacity. To test the battery voltage, you will need a multimeter or a voltmeter, which is readily available at any automotive supply store or online.
Here’s how you can test the voltage of your motorcycle battery:
- Start by ensuring that the motorcycle engine is turned off, and the ignition key is in the off position.
- Locate the battery and identify the positive (+) and negative (-) terminals. In most cases, the positive terminal is marked with a plus sign or the letters “+” and the negative terminal with a minus sign or the letters “-“.
- Set your voltmeter to DC voltage and choose a suitable range. 12 volts is the typical voltage for most motorcycle batteries.
- Connect the positive (red) probe of the voltmeter to the positive (+) terminal of the battery and the negative (black) probe to the negative (-) terminal.
- Note the voltage reading displayed on the voltmeter. A fully charged motorcycle battery should read around 12.6 – 13.5 volts.
If the voltage reading falls below 12 volts, it indicates a weak or discharged battery that may need recharging or replacing. On the other hand, if the voltage reading is significantly higher than 13.5 volts, it could indicate an overcharged battery or a problem with the charging system.
Important: Keep in mind that testing the voltage only provides a general indication of the battery’s health and should be used in conjunction with other tests to gain a comprehensive understanding of its overall condition.
Checking the battery’s load capacity
When it comes to assessing a motorcycle battery’s load capacity, there are a few methods you can employ. Load testing is a popular technique that can determine how well the battery performs under heavy usage conditions. Here’s what you need to do:
- Start by fully charging the motorcycle battery using an appropriate charger.
- Once fully charged, allow the battery to rest for a few hours to stabilize.
- Next, connect the battery to a load tester. A load tester is a device designed to simulate the electrical load that the battery experiences when starting the motorcycle.
- Ensure that the load tester is set to the appropriate voltage and discharge rate as specified by the manufacturer.
- Activate the load tester and observe the battery’s performance. A healthy battery should be able to maintain a stable voltage level under load for a specified duration, usually around 15 seconds.
- If the battery’s voltage drops significantly or fluctuates rapidly during the load test, this may indicate that the battery has a low load capacity and may need to be replaced.
It is worth noting that load testing can be a bit technical and may require specialized equipment. If you are unsure about how to perform this test, it is recommended to consult with a professional mechanic or battery specialist who can help you assess the load capacity of your motorcycle battery accurately.
In addition to load testing, you can also check the battery’s load capacity by monitoring its performance during normal usage. This involves observing how well the battery powers the motorcycle’s electrical components while riding. If you notice dimming headlights, slow cranking when starting the engine, or other signs of power loss, it may indicate a low load capacity and the need for a new battery.
Regularly testing your motorcycle battery’s load capacity is crucial to ensure optimal performance and reliability. By being proactive and monitoring the battery’s load handling capabilities, you can avoid unexpected failures and potential breakdowns on the road.
Inspecting the battery’s physical condition
When it comes to testing a motorcycle battery, it’s important not only to check its electrical performance but also to evaluate its physical condition. Here are some key aspects to consider when inspecting the battery’s physical state:
- Visual examination: Begin by visually inspecting the battery for any signs of damage or corrosion. Check for cracks or leaks in the battery casing, as this can indicate a potential issue. Look for any build-up of white or greenish residue around the terminals, which could suggest a battery acid leak. It’s also important to examine the battery connections for tightness and cleanliness.
- Battery age: Take note of the battery’s age, as this can provide valuable insights into its overall condition. Most motorcycle batteries have a service life of around 2-3 years. If your battery is approaching or exceeding this timeframe, it may be more prone to failure or diminished performance.
- Battery capacity: An effective way to assess the physical condition of a battery is to measure its capacity. This can be done using a battery load tester or a multimeter. By testing the battery capacity, you can determine if it is still within acceptable limits and capable of holding a charge. A battery with a significantly reduced capacity may need to be replaced.
- Terminal condition: Examine the battery terminals carefully to ensure they are not corroded or damaged. Corroded terminals can hinder the flow of electricity and lead to poor battery performance. If corrosion is present, clean the terminals using a mixture of baking soda and water, followed by brushing with a wire brush.
- Battery cables: Inspect the battery cables for any signs of wear or damage. Look for frayed or exposed wires, loose connections, or any evidence of overheating. Damaged battery cables can cause voltage drop and lead to electrical issues. If the cables are damaged, they should be replaced promptly.
- Battery hold-down: Ensure that the battery is securely held in place with a proper hold-down mechanism. Shake the battery gently to check if it moves or rattles excessively, as this can indicate a loose hold-down or mounting bracket. A secure hold-down prevents the battery from shifting or vibrating excessively during rides, reducing the risk of damage or dislodgement.
By inspecting the battery’s physical condition alongside its electrical performance, you can gather a comprehensive understanding of its overall health. Regularly checking and maintaining your motorcycle battery can help prolong its lifespan and ensure a reliable power source for your rides.
Testing the battery’s cranking power
One of the essential aspects of testing a motorcycle battery is assessing its cranking power. The cranking power determines the battery’s ability to deliver sufficient power to start the motorcycle’s engine. An insufficient cranking power can lead to starting problems and frequent battery failures, which can be quite frustrating for riders.
To test the battery’s cranking power, you will need a voltmeter or a multimeter. Follow these steps to evaluate the cranking power of your motorcycle battery:
- Ensure safety precautions: Before starting the test, make sure you are wearing appropriate safety gear, including gloves and eye protection. Safety should always be a top priority when working with batteries.
- Disconnect accessories: Disconnect any accessories or electrical components connected to the battery, such as headlights, GPS devices, or heated grips. This will ensure an accurate measurement of the battery’s cranking power.
- Set the voltmeter: Set your voltmeter or multimeter to the DC voltage setting. Most motorcycle batteries operate at 12 volts, so ensure your voltmeter is set accordingly.
- Attach the voltmeter: Connect the positive (red) probe of the voltmeter to the positive terminal of the battery. Then, connect the negative (black) probe to the negative terminal of the battery.
- Test the battery: While keeping an eye on the voltmeter, attempt to start the motorcycle. Observe the voltage reading on the voltmeter during the starting process. A healthy battery should maintain a voltage reading above 10 volts while cranking.
- Interpret the results: If the voltage drops significantly below 10 volts during the starting process, it indicates a weak or faulty battery. On the other hand, if the voltage remains stable and above 10 volts, it signifies a battery with adequate cranking power.
- Compare with specifications: Refer to your motorcycle’s manufacturer specifications to determine the ideal cranking power for your battery. If your battery consistently falls below the recommended cranking power, it may be time for a replacement.
Regularly testing the cranking power of your motorcycle battery can help prevent starting issues and ensure a smooth riding experience. If you suspect any weakness or difficulty in starting your motorcycle, it is recommended to perform this test to identify any underlying battery issues that may need attention.
Conclusion
Testing a motorcycle battery is an essential step in ensuring the proper functioning and longevity of your bike. By following the steps outlined in this article, you can easily determine the health of your battery and identify any issues that may need attention. Remember to always prioritize safety when working with batteries and use the appropriate tools and precautions.
Regularly testing your motorcycle battery can help you avoid any unexpected breakdowns and keep your bike running smoothly. If you notice any signs of a weak or failing battery, it is important to address the issue promptly. Whether you choose to use a multimeter or a battery tester, performing regular tests will help you maintain a reliable and efficient electrical system for your motorcycle.
Don’t let a dead battery derail your next ride. Take the time to periodically check and test your motorcycle battery to ensure that you can hit the road with confidence. Keep these steps in mind and stay proactive in maintaining the health of your battery. Happy riding!
FAQs
1. How often should I test my motorcycle battery?
Ideally, you should test your motorcycle battery at least once every few months, especially if you don’t use your bike regularly. A regular testing routine will help you catch any potential battery issues before they become a problem.
2. What are the signs of a failing motorcycle battery?
There are several indications that your motorcycle battery may be failing. These include difficulty starting the bike, dim headlights, the engine cranking slowly, or the bike failing to start altogether. If you notice any of these signs, it may be time to test and replace your battery.
3. How do I test my motorcycle battery with a multimeter?
To test your motorcycle battery with a multimeter, set the meter to the DC voltage mode and connect the positive probe to the positive terminal of the battery and the negative probe to the negative terminal. The meter should display a voltage reading. A healthy battery usually has a voltage reading around 12.6 volts.
4. Can I test my motorcycle battery without a multimeter?
Yes, you can perform a basic visual inspection of your motorcycle battery without a multimeter. Look for any signs of physical damage like corrosion or leakage. Also, check if the battery terminals are clean and securely connected. However, keep in mind that a visual inspection may not provide a thorough assessment of the battery’s overall health.
5. What should I do if my motorcycle battery fails the test?
If your motorcycle battery fails the test, it is likely time to replace it. Consult your motorcycle’s manual or consult with a professional to determine the specific battery model compatible with your bike. Make sure to handle the old battery according to proper recycling guidelines.