
Are you tired of being limited to taking selfies only at arm’s length? Do you want to capture more epic moments and create stunning group shots without anyone being left out? If so, then unlocking a Sony Monopod Stick is just what you need. This versatile accessory allows you to extend your reach and capture amazing photos and videos from unique angles. Whether you’re traveling, attending events, or simply exploring in nature, a Sony Monopod Stick can take your photography game to the next level. In this article, we will guide you through the process of unlocking your Sony Monopod Stick, giving you the freedom to capture breathtaking shots like never before.
Inside This Article
- Overview
- Step 1: Checking Compatibility
- Step 2: Powering On the Monopod Stick
- Step 3: Pairing with Your Sony Device
- Step 4: Unlocking the Monopod Stick
- Troubleshooting Tips
- Conclusion
- FAQs
Overview
Unlocking a Sony Monopod Stick is essential to maximize its functionality and enjoy the convenience it offers. Whether you’re a photography enthusiast or simply someone who loves taking selfies, a monopod stick can be a valuable accessory for your Sony device. In this article, we will guide you through the process of unlocking a Sony Monopod Stick, step by step.
By unlocking the monopod stick, you will be able to connect it to your Sony smartphone or camera wirelessly. This allows you to control the device remotely, capture amazing shots from unique angles, and access a range of features to enhance your photography experience.
Before diving into the unlocking process, it is important to ensure that your Sony device is compatible with the monopod stick. Sony Monopod Sticks are designed to work with specific models, so checking compatibility is crucial to avoid any compatibility issues.
Once you’ve confirmed compatibility, the next step is to power on the monopod stick. This is usually done by pressing and holding the power button, which is usually located on the handle or the remote control of the monopod stick. Make sure to check the user manual or instructions provided by the manufacturer for the specific power-on process.
After powering on the monopod stick, the next step is to pair it with your Sony device. This is typically done through Bluetooth connectivity. Enable Bluetooth on your Sony device, search for available devices, and select the monopod stick to establish a connection. Again, refer to the user manual or instructions for detailed steps on the pairing process.
Once the pairing is successful, you have to unlock the monopod stick to fully utilize its features. On the monopod stick, there is usually a button or a switch that enables unlocking. Press or slide it to unlock the monopod stick and allow it to communicate with your Sony device. This will enable you to control the camera functions, switch between front and back cameras, adjust the zoom, and even capture photos or videos remotely using the monopod stick.
If you encounter any issues during the unlocking process, don’t worry. We’ve got you covered with some troubleshooting tips. Make sure to check that Bluetooth is enabled on your Sony device, that the monopod stick is charged or has fresh batteries, and that you’re within the recommended range for Bluetooth connectivity. You can also try restarting your Sony device and the monopod stick, as well as resetting the Bluetooth connection and re-pairing if necessary.
Unlocking a Sony Monopod Stick opens up a world of possibilities in terms of photography and videography. It provides flexibility, convenience, and the ability to capture unique perspectives. By following the step-by-step process we’ve outlined, you’ll be able to unlock your Sony Monopod Stick and start exploring the endless creative possibilities it offers.
Step 1: Checking Compatibility
Before using your Sony Monopod Stick, it’s essential to ensure that it is compatible with your device. Here are a few steps to verify compatibility:
1. Check the Compatibility List: Visit the official Sony website or refer to the product manual to find a list of compatible devices. Make sure your device is included on the list before proceeding.
2. Confirm Bluetooth Capability: The Sony Monopod Stick requires a Bluetooth connection to pair with your device. Double-check that your device has Bluetooth functionality by going to the settings menu or referring to the device manual.
3. Check for Mounting Options: Different monopod sticks may have specific mounting options, such as a clamp or a phone holder. Ensure that your device can be securely attached to the monopod stick using the available mounting mechanism.
4. Consider the Size and Weight: Monopod sticks vary in size and weight handling capacities. Take note of the maximum weight and length limitations indicated by the manufacturer, and ensure that your device falls within these parameters.
5. Look for Application Compatibility: Some monopod sticks may have dedicated applications that offer additional features, such as remote shutter control or automatic photo editing. Confirm if there is a compatible app available for your device.
By thoroughly checking compatibility, you can ensure a seamless experience when using your Sony Monopod Stick with your device. If your device is not compatible, consider alternative monopod stick options that are compatible with your specific device.
Step 2: Powering On the Monopod Stick
Once you have determined the compatibility of your Sony device with the monopod stick, you can proceed to power it on. Follow these simple steps to ensure a smooth start:
- Locate the power button on the monopod stick. It is usually located near the handle or the base of the stick.
- Press and hold the power button for a few seconds until you see a power indicator light turn on. This indicates that the monopod stick is now powered on and ready to use.
- Make sure to check the battery level of the monopod stick. Some models have a battery level indicator, which will give you an idea of how much charge is left. If the battery is low, consider charging it before using for an extended period.
- If your monopod stick requires Bluetooth connection for additional features or remote control functionality, ensure that Bluetooth is enabled on your Sony device.
- Now that your monopod stick is powered on, you can continue with the pairing process or any other settings specific to your device.
Powering on the monopod stick is a simple procedure that ensures you can start using it seamlessly. By following these steps, you are one step closer to capturing stunning photos and videos with your Sony device and monopod stick.
Step 3: Pairing with Your Sony Device
Once you have powered on your Sony monopod stick, the next step is to pair it with your Sony device. This will allow you to control the monopod stick remotely and take stunning photos or videos with ease. Here’s how you can do it:
1. Go to the settings menu on your Sony device and navigate to the “Bluetooth” section. Make sure that the Bluetooth feature is turned on.
2. On the monopod stick, press and hold the Bluetooth button for a few seconds. This will put the monopod stick into pairing mode. You’ll notice that the LED indicator light starts flashing rapidly.
3. On your Sony device, you will see a list of available Bluetooth devices. Look for the monopod stick in the list and select it to initiate the pairing process.
4. Once you have selected the monopod stick, your Sony device will attempt to establish a connection with it. You may be asked to enter a PIN code, which is usually “0000” or “1234”. Follow the on-screen prompts to complete the pairing process.
5. After successful pairing, you will receive a notification on your Sony device confirming the connection with the monopod stick. You are now ready to use the monopod stick to capture amazing shots.
It’s important to note that the pairing process may vary slightly depending on the model of your Sony device and monopod stick. Refer to the user manual of your specific devices for detailed instructions, if needed.
Remember to keep the monopod stick and your Sony device within the Bluetooth range for optimal performance. Enjoy the convenience and versatility of using your Sony monopod stick to capture breathtaking moments with ease!
Step 4: Unlocking the Monopod Stick
Once you have successfully paired your Sony device with the Monopod Stick, you are now ready to unlock it and begin using its full range of features. Unlocking the Monopod Stick is a simple process that can be done in just a few quick steps.
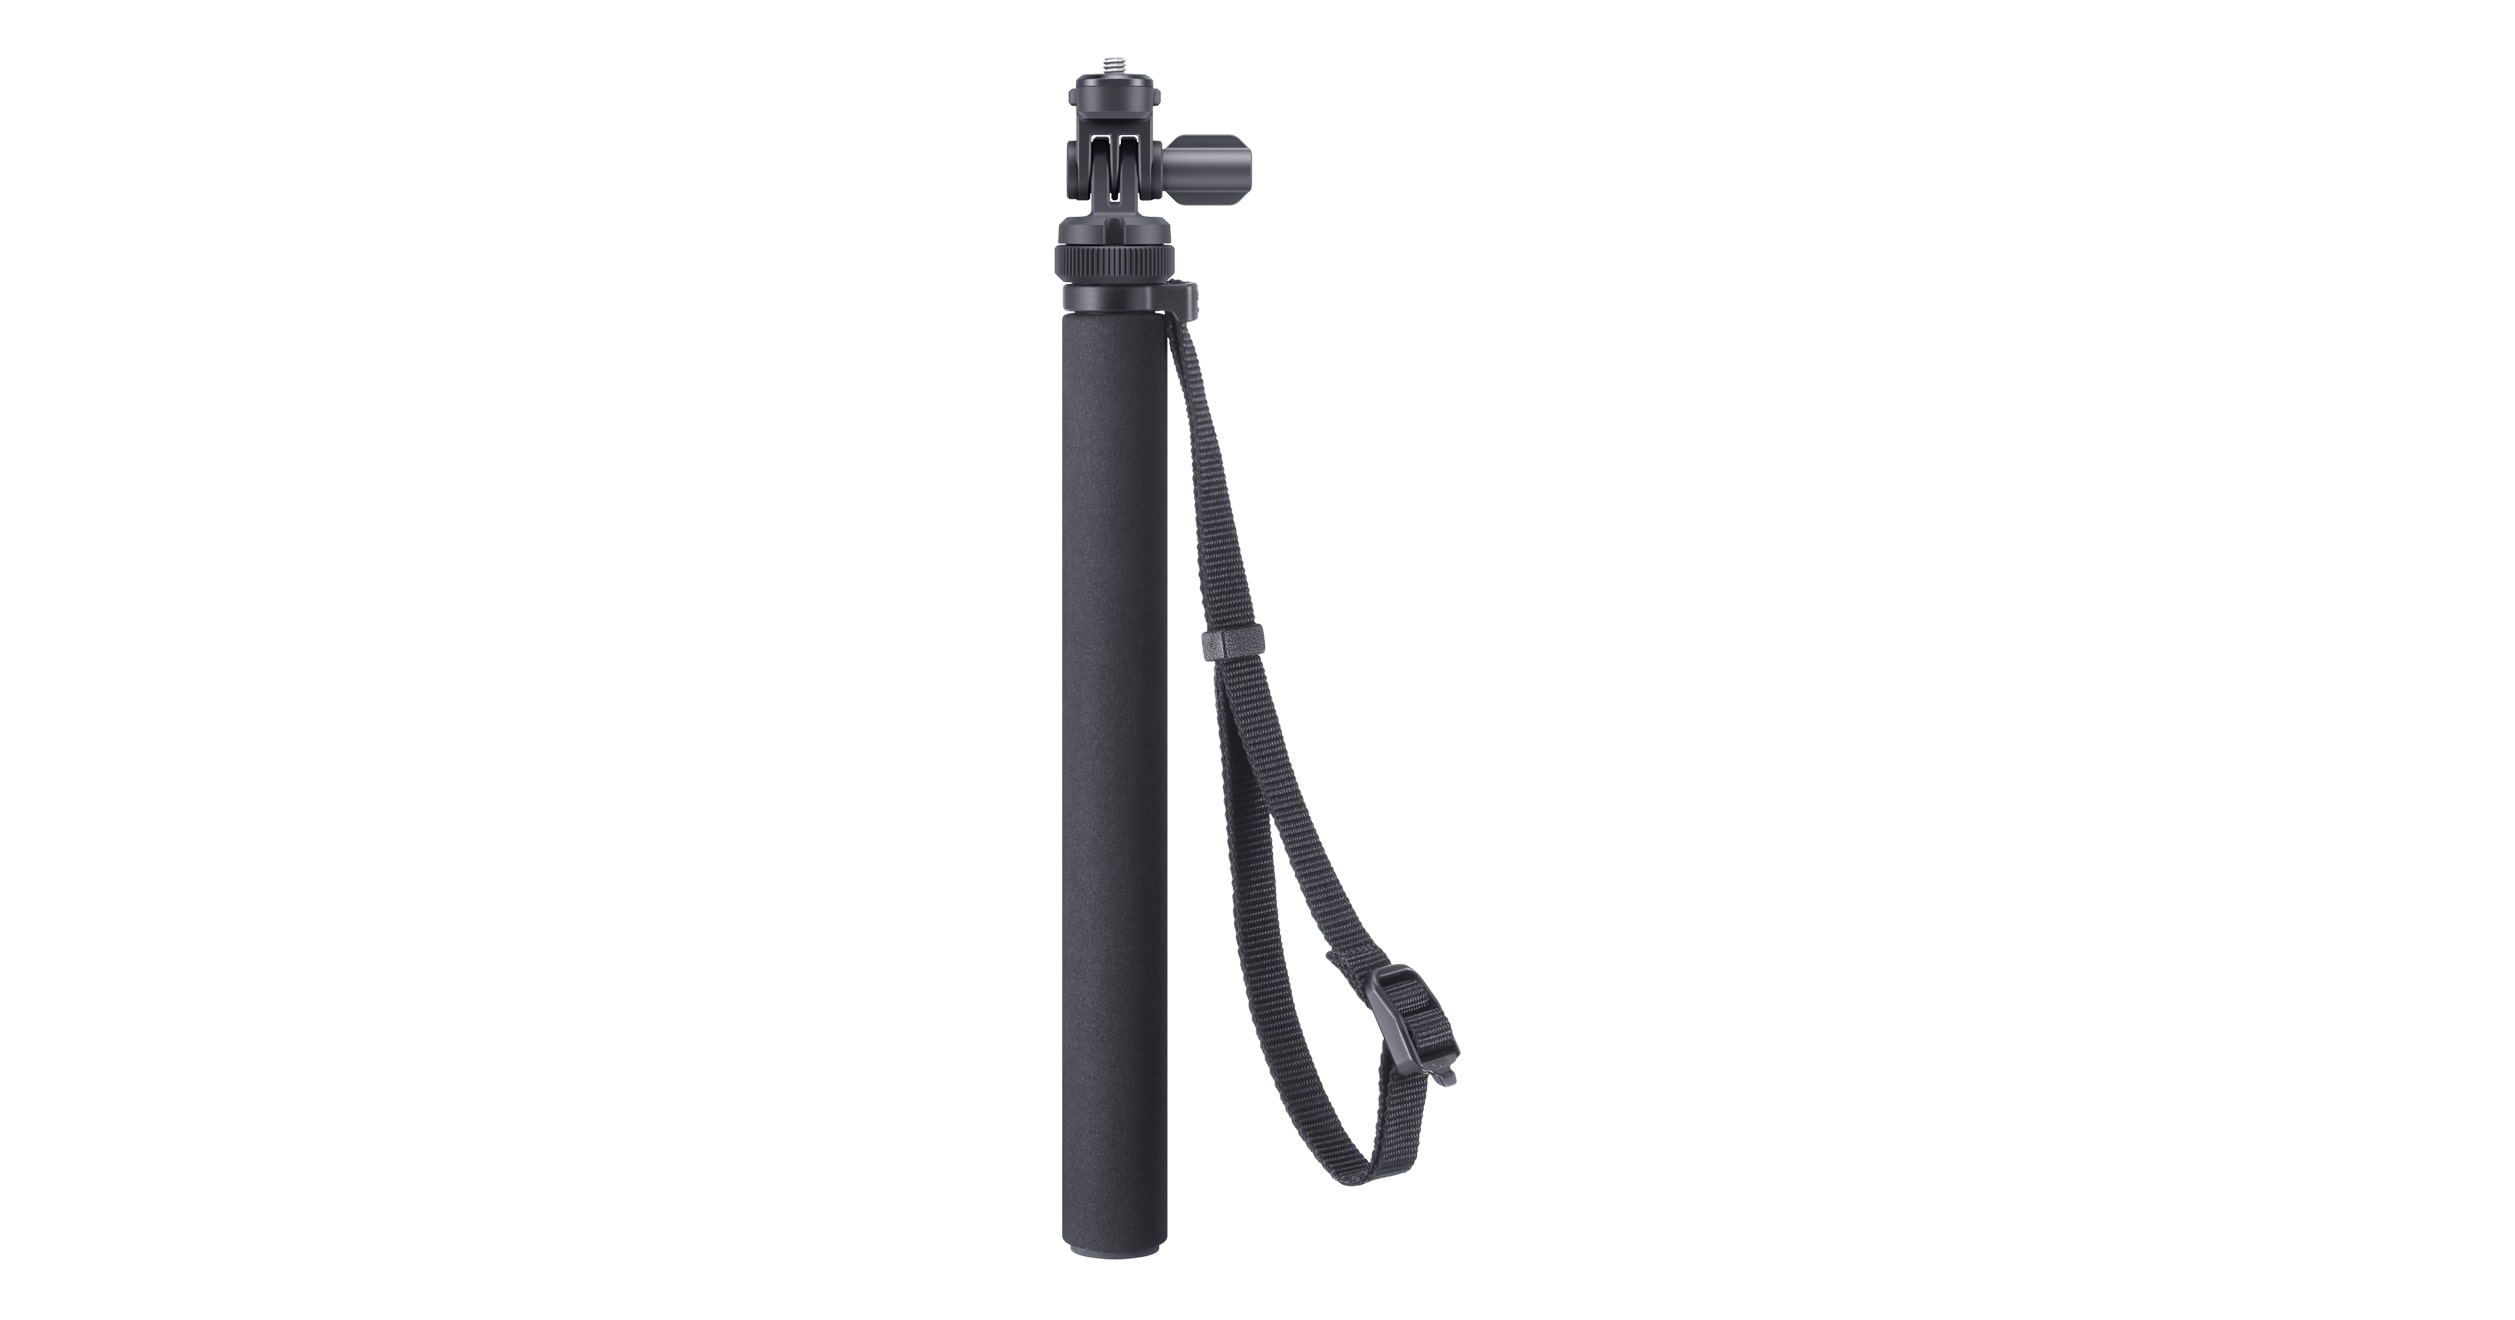
To unlock the Monopod Stick, locate the locking mechanism on the stick itself. This can usually be found near the base or handle of the stick. The locking mechanism is designed to ensure the stick remains in a fixed position when not in use, providing stability and preventing accidental movement.
To unlock the Monopod Stick, firmly hold the base or handle of the stick and twist the locking mechanism in the opposite direction of the arrow or unlock symbol. This action will release the lock and allow the stick to extend freely.
As you twist the locking mechanism, you may feel some resistance. This is normal and indicates that the lock is disengaging. Continue twisting until you no longer feel any resistance and the locking mechanism is fully released.
Once the Monopod Stick is unlocked, you can extend it to your desired length. Most Monopod Sticks have adjustable sections that can be extended or collapsed to suit your needs. Gently pull or push the sections of the stick to adjust its length, making sure to maintain a firm grip on the stick to prevent accidental dropping or damage.
After adjusting the length, you may want to double-check that the stick is securely locked into place. Give the stick a slight shake or wiggle to ensure that it is stable and won’t collapse during use. If you notice any loose sections or instability, carefully readjust and lock the stick until it feels secure.
Now that you have unlocked and adjusted the Monopod Stick, you are ready to use it to capture stable and professional-looking photos and videos. Remember to always exercise caution when using the stick, especially when extending it to its maximum length or in crowded areas.
By following these steps, you can easily unlock your Sony Monopod Stick and unleash its true potential. Enjoy capturing amazing moments with your Sony device and the versatility of the Monopod Stick!
Troubleshooting Tips
If you’re encountering issues while trying to unlock your Sony Monopod Stick, don’t worry. Here are some troubleshooting tips to help you out:
- Check the Battery: Ensure that the Monopod Stick has enough battery charge to function properly. Connect it to a power source and let it charge for a while before attempting to unlock it.
- Restart Your Device: Sometimes, a simple restart of your Sony device can resolve any connectivity issues. Turn off your device completely, wait for a few seconds, and then power it back on before trying to pair it with the Monopod Stick again.
- Reset the Monopod Stick: If the previous steps didn’t work, you can try resetting the Monopod Stick. Look for a small reset button or hole on the device and use a pin or small tool to press and hold it for a few seconds. This will reset the settings of the Monopod Stick and may fix any software glitches.
- Ensure Bluetooth is Enabled: Make sure that Bluetooth is turned on and enabled on both your Sony device and the Monopod Stick. Check the Bluetooth settings on your device and ensure it is set to discoverable mode or ready to pair with other devices.
- Update Firmware: Check if there are any firmware updates available for your Monopod Stick. Manufacturers often release firmware updates to fix bugs and improve the functionality of the device. Visit the official Sony website or contact their customer support to find out if there are any updates available for your specific model.
- Try Pairing with Another Device: If all else fails, try pairing the Monopod Stick with another compatible device. This will help determine if the issue lies with your Sony device or the Monopod Stick itself. If it works with another device, you may need to troubleshoot your Sony device further.
Remember, if you are still unable to unlock your Sony Monopod Stick after following these troubleshooting tips, it’s best to reach out to Sony’s customer support for further assistance. They have specialized knowledge and resources to help you resolve any technical issues you may encounter.
Conclusion
Unlocking a Sony Monopod Stick allows you to unleash its full potential and enjoy the many features and benefits it has to offer. Whether you want to capture stunning photos from different angles or take smooth and stable videos, unlocking your Sony Monopod Stick ensures that you can maximize its functionality.
By following the steps outlined in this article, you can easily unlock your Sony Monopod Stick and start exploring its full range of capabilities. Remember to familiarize yourself with the specific unlocking process for your particular model and be cautious while handling the device.
So, don’t let your Sony Monopod Stick sit idle. Unlock it, get creative, and take your photography and videography skills to the next level. Embrace the freedom of movement and flexibility that comes with unlocking your Sony Monopod Stick and capture unforgettable moments with ease.
FAQs
Q: Can I unlock a Sony Monopod Stick?
A: No, unlocking a Sony Monopod Stick is not possible. The term “unlocking” typically refers to unlocking the network restrictions on a mobile device, allowing it to be used with different carriers. However, a Sony Monopod Stick is not a mobile device and does not have any network restrictions.
Q: What is a Sony Monopod Stick used for?
A: A Sony Monopod Stick, also known as a selfie stick or a smartphone selfie stick, is a portable accessory used to extend the reach of a smartphone or camera for capturing selfies, group photos, or videos. It allows users to take photos or record videos from different angles and perspectives.
Q: How do I use a Sony Monopod Stick?
A: Using a Sony Monopod Stick is quite simple. First, attach your smartphone or camera to the mount or holder at the top of the stick. Ensure that it is secure and tightened properly. Then, extend the stick to your desired length, while keeping in mind the weight and stability. Finally, use the built-in shutter control, Bluetooth remote, or timer function on your device to capture photos or videos as desired.
Q: Is a Sony Monopod Stick compatible with all smartphones?
A: Sony Monopod Sticks are designed to be universally compatible with most smartphones, regardless of the brand or operating system. However, it is always advisable to check the product specifications or consult the manufacturer’s guidelines to ensure compatibility. Some Monopod Sticks may also come with adjustable smartphone holders or mounts to accommodate various device sizes.
Q: Can I use a Sony Monopod Stick with a digital camera?
A: Yes, Sony Monopod Sticks can also be used with digital cameras, as long as they are equipped with a standard tripod mount. Many Monopod Sticks come with a universal mount that can hold both smartphones and cameras. However, it is recommended to check the weight and stability requirements of the Monopod Stick to ensure it can support your specific camera model.