
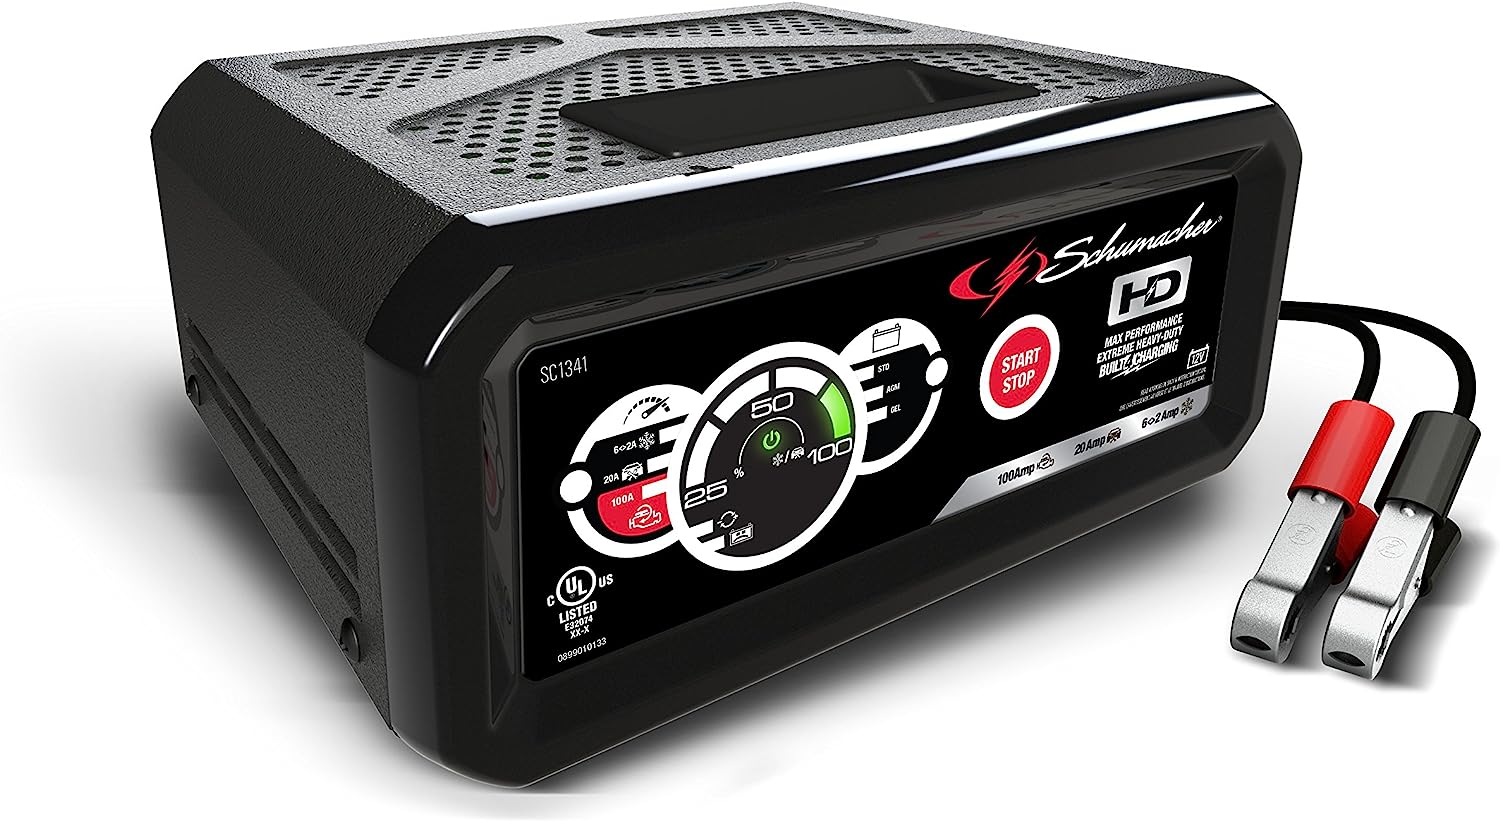
Are you struggling with a dead car battery or wondering how to keep your battery in optimal condition? Look no further than the Schumacher battery charger. This handy device is designed to revive dead batteries, maintain charge levels, and extend the lifespan of your car battery. In this comprehensive guide, we will walk you through the step-by-step process of using a Schumacher battery charger, providing you with the knowledge and confidence to tackle any battery-related issues. Whether you’re a seasoned car enthusiast or a first-time user, this article will equip you with all the information you need to harness the power of a Schumacher battery charger.
Inside This Article
- Safety Precautions
- Connecting the Battery Charger
- Selecting the Charging Mode
- Charging the Battery
- Maintaining the Battery
- Troubleshooting Common Issues
- Conclusion
- FAQs
Safety Precautions
When it comes to using a Schumacher battery charger, it’s important to keep safety as a top priority. Batteries contain harmful chemicals and can produce explosive gases, so taking proper precautions is essential. Here are some safety measures to follow before and during the use of a Schumacher battery charger:
- Read the manual: Before using the battery charger, take the time to carefully read and understand the manufacturer’s instructions. This will ensure that you are aware of any specific safety guidelines or precautions.
- Protective gear: Wear appropriate protective gear, such as safety glasses and gloves, to shield yourself from any potential hazards. This is particularly important when working with batteries, as they can release corrosive substances.
- Choose the right environment: Use the battery charger in a well-ventilated area, preferably outdoors or in a garage with the doors open. This will help disperse any gases that may be emitted during the charging process.
- Inspect the charger: Before plugging in the charger, inspect the cables, connectors, and charger itself for any signs of damage. If you notice any frayed wires or broken components, do not use the charger and contact the manufacturer for assistance.
- Disconnect power: Prior to connecting or disconnecting the battery charger, ensure that the charger is turned off and unplugged from the power source. This will help prevent any accidental electrical shocks.
- Proper connections: When connecting the charger to the battery, make sure to follow the correct polarity. The positive (+) and negative (-) terminals must be matched accordingly. Reversing the connections can cause damage to the charger, battery, or even result in a hazardous situation.
- Avoid sparks: To reduce the risk of sparks, always connect the charger to the battery first before plugging in the charger to the power source. Similarly, when disconnecting the charger, first unplug it from the power source, and then remove the charger from the battery.
- Keep a safe distance: Do not stand directly over the battery or charger when it is in use. This will help minimize the potential exposure to any gases or sparks that may occur.
- Monitor the charging process: While charging the battery, periodically check on the progress to ensure everything is functioning properly. If you notice any unusual sounds, smells, or excessive heat, discontinue charging immediately and refer to the troubleshooting section of the manual.
- Store the charger safely: When not in use, store the battery charger in a cool and dry location, away from flammable materials. Keep it out of reach of children and pets to avoid any accidents.
By following these safety precautions, you can ensure a safe and successful experience when using a Schumacher battery charger. Remember, safety should always be the number one priority when working with any electrical equipment, and taking the necessary precautions can help prevent any potential accidents or damage.
Connecting the Battery Charger
Before you begin connecting your Schumacher battery charger, it’s important to take a few safety precautions. Make sure you have read the user manual and understand the instructions provided by the manufacturer. Ensure that the charger is compatible with your specific type of battery and that it is designed for the voltage and capacity of the battery you want to charge.
1. Locate the battery: Start by identifying the location of the battery in the vehicle. In most cases, the battery is located under the hood, but it can also be located in the trunk or elsewhere depending on the vehicle’s make and model.
2. Position the vehicle: Park the vehicle in a well-ventilated area away from flammable materials. Turn off the engine and remove the ignition key. This is important to ensure safety while connecting the battery charger.
3. Identify the battery terminals: Look for the positive (+) and negative (-) terminals on the battery. The positive terminal is usually marked with a plus sign or the letters “POS,” while the negative terminal is marked with a minus sign or the letters “NEG.”
4. Connect the charger clamps: Attach the red clamp to the positive terminal of the battery. Ensure that the clamp is securely attached and making proper contact with the metal terminal. Then, connect the black clamp to the negative terminal in the same manner.
5. Double-check the connections: Before proceeding, double-check that the charger clamps are securely attached and properly aligned. Loose connections can lead to ineffective charging or even damage to the battery or charger.
6. Plug in the charger: Once the clamps are securely attached, plug the charger into a power outlet. Make sure the outlet is grounded and provides the necessary voltage for the charger.
7. Select the charging mode: Depending on the model of your Schumacher battery charger, you may have different charging modes to choose from. Consult the user manual to determine the appropriate charging mode for your battery type and condition.
8. Start the charging process: Once you have selected the appropriate charging mode, switch on the charger. You should see the charging indicator light up, indicating that the charging process has begun.
9. Monitor the charging progress: Keep an eye on the charger’s display or indicator lights to monitor the progress of the charging. Some chargers have built-in features that automatically adjust the charging rate or stop charging when the battery is fully charged.
10. Disconnect the charger: Once the battery is fully charged, or the charger’s built-in features indicate the charging process is complete, unplug the charger from the power outlet. Then, remove the clamps from the battery terminals, starting with the negative (-) clamp followed by the positive (+) clamp.
Remember to always follow the specific instructions provided by the manufacturer for your Schumacher battery charger. By connecting the charger correctly and taking the necessary safety precautions, you can efficiently and safely charge your vehicle’s battery with ease.
Selecting the Charging Mode
When it comes to using a Schumacher battery charger, one of the most important steps is selecting the right charging mode. This ensures that the battery is charged properly and efficiently. Schumacher battery chargers come with multiple charging modes to cater to different battery types and conditions. Let’s explore how to select the charging mode on a Schumacher battery charger.
1. Identify the Battery Type: Before you can select the appropriate charging mode, you need to identify the type of battery you are charging. Schumacher battery chargers are compatible with various battery types, including lead-acid, AGM, gel, and lithium-ion batteries. Check the battery label or refer to the manufacturer’s manual to determine the battery type.
2. Refer to the Charger Manual: Consult the manual that comes with your Schumacher battery charger to find the recommended charging mode for your specific battery type. The manual will provide detailed instructions on how to set the charging mode based on different battery chemistries and sizes.
3. Select the Charging Mode: Once you know the battery type and have referred to the manual, it’s time to select the charging mode on the Schumacher battery charger. Most chargers have a mode selection knob or button that allows you to choose the appropriate charge rate and voltage for your battery. Turn the knob or press the button to select the desired charging mode.
4. Adjust Ampere Setting: Depending on your battery’s condition and charging requirements, you may need to adjust the ampere setting on the charger. Some Schumacher battery chargers have adjustable amp settings, allowing you to choose the charge rate that best suits your battery’s needs. Again, refer to the manual for specific instructions on adjusting the ampere setting.
5. Confirm the Selection: After selecting the charging mode and adjusting the ampere setting if necessary, double-check that you have made the correct choices. Ensure that the charger is set to the appropriate charging mode for your battery type and that the ampere setting matches your battery’s requirements.
By carefully selecting the charging mode on your Schumacher battery charger, you can optimize the charging process and extend the lifespan of your battery. It’s crucial to follow the recommended charging modes outlined in the manual to avoid overcharging or undercharging your battery, which can lead to reduced performance and a shortened battery life.
Remember, different battery types require different charging modes, so it’s important to stay informed and choose the right mode for your battery. Always refer to the Schumacher charger manual for specific instructions and guidelines to ensure a safe and effective charging experience.
Charging the Battery
Once you have connected your Schumacher battery charger to the battery and selected the appropriate charging mode, you are ready to start charging. Follow these simple steps to ensure a safe and effective charging process.
1. Start by plugging in your Schumacher battery charger to a power source. Make sure the charger is turned off before connecting it to the battery.
2. Check the amperage settings on your battery charger. It is important to select the correct charging rate for your battery to avoid overcharging or undercharging. Refer to the manufacturer’s guidelines or consult the manual for recommended settings.
3. Once the charger is properly connected and the correct amperage is selected, you can turn on the charger. The charging process will begin, and you will see the charger’s indicators or display showing the progress.
4. It is important to monitor the battery charger while it is charging. Keep an eye on the charger’s indicators to ensure it is functioning properly and the battery is being charged. If you notice any unusual behavior or if the charger displays any error codes, refer to the troubleshooting section for assistance.
5. The charging time will vary depending on the size and condition of your battery. Generally, it can take several hours to fully charge a battery. Be patient and avoid interrupting the charging process.
6. Once the battery is fully charged, the charger’s indicators or display will show that the charging process is complete. At this point, you can turn off the charger and disconnect it from the power source.
7. It is recommended to perform a float or maintenance charge after the battery is fully charged. This will help keep the battery in optimal condition and extend its lifespan. Refer to the manual for instructions on how to perform a float charge.
8. After disconnecting the charger, you can safely remove the charging cables from the battery. Start by removing the negative cable followed by the positive cable. Be careful not to touch the cable clamps together or accidentally short circuit the battery.
By following these steps, you can effectively charge your battery using a Schumacher battery charger. Always refer to the manufacturer’s guidelines and the specific instructions provided with your charger for the best charging practices.
Maintaining the Battery
Proper maintenance of your battery is crucial to ensure its longevity and optimal performance. By following these tips, you can keep your battery in top condition:
1. Regularly Clean the Battery: Dust, dirt, and corrosion can build up on the battery’s terminals and connections, affecting its performance. Clean the battery with a mixture of baking soda and water to remove any residue. Be sure to disconnect the battery before cleaning.
2. Check the Electrolyte Levels: If you have a traditional flooded battery, check the electrolyte levels regularly. Ensure that the fluid covers the battery plates. If the levels are low, add distilled water to bring them up to the recommended levels.
3. Inspect the Battery Cables: Make it a habit to inspect the battery cables for any signs of wear, fraying, or corrosion. Replace any damaged cables as they can hinder the flow of electricity.
4. Use a Battery Maintainer: To keep your battery charged when not in use, consider using a battery maintainer or float charger. It will help to maintain the battery’s charge and prevent it from discharging completely.
5. Store in a Cool and Dry Place: When storing your battery, ensure it is kept in a cool and dry environment away from extreme temperatures. High heat can cause the battery to lose its charge faster.
6. Avoid Deep Discharges: It is best to avoid fully discharging the battery whenever possible. Deep discharges can reduce the battery’s capacity over time. If you notice that the battery is running low, charge it as soon as possible.
7. Use Battery-Appropriate Chargers: Not all chargers are suitable for every battery type. Using the wrong charger can damage the battery. Always use a charger that is compatible with your battery’s chemistry and voltage.
8. Follow Manufacturer’s Guidelines: Lastly, it is essential to follow the manufacturer’s guidelines for battery maintenance. They will provide specific instructions on how to care for your battery and ensure its optimal performance.
By following these maintenance tips, you can extend the life of your battery and enjoy reliable performance from your device or vehicle.
Troubleshooting Common Issues
While using a Schumacher battery charger, you may sometimes encounter certain issues that require troubleshooting. Here are some common problems you may face and their possible solutions:
1. Charger does not turn on: If the charger does not turn on when plugged in, check if the power source is functioning properly. Ensure that the power outlet is supplying electricity and check the fuse or circuit breaker associated with the charger. If necessary, replace the fuse or reset the circuit breaker.
2. Battery not charging: If the charger turns on but the battery does not charge, there could be several reasons. First, check the connections between the charger and the battery. Make sure the clamps are securely connected to the battery terminals. Additionally, check for corrosion or loose connections that may be obstructing the flow of electricity. Clean the terminals if necessary. If the battery is deeply discharged, it may require a longer charging time. Allow the charger to run for a longer duration and monitor the battery voltage to ensure it is increasing.
3. Charger overheating: If you notice that the charger is getting excessively hot during operation, it may be a sign of a problem. Ensure that the charger is in a well-ventilated area and not covered or obstructed. Overheating can also occur if you are using the charger at a higher amperage than recommended for the battery’s capacity. Refer to the charger’s manual for the appropriate charging setting. If the overheating persists, it is advisable to contact Schumacher’s customer support for further assistance.
4. Battery not maintaining charge: If your battery seems to lose its charge quickly after being charged, it could indicate an issue. Check for any parasitic drain on the battery, such as lights or accessories that remain on even when the vehicle is off. Disconnect any unnecessary devices and monitor if the battery maintains its charge. If the issue persists, it may be a sign of a faulty battery. Consider getting the battery tested or replaced if necessary.
5. Error codes or flashing lights: Some Schumacher battery chargers come equipped with error codes or flashing lights to indicate specific problems. Refer to the charger’s manual for the meaning of these codes or lights. It will provide you with valuable information on diagnosing and resolving the issue. If the manual does not address the specific problem, reach out to Schumacher’s customer support for guidance.
Remember, it is crucial to follow all safety precautions provided by Schumacher when troubleshooting or handling battery chargers. If you are unable to resolve the issue on your own, it is best to seek professional assistance to ensure the safety and functionality of your charger and battery.
Conclusion
In conclusion, learning how to use a Schumacher battery charger is not only a valuable skill, but it also allows you to keep your car’s battery in optimal condition. By following the steps outlined in this article, you can confidently connect and charge your battery without any issues. Always remember to prioritize safety and adhere to the manufacturer’s instructions when using any battery charger.
With the knowledge and understanding gained from this guide, you can now confidently take charge of your car’s battery maintenance. Whether it’s for a routine charge or an emergency situation, having a Schumacher battery charger and the know-how to use it will give you peace of mind on the road.
Remember, properly maintaining your battery ensures that your vehicle starts reliably and functions optimally. So, take the time to familiarize yourself with your Schumacher battery charger and keep your car powered up and ready to go whenever you need it.
FAQs
Here are some frequently asked questions about using a Schumacher Battery Charger:
1. How do I connect a Schumacher Battery Charger to my vehicle’s battery?
To connect a Schumacher Battery Charger to your vehicle’s battery, you will need to locate the battery and ensure that the charger is turned off. Then, connect the red positive clamp from the charger to the positive terminal on the battery. Next, connect the black negative clamp from the charger to a solid ground on the vehicle, such as an unpainted metal surface, away from the battery. Once the clamps are securely connected, you can turn on the charger and begin the charging process.
2. Can I use a Schumacher Battery Charger to charge other types of batteries?
Yes, Schumacher Battery Chargers are versatile and can be used to charge a variety of batteries, including car batteries, motorcycle batteries, boat batteries, and recreational vehicle (RV) batteries. However, it is important to refer to the charger’s manual to ensure that you are using the correct settings and voltage for the specific type of battery you are charging.
3. How long does it take to fully charge a battery with a Schumacher Battery Charger?
The length of time it takes to fully charge a battery with a Schumacher Battery Charger depends on several factors, including the size and condition of the battery, as well as the amperage setting on the charger. In general, it can take several hours to fully charge a battery, so it’s important to plan accordingly and ensure that you have enough time for the charging process to complete.
4. Can I leave the battery connected to the Schumacher Battery Charger indefinitely?
No, it is not recommended to leave the battery connected to the Schumacher Battery Charger indefinitely. Once the charging process is complete and the battery is fully charged, you should disconnect the charger from the battery to avoid overcharging or damage to the battery. It is also important to follow the safety instructions provided by Schumacher to ensure proper usage and prevent any potential hazards.
5. What safety precautions should I take when using a Schumacher Battery Charger?
When using a Schumacher Battery Charger, it is important to observe the following safety precautions:
- Ensure that the charger is turned off before making any connections.
- Follow the instructions provided by Schumacher for proper charging procedures.
- Wear appropriate protective gear, such as gloves and safety glasses.
- Avoid charging batteries in enclosed spaces or areas with poor ventilation.
- Do not exceed the recommended charging voltage and amperage for the specific battery being charged.
- Regularly inspect the charger and cables for any signs of damage or wear.
These precautions will help ensure your safety while using a Schumacher Battery Charger and extend the lifespan of your batteries.