
Are you struggling with unsightly spider veins and looking for an effective solution? Look no further than the Blue Light Pen, a revolutionary device designed to target and diminish the appearance of spider veins. Whether you’re dealing with spider veins on your face, legs, or other parts of your body, the Blue Light Pen offers a gentle and non-invasive method to address this common cosmetic issue.
In this article, we will delve into the world of the Blue Light Pen, exploring its benefits, how to use it effectively, and important safety considerations. We will also address some frequently asked questions to provide you with a comprehensive understanding of this innovative tool.
Inside This Article
- Overview of Spider Veins
- Understanding Blue Light Pen Treatment for Spider Veins
- Preparing for Blue Light Pen Treatment
- Step-by-Step Guide on Using a Blue Light Pen for Spider Veins
- Conclusion
- FAQs
Overview of Spider Veins
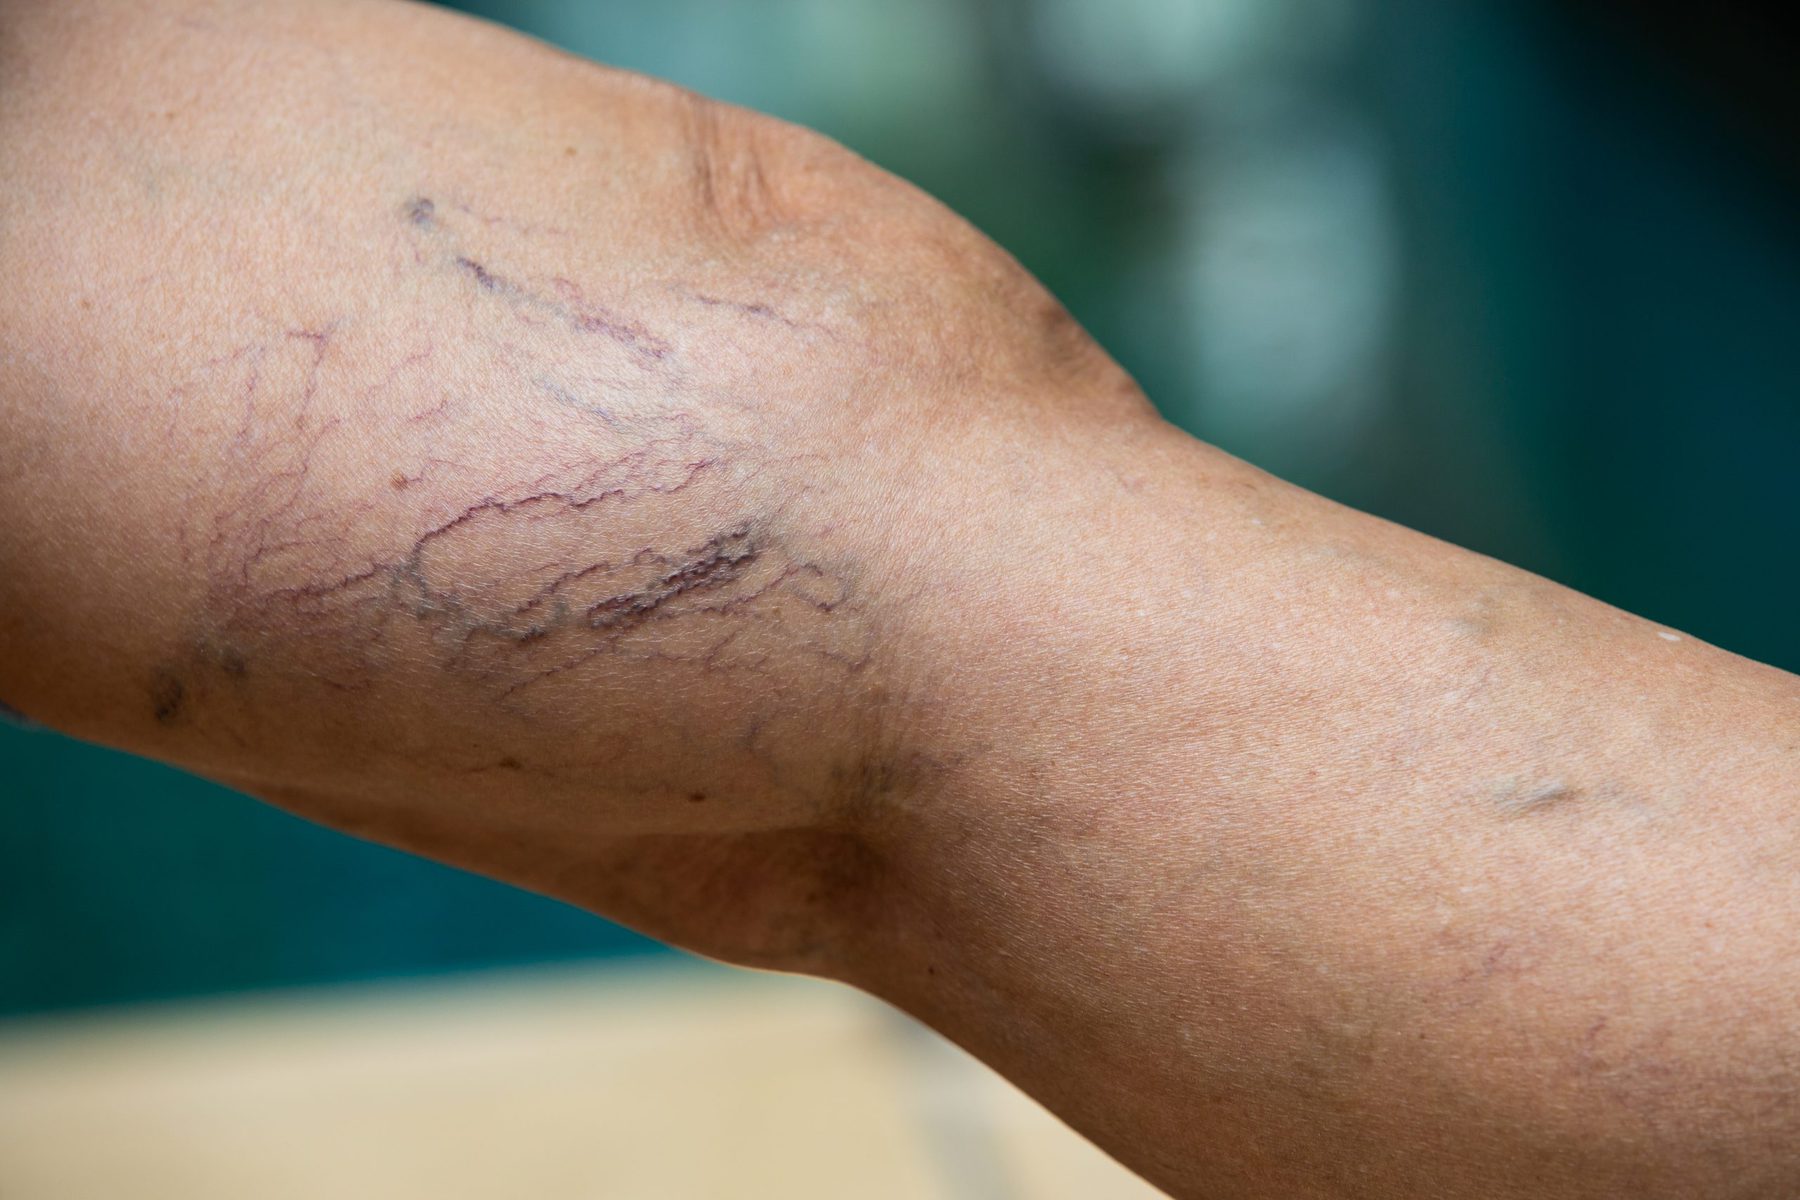
Spider veins, also known as telangiectasia, are small, dilated blood vessels that appear close to the surface of the skin. They often resemble spider webs or tree branches and can be found on various parts of the body, including the legs, face, and hands. While spider veins are typically harmless and rarely cause any medical complications, they can be a source of self-consciousness and cosmetic concern for many individuals.
The exact cause of spider veins is not well understood, but certain factors can contribute to their development. These factors include genetics, hormonal changes, pregnancy, prolonged periods of standing or sitting, obesity, and certain medical conditions, such as varicose veins or circulatory disorders.
Spider veins are more common in women than men and tend to increase in prevalence with age. They usually do not cause pain but may be accompanied by symptoms such as itching, burning, or heaviness in the affected area.
While spider veins are generally harmless, some individuals may seek treatment for cosmetic reasons or if the veins cause discomfort. There are several treatment options available, including the use of a blue light pen.
In the following sections, we will discuss the blue light pen treatment for spider veins in detail, including its effectiveness, the preparation required, and a step-by-step guide on how to use it.
Understanding Blue Light Pen Treatment for Spider Veins
Spider veins, also known as telangiectasia, are small, dilated blood vessels that appear close to the surface of the skin. They can commonly be found on the legs, face, and other parts of the body. While spider veins are usually harmless, they can be aesthetically displeasing and may cause discomfort to some individuals.
Blue Light Pen Treatment is a non-invasive and highly effective method for reducing the appearance of spider veins. This innovative technology utilizes blue light energy to target and destroy the unwanted blood vessels, leaving the surrounding tissue unharmed.
The blue light emitted by the pen is absorbed by the red pigment in the blood vessels, causing them to heat up and collapse. Over time, the body naturally eliminates the collapsed vessels, resulting in clearer and smoother skin.
One of the major advantages of blue light pen treatment is its precision. The pen allows for targeted treatment, ensuring that only the spider veins are affected while minimizing damage to the surrounding healthy skin.
Blue light pen treatment is also quick and convenient. Depending on the size and number of the spider veins being treated, a session can typically be completed within 10 to 30 minutes. The procedure is virtually painless, with patients experiencing only a mild warming sensation during the treatment.
Furthermore, blue light pen treatment requires minimal downtime. Unlike more invasive procedures, there is no need for anesthesia or extensive recovery time. Patients can resume their normal activities immediately after the session.
It’s important to note that the effectiveness of blue light pen treatment may vary depending on individual cases. Some individuals may require multiple treatment sessions to achieve their desired results. Additionally, the longevity of the results can be influenced by factors such as genetics, lifestyle, and sun exposure.
Before deciding on blue light pen treatment, it is recommended to consult with a dermatologist or a skincare professional to assess your specific needs and determine if the treatment is suitable for you.
Preparing for Blue Light Pen Treatment
Before undergoing any medical procedure, it’s important to adequately prepare yourself to ensure the best possible outcome. The same goes for preparing for a blue light pen treatment for spider veins. By following a few simple steps, you can optimize the effectiveness and safety of the treatment. Here’s a guide to help you prepare:
1. Consultation with a Healthcare Professional
The first step in preparing for a blue light pen treatment is to schedule a consultation with a healthcare professional who specializes in dermatology or aesthetic medicine. During this consultation, the professional will assess your spider veins, determine if blue light pen treatment is suitable for you, and provide guidance on how to prepare.
2. Avoid Excessive Sun Exposure
Prior to your scheduled blue light pen treatment, it’s crucial to avoid excessive sun exposure. Exposure to the sun can make your skin more sensitive and increase the risk of complications during and after the procedure. Be sure to wear sunscreen with a high SPF and cover the treatment area when you are outdoors.
3. Stop Using Retinol Products
If you are using any skincare products that contain retinol, such as retinol creams or serums, it’s advisable to stop using them at least a week before your blue light pen treatment. Retinol can increase skin sensitivity and may interfere with the effectiveness of the procedure.
4. Cleanse and Exfoliate Your Skin
On the day of your blue light pen treatment, it’s important to cleanse your skin thoroughly to remove any dirt, oil, or makeup. Use a gentle cleanser suitable for your skin type. Additionally, exfoliating your skin a few days before the treatment can help remove dead skin cells and enhance the penetration of the blue light into the targeted area.
5. Avoid Blood-Thinning Medications
If you are taking any blood-thinning medications, such as aspirin or anticoagulants, it’s essential to consult with your healthcare professional about whether you should temporarily stop taking them before the blue light pen treatment. Blood-thinning medications can increase the risk of bruising or bleeding during the procedure.
6. Arrive with Clean, Bare Skin
When you arrive for your blue light pen treatment, make sure the treatment area is clean and free from any lotions, creams, or oils. It’s best to arrive with bare skin to ensure optimal results and minimize any potential reactions or complications.
7. Ask Questions
If you have any doubts or concerns about the blue light pen treatment, don’t hesitate to ask your healthcare professional. They are there to address your questions and provide you with the necessary information to ease any anxieties and ensure a successful treatment.
By following these steps and preparing properly for your blue light pen treatment, you can enhance the effectiveness of the procedure and reduce the risk of complications. Remember to consult with a healthcare professional for personalized guidance based on your specific needs and medical history.
Step-by-Step Guide on Using a Blue Light Pen for Spider Veins
If you are struggling with the appearance of spider veins on your skin, a blue light pen can be an effective solution. This innovative device utilizes targeted light therapy to diminish the visibility of spider veins and promote smoother, clearer skin. If you are considering using a blue light pen for spider veins, follow this step-by-step guide to ensure optimal results:
1. Cleanse your skin: Before using the blue light pen, it’s important to cleanse your skin thoroughly. Remove any dirt, oils, or makeup from the treatment area using a gentle cleanser. Pat your skin dry with a clean towel.
2. Read the instructions: Familiarize yourself with the user manual and instructions that come with your blue light pen. Each device may have different specifications and recommended usage guidelines, so it’s essential to understand how to operate it properly.
3. Charge the blue light pen: Ensure that your blue light pen is fully charged before using it. Most devices come with a USB charging cable or charging dock. Follow the manufacturer’s instructions to charge the pen adequately.
4. Prep the treatment area: Focus on the area affected by spider veins. If necessary, trim or remove any hair in that area, as hair can interfere with the effectiveness of the treatment. Make sure the skin is dry and free from any lotions or creams.
5. Apply a conductive gel: To enhance the conductivity of the blue light pen, apply a thin layer of conductive gel to the treatment area. This gel helps the light penetrate the skin more effectively and ensures optimal results.
6. Turn on the blue light pen: Follow the instructions provided with your device to turn it on. Most blue light pens have a power button or switch that you need to press or slide. Make sure the intensity level is set to a comfortable level for your skin.
7. Begin treatment: Gently place the blue light pen directly on the spider veins you want to target. Move the pen in slow, circular motions, applying light pressure. The device emits a concentrated beam of blue light, which targets the pigmented blood vessels beneath the skin.
8. Be consistent: For best results, use the blue light pen consistently according to the recommended treatment duration and frequency provided by the manufacturer. Typically, sessions can last anywhere from a few minutes to several minutes per treatment area.
9. Follow post-treatment care: After using the blue light pen, follow any recommended post-treatment care instructions. This may include applying a soothing cream or moisturizer to calm the skin and protect it from dryness.
10. Monitor your progress: Keep track of your progress over time. It may take several sessions before you start noticing a reduction in the visibility of spider veins. Take photos or measurements to compare the results and adjust your treatment plan if necessary.
Remember, using a blue light pen for spider veins requires patience and consistency. It’s important to follow the instructions provided with your specific device and consult with a healthcare professional if you have any underlying medical conditions or concerns. With proper usage, a blue light pen can be an effective tool in improving the appearance of spider veins and enhancing your skin’s overall complexion.
Conclusion
In conclusion, using a blue light pen for spider veins can be an effective and convenient solution for those looking to reduce the appearance of these unsightly veins. By emitting a targeted beam of blue light, these pens can help to break down the pigment of the veins, helping them to fade over time.
While blue light pens may not completely eliminate spider veins, they can significantly improve their appearance and boost self-confidence. However, it’s important to keep in mind that results may vary depending on the severity of the spider veins and individual factors.
Before using a blue light pen, it is advisable to consult a dermatologist or healthcare professional for guidance and to ensure that it is safe and suitable for your specific needs. Additionally, it is important to follow the instructions provided by the manufacturer and to use the pen consistently and correctly for optimal results.
Overall, incorporating a blue light pen into your skincare routine can be a simple and effective way to address spider veins, offering a non-invasive and convenient option to help improve the appearance of your skin.
FAQs
1. What is a blue light pen for spider veins?
2. How does a blue light pen work for spider veins?
3. Is the blue light pen safe to use on spider veins?
4. How often should I use the blue light pen for spider veins?
5. Are there any side effects of using a blue light pen for spider veins?