
Welcome to the world of iPhones! If you’re new to the iPhone 8 Plus or earlier models, it’s essential to understand the basic functions of the buttons and ports on your device. Whether you’re navigating through the settings, capturing memorable moments with the camera, or connecting your iPhone to other devices, having a solid understanding of these elements is crucial.
In this article, we’ll take you on a journey to explore the various buttons and ports on the iPhone 8 Plus and earlier models. From the power button and volume controls to the home button and headphone jack, we’ll demystify their purpose and functionality. By the end, you’ll feel confident in your ability to navigate your iPhone with ease.
Inside This Article
- Buttons and Ports on the iPhone 8 Plus and Earlier
- Home Button – Functionality of the Home Button on the iPhone – How to use the Home Button for navigation and multitasking – Troubleshooting common issues related to the Home Button
- Power Button- Purpose and functions of the Power Button- How to power on/off the iPhone using the Power Button- Additional features and shortcuts related to the Power Button
- Volume Buttons
- Silent/Ringer Switch
- Headphone Jack – Overview of the Headphone Jack and its capabilities – Connecting and using headphones with the iPhone – Using adapters and alternative options for audio output
- Speaker: Features and Functions of the Built-in Speakers on the iPhone
- Microphone- Understanding the role and location of the microphone on the iPhone- Utilizing the microphone for voice recording and calls- Troubleshooting microphone-related problems on the iPhone
- Conclusion
- FAQs
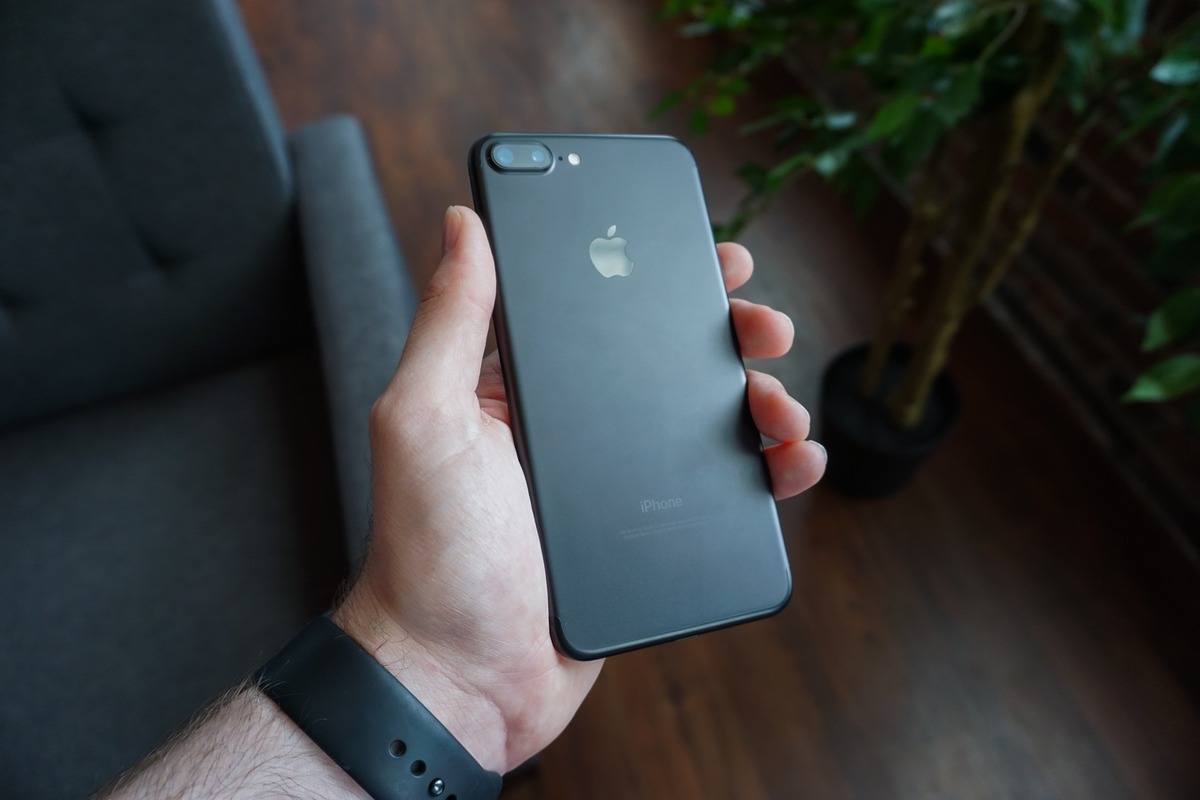
Buttons and Ports on the iPhone 8 Plus and Earlier
The iPhone 8 Plus and earlier models are known for their familiar and intuitive button and port configurations. These physical features are essential for controlling various functions and connecting accessories. In this article, we will take a closer look at the buttons and ports found on the iPhone 8 Plus and earlier models, including the Home Button, Power Button, Volume Buttons, Silent/Ringer Switch, Lightning Connector, Headphone Jack, Speaker, and Microphone.
Home Button
The Home Button is a crucial component of the iPhone’s user interface. Located at the bottom center of the device, it allows users to quickly return to the home screen, access multitasking features, and activate Siri by holding it down. With the introduction of newer iPhone models, such as the iPhone X and later, the physical Home Button has been replaced with virtual gestures.
Power Button
The Power Button, also known as the Sleep/Wake Button, is situated on the upper-right side of the iPhone. Its primary purpose is to power the device on and off. Additionally, a quick press of the Power Button can lock the screen, while a long press activates the Emergency SOS feature or triggers the Power off slider. On some models, like the iPhone SE (2nd generation), the Power Button doubles as the fingerprint sensor.
Volume Buttons
The Volume Buttons, consisting of two separate buttons labeled as Volume Up (+) and Volume Down (-), are located on the left side of the iPhone. These buttons enable users to adjust the volume levels for media playback, incoming call ringtones, and system sounds. Additionally, by pressing both the Volume Up and Volume Down buttons simultaneously, users can capture a screenshot on their iPhone.
Silent/Ringer Switch
The Silent/Ringer Switch, situated just above the Volume Buttons, allows users to quickly toggle between silent and ringer modes. When flipped towards the back of the iPhone, the device is set to silent mode, muting all incoming calls and notifications. Conversely, when the switch is in the forward position, the iPhone is in ringer mode, allowing audible alerts and notifications.
Lightning Connector
The Lightning Connector is a proprietary charging and data transfer port exclusive to Apple devices. Located at the bottom of the iPhone, it serves as the primary method of charging the device using the included Lightning cable. Additionally, the Lightning Connector allows users to connect various accessories, such as headphones, speaker docks, and adapters for HDMI or USB connections.
Headphone Jack
The Headphone Jack, a standard 3.5mm audio port, is present on older iPhone models, including the iPhone 8 Plus. It enables users to connect wired headphones, earphones, or other audio accessories for seamless audio playback. However, beginning with the iPhone 7, newer iPhone models have removed the headphone jack in favor of wireless audio solutions.
Speaker
The Speaker on the iPhone 8 Plus and earlier models is positioned at the bottom of the device alongside the Lightning Connector. It delivers clear and crisp audio output for various multimedia experiences, including music playback, movie watching, and speakerphone calls. The iPhone’s speaker is designed to provide sound in mono, meaning audio comes from a single channel.
Microphone
The Microphone on the iPhone is essential for capturing audio during calls, voice recordings, and video recordings. It is located at the bottom of the device, opposite the Speaker. The microphone ensures clear and accurate audio transmission during conversations and recordings, facilitating effective communication.
Understanding the various buttons and ports on the iPhone 8 Plus and earlier models is essential for maximizing the functionality of your device. Whether it’s navigating through the user interface, adjusting volume levels, connecting accessories, or recording audio, each button and port plays a significant role in enhancing the overall user experience.
Home Button – Functionality of the Home Button on the iPhone – How to use the Home Button for navigation and multitasking – Troubleshooting common issues related to the Home Button
The Home Button is a central element of the iPhone’s navigation system. Located at the bottom of the device, it serves various functions that enhance user experience. Let’s take a closer look at the functionality of the Home Button.
First and foremost, the Home Button acts as a primary means of navigation. A single press of the button takes you to the home screen from any app or menu, allowing for quick and convenient access to your apps and widgets.
In addition to its navigation capabilities, the Home Button also plays a crucial role in multitasking. By double-pressing the Home Button, you can easily switch between recent apps, making it effortless to jump back and forth between different tasks or activities.
Furthermore, the Home Button can be used to activate Siri, Apple’s intelligent voice assistant. With a long press of the Home Button, you can summon Siri and ask for assistance, such as making calls, sending messages, or searching the web.
It’s important to note that the functionality of the Home Button may vary depending on the model of your iPhone. For example, newer models like the iPhone X and later do not have a physical Home Button; instead, they utilize gesture-based navigation.
Despite its usefulness, the Home Button may sometimes encounter issues. One common problem is when the button becomes unresponsive or less sensitive to touch. If you experience this, try gently cleaning the surface of the Home Button and make sure your fingertips are clean and dry.
If the Home Button continues to malfunction, you can enable the on-screen AssistiveTouch button as a temporary workaround. This virtual button can be activated through the Accessibility settings and provides access to various functions that the Home Button would typically perform.
In some cases, a software glitch or a misconfiguration may cause the Home Button to freeze or not work as expected. Restarting your iPhone or performing a software update can often resolve these issues.
In rare cases where none of the troubleshooting steps work, it may be necessary to visit an authorized service center or contact Apple Support for further assistance.
Power Button- Purpose and functions of the Power Button- How to power on/off the iPhone using the Power Button- Additional features and shortcuts related to the Power Button
The Power Button on the iPhone serves several important purposes and offers various functions beyond just turning the device on and off. Understanding how to properly use and take advantage of these features can greatly enhance your iPhone experience.
The main function of the Power Button is to power on and off the iPhone. Pressing and holding the Power Button for a few seconds will turn the device on. To power off the iPhone, simply press and hold the Power Button until the “slide to power off” slider appears on the screen. Slide the slider to the right to shut down the device.
In addition to its primary function, the Power Button can also perform several useful shortcuts and provide easy access to certain features. For instance, double-pressing the Power Button quickly opens the Camera app, allowing you to capture precious moments without the need to unlock your iPhone and navigate through menus.
Another helpful feature associated with the Power Button is the emergency SOS function. Pressing the Power Button five times in quick succession will bring up the Emergency SOS screen, allowing you to call for help in case of an emergency.
In some iPhone models, like the iPhone X and later, the Power Button can be used to activate Siri. Simply press and hold the Power Button to launch Siri and give voice commands to your iPhone.
Furthermore, the Power Button can be used to take screenshots. By pressing the Power Button along with the Volume Up Button simultaneously, you can capture an image of the current screen, which can be useful for sharing information or troubleshooting purposes.
It’s also worth mentioning that the Power Button can be customized in the iPhone settings. You can adjust the functionality of the Power Button to perform actions such as locking the device, opening the control center, or launching specific applications.
Overall, the Power Button on the iPhone serves as more than just a means to turn the device on and off. By familiarizing yourself with its additional functions and shortcuts, you can make the most out of your iPhone and streamline your everyday activities.
Volume Buttons
The volume buttons on the iPhone, consisting of the Volume Up and Volume Down buttons, serve multiple functions and are crucial for controlling the audio output on your device. Let’s explore the various features and capabilities of these buttons.
One of the primary functions of the volume buttons is adjusting the volume levels during calls, media playback, and notifications. By pressing the Volume Up button, you can increase the volume, making it louder and easier to hear. Conversely, pressing the Volume Down button will decrease the volume, making it quieter.
In addition to adjusting the volume, the volume buttons can also be used to control other features on your iPhone. One such feature is capturing screenshots. By pressing the Volume Up button and the Power button simultaneously, you can quickly capture a screenshot of what’s displayed on your screen. This is a handy feature for capturing important moments or sharing information with others.
When using the volume buttons to adjust the volume levels, you’ll notice a visual indicator on your screen. This indicator shows the current volume level and adjusts accordingly as you press the volume buttons. It provides a convenient visual reference, allowing you to determine the volume level without needing to rely solely on auditory cues.
The volume buttons also have additional functionality when connected to certain accessories, such as headphones or external speakers. Depending on the accessory, pressing the volume buttons may allow you to control the volume levels directly on the accessory itself, offering convenient access to audio adjustments.
It’s worth noting that the volume buttons can be customized to perform specific functions in certain apps or settings. For example, in the Camera app, the volume buttons can be used to take photos or record videos. This allows for easy and quick capturing of moments without having to tap on the screen.
Silent/Ringer Switch
The Silent/Ringer switch on the iPhone is a small physical button located on the side of the device. It serves as a quick and convenient way to toggle between silent mode and ringer mode. The switch is an essential feature that allows users to control the sound settings of their iPhone with a simple flip.
Switching the iPhone to silent mode using the Silent/Ringer switch is incredibly straightforward. When the switch is flipped towards the back of the device, the iPhone goes into silent mode, also known as “Do Not Disturb” mode. In this mode, the phone will not ring, vibrate, or produce any audible alerts for incoming calls, messages, or notifications.
Conversely, flipping the Silent/Ringer switch towards the front of the device puts the iPhone back into ringer mode. In this mode, the iPhone will ring, vibrate, and generate audible notifications for incoming calls, messages, and alerts, according to the user’s settings.
The Silent/Ringer switch provides convenience and efficiency for managing sound settings, especially in situations where it is necessary to quickly silence the phone, such as during meetings, classes, or in quiet environments. It eliminates the need to navigate through the software settings to toggle between silent and ringer modes.
Furthermore, users can customize the behavior of the Silent/Ringer switch through the iPhone’s settings. By going to the “Sounds & Haptics” or “Sounds” section in the Settings app, users can adjust various settings related to the sound profile of their iPhone.
For example, users can choose whether they want the switch to mute both ringer and alerts or only to mute the ringer while still allowing alerts to sound. Users can also enable or disable the vibrate function along with the silent mode, depending on their preference.
In addition, the Settings app allows users to adjust the volume level of the ringer and alerts separately from the media and app sounds. This way, users can fine-tune the sound settings to suit their needs and ensure they don’t miss any important calls or notifications.
Overall, the Silent/Ringer switch on the iPhone offers a simple and effective solution for managing sound settings on the device. Its significance lies in the convenience it provides for quickly switching between silent and ringer modes, as well as the customization options available to tailor the sound experience to individual preferences.
Headphone Jack – Overview of the Headphone Jack and its capabilities – Connecting and using headphones with the iPhone – Using adapters and alternative options for audio output
The headphone jack on the iPhone is an essential port that allows users to connect and enjoy audio through headphones or other external audio devices. Let’s explore the capabilities of the headphone jack, how to connect and use headphones with your iPhone, and alternative options for audio output.
The headphone jack serves as a gateway for audio output from your iPhone device. Whether you want to listen to music, watch videos, or make calls, the headphone jack provides a direct connection for you to enjoy high-quality sound.
Connecting headphones to your iPhone is a simple process. Start by inserting the headphone plug into the 3.5mm headphone jack located on the bottom or side of your iPhone, depending on the model. Once connected, your iPhone will recognize the headphones, and you can start enjoying your favorite audio content.
One of the advantages of using headphones with your iPhone is the ability to have a more immersive and private listening experience. With headphones, you can enjoy music, podcasts, and phone calls without disturbing those around you. Additionally, headphones often offer superior audio quality compared to the device’s built-in speakers.
If you encounter issues with the headphone plug, such as one side not working or static noises, try cleaning the headphone jack with a soft cloth or brush. It’s also a good idea to check if the headphones are properly inserted and functioning correctly.
In some cases, you may want to connect non-standard audio devices that don’t have a traditional headphone jack. Here, you have the option to use adapters. Adapters can convert your iPhone’s Lightning port into a headphone jack, allowing you to connect different audio devices, such as professional headphones or external speakers.
Alternatively, if you have wireless headphones or earbuds, you can connect them to your iPhone via Bluetooth. This offers the convenience of a wireless connection, allowing you to move around freely without being tethered to your device. Simply pair your Bluetooth headphones with your iPhone, and you’re ready to go.
For users who prefer a wired connection but have an iPhone model without a headphone jack (e.g., iPhone 7 and newer), Apple provides a Lightning to 3.5mm headphone jack adapter. This adapter plugs into the Lightning port of your iPhone and converts it into a traditional headphone jack, allowing you to use your existing wired headphones.
Finally, in setups where you need to provide audio to multiple listeners or connect your iPhone to external speakers, you can use Bluetooth speakers or connect your iPhone to speakers using a compatible audio cable.
Speaker: Features and Functions of the Built-in Speakers on the iPhone
When it comes to enjoying media or making calls on your iPhone, the built-in speakers play a crucial role in delivering clear and immersive audio. Understanding the features and functions of these speakers can enhance your overall experience with your iPhone.
The built-in speakers on the iPhone are primarily used for audio output. Whether you’re listening to music, watching videos, or engaging in phone calls, these speakers ensure that the sound reaches your ears with impressive clarity and volume.
One notable feature of the iPhone speakers is the stereo sound output. Starting from the iPhone 7 and onwards, Apple introduced stereo speakers, providing a more immersive audio experience. With stereo sound, you can enjoy a wider soundstage and a more balanced audio output.
In addition to delivering rich audio, the iPhone speakers also play a role in phone calls. When making or receiving calls, the speakers function as the main audio source, allowing you to have a clear conversation without the need for headphones or external speakers.
Understanding Audio Output and Quality:
Audio output quality is an essential factor to consider when using the built-in speakers on your iPhone. The iPhone speakers are designed to produce crisp and clear sound, but various factors can affect the audio quality.
The placement of your iPhone can impact the audio output. For example, when the iPhone is placed on a soft surface, such as a pillow or a couch, the sound may appear muffled or less pronounced. To ensure optimum audio quality, it’s best to place your iPhone on a solid surface, such as a table or a desk.
Another element that influences audio quality is the volume level. Higher volume settings may result in some distortion or reduction in clarity. It’s important to find a balance between a comfortable listening level and maintaining the integrity of the audio.
Troubleshooting Common Issues with iPhone Speakers:
If you encounter any problems with the speakers on your iPhone, there are a few troubleshooting steps you can take:
- Check the volume settings: Ensure that the volume level is not set to the lowest setting or muted. Adjust the volume using the physical volume buttons or through the Control Center.
- Remove any debris or obstructions: Sometimes, dirt, dust, or lint can accumulate in the speaker grills, affecting the audio output. Gently clean the speaker area with a soft brush or cloth.
- Reset the iPhone: A simple restart can fix minor software glitches that may be causing issues with the speakers. Hold down the power button and slide to power off, then turn on the device again.
- Update the iOS software: Outdated software versions can sometimes cause problems with the speakers. Ensure that your iPhone is running the latest iOS version by going to Settings > General > Software Update.
If the above steps do not resolve the issue, it is recommended to contact Apple Support or visit an authorized service center for further assistance.
Overall, the built-in speakers on the iPhone offer impressive audio output and functionality, enhancing your multimedia experience and making your phone calls crystal clear. By understanding their features, optimizing audio quality, and troubleshooting common issues, you can enjoy rich and immersive sound on your iPhone.
Microphone- Understanding the role and location of the microphone on the iPhone- Utilizing the microphone for voice recording and calls- Troubleshooting microphone-related problems on the iPhone
The microphone is an essential component of the iPhone, responsible for capturing audio input and enabling various functionalities such as voice recording and making phone calls. Understanding the role and location of the microphone can help you fully utilize its capabilities and troubleshoot any related issues.
On most iPhone models, you will find multiple microphones strategically placed to optimize audio quality in different scenarios. Typically, there are three microphones on the device:
– Front Microphone: Located near the front-facing camera, this microphone is primarily used for capturing your voice during phone calls and FaceTime conversations.
– Bottom Microphone: Situated next to the Lightning connector, this microphone serves multiple purposes. It picks up audio when recording videos, functions during speakerphone calls, and captures audio during regular phone calls when the iPhone is not held close to your ear.
– Back Microphone: Positioned on the back of the iPhone, this microphone helps reduce background noise and enhances audio quality during video recording.
Utilizing the microphone for voice recording and making calls is a breeze on the iPhone. Whether it’s capturing a voice memo or participating in a conference call, the microphone delivers clear and crisp audio input.
To record audio, simply open the Voice Memos app, position the microphone correctly, and tap the red record button. You can also use third-party apps for more advanced recording features.
Making phone calls with the iPhone’s microphone is equally straightforward. Simply dial the number or select a contact, and the microphone will capture your voice during the call. The multiple microphones work harmoniously to provide excellent call quality, ensuring your voice is heard loudly and clearly by the recipient.
However, there can be times when you encounter microphone-related problems on your iPhone. If the other party cannot hear you during a call or your voice recordings have poor quality, you can take the following troubleshooting steps:
– Check for Blockages: Ensure that there are no obstructions covering the microphones such as dust, lint, or debris. Use a soft brush or compressed air to clean them if necessary.
– Restart the iPhone: Sometimes, a simple restart can resolve microphone issues. Hold the Power button and slide to power off. Then, turn on the iPhone again and check if the microphone problem persists.
– Update iOS: Keeping your iPhone’s software up to date is crucial. Go to Settings, tap on General, and select Software Update to check for any available updates. Install the update if one is available.
– Reset Settings: If all else fails, you can try resetting your iPhone’s settings. Go to Settings, tap on General, select Reset, and choose Reset All Settings. Keep in mind that this will erase your personalized settings, but your data will remain intact.
– Seek Professional Help: If the microphone issue persists after trying the above steps, it is recommended to contact Apple support or visit an authorized service provider for further assistance.
By understanding the role and location of the microphone on your iPhone, utilizing it for voice recording and phone calls, and troubleshooting microphone-related problems, you can ensure optimal performance and enjoy uninterrupted communication experiences.
In conclusion, understanding the buttons and ports on your iPhone is fundamental to navigating and utilizing its full potential. By familiarizing yourself with the various buttons and ports, such as the power button, volume buttons, mute switch, Lightning port, and headphone jack (on earlier models), you can confidently and efficiently use your iPhone for tasks such as making calls, adjusting volume, charging, connecting accessories, and more.
Knowing the location and purpose of these buttons and ports allows you to troubleshoot issues, connect external devices, and take full advantage of the features and functionalities offered by your iPhone. Whether it’s capturing memorable moments with the camera, enjoying music through your headphones, or connecting to external speakers for a better audio experience, understanding the buttons and ports on your iPhone is key to maximizing its potential.
So dive in, get familiar with your iPhone’s buttons and ports, and unlock a world of possibilities!
FAQs
1. What are the essential buttons and ports found on the iPhone 8 Plus and earlier models?
The iPhone 8 Plus and earlier models feature several important buttons and ports. These include the power button, volume buttons, the silent switch (or mute button), the home button, and the lightning connector for charging and data transfer.
2. How do I turn my iPhone on and off?
To turn on your iPhone, press and hold the power button located on the side or top of the device until the Apple logo appears. To turn it off, press and hold the power button again until the “slide to power off” option appears on the screen. Swipe the slider to the right to shut down your iPhone.
3. What is the function of the volume buttons on the iPhone?
The volume buttons, usually located on the left side of the iPhone, are used to control the device’s audio output. Pressing the volume up button increases the volume, while pressing the volume down button decreases it. These buttons can be used to adjust the ringer volume, media playback volume, and call volume.
4. How do I put my iPhone on silent or vibrate mode?
To put your iPhone on silent or vibrate mode, look for the small physical switch located on the side of the device, just above the volume buttons. Slide the switch towards the screen to put it on silent mode, indicated by a red dot. Sliding it back towards the back of the device will disable silent mode.
5. What is the purpose of the lightning connector on the iPhone?
The lightning connector is a proprietary interface developed by Apple for charging the iPhone and connecting it to other devices or accessories. It enables fast charging, data transfer, and audio playback through compatible lightning cables or adapters. It is located at the bottom of the iPhone.