
If you’re passionate about photography and love capturing unforgettable moments on your cell phone, then you’ll definitely want to consider investing in the iStabilizer Monopod. This innovative mobile accessory is designed to take your mobile photography to the next level by providing stability and versatility. Gone are the days of blurry and shaky photos, as the iStabilizer Monopod offers a reliable and convenient solution. Whether you’re traveling, attending events, or simply exploring your creativity, this monopod will be your trusty companion. In this article, we’ll explore how to effectively use the iStabilizer Monopod to take stunning pictures that will impress your friends and followers. From finding the perfect angle to utilizing the monopod’s features, we’ll cover all the tips and tricks you need to know. Get ready to elevate your mobile photography game!
Inside This Article
- Istabilizer Monopod: How To Take Pictures
- Finding the Right Positioning
- Adjusting the Monopod Height
- Using the Remote Shutter
- Ensuring Sharp and Stable Shots
- Conclusion
- FAQs
Istabilizer Monopod: How To Take Pictures
Are you eager to capture stunning photos with the help of an istabilizer monopod? Look no further – we’ve got you covered! In this guide, we will walk you through the process of using an istabilizer monopod to take incredible pictures. Whether you’re an amateur photographer or a seasoned pro, these tips will help you make the most out of your monopod and capture the perfect shots. So, let’s get started!
Finding the Right Positioning
The first step to taking great pictures with an istabilizer monopod is finding the right positioning. Take a moment to assess the surroundings and decide on the best angle for your shot. Consider the subject you want to capture, the lighting conditions, and any potential obstructions in the frame. By carefully selecting your positioning, you can ensure that all elements align harmoniously in the final image.
Adjusting the Monopod Height
Next, let’s talk about adjusting the height of your istabilizer monopod. This feature is incredibly useful for achieving different perspectives in your photos. If you want to capture a wide-angle shot, extend the monopod to its maximum height. On the other hand, if you’re aiming for a low-angle shot, you can collapse the monopod and shoot from a lower position. Experimenting with various heights will allow you to add depth and dimension to your images.
Using the Remote Shutter
One of the great advantages of an istabilizer monopod is the remote shutter function. This allows you to trigger the camera shutter wirelessly, eliminating the need for self-timers or reaching for the camera button. Before you start taking pictures, make sure to pair the remote shutter with your device, following the manufacturer’s instructions. Once connected, you can easily capture photos with a simple click of the remote, ensuring you don’t miss any precious moments.
Ensuring Sharp and Stable Shots
To obtain sharp and stable shots, it’s essential to pay attention to a few key factors. Firstly, make sure to hold the istabilizer monopod firmly and keep it steady while taking the picture. Avoid any unnecessary movements or shaky hands. Secondly, utilize the monopod’s built-in self-stabilization feature, which helps reduce camera shake. Finally, you can also explore using image stabilization settings on your camera or smartphone for additional support. These measures combined will result in clear, crisp, and professional-looking photographs.
Now that you’re familiar with the basics of using an istabilizer monopod, you can go out and start capturing awe-inspiring images. Remember, practice makes perfect, so don’t hesitate to experiment with different angles, compositions, and settings. With dedication and creativity, your monopod will become an invaluable tool in your photography arsenal. So grab your istabilizer monopod and get ready to capture the world through a whole new lens!
Finding the Right Positioning
When it comes to taking pictures with an iStabilizer Monopod, finding the right positioning is key to capturing stunning shots. Whether you’re taking a selfie or shooting a group photo, the position of the monopod plays a vital role in framing the subject and achieving the desired composition.
Start by assessing the surroundings and identifying the perfect spot to set up your monopod. Look for a location with good lighting and a clean background that complements your subject. Avoid cluttered or distracting backgrounds that can take away from the main focus of your photo.
Once you’ve chosen the location, grip the monopod firmly and extend it to the desired height. Remember to maintain a stable grip on the handle to prevent any accidental drops. It’s also important to keep your elbows close to your body for added stability.
Position the monopod in front of you at a comfortable distance, ensuring that the camera is facing towards you or the subject you want to capture. This will allow you to have better control over the framing and composition of your photographs.
Experiment with different angles and perspectives by adjusting the angle at which you hold the monopod. Tilting it slightly upwards or downwards can create dynamic and interesting shots. Don’t be afraid to get creative and try out different positions to capture unique and captivating images.
Remember to consider the focal length of your camera lens when positioning the monopod. In general, the longer the focal length, the further away you should position the monopod to avoid distortions or unwanted effects on the subject. Conversely, if you’re using a wide-angle lens, you can place the monopod closer to the subject for a more immersive perspective.
Overall, finding the right positioning when using an iStabilizer Monopod is crucial for capturing the perfect shot. By considering factors such as lighting, background, angles, and lens focal length, you can enhance your photography skills and create stunning images that will leave a lasting impression.
Adjusting the Monopod Height
When using an iStabilizer Monopod, it is important to find the right height to ensure stability and get the perfect shot. Here are a few steps to help you adjust the monopod height:
1. Extend the Monopod: Begin by extending the monopod to its full length. This will give you a starting point to find the ideal height for your photos.
2. Test the Height: Hold the monopod with your phone attached and take a few test shots at different heights. Pay attention to the composition and stability of the photos.
3. Consider the Subject: The height of the monopod will depend on the subject you are photographing. If you are capturing landscapes, a higher height might be more suitable. For portraits or close-ups, a lower height may be preferable.
4. Adjust Gradually: Make small adjustments to the height of the monopod until you find the sweet spot. It may take a few tries to find the perfect height that works for you and your desired shot.
5. Lock the Height: Once you have found the ideal height, ensure that the monopod is securely locked in place. This will prevent any accidental height adjustments while you are capturing your photos.
Remember, finding the right monopod height is a matter of trial and error. Experiment with different heights to see how it affects your compositions and the stability of your shots.
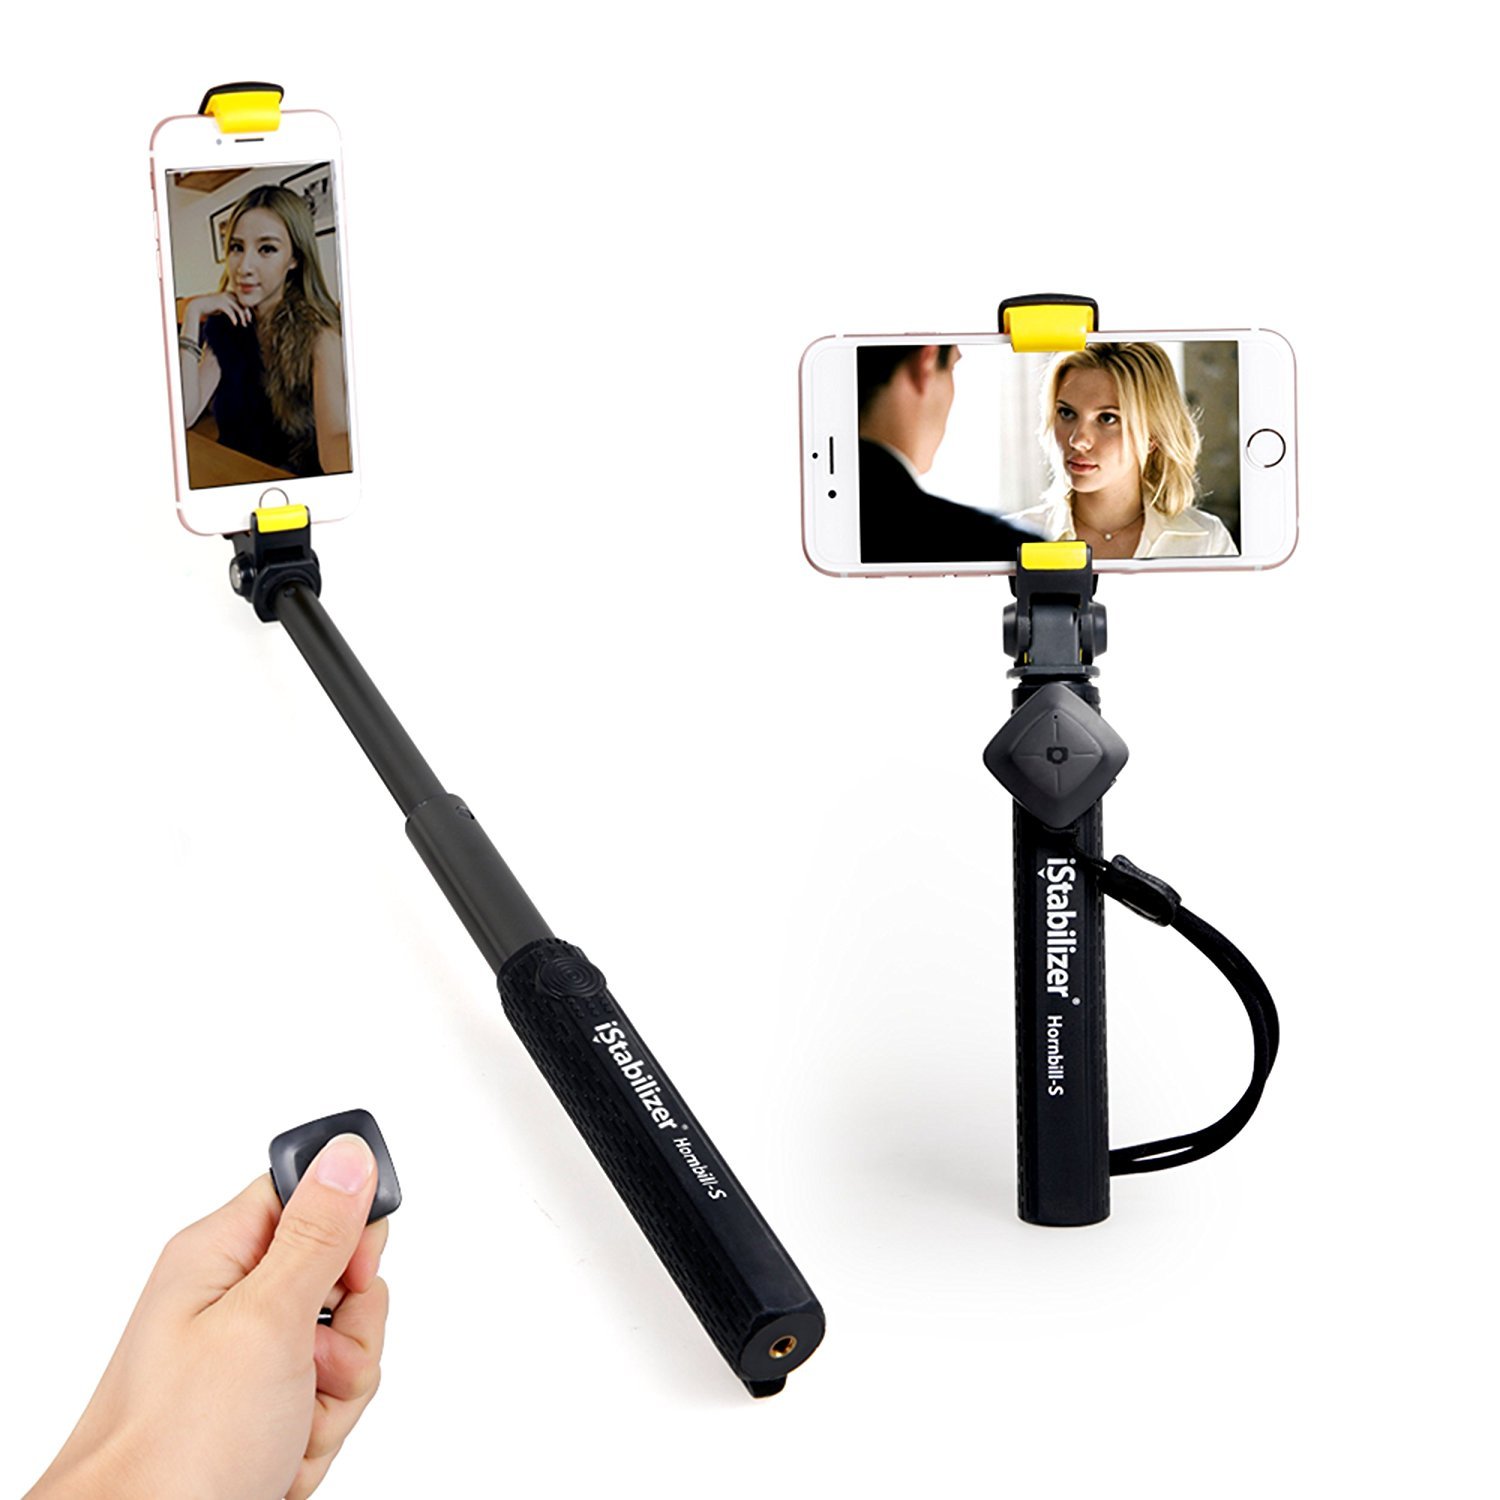
Using the Remote Shutter
One of the key features of the iStabilizer Monopod is its remote shutter function. This allows you to take pictures without having to physically touch your smartphone. Using the remote shutter can greatly improve the stability of your shots and reduce the risk of blurry images.
To use the remote shutter, you first need to pair it with your smartphone. This is a simple process that usually involves turning on the Bluetooth function on your phone and pressing a pairing button on the remote. Once the devices are paired, you can start using the remote shutter to capture stunning photos.
When using the remote shutter, it’s important to position yourself within the range of the Bluetooth signal. This typically ranges from 30 to 50 feet, depending on the specific model of the iStabilizer Monopod. This gives you the freedom to step back and capture wider shots or fit more people into the frame.
Once you have found the perfect positioning, you can press the button on the remote to take a photo. The remote shutter is designed to be quick and responsive, ensuring that you can capture the moment with precision. This is especially useful for group photos or self-portraits.
When using the remote shutter, it’s important to keep a firm grip on the iStabilizer Monopod to prevent any shaking or movement. This will help ensure that your photos are sharp and free from blurriness. Additionally, using the remote shutter allows you to minimize the risk of camera shake caused by pressing the shutter button on your phone.
Ensuring Sharp and Stable Shots
When it comes to capturing sharp and stable shots with an iStabilizer Monopod, there are a few key factors to consider. By following these tips, you can elevate your photography game and produce stunning images:
1. Grip the Monopod Properly: To ensure stability, it’s important to hold the monopod correctly. Place your hand firmly around the grip, keeping it steady and secure. This will minimize any unwanted camera movement and help maintain sharpness in your photos.
2. Control Your Breathing: It may sound surprising, but even your breathing can affect the stability of your shots. Take a deep breath, exhale slowly, and then click the shutter release button. By controlling your breath, you can reduce any movement that could potentially blur your photos.
3. Utilize Image Stabilization: If your mobile device has built-in image stabilization, make sure to activate it. Image stabilization technology helps compensate for any hand movements, resulting in sharper and clearer images. Check your device’s settings to enable this feature.
4. Adjust the Shutter Speed: In low light conditions or when shooting fast-moving subjects, adjusting the shutter speed can make a big difference. Slower shutter speeds may result in blur due to camera shake, so try increasing the shutter speed to freeze the action and ensure sharper shots.
5. Avoid Zooming In: Digital zooming can decrease the quality and sharpness of your shots. Instead of relying on zooming, consider moving closer to your subject or cropping the image later. This will help maintain the integrity of the photo and produce sharper results.
6. Use proper Lighting: Good lighting plays a crucial role in capturing sharp photos. Whenever possible, try to shoot in well-lit environments. Natural light is often the best option, but if that’s not available, make use of artificial lighting sources, such as lamps or flashes, to ensure your subject is well-illuminated.
7. Keep Your Monopod Steady: To minimize any micro-movements that can impact sharpness, it’s essential to keep your monopod as stable as possible. Avoid sudden movements and use slow, deliberate motions when panning or tilting. This will help maintain the stability of your shots and result in sharper images.
By applying these tips, you can ensure that your iStabilizer Monopod helps you capture sharp and stable shots every time. Experiment with these techniques and practice regularly to master the art of mobile photography.
Conclusion
In conclusion, the iStabilizer Monopod is a fantastic tool for taking pictures with your mobile phone. It provides stability and control, allowing you to capture clear and sharp images. Whether you are a professional photographer looking to enhance your mobile photography skills or simply a photography enthusiast wanting to improve your mobile photos, the iStabilizer Monopod is a must-have accessory.
With its lightweight and portable design, this monopod is a convenient solution for capturing stunning shots on the go. Its adjustable height and compatibility with various smartphones make it versatile and suitable for a wide range of users. So, whether you’re traveling, attending events, or exploring the outdoors, the iStabilizer Monopod will be your perfect companion for capturing those memorable moments.
Investing in the iStabilizer Monopod will not only improve your photography skills but also enhance your overall mobile phone experience. So, don’t miss out on the opportunity to elevate your mobile photography game and start capturing stunning photos with ease and precision!
FAQs
1. What is an iStabilizer Monopod?
The iStabilizer Monopod is a versatile and portable photography accessory designed to provide stability and flexibility while taking pictures or recording videos. It consists of a extendable pole, adjustable mounting bracket, and a secure grip, allowing you to capture stunning shots from various angles.
2. How does the iStabilizer Monopod work?
The iStabilizer Monopod works by securely mounting your smartphone or camera onto the adjustable bracket at the top of the pole. The extendable pole allows you to extend your reach, enabling you to capture wider shots or take selfies with ease. The secure grip provides stability and minimizes camera shake, resulting in sharper and clearer images.
3. Is the iStabilizer Monopod compatible with all smartphones?
Yes, the iStabilizer Monopod is designed to be universally compatible with almost all smartphones, including iPhone, Samsung, Google Pixel, and more. The adjustable mounting bracket can accommodate various phone sizes and securely hold them in place during use.
4. Can I use the iStabilizer Monopod for video recording?
Absolutely! The iStabilizer Monopod is not only great for capturing photos but also for recording videos. Its stability and extendable pole make it ideal for vlogging, action shots, or even filming events. You can easily adjust the angle and height to capture the perfect shot.
5. Is the iStabilizer Monopod easy to carry around?
Yes, the iStabilizer Monopod is designed to be lightweight and portable, making it convenient to carry around. When not in use, the extendable pole can be collapsed to a compact size, easily fitting into a backpack or even your pocket. This makes it an excellent companion for travel, outdoor adventures, or everyday use.