
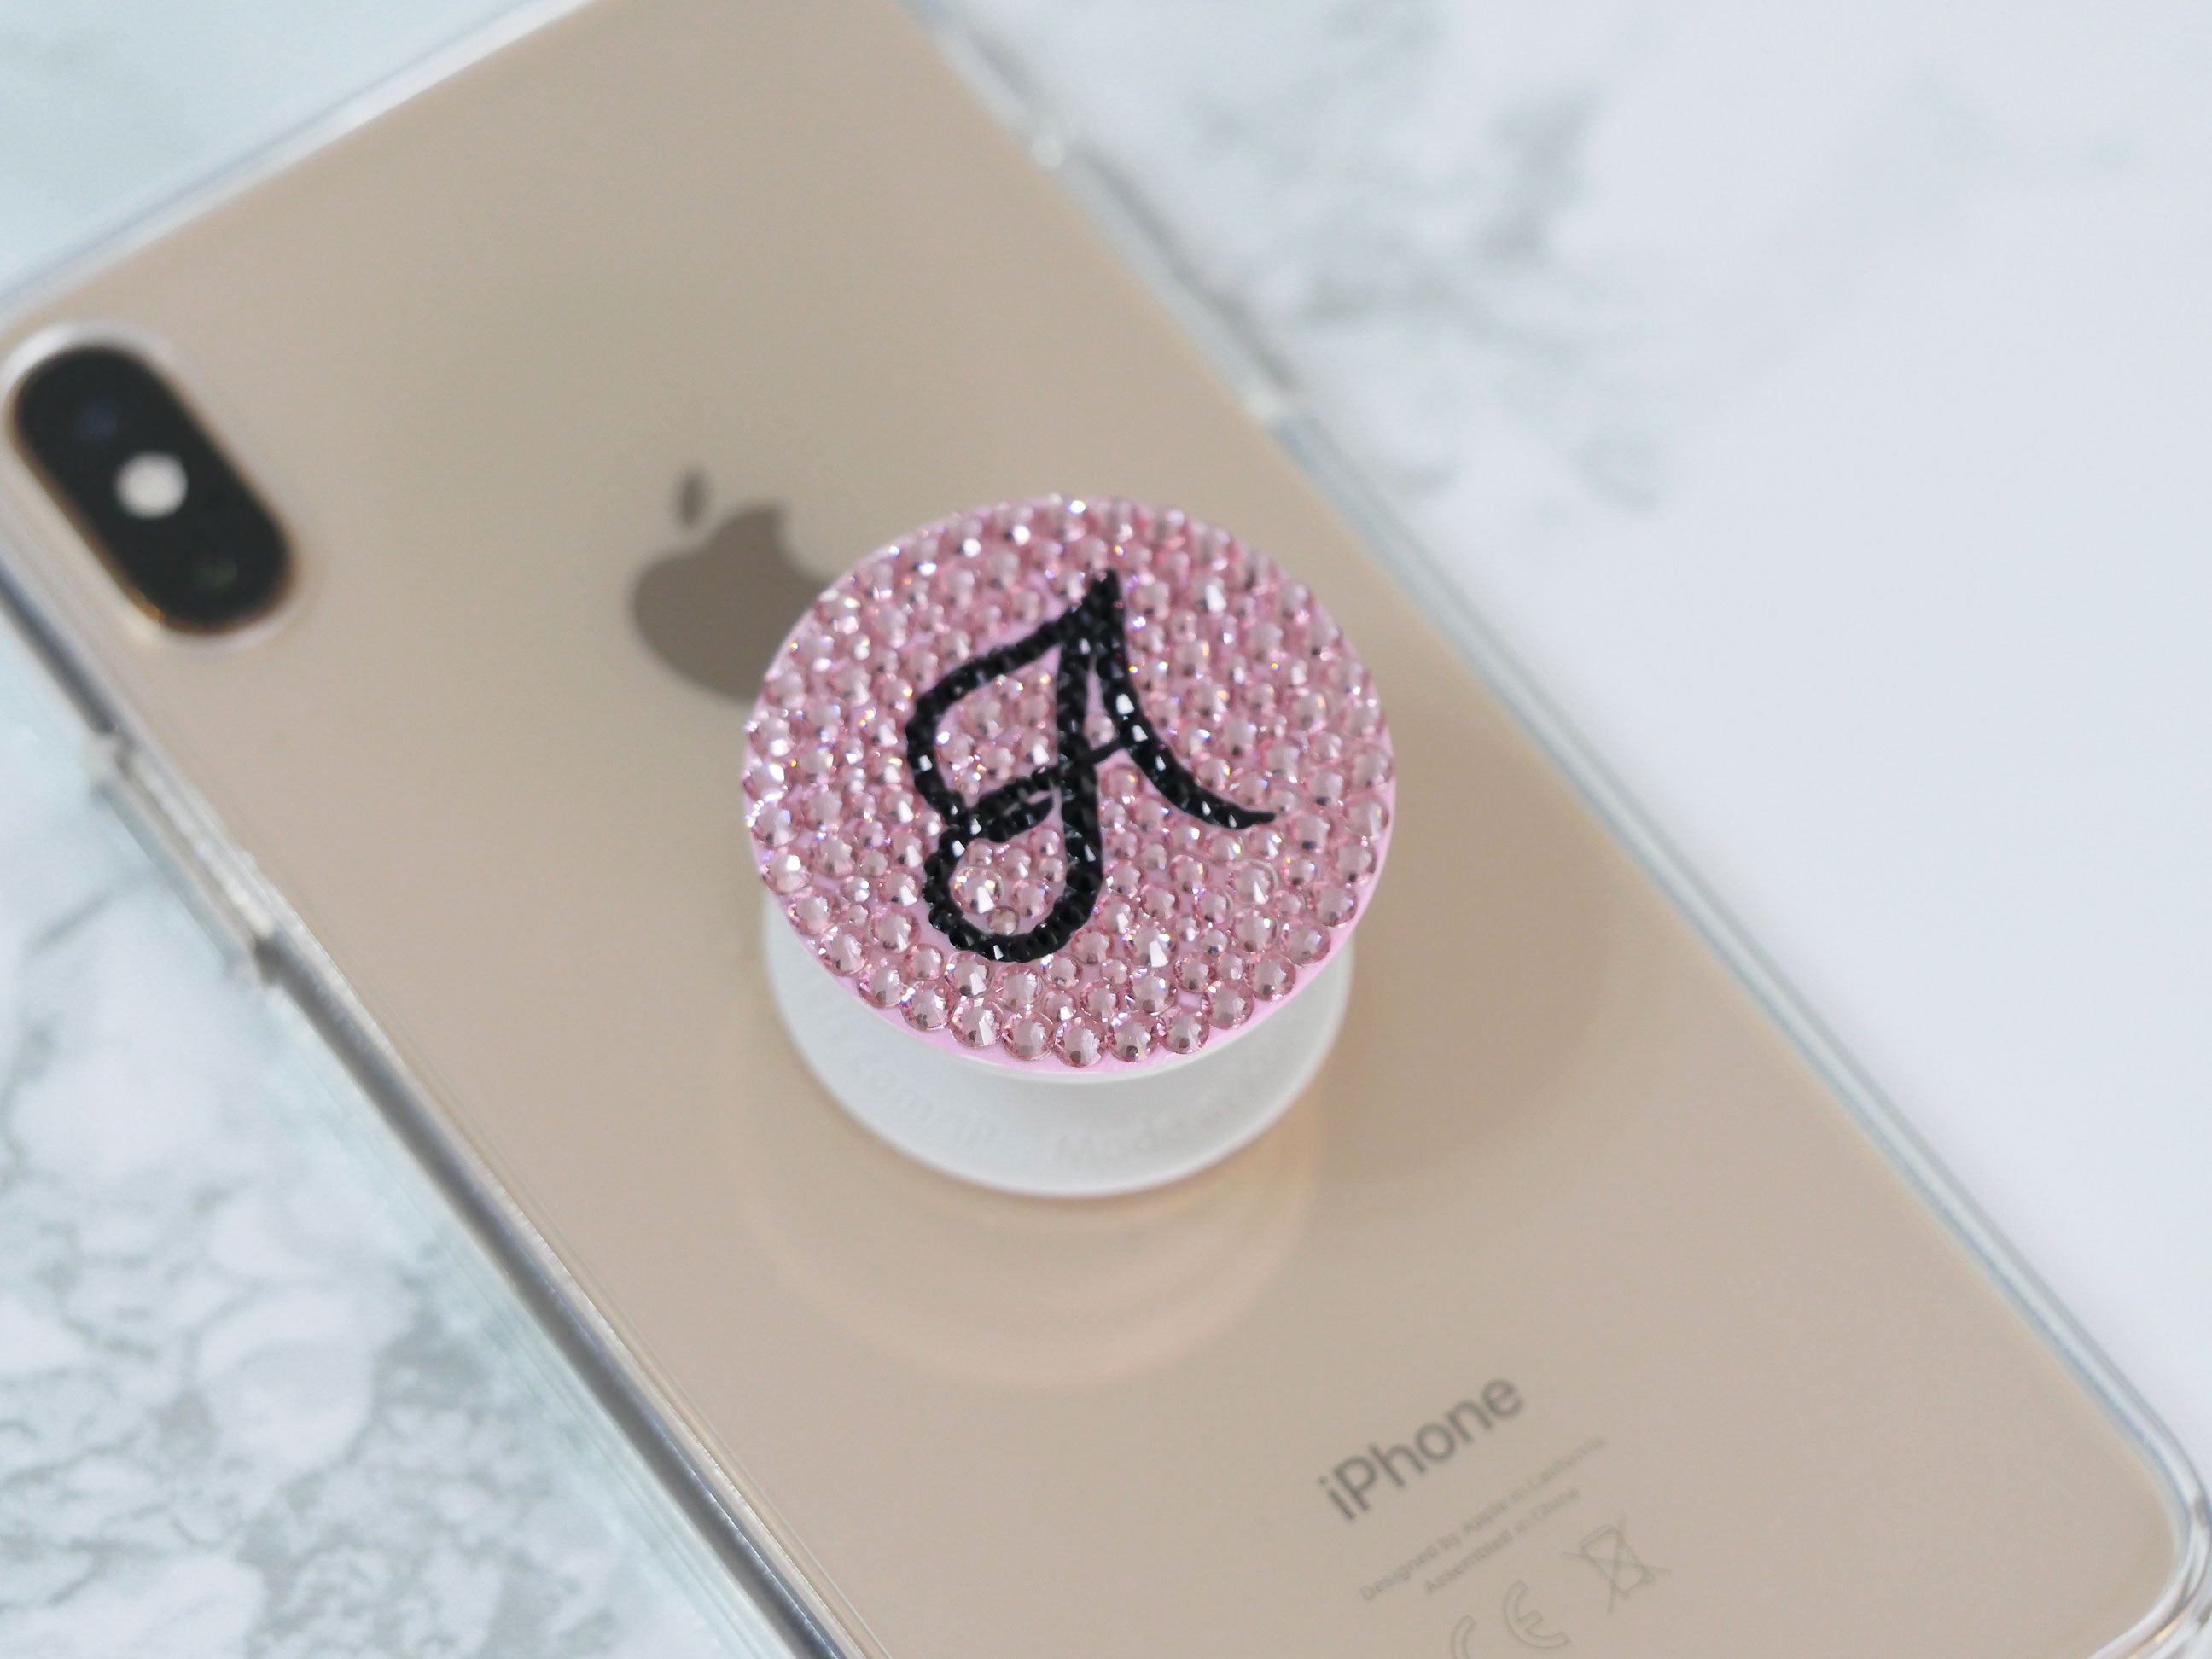
PopSockets are a popular mobile phone accessory that has taken the world by storm. These small, expandable grips attach to the back of your phone, providing a secure grip, convenience, and a stylish touch. But have you ever wondered how to take your PopSocket to the next level of elegance? Look no further than Swarovski PopSockets.
Swarovski has long been known for their stunning crystal creations, and now they have partnered with PopSockets to bring their signature sparkle to your phone. Swarovski PopSockets feature genuine Swarovski crystals, adding a touch of glamour and sophistication to your device. But how exactly do you go about applying these dazzling accessories? In this article, we will guide you through the process of Swarovski PopSocket application, so you can bling out your phone in no time.
Inside This Article
- What is a Popsocket?
- Materials Needed for Swarovski Popsocket
- Step-by-Step Guide to Swarovski Popsocket
- Tips and Tricks for a Stunning Swarovski Popsocket
- What is a Popsocket?
- Materials Needed for Swarovski Popsocket
- Step-by-Step Guide to Swarovski Popsocket
- Tips and Tricks for a Stunning Swarovski Popsocket
- Care and Maintenance of Swarovski Popsocket
- Conclusion
- FAQs
What is a Popsocket?
If you’ve ever struggled to hold your phone securely or prop it up for hands-free use, then you’re in for a treat with the invention of the Popsocket. A Popsocket is a small, collapsible device that attaches to the back of your smartphone or tablet, providing a convenient grip and multiple functionalities.
The Popsocket is designed with a round disc-shaped base that easily adheres to the back of your device, while the expandable accordion-like stem sits flush against the device when not in use. When you need it, simply pop it out to create a secure grip for your fingers. This ingenious gadget offers a comfortable and secure way to hold your phone, reducing the chances of accidental drops and making it easier to text, take selfies, or watch videos without straining your hand.
Not only does a Popsocket provide added comfort and security, but it also doubles as a versatile accessory with various practical uses. You can use it to prop up your phone at the perfect viewing angle for hands-free scrolling, video calls, or watching your favorite shows. Its collapsible design allows for easy storage and flexibility when not in use.
The functionality and convenience of a standard Popsocket have given rise to a wide range of designs and customization options. You can find Popsockets in different colors, patterns, and even branded designs featuring your favorite sports teams, celebrities, or pop culture icons. They have become a fun and personalized way to express your style and interests while adding a practical accessory to your smartphone.
In addition to the standard Popsocket, there are also specialized versions available, such as Popsockets with integrated car mounts, Popsockets with mirrors for quick touch-ups, and even Popsockets with built-in wallets to hold your cards or cash.
In summary, a Popsocket is a must-have accessory for anyone looking to enhance their smartphone experience. It combines comfort, convenience, and customization into a compact and versatile device. Whether you’re seeking a secure grip, a stand for hands-free viewing, or a way to express your personal style, the Popsocket has got you covered.
Materials Needed for Swarovski Popsocket
When creating a stunning Swarovski Popsocket, you will need the following materials:
- Swarovski crystals
- Popsocket base
- E6000 adhesive
- Toothpick or applicator
- Tweezers
Swarovski crystals are renowned for their superior quality and dazzling sparkle. They come in various sizes and colors, allowing you to unleash your creativity and design a unique Popsocket. The Popsocket base serves as the foundation for your crystal arrangement. It provides a sturdy surface to securely affix the crystals.
E6000 adhesive is a strong and durable glue that is perfect for attaching the crystals to the Popsocket base. Its clear formula ensures no visible residue after drying, maintaining the beauty of the crystals. A toothpick or an applicator can be used to apply the adhesive with precision, ensuring accurate placement of the crystals. Tweezers are essential for handling and positioning the delicate Swarovski crystals without smudging or damaging them.
With these materials at your disposal, you’re ready to embark on your journey to create a dazzling Swarovski Popsocket that will grab attention and add a touch of glamour to your mobile device.
Step-by-Step Guide to Swarovski Popsocket
Creating a stunning Swarovski Popsocket is easier than you think. Follow these simple steps to transform your plain Popsocket into a sparkling accessory:
- Prepare the popsocket base: Start by cleaning the surface of the Popsocket base with a gentle cleaning solution to remove any dirt or debris. This will ensure a smooth and secure adhesion for the Swarovski crystals.
- Apply adhesive on the base: Squeeze a small amount of E6000 adhesive onto a clean surface. Using a toothpick or an applicator, dab a small amount of adhesive onto the back of each Swarovski crystal.
- Place Swarovski crystals on the adhesive: Using tweezers, carefully pick up each Swarovski crystal and place it onto the adhesive. You can create your own design or pattern, or simply place the crystals randomly for a dazzling effect.
- Fill the entire base with crystals: Continue placing the Swarovski crystals onto the adhesive, covering the entire surface of the Popsocket base. Make sure to leave no gaps between the crystals for a seamless and glamorous look.
- Let it dry and secure any loose crystals: Allow the adhesive to dry completely, following the instructions provided by the manufacturer. Once dry, inspect the Popsocket and ensure that all crystals are securely attached. If any crystals feel loose, apply a small dot of adhesive underneath to secure them in place.
By following these steps, you can easily create your very own Swarovski Popsocket that perfectly complements your personal style and adds a touch of luxury to your mobile device.
Tips and Tricks for a Stunning Swarovski Popsocket
Creating a Swarovski Popsocket is a fun and rewarding DIY project. To help you achieve a stunning result, here are some tips and tricks to keep in mind:
- Select your desired crystal colors and patterns beforehand: Before you start applying the crystals, take some time to plan out the design. Decide on the color scheme and arrangement of the Swarovski crystals to ensure a cohesive and visually appealing look.
- Use tweezers for precision placement of the crystals: Handling small crystals can be challenging, so using a pair of tweezers can make the process much easier. Tweezers allow you to precisely place each crystal on the adhesive without accidentally smudging the glue or misplacing the crystals.
- Apply adhesive in small sections to prevent it from drying out: E6000 adhesive is a strong and durable glue that works well for attaching Swarovski crystals. However, it can dry relatively quickly, so it’s important to work in small sections. Apply a small amount of adhesive to the base and then start placing crystals in that area. This will prevent the glue from drying out before you have a chance to apply the crystals.
- Be patient and take breaks if needed for complex designs: Creating intricate designs with Swarovski crystals can be time-consuming. It’s important to be patient and take breaks if needed. Rushing the process can lead to mistakes and uneven application of the crystals. So, take your time, enjoy the creative process, and step back to admire your progress along the way.
By following these tips and tricks, you can elevate your Swarovski Popsocket to a whole new level. Remember, the key to a stunning result lies in careful planning, precision placement, and patience.
What is a Popsocket?
A Popsocket is a small, collapsible accessory that attaches to the back of a smartphone, providing a secure grip to prevent accidental drops and making it easier to hold the device. It consists of a base that adheres to the phone and a flexible stem that can be extended or collapsed, depending on the user’s preference.
Materials Needed for Swarovski Popsocket
- Swarovski crystals
- Popsocket base
- E6000 adhesive
- Toothpick or applicator
- Tweezers
Step-by-Step Guide to Swarovski Popsocket
- Prepare the popsocket base by cleaning it with a gentle cleanser and allowing it to dry completely.
- Apply small dots of E6000 adhesive on the base using a toothpick or applicator.
- Using tweezers, carefully place Swarovski crystals on the adhesive, creating your desired design or pattern.
- Continue filling the entire base with crystals until you achieve the desired look.
- Allow the adhesive to dry according to the manufacturer’s instructions and gently press down on any loose crystals to secure them in place.
Tips and Tricks for a Stunning Swarovski Popsocket
- Select your desired crystal colors and patterns beforehand to ensure a cohesive and visually appealing design.
- Use tweezers for precision placement of the crystals, allowing you to easily adjust their position without smudging the adhesive.
- Apply the adhesive in small sections, working on one part of the base at a time, to prevent it from drying out before you can attach the crystals.
- Be patient when creating complex designs and take breaks if needed. This will help you maintain focus and ensure the best results.
Care and Maintenance of Swarovski Popsocket
- Avoid excessive exposure to water or moisture, as this can damage the adhesive and may cause the crystals to lose their sparkle.
- Clean the popsocket with a soft cloth to remove fingerprints or smudges while maintaining the shine of the crystals.
- Avoid using harsh chemicals or abrasive materials when cleaning, as they can scratch or dull the surface of the crystals.
By following these steps and taking proper care of your Swarovski Popsocket, you can enjoy a dazzling accessory that adds style and functionality to your smartphone.
Conclusion
In conclusion, Swarovski Popsockets are a trendy and fashionable accessory that adds a touch of bling to your mobile device. They not only enhance the functionality of your phone but also serve as a stylish statement piece. With their dazzling crystals and sleek designs, Swarovski Popsockets are a must-have for anyone looking to elevate their phone’s aesthetic.
By following the step-by-step guide on how to apply a Swarovski Popsocket, you can confidently personalize your device in a way that reflects your unique style. Whether you prefer a simple and elegant look or want to make a bold fashion statement, Swarovski Popsockets offer a wide range of options to choose from.
Remember to clean your phone’s surface thoroughly before applying the Popsocket to ensure a secure hold. Additionally, be mindful of the weight and size of the Popsocket to avoid any inconvenience or damage to your device.
Investing in a Swarovski Popsocket not only protects your phone from accidental drops but also adds a touch of glamour to your everyday life. So go ahead, give your phone a dazzling makeover with a Swarovski Popsocket and let it shine like no other!
FAQs
Q: What is a Swarovski Popsocket?
A: A Swarovski Popsocket is a mobile accessory that combines the functionality of a Popsocket grip with the luxury and sparkle of Swarovski crystals. It adds a touch of elegance to your phone while providing a secure grip and stand for your device.
Q: How do I attach a Swarovski Popsocket to my phone?
A: Attaching a Swarovski Popsocket is easy. Simply peel off the adhesive backing and firmly press it onto the desired location on the back of your phone or phone case. Make sure to carefully position it for optimal grip and style.
Q: Can I remove a Swarovski Popsocket from my phone?
A: Yes, a Swarovski Popsocket is designed to be removable. To remove it, gently lift the edges of the Popsocket and slowly peel it away from your phone or phone case. If there is any residue left behind, you can use adhesive remover or rubbing alcohol to clean the surface.
Q: Will a Swarovski Popsocket damage my phone?
A: Swarovski Popsockets are designed to be safe for use with your phone. The adhesive used is strong enough to securely hold the Popsocket in place, but it should not damage the surface of your phone when properly attached and removed.
Q: Are Swarovski Popsockets compatible with wireless charging?
A: It depends on the thickness and position of the Swarovski Popsocket. If the Popsocket is thin and does not interfere with the wireless charging coil in your phone, it may still be compatible with wireless charging. However, it is recommended to remove the Popsocket before wirelessly charging your phone to ensure optimal charging efficiency.