
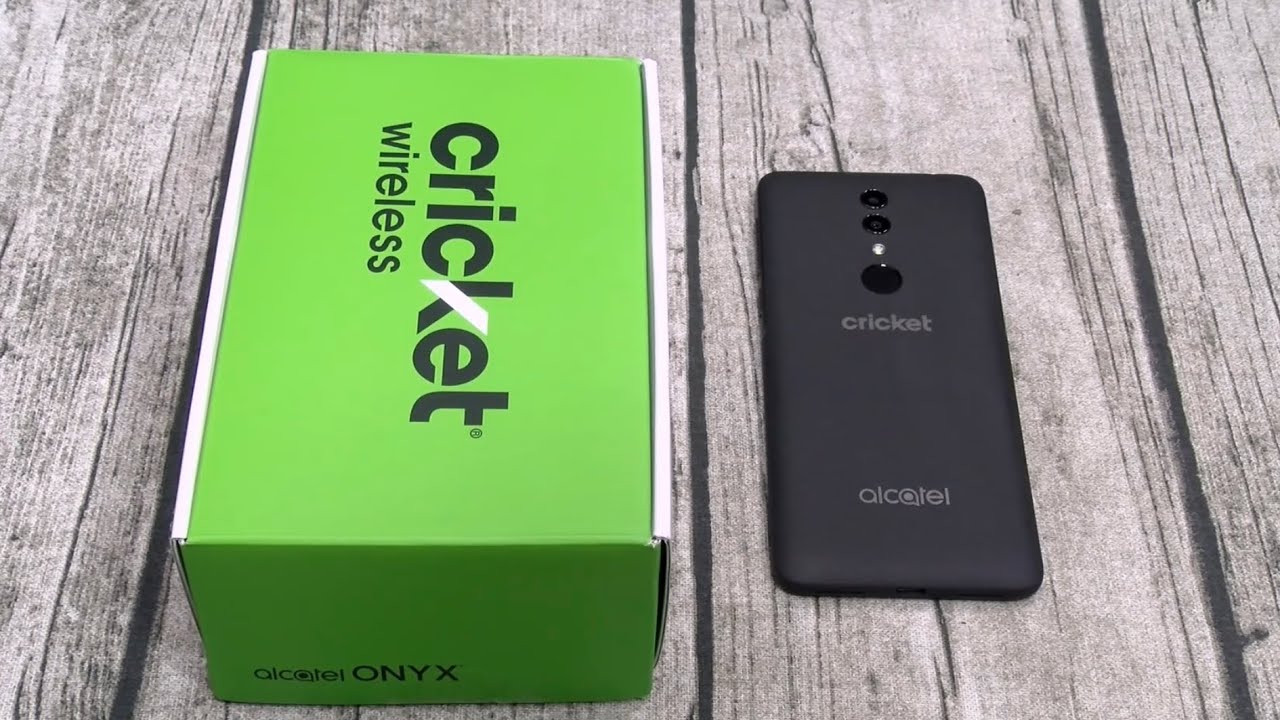
Are you looking to activate your Cricket phone for free? Well, you’ve come to the right place! In this comprehensive guide, we will walk you through the steps to activate your Cricket phone without incurring any additional costs. Cricket Wireless is a popular mobile carrier in the United States, offering affordable plans and reliable coverage. Activating your Cricket phone will enable you to make calls, send messages, and browse the internet, ensuring you stay connected with your loved ones and the world around you. Whether you’re a new Cricket customer or an existing one, activating your phone is a simple and straightforward process. So, let’s get started and unlock the full potential of your Cricket phone without spending a dime!
Inside This Article
- Overview
- Step 1: Check Phone Compatibility
- Step 2: Choose a Cricket Wireless Plan
- Step 3: Purchase a Cricket SIM Card
- Step 4: Insert SIM Card into Phone
- Step 5: Activate Cricket Phone Online
- Step 6: Follow Activation Instructions
- Step 7: Set Up Cricket Account
- Step 8: Test Phone and Services
- Step 9: Enjoy your Activated Cricket Phone for Free
- Conclusion
- FAQs
Overview
Are you looking to activate your Cricket phone for free? Cricket Wireless offers a simple and straightforward process to activate your phone on their network. By following a few steps, you can have your Cricket phone up and running in no time. Whether you are bringing your own device or purchasing a new one, this guide will walk you through the activation process.
Cricket Wireless, a subsidiary of AT&T, operates as a mobile virtual network operator (MVNO). They provide affordable prepaid phone plans with nationwide coverage. By activating your Cricket phone, you can enjoy their reliable network and take advantage of their various plans and features.
Activating your Cricket phone for free is a convenient and economical option. It enables you to connect with friends, family, and colleagues, while also accessing the internet, social media, and other apps on your mobile device. So let’s dive into the step-by-step process of activating your Cricket phone and enjoying all its features.
Step 1: Check Phone Compatibility
Before you can activate your Cricket phone for free, it is important to check if your phone is compatible with Cricket’s network. Cricket Wireless operates on the GSM network, which means that only smartphones that are GSM-compatible can be activated on their network.
To check if your phone is compatible, you can visit the Cricket Wireless website and use their “Bring Your Own Device” tool. Simply enter the make and model of your phone, and the tool will verify if your phone can be activated on Cricket’s network.
If your phone is not compatible, don’t worry! Cricket offers a wide range of affordable smartphones for purchase that are already compatible with their network. You can browse their selection online or visit a Cricket store to find the perfect phone for you.
It is worth noting that unlocked phones are generally more likely to be compatible with Cricket’s network. Unlocked phones are not tied to a specific carrier and can be used with any GSM network, including Cricket Wireless.
So, before proceeding to activate your Cricket phone for free, make sure to double-check its compatibility with Cricket’s network. This will ensure a smooth and hassle-free activation process, allowing you to enjoy all the features and services Cricket has to offer.
Step 2: Choose a Cricket Wireless Plan
Once you’ve checked the compatibility of your phone with Cricket Wireless, the next step is to choose a suitable plan that fits your needs. Cricket offers a variety of plans, ranging from basic options for light users to unlimited data plans for heavy data consumers.
To select the right plan, evaluate your usage patterns and consider factors such as how much data, talk, and text you require on a monthly basis. Cricket provides detailed information about each plan on their website, making it easy to compare the features and prices.
If you’re unsure about which plan to choose, Cricket Wireless also offers a helpful plan selector tool that can guide you based on your usage preferences and budget. This tool can help you find the plan that best suits your needs, ensuring you get the right balance of affordability and the services you require.
Keep in mind that Cricket Wireless plans come with various benefits, such as mobile hotspot access, international calling, and roaming capabilities. Consider whether these additional features are important to you and factor them into your decision-making process.
Once you’ve decided on the plan that meets your requirements, click on the respective plan on the Cricket website to proceed with the activation process. This will take you to the next step of purchasing a Cricket SIM card.
Step 3: Purchase a Cricket SIM Card
Once you have checked the compatibility of your phone and selected the Cricket Wireless plan that suits your needs, it’s time to purchase a Cricket SIM card. The SIM card is an essential component that allows your phone to connect to the Cricket Wireless network and access its services.
You can purchase a Cricket SIM card in various ways. One option is to visit a Cricket Wireless store near you. They will have SIM cards available for purchase, and the staff can assist you in selecting the right one for your specific phone model. Alternatively, you can also purchase a Cricket SIM card online through the official Cricket Wireless website or other authorized retailers.
When purchasing a Cricket SIM card, it’s important to ensure that it is compatible with your phone’s make and model. Most modern smartphones use Nano-SIM cards, while older models may require Micro-SIM or even standard SIM cards. Be sure to check the specifications of your phone and choose the appropriate SIM card size.
Cricket Wireless offers SIM cards at different price points. However, if you are activating your phone for free, there may be promotions or deals available where you can get the SIM card at a discounted price or even for free. Keep an eye out for any ongoing offers that can help you save money on your purchase.
Once you have purchased a Cricket SIM card, you will receive it either in the store or through mail delivery if you bought it online. Make sure to keep the SIM card safe and follow the instructions provided. Do not insert the SIM card into your phone until you are ready to activate it in the following steps.
Step 4: Insert SIM Card into Phone
Now that you have your Cricket SIM card in hand, it’s time to insert it into your phone. Follow these simple steps:
- Power off your phone: Before inserting the SIM card, make sure to power off your phone. This will prevent any potential damage to the SIM card or your device.
- Locate the SIM card slot: Look for the SIM card slot on your phone. Usually, it is located either on the side of the device or under the back cover.
- Remove the back cover (if applicable): If your phone has a removable back cover, carefully pry it off to reveal the SIM card slot.
- Insert the SIM card: Take your Cricket SIM card and align it with the SIM card slot. Make sure the gold contacts face down and line up with the corresponding pins in the slot. Gently push the SIM card into the slot until it clicks into place.
- Secure the back cover (if applicable): If you removed the back cover, carefully snap it back into place, ensuring it is securely fastened.
- Power on your phone: Once the SIM card is inserted, power on your phone. It may take a moment for your device to recognize the new SIM card and establish a connection.
Now that your Cricket SIM card is successfully inserted, your phone is ready for activation and setup. Proceed to the next step to complete the activation process and access Cricket’s wireless services.
Step 5: Activate Cricket Phone Online
Activating your Cricket Phone online is a straightforward process that can be completed in just a few simple steps. Follow the instructions below to activate your Cricket Phone and start enjoying the seamless wireless service.
1. Begin by visiting the Cricket Wireless website on your computer or mobile device. On the homepage, you will find the option to “Activate” or “Activate/Reactivate” your phone. Click on the appropriate link to proceed.
2. Next, you will be asked to enter your Cricket Wireless phone number. Make sure to enter the correct number associated with the device that you are activating. Double-check for any typos to ensure accuracy.
3. Once you have entered your phone number, you will be prompted to provide your account information. This may include details such as your name, address, and billing information. Fill in all the required fields accurately.
4. After providing your account information, you will be given the option to choose a new Cricket Wireless plan or activate a compatible plan that you have already purchased. Select the appropriate plan based on your preferences and budget.
5. Once you have chosen a plan, you will be prompted to select any additional features or services that you may want to include with your Cricket Phone. This may include features like international calling or device insurance. Make your selections and proceed to the next step.
6. The next step is to review your order and make any necessary changes or corrections. Verify that the plan, features, and services selected are accurate and aligned with your preferences. This is a crucial step to ensure that you activate the correct services on your phone.
7. After reviewing and confirming your order, you will be presented with the option to transfer your existing phone number to Cricket Wireless or choose a new phone number. Follow the on-screen instructions to complete this step.
8. Once you have completed the previous steps, you will be asked to review and accept the Cricket Wireless terms and conditions. Make sure to read through them carefully and click on the checkbox to indicate your agreement.
9. Finally, click on the “Activate” or “Submit” button to initiate the activation process. Wait for a few moments as the system processes your request and activates your Cricket Phone. You may need to reboot your phone to complete the activation.
Congratulations! Your Cricket Phone is now activated and ready to use. Make sure to double-check that your phone has service and that all the features and services you have chosen are functioning properly. If you encounter any issues, reach out to Cricket Wireless customer support for assistance.
Step 6: Follow Activation Instructions
Once you have inserted the Cricket SIM card into your phone, it’s time to follow the activation instructions. Here’s a step-by-step guide to help you through the process:
1. Power on your phone – Make sure your phone is powered on and connected to a stable Wi-Fi or cellular network.
2. Open the Cricket app or website – Launch the Cricket app on your phone or visit the Cricket website using a web browser on your computer.
3. Sign in to your account – If you already have a Cricket account, sign in using your username and password. If you don’t have an account, you can create one by providing the necessary details.
4. Select “Activate” – Look for the activation option in the app or on the website and click on it.
5. Enter your SIM card details – You may be asked to enter the SIM card number, ICCID, or other unique identifiers associated with your Cricket SIM card. Make sure to input these details accurately.
6. Choose a phone number – Depending on your preference, you can either choose a new phone number or port over an existing number from another carrier. Follow the instructions provided to make your selection.
7. Confirm the activation – Review all the information you’ve entered and confirm that everything is correct. Double-check your SIM card details and phone number selection before proceeding.
8. Wait for activation – Once you’ve confirmed the activation, it may take a few minutes for the process to complete. During this time, do not remove the SIM card or turn off your phone.
9. Restart your phone – After the activation is complete, restart your phone to ensure that the changes take effect. This will allow your phone to connect to the Cricket network and start using the services.
10. Test your phone – Once your phone has restarted, make a test call or send a text message to ensure that your Cricket phone is fully activated and working correctly. If you encounter any issues, refer to the troubleshooting section in the Cricket app or contact Customer Support for assistance.
By following these activation instructions, you’ll successfully activate your Cricket phone and begin enjoying the benefits of your chosen Cricket Wireless plan.
Step 7: Set Up Cricket Account
Once you have activated your Cricket phone, the next step is to set up your Cricket account. The account setup process is straightforward and can be easily done online. Follow these steps to get your Cricket account up and running:
- Visit the Cricket Wireless website: Open your preferred web browser and go to the official Cricket Wireless website.
- Click on “My Account”: Locate the “My Account” option on the website’s homepage and click on it. This will take you to the Cricket account login page.
- Create a new account: If you don’t already have an existing Cricket account, click on the “Create an Account” or a similar option. Fill in the required information, including your name, address, email, and phone number. Create a username and password for your account.
- Verify your email: After completing the account creation process, Cricket will send you an email with a verification link. Check your email inbox and click on the link to verify your email address.
- Log in to your Cricket account: Once your email is verified, return to the Cricket Wireless website and log in to your newly created account using your username and password.
- Complete the setup process: Follow the on-screen prompts to complete the setup process. This may include agreeing to the terms and conditions, setting up additional security measures, and providing any necessary payment information.
- Choose a plan: After setting up your Cricket account, you will be able to choose a plan that suits your needs. Cricket offers a variety of affordable plans with different data allowances, so select the one that best fits your requirements.
- Add additional features: Depending on your preferences, you may have the option to add additional features to your plan, such as international calling, device protection, or mobile hotspot capabilities. Take some time to explore the available options and choose any extras you desire.
- Review your account information: Before finalizing your account setup, review all the details you have entered to ensure accuracy. Double-check your personal information, payment information, and selected plan to confirm that everything is correct.
- Submit your account setup: Once you are satisfied with your account information, submit your setup by clicking on the appropriate button on the webpage. This will finalize your Cricket account setup and make you an official Cricket Wireless customer. Congratulations!
By following these steps, you can set up your Cricket account quickly and easily. Once your account is set up, you can manage your services, pay your bills, and access other account-related features through the Cricket Wireless website or the MyCricket app. Enjoy the flexibility and convenience of having a Cricket account that enables you to stay connected and take full advantage of your activated Cricket phone!
Step 8: Test Phone and Services
Once you have successfully activated your Cricket phone, it’s time to put it to the test. Testing your phone and services ensures that everything is functioning as expected, and you can start enjoying your newly activated Cricket phone for free. Here are a few things you can do to ensure that your phone and services are working properly.
1. Make a test call: Dial a friend or family member’s phone number to verify that you can make and receive calls without any issues. Check for voice clarity, call dropouts, and any other connectivity problems that may affect your calling experience.
2. Send a test message: Send a text message to another phone to ensure that your messaging service is working correctly. Test both SMS and MMS functions to ensure that you can send and receive both plain text and multimedia messages without any problems.
3. Connect to the internet: Use your Cricket phone to connect to the internet and browse websites or use different apps that require internet access. Check for internet speed, stability, and overall browsing experience to ensure that your data connection is functioning optimally.
4. Test data usage: Open different apps that require data, such as social media apps, streaming services, or email clients, and check if your phone is consuming data as expected. Monitor your data usage to avoid exceeding your plan’s data limits or incurring any extra charges.
5. Check voicemail: Call your own number from your Cricket phone and set up your voicemail if you haven’t done so already. Leave yourself a test voicemail message to ensure that the voicemail service is working correctly, and you can listen to and manage your messages without any issues.
6. Test camera and multimedia features: Use the camera on your Cricket phone to take pictures and record videos. Play back the media files to check for video and audio quality. Test other multimedia features like playing music or watching videos to ensure that all the features are functioning correctly.
7. Verify additional services: If you have subscribed to any additional services, such as international calling or data roaming, test those as well to ensure that they are activated and working correctly.
By thoroughly testing your Cricket phone and services, you can identify any potential issues early on and seek assistance from Cricket’s customer support if needed. Once you are satisfied that everything is working as expected, you can fully enjoy the benefits of your activated Cricket phone and the free service it provides.
Step 9: Enjoy your Activated Cricket Phone for Free
Congratulations! You have successfully activated your Cricket phone and can now enjoy all the fantastic features and services it has to offer. Here are a few ways to make the most of your activated Cricket phone:
1. Explore the App Store: One of the best things about having a smartphone is the wide range of apps available for download. Whether you’re looking for social media apps, games, productivity tools, or entertainment apps, you can find them all on your Cricket phone’s app store. Spend some time browsing through the app store and discover new and exciting apps to enhance your mobile experience.
2. Stay Connected with Loved Ones: With your activated Cricket phone, you can easily stay connected with your friends and family. Use the phone’s built-in messaging and calling features to keep in touch, or utilize popular messaging apps like WhatsApp or Skype to communicate with loved ones around the globe. Make voice and video calls, send messages, and share moments with the people who matter most to you.
3. Capture Memories with the Camera: Most Cricket phones come equipped with high-quality cameras that allow you to capture beautiful photos and videos. Use your phone’s camera to document special moments, create stunning visuals for social media, or simply enjoy photography as a hobby. Experiment with different camera settings and editing apps to enhance the quality of your photos and make them truly memorable.
4. Stream and Enjoy Entertainment: Your activated Cricket phone can serve as a portable entertainment center. Use it to stream your favorite music, movies, TV shows, or podcasts. With popular streaming apps like Spotify, Netflix, Hulu, and more, you can have endless hours of entertainment at your fingertips. Whether you’re on a long commute, waiting for an appointment, or relaxing at home, your Cricket phone can keep you entertained wherever you go.
5. Customize your Phone: Make your Cricket phone truly your own by customizing its appearance and settings. Change the wallpaper, rearrange or add widgets to your home screen, and personalize the sounds and notifications. Explore the settings menu to discover hidden features and customize your phone to suit your preferences.
With your activated Cricket phone, the possibilities are endless. Take advantage of the various features and services available to you and make your mobile experience truly enjoyable. Whether you’re using it for personal or professional purposes, your Cricket phone is a powerful tool that can greatly enhance your daily life.
Conclusion
Activating your Cricket phone for free is a fairly straightforward process that allows you to start using your new device quickly and effortlessly. By following the steps outlined in this guide, you can easily activate your phone without any additional cost.
Remember, to activate your Cricket phone, you will need a Cricket wireless SIM card and the IMEI number of your device. Make sure to have these handy before starting the activation process.
Whether you choose to activate your Cricket phone online or through customer service, the activation process should only take a few minutes. Once your phone is activated, you can start enjoying all the features and services that Cricket Wireless has to offer, including reliable network coverage and affordable plans.
So, don’t let the activation process hold you back. Get your Cricket phone activated today and start exploring all the possibilities that your new device has in store for you!
FAQs
1. How do I activate my Cricket phone for free?
Activating your Cricket phone for free is a simple process. First, make sure you have a Cricket SIM card and an active service plan. Insert the SIM card into your device and power it on. Follow the on-screen prompts to activate your phone. If you are porting your number from another carrier, you will need to provide some additional information. Once the activation process is complete, your Cricket phone will be ready to use.
2. Can I activate a used Cricket phone?
Absolutely! You can activate a used Cricket phone as long as it is compatible with Cricket’s network. Before activating a used phone, it is recommended to check the device’s IMEI number to ensure it is not blacklisted or reported as stolen. You can do this by contacting Cricket’s customer service or using an online IMEI checker tool.
3. What are the benefits of activating a Cricket phone?
Activating a Cricket phone comes with several benefits. Firstly, Cricket offers affordable service plans with unlimited talk, text, and data options. Additionally, Cricket provides excellent coverage nationwide, ensuring that you stay connected wherever you go. By activating a Cricket phone, you also gain access to exclusive deals, promotions, and discounts on devices and accessories.
4. How long does it take to activate a Cricket phone?
The activation process for a Cricket phone usually takes a few minutes. After inserting the SIM card and powering on the device, follow the on-screen instructions to complete the activation. In some cases, if you are porting your number from another carrier, the process may take slightly longer. However, Cricket strives to make the activation process as quick and seamless as possible for its customers.
5. Can I activate my Cricket phone online?
Yes, you can activate your Cricket phone online. Cricket Wireless provides an easy-to-use online activation portal where you can activate your device from the comfort of your own home. Simply visit the Cricket Wireless website and follow the steps outlined in the activation process. If you encounter any issues or need assistance, Cricket’s customer support team is available to help you through the online activation process.