
Cell phone antennas are crucial for ensuring a strong and reliable signal reception. Whether you are experiencing weak signals or dropped calls, knowing how to make a cell phone antenna can offer a cost-effective solution. By creating your own antenna, you can potentially boost your cell phone’s signal strength and improve your overall connectivity. This article will guide you through the process of making a cell phone antenna, providing step-by-step instructions and tips along the way. Whether you are tech-savvy or just starting to dabble in DIY projects, this guide will help you harness the power of a homemade antenna and enhance your cell phone experience. So, let’s dive in and learn how to make your own cell phone antenna!
Inside This Article
- Materials Required
- Step 1: Gathering the Necessary Components
- Step 2: Cutting the Wire
- Step 3: Creating the Antenna Element
- Step 4: Assembling the Antenna Base
- Step 5: Connecting the Antenna Element to the Base
- Step 6: Mounting the Antenna to the Cell Phone
- Step 7: Testing and Adjusting the Antenna
- Conclusion
- FAQs
Materials Required
To make a cell phone antenna, you will need the following materials:
- Copper Wire: You will need a piece of copper wire, preferably around 20 gauge, with a length of approximately 30 inches. Copper wire is used because it is an excellent conductor of electricity.
- Coaxial Cable: Obtain a coaxial cable with a length of about 6 feet. This cable will act as the connector between the antenna and your cell phone.
- Connectors: To attach the coaxial cable to the antenna and your cell phone, you will need suitable connectors. These can be purchased at a local electronics store.
- Insulating Tape: Use insulating tape to protect the connections and wires against damage and ensure a stable connection.
- Electrical Tape: Electrical tape is essential for securing and bundling the wires and cables together. It provides insulation and protects against potential short circuits.
- Wire Cutters: This tool will be necessary for cutting the copper wire and coaxial cable to the required lengths.
- Wire Strippers: Wire strippers are needed for removing the insulation from the ends of the wires and coaxial cable, allowing for proper connections.
- Soldering Iron and Solder: A soldering iron and solder are recommended for securing the connections and creating a reliable antenna.
Note: It’s important to make sure that all the materials are of good quality for optimal performance of the DIY cell phone antenna.
Step 1: Gathering the Necessary Components
Before you start building your own cell phone antenna, you’ll need to gather a few key components. These components are essential in ensuring the successful construction and functionality of your antenna. Here’s a list of what you’ll need:
- A coaxial cable: This serves as the backbone of your antenna and allows the transmission of signals between your cell phone and the antenna.
- An SMA connector: This connector will help you connect the coaxial cable to your cell phone or wireless device.
- A metal wire: This will act as the antenna element and is an integral part of capturing and transmitting signals.
- A soldering iron: You’ll need this tool to securely attach the SMA connector to the coaxial cable and to connect the metal wire to the connector.
- Heat shrink tubing: This will provide insulation and protection to the soldered connections.
- A heat gun or lighter: This will be used to shrink the tubing and create a tight, secure seal.
- A pair of wire cutters: You’ll need these to cut the metal wire to the desired length.
- A multimeter: This handy tool will help you measure the signal strength and ensure that your antenna is working effectively.
Once you have gathered all of these components, you are ready to move on to the next step in the process – building your cell phone antenna!
Step 2: Cutting the Wire
Now that you have gathered all the necessary materials, it’s time to move on to the next step: cutting the wire. This is a crucial part of building the cell phone antenna, as the length and dimensions of the wire will affect its performance.
Here’s how you can cut the wire:
-
Measure and mark the desired length of the wire. Typically, a 1/4 wavelength will work well for most cell phone frequencies. To calculate the 1/4 wavelength, divide the wavelength by 4.
-
Carefully cut the wire using a pair of wire cutters or a sharp knife. Make sure to trim any excess wire and create clean and precise cuts.
-
If you are using a coaxial cable, remove the outer insulation carefully without damaging the inner wire. Strip off approximately 1 inch of the outer insulation to expose the inner conductor.
-
Next, strip off approximately 1/4 inch of the insulation from the inner conductor, leaving the remaining wire exposed.
It’s important to note that different cell phone bands operate at different frequencies, so it’s recommended to research the specific frequency bands of your cell phone service provider. This will help you determine the appropriate length for the wire of your cell phone antenna.
Once you have successfully cut the wire to the desired length, you are ready to move on to the next step of building your cell phone antenna.
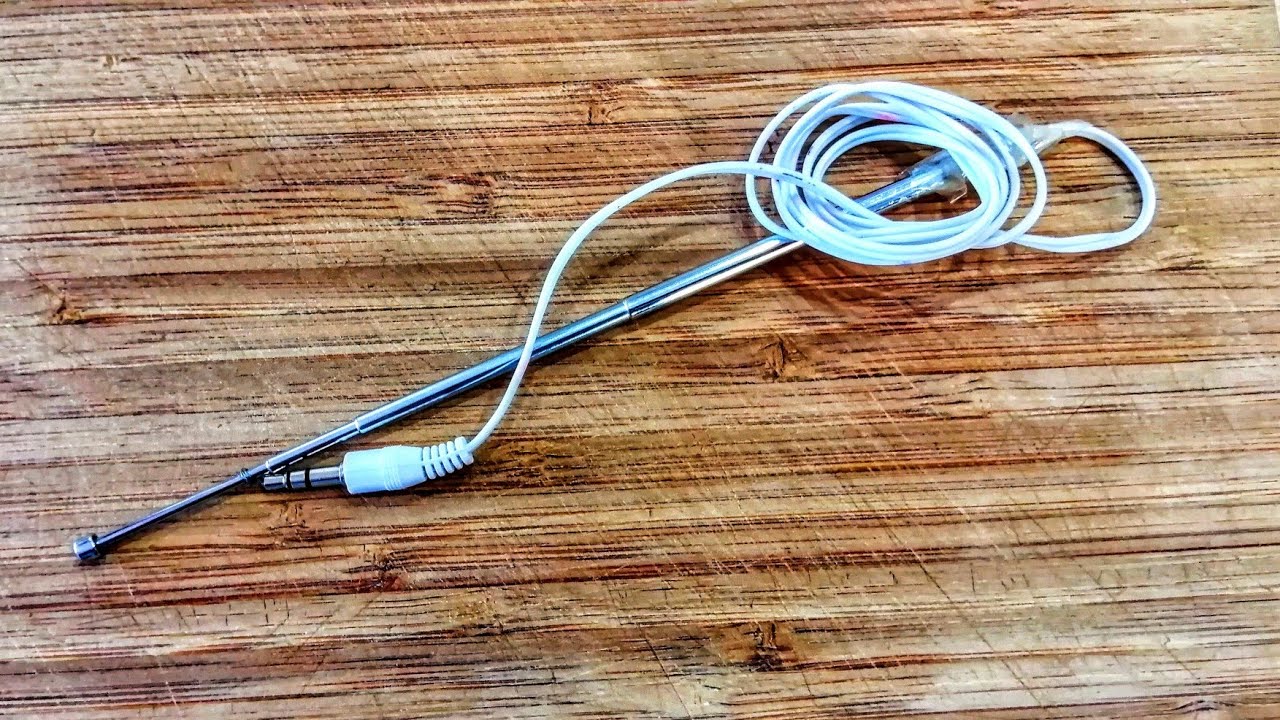
Step 3: Creating the Antenna Element
Now that you have prepared the necessary materials, it is time to move on to the next step and create the antenna element for your cell phone. The antenna element plays a crucial role in capturing and transmitting signals, so it is important to pay attention to this part of the process.
Start by taking the copper wire and cutting it to the desired length. The length of the wire will depend on the specific cell phone model you are working with and the frequency bands you want to target. Refer to the user manual or do some research to determine the optimal length for your antenna.
Once you have cut the wire to the correct length, strip off about 1 cm of insulation from each end. This will expose the metal conductor, allowing for better signal transmission. Be careful when stripping the wire to avoid damaging the conductor.
Next, you will need to shape the wire into a specific pattern. One popular design is the straight monopole antenna. To create this, bend the wire at a right angle, leaving a small section straight. The length of the straight section should be approximately one-quarter of the wavelength of the desired frequency band.
After bending the wire, you can further refine the shape by using pliers to create loops or twists. These variations in the antenna’s structure can help improve signal reception and transmission in certain situations. Experimentation and testing may be required to find the most effective configuration for your specific needs.
Once you are satisfied with the shape of the antenna element, it is time to attach it to the main assembly. Depending on the design of your DIY antenna, this may involve soldering the wire to a connector or securing it with adhesive.
Remember, the quality of the antenna element’s construction can significantly impact its performance. Take your time and ensure that the wire is securely attached and the connections are solid.
Finally, give the entire assembly a visual inspection and make any necessary adjustments. Ensure that there are no loose wires, sharp edges, or other potential hazards. A well-constructed antenna will not only improve signal strength but also reduce the risk of damage to your cell phone.
With the antenna element created and securely attached to the main assembly, you are one step closer to improving your cell phone’s signal reception. The next step is testing and troubleshooting the antenna to ensure optimal performance.
Step 4: Assembling the Antenna Base
Now that we have our antenna elements ready, it’s time to move on to assembling the antenna base. The antenna base is an integral part of the overall antenna structure and is responsible for providing stability and support.
Here’s a step-by-step guide on how to assemble the antenna base:
- Start by preparing the base plate. This is usually a rectangular or circular piece of sturdy material, such as metal or plastic. Ensure that the base plate is clean and free from any debris.
- Place the base plate on a flat and stable surface. This will serve as the foundation of your antenna.
- Take the antenna mast, which is a long, cylindrical tube or rod, and position it at the center of the base plate. Make sure it is perpendicular to the base plate for optimal performance.
- Use screws or bolts to secure the antenna mast to the base plate. Ensure that they are tightened properly to ensure stability and prevent any wobbling.
- Next, attach the antenna elements to the mast. Depending on the type of antenna you are building, this can be done using clamps, brackets, or other mounting mechanisms.
- Ensure that the antenna elements are securely attached and properly aligned. This is crucial for optimal signal reception. Double-check and make any necessary adjustments.
- Once everything is in place, give the antenna a gentle shake to ensure it is stable and properly secured. If you notice any looseness or instability, revisit the previous steps to tighten any connections.
- Finally, inspect the assembled antenna base for any potential issues or misalignments. This will help in identifying and troubleshooting any problems before proceeding further.
Remember to refer to the instructions provided with your specific antenna kit or consult online resources for any additional guidance or recommendations specific to your chosen antenna design.
With the antenna base assembled, we are now closer to completing our homemade cell phone antenna. In the next step, we will connect the antenna to our cell phone or a signal booster to see its impact on signal reception. Stay tuned!
Step 5: Connecting the Antenna Element to the Base
Now that you have constructed the antenna element, it’s time to connect it to the base to complete your cell phone antenna. This step is crucial in ensuring that the antenna functions optimally to enhance your cell phone’s signal strength. Follow these simple steps to successfully connect the antenna element to the base:
1. First, identify the connectors on both the antenna element and the base. These connectors are typically labeled as male or female, indicating their respective types.
2. Align the male connector on the antenna element with the female connector on the base, ensuring they match up correctly.
3. Gently push the two connectors together until you hear a click or feel them securely lock into place. This indicates that the antenna element is now properly connected to the base.
Pro tip: It’s essential to handle the connectors with care to avoid any damage while connecting them. Firm but gentle pressure should be sufficient to achieve a secure connection.
4. Once the antenna element is connected to the base, give it a gentle tug to ensure it is firmly attached. You want to make sure the connection is secure to prevent any signal loss due to a loose connection.
5. After verifying the connection, take a moment to inspect the overall setup. Ensure there are no loose wires, bent connectors, or any other visible damage that may interfere with the antenna’s performance.
6. Finally, place the assembled cell phone antenna in a location where it has the best chance of receiving a strong signal. This might be near a window, on a higher floor, or in an area with minimal obstructions. Experiment with different positions to find the optimal spot.
By following these steps, you can successfully connect the antenna element to the base, completing your homemade cell phone antenna. This will help boost your cell phone’s signal strength and improve your overall calling and data experience. Enjoy the enhanced connectivity!
Step 6: Mounting the Antenna to the Cell Phone
Mounting the antenna to the cell phone is the final and crucial step in this DIY project. Here are the steps to follow:
-
Locate the back cover of your cell phone and remove it carefully to expose the internal components.
-
Find a suitable spot on the back of the cell phone where you can attach the antenna. It is usually recommended to position it near the top of the phone.
-
Ensure that the surface is clean and free from any dirt or debris that may interfere with the adhesive. Use a soft cloth or alcohol wipe to clean the area.
-
Peel off the protective backing from the adhesive side of the antenna.
-
Align the antenna with the chosen spot on the back of the phone, making sure it is centered and securely positioned.
-
Press down firmly on the antenna to ensure it adheres properly to the phone.
-
Replace the back cover of the cell phone, taking care not to disturb the antenna in the process.
-
Test the signal strength and quality of your cell phone after mounting the antenna. If necessary, adjust the position of the antenna slightly to achieve the best results.
Remember, the mounting process may vary depending on the type of antenna and cell phone you are using. It’s always a good idea to refer to the manufacturer’s instructions or seek professional assistance if you encounter any difficulties.
Now that you have successfully mounted the antenna to your cell phone, you can enjoy improved signal strength and enhanced performance. Stay connected wherever you go!
Step 7: Testing and Adjusting the Antenna
Now that you have successfully built your own cell phone antenna, it’s time to test and adjust it to ensure optimal performance. Follow these steps to ensure your antenna is working effectively:
1. Connect your antenna to your cell phone. Plug one end of the cable into the antenna connector on your phone, and the other end into the connector on the antenna.
2. Power on your cell phone and check the signal strength. Look for the signal bars on your phone’s display or check the signal strength indicator in the settings menu. Note the current signal strength reading.
3. Move around to different locations while holding your phone with the antenna attached. Try areas with different signal strengths, such as near a window, outside, or in different rooms of your house. Take note of any changes in signal strength as you move around.
4. If you notice a significant improvement in signal strength in certain locations, it indicates that your antenna is working effectively. However, if the signal strength remains weak or doesn’t improve, you may need to adjust the positioning of your antenna.
5. Try rotating or moving the antenna slightly to find the sweet spot with the strongest signal. You can also try adjusting the height or angle of the antenna to optimize the reception.
6. Repeat the signal strength test in different locations and adjust the antenna as needed. Keep track of the locations where you get the best signal strength, as these will be the ideal spots for using your phone with the antenna.
7. It’s important to remember that the performance of your homemade antenna may vary depending on factors such as the type of cell phone you have, your location, and the surrounding environment. Experiment with different positions and orientations to find the best setup for your specific situation.
8. Once you are satisfied with the signal strength and reception of your antenna, you can securely attach it to a stable surface or mount it outside your house for better range.
By testing and adjusting your cell phone antenna, you can maximize its effectiveness and improve your overall cell phone signal quality. Enjoy enhanced call clarity, faster data speeds, and a more reliable connection!
Conclusion
Building your own cell phone antenna can be a rewarding and practical DIY project. By following the steps and tips outlined in this guide, you can boost your cell phone’s signal strength and improve your overall connectivity. Whether you’re in a rural area with limited coverage or experiencing weak signals indoors, a homemade antenna can make a noticeable difference in your cell phone reception.
Remember to choose the right antenna design based on your needs and follow proper safety precautions during the construction process. Experiment with different materials, positions, and orientations to find the optimal setup. Don’t be afraid to seek help or consult online resources for troubleshooting and fine-tuning your antenna.
In a world that relies heavily on mobile communication, having a reliable cell phone signal is essential. So why not take matters into your own hands and give your cell phone’s signal strength a boost with a homemade antenna? Happy building!
FAQs
1. Why do I need to make a cell phone antenna?
–
In certain situations, such as living in a remote area with poor cell reception or being in an emergency situation, having a homemade cell phone antenna can help boost your signal strength and improve call quality.
+
2. Can I make a cell phone antenna without any technical expertise?
–
Yes, you can! There are several simple methods to create a cell phone antenna using common household items. These methods typically don’t require any technical expertise, making it accessible to anyone who wants to improve their cell signal.
+
3. What materials do I need to make a cell phone antenna?
–
The materials needed to make a cell phone antenna can vary depending on the method you choose. Some common materials include copper wire, a coaxial cable, aluminum foil, paper clips, and even a soda can. These items are usually readily available in most homes.
+
4. Are there any risks in making a homemade cell phone antenna?
–
When making a homemade cell phone antenna, there aren’t significant risks as long as you follow instructions properly and use the appropriate tools. However, it’s essential to remember that homemade antennas may not match the performance of commercial antennas and could potentially damage your cell phone if constructed and used incorrectly. Proceed with caution and consider seeking professional help if you have concerns.
+
5. Can a homemade cell phone antenna work for all cell phone models?
–
Homemade cell phone antennas can work with a variety of cell phone models. However, the effectiveness may vary depending on your phone’s specific frequency requirements and design. It’s advisable to research and ensure that the homemade antenna you choose is compatible with your cell phone model to maximize its effectiveness.
+