
The Samsung S20 is a powerful and feature-packed mobile phone that has gained immense popularity among smartphone users. However, over time, the battery life of any phone can start to diminish, leading to shorter usage times and inconvenience. In such cases, replacing the battery becomes a viable solution to restore the phone’s performance and longevity.
In this comprehensive guide, we will walk you through the step-by-step process of replacing the battery in your Samsung S20. Whether you are a tech-savvy individual or a beginner, fear not! We will provide you with all the necessary information and tips to ensure a seamless battery replacement experience.
So, if you have been experiencing battery issues with your Samsung S20 and want to bring it back to life, read on to discover how you can easily replace the battery and enjoy a rejuvenated mobile phone experience.
Inside This Article
- Step 1: Gather the necessary tools
- Step 2: Power off your Samsung S20
- Step 3: Remove the back cover
- Step 4: Disconnect the old battery
- Step 5: Install the new battery
- Step 6: Reattach the back cover
- Step 7: Power on your Samsung S20
- Conclusion
- FAQs
Step 1: Gather the necessary tools
Before you begin the process of replacing the battery in your Samsung S20, you will need to gather a few essential tools. These tools will ensure that you are able to safely and effectively complete the battery replacement without causing any damage to your device. Here are the tools you will need:
1. Replacement Battery: Make sure to purchase a battery that is compatible with your Samsung S20 model. You can find compatible replacement batteries online or at your local electronics store.
2. Small Screwdriver Set: You will need a set of small screwdrivers to remove the screws securing the back cover of your Samsung S20. Look for a screwdriver set that includes various sizes to accommodate different types of screws.
3. Plastic Opening Tools: These tools are designed to safely pry open the back cover of your Samsung S20 without causing any damage. Plastic opening tools are ideal as they are less likely to scratch or harm the device compared to metal tools.
4. Tweezers: Tweezers are useful for handling small components inside your Samsung S20. They allow for precise movement and manipulation of delicate parts during the battery replacement process.
5. Adhesive Strips: Adhesive strips are needed to secure the new battery in place once it is installed. These strips are typically included with replacement battery kits, but if not, you can purchase them separately.
6. Clean Cloth or Microfiber Towel: It’s important to have a clean cloth or microfiber towel on hand to wipe away any dust, debris, or fingerprints that may interfere with the battery replacement process.
By gathering these necessary tools before you begin, you will be well-equipped to handle the battery replacement process smoothly and efficiently.
Step 2: Power off your Samsung S20
To ensure the safety of both yourself and your device, it is crucial to power off your Samsung S20 before proceeding with any battery replacement. By doing so, you’ll minimize the risk of any electrical mishaps and prevent potential damage to the internal components.
To power off your Samsung S20, simply press and hold the power button located on the side or top of the device. A menu will appear on the screen with various options, including “Power off” or “Restart.” Tap on the “Power off” option and confirm your selection.
Wait for a few seconds until the device completely shuts down. You can verify this by ensuring that the screen is turned off and the device no longer shows any signs of activity. This step is essential to ensure your safety during the battery replacement process.
It is important to note that powering off your Samsung S20 will not erase any of your data or settings. Your personal information, apps, and files will remain intact. However, it is always a good practice to back up your data regularly to ensure its safety.
Once you have successfully powered off your Samsung S20, you can proceed to the next step of removing the back cover. Remember, taking the time to power off your device properly is crucial for a safe and smooth battery replacement process.
Step 3: Remove the back cover
Removing the back cover of your Samsung S20 is a crucial step in replacing the battery. Follow these simple instructions to safely remove the back cover without causing any damage:
1. Hold your Samsung S20 securely with both hands to maintain a firm grip.
2. Locate the small notch or groove on the side of the device. It is usually positioned towards the bottom of the phone.
3. Insert your fingernail, a plastic pry tool, or a SIM card ejection tool into the notch or groove. Apply gentle pressure to pry open the back cover.
4. Once you feel a slight separation, carefully slide your tool along the edges of the device to release the clips holding the back cover in place.
5. Take your time and ensure that you release all the clips around the entire perimeter of the device.
6. Once all the clips are released, gently lift the back cover away from the main body of the phone.
7. Set the back cover aside in a safe place to prevent it from getting scratched or damaged.
Now that you have successfully removed the back cover, you can proceed to the next step in the battery replacement process. Take caution while performing this step to avoid any accidental damage to your Samsung S20.
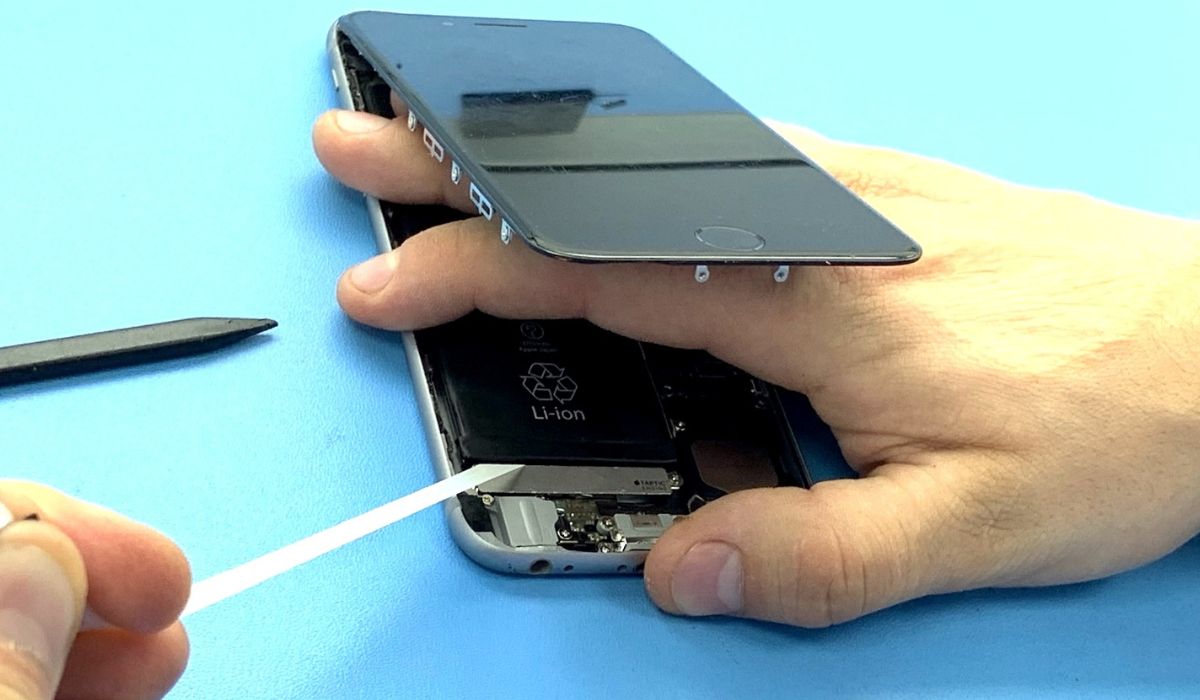
Step 4: Disconnect the old battery
Disconnecting the old battery is a crucial step when replacing the battery of your Samsung S20. Follow these steps to safely disconnect the old battery:
- Ensure safety precautions: Before proceeding, it is important to prioritize your safety. Make sure you are working on a stable surface and that your phone is powered off.
- Remove the battery connector cover: Locate the battery connector cover on the motherboard of your Samsung S20. It is usually a small plastic cover with two or more screws. Use a screwdriver to remove the screws and gently lift the cover off.
- Disconnect the battery connector: After removing the cover, you will see the battery connector. It is a small plug connecting the battery to the motherboard. Carefully unplug the connector by gently pulling it away from the motherboard.
- Use plastic tools: To avoid damaging any delicate parts, it is recommended to use plastic tools to disconnect the battery connector. Metal tools can potentially cause short circuits or other damages.
- Check for adhesive: In some cases, the battery might be secured with adhesive to the phone’s frame. If you encounter this, slowly pry the battery away from the frame while being careful not to bend or puncture it.
- Inspect the battery connections: Take a moment to inspect the battery connections and make sure they are free from any debris or damage. This will ensure a smooth installation of the new battery.
Disconnecting the old battery is an important step in the process of replacing it with a new one. Following these steps will help you safely remove the old battery from your Samsung S20, allowing for a smooth transition to the next step in the battery replacement process.
Step 5: Install the new battery
Now that you have successfully disconnected the old battery, it’s time to install the new one. Follow these steps to complete the process:
1. Carefully take out the new battery from the packaging. Ensure that it is the correct battery model for your Samsung S20.
2. Place the new battery into the battery compartment, making sure it is aligned properly with the contacts. Be gentle and avoid using excessive force.
3. Once the battery is in position, reconnect the battery connector by carefully attaching it to the corresponding socket on the motherboard. Ensure that it is securely connected.
4. Double-check that the battery is properly seated in its compartment and that all connections are secure. Any loose connections may result in poor battery performance or the device not functioning properly.
5. Carefully put the back cover back onto your Samsung S20, aligning it with the edges of the device. Press gently until you hear a click, indicating that the cover is securely in place.
6. Give the device a final inspection, ensuring that the back cover is snugly attached and there are no gaps or loose parts. This will help maintain the device’s water and dust resistance.
7. Congratulations! You have successfully installed the new battery in your Samsung S20. Now it’s time to power on your device and enjoy its extended battery life.
Remember, if you encounter any difficulties during the battery replacement process or if you are unsure about any steps, it is always recommended to seek professional assistance or contact the manufacturer’s customer support for guidance.
Step 6: Reattach the back cover
Now that you have successfully replaced the battery of your Samsung S20, it’s time to reattach the back cover. Follow these steps to ensure a secure fit:
1. Take the back cover and align it with the edges of your phone. Make sure the camera, fingerprint sensor, and other openings on the cover match with the corresponding components on your phone.
2. Gently press down on the back cover, starting from the top and working your way down. Apply even pressure to ensure that all sides of the cover are properly secured.
3. You may hear a clicking sound when the back cover locks into place. This indicates that it is securely attached to your Samsung S20.
4. Inspect the edges of the phone to confirm that the back cover is flush with the device. There should be no gaps or loose areas. If you notice any irregularities, remove the cover and try reattaching it again.
5. Once you are satisfied with the fit, give the back cover a gentle shake to check for any looseness. If it feels secure and stable, you can proceed to the next step.
6. Take a moment to clean the back cover with a microfiber cloth to remove any fingerprints or smudges. This will help keep your Samsung S20 looking its best.
7. Finally, power on your Samsung S20 by pressing and holding the power button. Once the device boots up, you can use it with confidence, knowing that you have successfully replaced the battery and reattached the back cover.
Congratulations! You have completed the process of replacing the battery and reattaching the back cover of your Samsung S20. Enjoy using your refreshed device with improved battery life!
Step 7: Power on your Samsung S20
Now that you have successfully replaced the battery in your Samsung S20, it’s time to power it back on and make sure everything is working correctly. Follow these steps to safely turn on your device:
1. Take a moment to double-check that the back cover is securely attached and there are no loose fittings.
2. Press and hold the power button located on the side of your Samsung S20. Hold it for a few seconds until you see the Samsung logo appear on the screen.
3. Once the logo appears, release the power button and wait patiently for your device to boot up. This process may take a few moments, so be patient.
4. Once your Samsung S20 has powered on, you will be prompted to enter your PIN or passcode to unlock the device. Enter the appropriate credentials to access your home screen.
5. Take a moment to explore your device and ensure that all functions are working properly. Check the battery level indicator to make sure it reflects the new battery’s charge capacity.
6. Congratulations! Your Samsung S20 is now powered on and ready to use with its new battery. Enjoy the extended battery life and enhanced performance!
As with any electronic device, it’s important to keep an eye on your battery performance over time. If you notice any issues or if the battery drain seems excessive, consider reaching out to a professional or Samsung support for further assistance.
Remember, properly maintaining and replacing your phone’s battery can significantly extend its lifespan and ensure optimal performance. By following the steps outlined in this guide, you have taken a proactive approach to keep your Samsung S20 running smoothly.
Replacing the battery of your Samsung S20 can be a cost-effective and practical solution to extend the lifespan of your phone. Through this article, we have explored the step-by-step process of replacing the battery, starting from gathering the necessary tools to safely removing the old battery and installing the new one. By following these instructions carefully, you can successfully replace the battery of your Samsung S20 without any complications.
Remember, if you are unsure or uncomfortable performing the replacement yourself, it is always recommended to seek professional help. Additionally, it is essential to purchase a high-quality replacement battery from a reputable source to ensure optimal performance and longevity.
By taking the time to replace the battery of your Samsung S20, you can continue to enjoy all the features and functions of your phone without the worry of a diminishing battery life. So don’t hesitate, gather your tools, follow the steps outlined in this article, and breathe new life into your Samsung S20!
FAQs
Q: What are the signs that indicate the need to replace the battery on my Samsung S20?
A: There are a few indicators that suggest it may be time to replace your Samsung S20 battery. These include a significant decrease in battery life, the phone shutting down unexpectedly, the battery not holding a charge even after being fully charged, or the device getting excessively hot during normal usage.
Q: Can I replace the battery on my Samsung S20 myself?
A: Yes, you can replace the battery on your Samsung S20 yourself if you have the necessary tools and expertise. However, it’s important to note that opening up the phone and replacing the battery may void your warranty, so be sure to consider that before proceeding. If you’re not confident in your abilities, it’s best to take it to a professional technician.
Q: What tools do I need to replace the battery on my Samsung S20?
A: To replace the battery on your Samsung S20, you will need a few tools, including a small Phillips screwdriver, a plastic prying tool or spudger, a heat gun or hairdryer to loosen the adhesive, replacement adhesive strips, and a new battery that is compatible with your device. It’s important to have the right tools to ensure a smooth and successful battery replacement.
Q: Are there any precautions I should take before replacing the battery on my Samsung S20?
A: Yes, before replacing the battery on your Samsung S20, it’s essential to take some precautions. First, make sure to power off the phone completely. It’s also a good idea to remove the SIM card tray to prevent any accidental damage during the battery replacement process. Additionally, use caution when working with tools and be gentle when prying open the phone to avoid any unnecessary damage.
Q: How long does it take to replace the battery on a Samsung S20?
A: The duration of the battery replacement process on a Samsung S20 can vary depending on the individual’s experience and skill level. On average, it may take around 30 minutes to an hour. However, it’s important to take your time and follow instructions carefully to ensure a successful battery replacement without damaging any other components.