
Are you eager to explore the world of 360-degree videos? With the advancement of technology, capturing immersive moments has become easier than ever, even with just your iPhone. Gone are the days when shooting 360-degree videos required expensive and cumbersome additional hardware.
In this article, we will guide you through the process of shooting 360 videos on your iPhone, without the need for any external devices. With the right techniques and a few handy apps, you can unlock a whole new world of creativity and capture breathtaking 360-degree footage right from your smartphone.
Whether you want to create stunning virtual reality experiences, share engaging content on social media, or simply document your adventures in an immersive way, we’ve got you covered. So, let’s dive in and discover how you can start shooting incredible 360 videos using just your iPhone!
Inside This Article
- Overview of Shooting 360 Videos on iPhone without Additional Hardware
- Step 1: Choose the Right App
- Step 2: Prepare Your iPhone for Shooting
- Step 3: Set Up Your Shot
- Step 4: Start Recording
- Step 5: Editing and Sharing Your 360 Videos
- Tips and Tricks for Better Results
- Troubleshooting Common Issues
- Conclusion
- FAQs
Overview of Shooting 360 Videos on iPhone without Additional Hardware
Shooting 360 videos on your iPhone has never been easier, and the best part is that you can do it without any additional hardware. With the advancements in technology, your iPhone is capable of capturing immersive 360-degree videos that allow viewers to experience the scene from every angle. Whether you want to capture stunning landscapes, memorable moments, or showcase your creative skills, shooting 360 videos on your iPhone opens up a world of possibilities.
Gone are the days when shooting 360 videos required expensive equipment or specialized cameras. With the right app and some simple techniques, you can transform your iPhone into a powerful tool for capturing immersive content. In this article, we will guide you through the process of shooting 360 videos on your iPhone without the need for any additional hardware.
By utilizing the built-in capabilities of your iPhone’s camera and the power of specialized apps, you can create captivating 360 videos with ease. Whether you own the latest iPhone model or an older version, you can still take advantage of this exciting technology.
So, how does shooting 360 videos on your iPhone without additional hardware work? It’s all made possible through the combination of the iPhone’s built-in gyroscope and a trusted 360 video app. The gyroscope allows your iPhone to track its orientation and movement, while the app stitches together the footage from each angle to create the immersive 360 video.
While shooting 360 videos on your iPhone without additional hardware is convenient, it’s important to set up your shot properly to achieve the best results. This involves choosing the right app, preparing your iPhone, setting up the shot, and maintaining stability while recording.
In the following sections, we will walk you through each step of the process, providing practical tips and tricks along the way. We will also share some troubleshooting techniques to help you overcome common issues that may arise during the shooting or editing process. So, let’s dive in and explore how you can shoot 360 videos on your iPhone without the need for any additional hardware.
Step 1: Choose the Right App
When it comes to shooting 360 videos on your iPhone without any additional hardware, the first and most important step is to choose the right app. With the numerous options available in the App Store, finding the perfect app can seem overwhelming. However, with a little guidance, you can easily determine which app best suits your needs.
Here are a few key factors to consider when selecting the right app:
- Compatibility: Make sure the app is compatible with your iPhone model and iOS version. Check the app description or reviews to confirm compatibility.
- Features: Look for apps that offer a wide range of features like manual exposure control, real-time stitching, and the ability to add filters and effects. These features can greatly enhance your 360 video shooting experience.
- User-Friendly Interface: Opt for an app with a user-friendly interface that is easy to navigate. This will save you time and frustration when setting up your shots and editing your videos.
- Reviews and Ratings: Take a few moments to read reviews and check the app’s ratings. This can give you valuable insights into the app’s performance and reliability.
Some popular 360 video apps for iPhone include:
- Google Street View: This app allows you to capture 360-degree photos and videos. It offers straightforward controls and easy sharing options.
- Theta360: With this app, you can shoot, view, and edit 360-degree photos and videos. It provides advanced editing features and supports live streaming.
- Capture 360: This app offers a user-friendly interface and various shooting modes for capturing stunning 360 videos. It also includes editing tools for adding filters and effects.
Take your time to explore different apps, read reviews, and consider your specific requirements. Choosing the right app will significantly impact your 360 video shooting experience on your iPhone.
Step 2: Prepare Your iPhone for Shooting
Before you start shooting 360 videos on your iPhone, there are a few important steps to take to ensure that you capture high-quality footage. Follow these guidelines to prepare your iPhone for shooting:
1. Clean the lens: The lens of your iPhone can easily become smudged or dirty, which can affect the clarity of your 360 videos. Take a soft microfiber cloth and gently clean the lens before you begin shooting. This will ensure that your videos come out sharp and clear.
2. Free up storage space: Shooting 360 videos requires a significant amount of storage space. It’s essential to free up storage on your iPhone before you start shooting to avoid running out of space midway through a recording. Delete unnecessary apps, photos, and videos to create enough space for your footage.
3. Close background apps: Having too many apps running in the background can drain your iPhone’s processing power, resulting in laggy or unstable 360 video recordings. Before you begin shooting, close all unnecessary apps to optimize your iPhone’s performance.
4. Enable airplane mode: Incoming calls, notifications, and other interruptions can disrupt your 360 video recording process. To prevent any unwanted disturbances during your shoot, it’s a good idea to enable airplane mode. This will ensure that your footage remains uninterrupted and free from distractions.
5. Use a tripod or stabilizer: To capture smooth and steady 360 videos, consider using a tripod or stabilizer. These tools help reduce camera shake and improve the overall stability of your footage. You can find a wide range of tripods and stabilizers designed specifically for iPhones, making it easier to shoot professional-looking videos.
6. Adjust camera settings: Before you start recording, take a moment to adjust the camera settings on your iPhone. Experiment with different exposure levels, white balance, and focus modes to achieve the desired look for your 360 videos. You can access these settings by tapping the “Settings” icon in your camera app.
By following these steps, you can ensure that your iPhone is properly prepared for shooting 360 videos. Taking the time to clean the lens, free up storage space, close background apps, enable airplane mode, use a tripod or stabilizer, and adjust camera settings will greatly improve the quality of your footage and enhance the overall shooting experience.
Step 3: Set Up Your Shot
Once you have chosen the right app and prepared your iPhone for shooting, it’s time to set up your shot for capturing stunning 360 videos. Here are some essential tips to help you get the perfect shot:
1. Find a Good Location: Look for a location that offers interesting visuals and a wide field of view. Consider shooting outdoors to capture beautiful landscapes or find an indoor space with unique architecture. A location with good lighting will also enhance the overall quality of your 360 video.
2. Remove Any Obstructions: Clear the area of any objects or obstacles that may obstruct your view. Ensure that there are no people, furniture, or unnecessary items in the frame that could detract from the focus of your shot.
3. Think About Composition: Just like traditional photography or videography, composition plays a key role in creating visually appealing shots. Consider the rule of thirds and experiment with different angles and perspectives to make your 360 video more engaging.
4. Pay Attention to Your Background: Your background can make or break your shot. Make sure that it complements the main subject and adds depth to the video. Avoid cluttered or distracting backgrounds that could take away from the main focus of your 360 video.
5. Use Leading Lines: Leading lines can help guide the viewer’s attention and create a sense of depth and dimension. Look for natural lines like paths, roads, or architectural elements that can lead the viewer’s eye to the main subject in your shot.
6. Experiment with Movement: While it’s important to keep your camera steady for a smooth viewing experience, adding subtle movements can make your 360 video more dynamic. Try panning slowly or capturing different perspectives to add visual interest to your shot.
7. Test Different Exposures: Depending on the lighting conditions, you may need to adjust the exposure settings on your iPhone to ensure that your shot is properly exposed. Use the exposure control feature on your camera app to find the right balance between highlights and shadows.
8. Consider the Audio: Don’t forget about the audio aspect of your 360 video. If you’re shooting in a noisy environment, it’s advisable to use an external microphone to capture clear and high-quality sound. This will greatly enhance the overall viewing experience for your audience.
By following these tips and setting up your shot carefully, you’ll be able to capture captivating and immersive 360 videos using just your iPhone. With practice and experimentation, you’ll continue to improve your skills and create amazing content that wows your viewers.
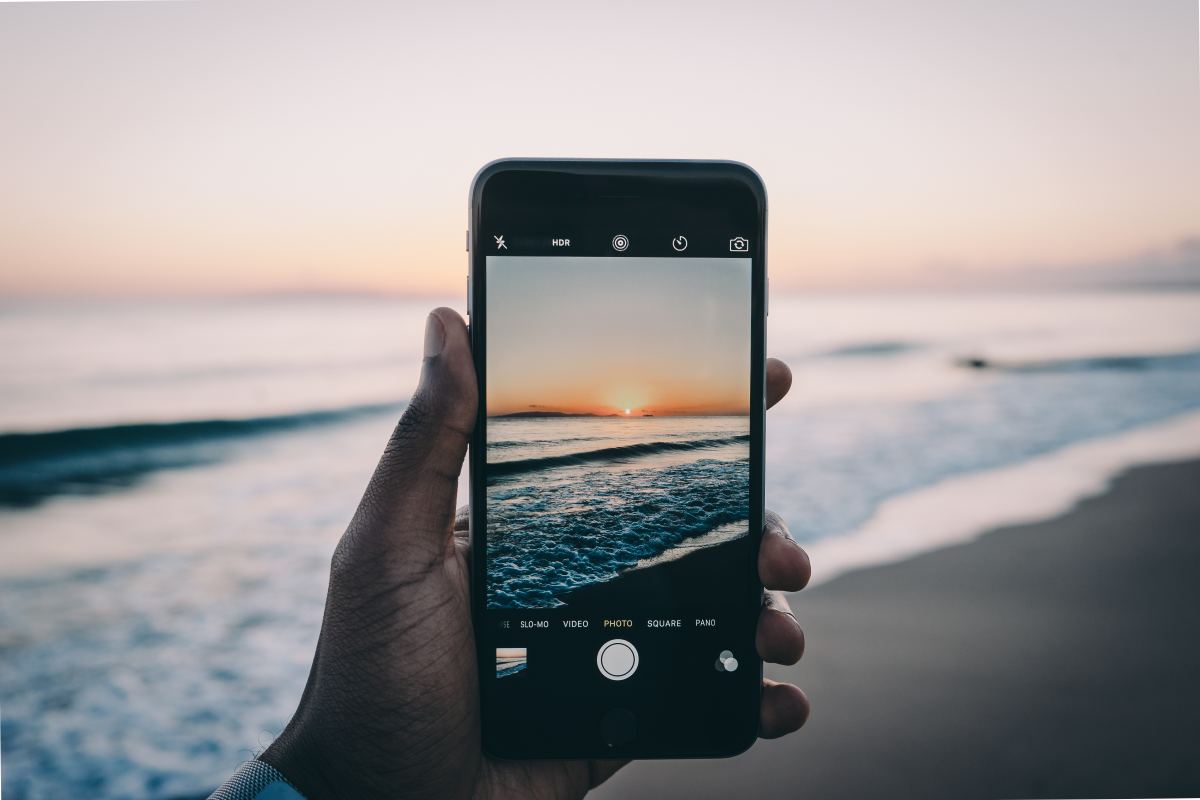
Step 4: Start Recording
Now that you have everything set up and you’re ready to go, it’s time to start recording your 360 video on your iPhone. Follow these steps to capture stunning footage:
1. Confirm your shot: Before you hit the record button, make sure that your iPhone is positioned correctly to capture the full 360-degree view. Check the composition, angle, and focus to ensure you have the desired shot.
2. Press the record button: Once you’re satisfied with the framing, it’s time to press the record button. Depending on the app you’re using, the record button might be displayed as a large circle or a traditional video camera icon. Simply tap the button to start recording the 360 video.
3. Keep your iPhone steady: Stability is crucial when shooting 360 videos to avoid shaky footage. Make sure to hold your iPhone steadily or, for even better results, mount it on a tripod or a stabilizer. This will help ensure smooth and professional-looking footage.
4. Capture the action: As you record, make sure to focus on capturing the action happening around you. Since the viewer will have the freedom to look in any direction, ensure that interesting events, landscapes, or subjects are within the frame throughout the recording.
5. Be mindful of duration: While shooting, keep in mind the duration of the video you want to create. Some apps have a time limit on recording, while others may have limitations due to storage space. Plan accordingly to capture the desired length of footage.
6. Experiment with movement: To add more dynamic elements to your 360 video, experiment with different camera movements. You can try panning slowly, rotating the camera, or even walking around the scene to provide a more immersive experience for the viewer.
7. Monitor your battery and storage: Shooting 360 videos can be quite demanding on both battery life and storage. Keep an eye on your battery level and storage space to avoid interruptions during the recording. It’s a good idea to have extra charged batteries and sufficient storage available.
8. Stop recording: When you’re done capturing the footage, simply press the stop or pause button, depending on the app you’re using. The video will then be saved to your iPhone’s storage for further editing and sharing.
By following these steps, you’ll be able to start recording your 360 videos on your iPhone without the need for any additional hardware. Let your creativity flow and capture immersive experiences that will leave your viewers mesmerized.
Step 5: Editing and Sharing Your 360 Videos
Once you have captured your 360 videos on your iPhone, the next step is to edit and share your masterpiece with the world. Here’s how you can do it:
1. Choose the Right Editing App: There are several apps available on the App Store specifically designed for editing 360 videos. One popular choice is the “Insta360 Studio” app. Download and install the app on your iPhone.
2. Import Your 360 Videos: Launch the editing app and import the 360 videos from your iPhone’s camera roll. The app will automatically detect the 360-degree format and load the video accordingly.
3. Trim and Cut: Use the editing tools provided by the app to trim and cut your 360 videos. This will help you remove any unwanted footage and create a more polished final product.
4. Add Filters and Effects: Enhance the visual appeal of your 360 videos by applying filters and effects. Experiment with different styles to find the one that suits your video’s theme and mood.
5. Adjust the Viewpoint: Most editing apps for 360 videos allow you to adjust the viewpoint, which determines the initial angle viewers will see when they start watching your video. Play around with the settings to find the best viewpoint that captures the essence of your footage.
6. Add Text and Annotations: If you want to add captions, titles, or annotations to your 360 videos, look for an editing app that offers this feature. This will provide additional context and information to your viewers.
7. Include Background Music: Enhance the audio experience of your 360 videos by adding background music. Choose a track that complements the mood and ambiance of your footage. Make sure to use royalty-free or properly licensed music to avoid copyright issues.
8. Export and Save: Once you’re satisfied with the edits, export the final version of your 360 video. The editing app will guide you through the export process, allowing you to choose the desired video quality and format. Save the edited video to your iPhone’s camera roll.
9. Share Your 360 Video: Now that you have your edited 360 video ready, it’s time to share it with the world. You can upload your video to social media platforms like YouTube, Facebook, or Instagram, which have native support for 360 videos. Alternatively, you can use a dedicated 360 video hosting platform to showcase your creations.
Remember to optimize your video’s metadata and add relevant tags and descriptions to improve its discoverability on search engines. Engage with your audience by replying to comments and encouraging them to share your 360 video with their network.
With these editing and sharing tips, you can take your 360 videos captured on your iPhone to the next level and captivate your audience with immersive visuals.
Tips and Tricks for Better Results
Shooting 360 videos on iPhone can be an exciting and immersive experience. To help you get the best results, here are some tips and tricks to keep in mind:
1. Find a Stable Surface: When shooting 360 videos, it’s important to keep your iPhone steady to avoid any jerky movements. Use a tripod or find a flat and stable surface to place your iPhone before starting the recording.
2. Consider Lighting: Lighting plays a crucial role in the overall quality of your video. Make sure to shoot in well-lit environments to capture clear and vibrant footage. Avoid shooting directly into bright light sources, as it can cause overexposure and wash out the details.
3. Explore Different Perspectives: Get creative with your shots by experimenting with different angles and perspectives. Try placing your iPhone higher or lower than eye level to capture unique and dynamic footage. Don’t be afraid to get close to your subjects for a more intimate experience.
4. Slow and Steady Movements: When panning or moving the iPhone while shooting, be sure to do it slowly and smoothly. Quick and jerky movements can result in a disorienting viewing experience for your audience. Slow and steady movements allow viewers to fully appreciate the immersive nature of 360 videos.
5. Pay Attention to Audio: Good audio is essential for a captivating video. Ensure that you are in a quiet environment and reduce any background noise as much as possible. You can also consider using an external microphone for better audio quality.
6. Engage with the Surroundings: In 360 videos, viewers can explore the entire environment. Take advantage of this by including interesting elements or points of interest in your frame. Encourage viewers to look around and engage with the surroundings.
7. Use the Rule of Thirds: The rule of thirds is a composition technique where you divide the frame into nine equal sections. Positioning your subject or key elements along these lines or at the intersections creates a visually appealing shot.
8. Experiment with Editing: After shooting your 360 video, don’t be afraid to experiment with different editing techniques to enhance the final result. There are various apps available that allow you to add filters, adjust colors, and even apply special effects to make your video stand out.
9. Plan Your Shots: Before you start recording, take some time to plan your shots and visualize what you want to capture. This will help you make more deliberate and intentional decisions when framing your shots, resulting in a more cohesive and engaging video.
10. Share and Engage: Once you’ve edited your 360 video, it’s time to share it with the world. Upload it to social media platforms or 360 video sharing platforms to gain feedback and engage with your audience. Encourage viewers to leave comments and share their thoughts on the immersive experience.
By following these tips and tricks, you’ll be well on your way to shooting stunning and captivating 360 videos on your iPhone. Remember, practice makes perfect, so don’t be afraid to experiment and explore the possibilities of this exciting medium!
Troubleshooting Common Issues
While shooting 360 videos on your iPhone without additional hardware is an exciting and convenient way to capture immersive content, you may encounter some common issues along the way. Here are a few troubleshooting tips to help you overcome these challenges:
1. Poor Video Quality: If you notice that your 360 videos have low resolution or appear grainy, try adjusting the video settings in the app you’re using. Look for options to increase the resolution or adjust the bitrate for a higher quality recording. Additionally, ensure that you have enough storage space on your iPhone as low storage can affect video quality.
2. Shaky Videos: One of the most common issues when shooting 360 videos is dealing with shaky footage. This can happen due to hand movements or unstable surfaces. To reduce camera shake, consider using a tripod or a smartphone stabilizer to keep your iPhone steady. You can also try using a self-timer or a remote control to activate the recording to minimize shake caused by pressing the record button.
3. Stitching Errors: 360 videos are typically created by stitching together multiple images or video streams from different lenses. Sometimes, you may encounter stitching errors that result in visible seams or distortions in the video. To address this issue, ensure that you’re using a reliable app with good stitching algorithms. Additionally, avoid moving the camera too quickly or in a jerky manner while recording, as this can make the stitching process more challenging.
4. Overheating: Extended periods of shooting 360 videos can put a strain on your iPhone’s hardware, leading to overheating. If you encounter this issue, it’s important to give your device a break and let it cool down. Avoid shooting in direct sunlight or in hot environments, as this can exacerbate the problem. If overheating continues to be a persistent issue, consider shooting in shorter bursts or using an external cooling solution.
5. Limited Battery Life: Shooting 360 videos can quickly drain your iPhone’s battery, especially when using advanced features or shooting for extended periods. To mitigate this issue, make sure your iPhone is fully charged before you start shooting. You can also conserve battery life by closing background apps, reducing screen brightness, and disabling unnecessary features like Wi-Fi or Bluetooth when not in use. Carrying a portable charger or extra battery can also be handy for longer shooting sessions.
6. Storage Management: 360 videos take up a significant amount of storage space on your iPhone. If you find yourself running out of storage, consider transferring your videos to a computer or external storage device regularly. You can also delete unnecessary files or apps from your iPhone to free up space. Alternatively, investing in a high-capacity iPhone or using cloud storage options can help alleviate storage constraints.
By following these troubleshooting tips, you can address common issues that may arise while shooting 360 videos on your iPhone without additional hardware. Remember, practice makes perfect, and with time, you’ll become more proficient in capturing stunning immersive experiences on your iPhone.
Conclusion
With the advancements in technology, shooting 360 videos on your iPhone is now easier than ever before. By utilizing the built-in features and capabilities of your device, you can capture immersive and engaging content without the need for additional hardware.
Through this article, we have explored the various methods to shoot 360 videos on your iPhone, from using the native camera app to utilizing third-party apps. We have also discussed the importance of stabilization, lighting, and composition in creating stunning 360 videos.
Remember, practice makes perfect. Experiment with different shooting techniques, explore different environments, and unleash your creativity. With some time and effort, you’ll be able to capture breathtaking 360 videos that will transport your audience to new virtual worlds.
So grab your iPhone, put your newfound knowledge into action, and start capturing stunning 360 videos today!
FAQs
1. Can I shoot 360 videos on iPhone without any additional hardware?
Absolutely! With the advancements in technology, you can now shoot 360 videos on your iPhone without requiring any additional hardware. All you need is the right app and a compatible iPhone.
2. Which app is best for shooting 360 videos on iPhone?
There are several great apps available for shooting 360 videos on iPhone. Some popular options include Google Street View, VR180, and Fyuse. These apps provide easy-to-use interfaces and powerful features to capture, edit, and share your 360 videos.
3. Do I need a special camera attachment for shooting 360 videos on iPhone?
No, you don’t need a special camera attachment to shoot 360 videos on iPhone. The iPhone’s built-in camera is capable of capturing 360-degree footage. However, using certain external accessories, such as tripods or stabilizers, can help improve the quality and stability of your recordings.
4. Can I edit 360 videos on iPhone?
Yes, you can edit 360 videos on your iPhone using various editing apps available on the App Store. These apps allow you to trim, crop, add effects, and even stitch multiple 360 videos together. Some popular editing apps for iPhone include Adobe Premiere Rush, VeeR Editor, and Splice.
5. Where can I share my 360 videos shot on iPhone?
Once you have shot and edited your 360 videos on iPhone, you can share them on various platforms. Social media platforms like Facebook, YouTube, and Instagram support 360 videos, allowing you to share your creations with friends, family, and followers. You can also upload your videos to popular VR platforms like YouTube VR and Samsung VR for a more immersive viewing experience.