
Welcome to our comprehensive guide on how to insert a SIM card into a Sony Xperia Z. The Sony Xperia Z is a popular and highly capable mobile phone that delivers stunning visuals, powerful performance, and advanced features. Whether you are setting up your new Xperia Z for the first time or need to switch your SIM card, understanding the correct way to insert it is crucial. In this article, we will walk you through the step-by-step process of inserting a SIM card into your Sony Xperia Z, including important tips and precautions to ensure a seamless and successful installation. So, without further ado, let’s dive right in and learn how to insert a SIM card into your Sony Xperia Z!
Inside This Article
- Removing the Back Cover
- Inserting the SIM Card
- Replacing the Back Cover
- Configuring the SIM Card Settings
- Conclusion
- FAQs
Removing the Back Cover
One of the first steps in inserting a SIM card in a Sony Xperia Z is removing the back cover. The back cover of the Xperia Z is designed to be easily removable, allowing access to the SIM tray. Follow these steps to remove the back cover:
-
Turn off your Sony Xperia Z by pressing the power button until the power options appear, then select “Power off.
-
Lay your Xperia Z face down on a flat surface.
-
Locate the small notch on the side of the device near the top-left corner.
-
Insert your thumbnail or a prying tool into the notch.
-
Apply gentle pressure and lift the back cover slightly away from the device.
-
Continue to slide your thumbnail or prying tool along the seam of the device, gradually separating the back cover from the Xperia Z.
-
Once the back cover is completely separated, lift it off the device and set it aside.
Now that you have successfully removed the back cover, you can proceed with inserting the SIM card into your Sony Xperia Z.
Inserting the SIM Card
Inserting the SIM card into your Sony Xperia Z is a straightforward process. Follow the steps below to ensure a successful SIM card insertion.
- Turn off your Sony Xperia Z by pressing and holding the power button.
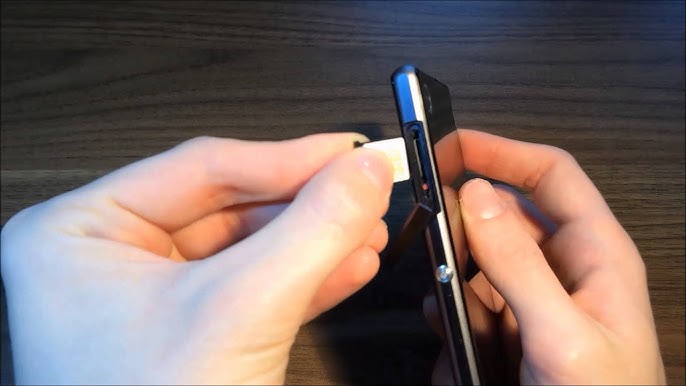
- Locate the SIM card tray. It is usually positioned on the side of the phone or at the top, depending on the model.
- Take a SIM card ejector tool, or alternatively, a small paperclip, and insert it into the tiny hole next to the SIM card tray. Apply gentle pressure until the tray pops out.
- Remove the SIM card tray from the phone.
- Take your SIM card and ensure that it is the correct size for your Sony Xperia Z. The Xperia Z typically uses a nano SIM card.
- Place the SIM card into the designated area on the SIM card tray, making sure the gold contacts on the SIM card are facing downwards.
- Gently insert the SIM card tray back into the phone, aligning it properly with the slot.
- Push the tray inward until it is firmly in place.
- Turn on your Sony Xperia Z by pressing and holding the power button.
Once your Xperia Z has powered on, it should recognize the inserted SIM card and establish a network connection. If you encounter any issues with the SIM card insertion process, refer to the troubleshooting section below.
Replacing the Back Cover
The back cover of the Sony Xperia Z is designed to be easily removable, allowing you to access the battery, SIM card slot, and microSD card slot. If you need to replace the back cover, follow these simple steps:
- Power off your Sony Xperia Z before attempting to remove the back cover.
- Hold the device firmly and locate the small notch on the bottom right corner of the phone.
- Using your fingernail or a small flat tool, gently lift the notch to start loosening the back cover.
- Continue to apply upward pressure along the edges of the back cover until it is completely detached from the phone.
- Set the old back cover aside and align the new back cover with the device.
- Starting from the top edge, press down firmly until you hear a click, indicating that the back cover is securely in place.
- Double-check that the back cover is properly aligned and flush with the phone.
- Power on your Sony Xperia Z to confirm that the new back cover is functioning correctly.
It’s important to note that the back cover of the Sony Xperia Z is not only a protective casing but also plays a crucial role in maintaining the waterproof feature of the device. Therefore, it’s recommended to ensure a tight and secure fit when replacing the back cover to preserve the waterproof capabilities of your Sony Xperia Z.
If you encounter any difficulties or issues while replacing the back cover, it’s advisable to seek professional assistance or consult the user manual provided by Sony for detailed instructions.
Configuring the SIM Card Settings
After inserting the SIM card into your Sony Xperia Z, it is important to configure the SIM card settings to ensure that your phone functions properly. Here are the steps to follow:
1. Go to the Settings menu on your Xperia Z. You can access this by swiping down from the top of your screen and tapping on the gear icon.
2. Scroll down and tap on “SIM card settings”. This option allows you to manage settings related to your SIM card.
3. In the SIM card settings menu, you will find options such as preferred network mode, data roaming, call forwarding, and more.
4. Tap on each option to customize the settings according to your preferences. For example, you may want to choose the preferred network mode based on your carrier’s recommendations or enable data roaming if you plan on using your phone abroad.
5. Once you have made the necessary changes, tap on the back arrow at the top left corner of the screen to exit the SIM card settings menu.
6. Your SIM card settings will now be saved, and your Sony Xperia Z will be configured accordingly.
It is important to note that the available options may vary depending on your carrier and the specific model of your Xperia Z. If you are unsure about any of the settings, it is recommended to consult your carrier or refer to the user manual for further guidance.
By configuring the SIM card settings, you can optimize your Xperia Z’s performance and ensure that you have seamless connectivity and functionality.
Conclusion
In conclusion, inserting a SIM card into your Sony Xperia Z is a simple process that allows you to connect to a mobile network and enjoy seamless communication and data services. By following the step-by-step guide provided in this article, you can easily insert a SIM card into your device without any hassle. Remember to power off your device before inserting or removing the SIM card to avoid potential damage. Whether you are upgrading your device or setting it up for the first time, knowing how to insert a SIM card is a fundamental skill for any Xperia Z owner. So, go ahead and get your SIM card ready, and start enjoying all the amazing features that your Sony Xperia Z has to offer!
FAQs
Q: How do I insert a SIM card into the Sony Xperia Z?
A: Inserting a SIM card into the Sony Xperia Z is a simple process. Follow these steps:
- Turn off your device.
- Locate the SIM card slot on the side of the phone.
- Use a SIM card removal tool or a small paperclip to open the SIM card tray.
- Insert your SIM card into the tray, ensuring it’s placed correctly with the gold contacts facing downwards.
- Push the SIM card tray back into the device until it securely locks in place.
- Turn your phone on and you should see the SIM card signal display on the screen.
Q: Can I use any type of SIM card with the Sony Xperia Z?
A: The Sony Xperia Z is compatible with standard-sized SIM cards. It is important to note that the device does not support dual SIM functionality. Therefore, you can only use one SIM card at a time in the phone.
Q: How do I remove the SIM card from the Sony Xperia Z?
A: To remove the SIM card from the Sony Xperia Z, follow these steps:
- Make sure your device is turned off.
- Locate the SIM card slot on the side of the phone.
- Use a SIM card removal tool or a small paperclip to open the SIM card tray.
- Gently pull the SIM card tray out of the device.
- Remove the SIM card from the tray.
- Insert the tray back into the phone.
Q: What should I do if my Sony Xperia Z does not recognize the SIM card?
A: If your Sony Xperia Z does not recognize the SIM card, try the following troubleshooting steps:
- Remove the SIM card from the device and clean the contacts on the card gently with a soft cloth.
- Ensure that the SIM card is inserted correctly, with the gold contacts facing downwards.
- Restart your device and check if it detects the SIM card.
- If the issue persists, try inserting the SIM card into another phone to determine if the problem lies with the SIM card or the device itself.
- If none of these steps work, it is recommended to contact Sony Xperia customer support for further assistance.
Q: Can I use a SIM card from another carrier in my Sony Xperia Z?
A: Yes, the Sony Xperia Z is typically sold as an unlocked device, meaning it can be used with SIM cards from different carriers. However, it is advisable to check for any compatibility restrictions with your specific carrier before switching SIM cards.