
Are you a proud owner of a Sony Xperia Z and looking for a step-by-step guide on how to insert a SIM card? Look no further! In this article, we will walk you through the process of putting a SIM card in your Sony Xperia Z. The SIM card is an essential component of your phone that allows you to connect to a mobile network and make calls, send messages, and access the internet. By following our easy-to-follow instructions, you will have your SIM card inserted in no time, ensuring that you can fully utilize all the features and functionalities of your Sony Xperia Z. So, let’s dive in and discover how to properly insert a SIM card in your Sony Xperia Z!
Inside This Article
- Overview
- Step 1: Locate the SIM Card Slot
- Step 2: Insert the SIM Card
- Step 3: Power on the Device
- Step 4: Check SIM Card Recognition
- Conclusion
- FAQs
Overview
Putting a SIM card in your Sony Xperia Z is a simple process that allows you to connect to a mobile network and enjoy all the features and benefits that come with it. Whether you’re setting up a new device or replacing an existing SIM card, this article will guide you through the process step by step.
Having a properly inserted SIM card ensures that your phone can make calls, send text messages, and use mobile data. It is a small chip that stores important information, such as your phone number and network settings. Without a SIM card, your phone would only be able to connect to Wi-Fi networks and would not be able to access cellular networks.
The Sony Xperia Z comes with a dedicated SIM card slot, making it easy to insert or remove your SIM card. The slot is typically located on the side of the phone, and it is designed to accommodate nano-SIM cards. Nano-SIM cards are the smallest type of SIM card and are commonly used in modern smartphones.
Before proceeding with the SIM card insertion process, make sure your Xperia Z is turned off. This will prevent any potential damage to the device or the SIM card. Additionally, ensure that you have your SIM card handy, as well as any tools that may be required for insertion, such as a SIM card ejector tool or a small paperclip.
Now that you have a clear overview of the SIM card insertion process for the Sony Xperia Z, let’s dive into the step-by-step instructions on how to insert the SIM card into your device. By following these simple guidelines, you’ll be up and running in no time, ready to enjoy all the functionality your Xperia Z has to offer.
Step 1: Locate the SIM Card Slot
Before inserting a SIM card into your Sony Xperia Z, you need to locate the SIM card slot. This determines where you should place the SIM card for it to work properly. Fortunately, finding the SIM card slot on this device is quite easy.
To locate the SIM card slot, first, hold your Xperia Z with the screen facing towards you. Now, take a careful look at the right-hand side of the device. You will notice a small flap or cover on the side. This flap is hiding the SIM card slot.
Once you’ve identified the flap, use a SIM card removal tool, or you can even use a paperclip, to gently insert into the tiny hole located next to the flap. Apply a bit of pressure, and the flap should pop open, revealing the SIM card slot.
It is important to note that the location of the SIM card slot may vary depending on the specific model of your Sony Xperia Z. However, it is most commonly found on the right-hand side of the device.
Step 2: Insert the SIM Card
Once you have located the SIM card slot on your Sony Xperia Z, it’s time to insert the SIM card. Here are the steps to guide you through the process:
1. Prepare the SIM card: Before inserting the SIM card, make sure it is compatible with your Sony Xperia Z. The SIM card should be the appropriate size and format for your device.
2. Power off your phone: It is important to turn off your Sony Xperia Z before inserting the SIM card. This will prevent any damage to the device or the SIM card.
3. Open the SIM card slot: Use a SIM card ejector tool (included with your phone or a small paperclip) to open the SIM card slot. Insert the tool into the small hole next to the slot and gently apply pressure to open it.
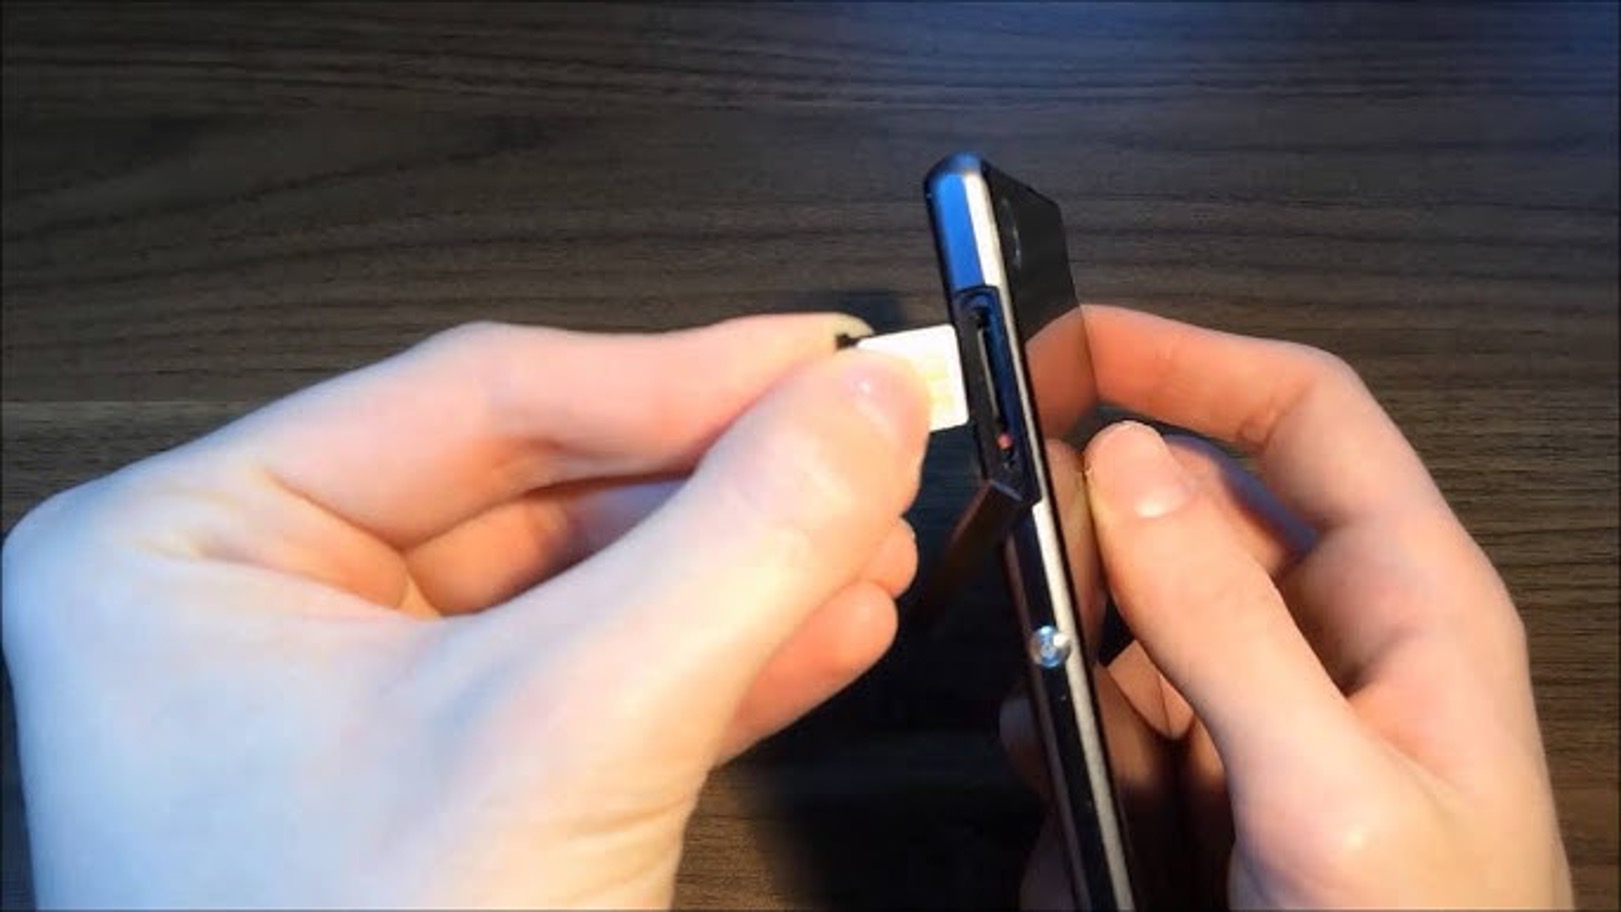
4. Insert the SIM card: Take the SIM card and align it with the SIM card slot, making sure the gold contacts on the card are facing down. Carefully slide the SIM card into the slot until it is firmly in place.
5. Close the SIM card slot: Once the SIM card is securely inserted, gently push the SIM card slot back into its original position until it clicks into place. Ensure it is completely closed to prevent any damage or accidental removal of the SIM card.
6. Power on your phone: After inserting the SIM card, power on your Sony Xperia Z and wait for it to boot up. The device will automatically detect the SIM card and display the network information on the screen.
Now that you have successfully inserted the SIM card into your Sony Xperia Z, you can enjoy using your device for calls, messaging, and data services.
Step 3: Power on the Device
Now that you have successfully inserted the SIM card into your Sony Xperia Z, it’s time to power on the device and get it up and running. Follow these simple steps to power on your Sony Xperia Z:
1. Locate the power button on the side or top of your device. It is usually marked with a small icon of a circle with a line through it.
2. Press and hold the power button for a few seconds until the device vibrates or displays the Sony logo on the screen. This indicates that the device is being powered on.
3. After the device powers on, you will be prompted to set up your Xperia Z. Follow the on-screen instructions to choose your language, connect to a Wi-Fi network, and sign in to your Google account.
4. Once you have completed the initial setup process, your Sony Xperia Z will be ready to use. You can now enjoy all the features and functionalities that the device has to offer.
Remember to keep your SIM card tray secure and ensure that it remains properly inserted. If you experience any issues with the SIM card, such as a loss of signal or difficulty making calls, double-check the SIM card’s position and make sure it is firmly inserted into the tray.
Now that you have successfully powered on your Sony Xperia Z, you can start exploring its capabilities and customizing it to suit your needs. Whether you’re using it for work or personal use, this powerful device is sure to enhance your mobile experience.
Step 4: Check SIM Card Recognition
Once you have successfully inserted the SIM card into your Sony Xperia Z, it’s important to check if the device recognizes the card properly. This step ensures that your phone can establish a connection with your cellular network and you’ll be able to make calls, send text messages, and access the internet.
Here’s how you can check the SIM card recognition on your Sony Xperia Z:
- Power on your device by pressing and holding the power button until the Sony logo appears.
- Wait for the device to boot up and reach the lock screen. Once you’re on the lock screen, swipe up or enter your passcode to unlock the phone.
- Go to the home screen by swiping to the left or pressing the home button.
- Look for the signal bars or the network indicator icon on the status bar at the top of the screen. This indicates that your SIM card is recognized and your phone is connected to the cellular network.
If you see the signal bars or the network indicator icon on the status bar, congratulations! Your SIM card is recognized, and you can start using your Sony Xperia Z for making calls, sending messages, and accessing the internet.
In case you don’t see the signal bars or the network indicator icon, there could be a few reasons why the SIM card is not being recognized:
- Make sure the SIM card is inserted correctly. Remove the SIM card, check for any visible damage, and reinsert it properly.
- Ensure that the SIM card is activated and valid. Contact your mobile service provider to confirm the activation status and check if there are any issues with the SIM card.
- If you have recently changed your SIM card, it’s possible that your phone may need to be unlocked to work with the new carrier’s SIM card. Contact your previous carrier or the device manufacturer for assistance with unlocking your phone.
- In rare cases, there may be an issue with the SIM card slot or the device’s software. If you’ve tried all the steps above and the SIM card is still not recognized, it’s recommended to reach out to Sony Xperia support or visit an authorized service center for further assistance.
Remember, ensuring proper SIM card recognition is crucial for your Sony Xperia Z to function as a fully connected mobile device. By following the steps above, you’ll be able to confirm if your SIM card is recognized, allowing you to enjoy all the features and connectivity options that your phone has to offer.
Conclusion
Putting a SIM card in your Sony Xperia Z is a simple task that allows you to enjoy all the features and connectivity that your phone has to offer. By following the step-by-step instructions outlined in this article, you can easily insert the SIM card and get your phone up and running in no time. Remember to turn off your phone before inserting or removing the SIM card to prevent any damage or data loss.
With a properly inserted SIM card, you can make calls, send messages, access the internet, and enjoy all the other functionalities your Sony Xperia Z has to offer. Whether you’re upgrading your phone, switching carriers, or traveling abroad, knowing how to put a SIM card in your Sony Xperia Z gives you the freedom to stay connected wherever you go.
So don’t hesitate – follow the steps mentioned above and make sure your Sony Xperia Z is ready to go with a properly inserted SIM card. Get ready to experience the world of seamless connectivity and convenience with your powerful Sony Xperia Z smartphone!
FAQs
Q: How do I put a SIM card in a Sony Xperia Z?
A: Inserting a SIM card into a Sony Xperia Z is a simple process. Follow these steps:
- Locate the SIM card tray on the side of your Xperia Z smartphone. It is usually on the left side of the device.
- Take a SIM card ejector tool or a small paperclip and insert it into the tiny hole next to the SIM card tray. Apply a bit of pressure until the tray pops out.
- Remove the SIM card tray and place your SIM card on it. Ensure that the metal contacts on the SIM card are facing downwards.
- Gently push the SIM card tray back into the slot until it clicks back into place.
- Your Xperia Z smartphone will now recognize the inserted SIM card and you can proceed with setting up your device.
Q: Can I use any SIM card in a Sony Xperia Z?
A: The Sony Xperia Z is usually unlocked, meaning it can work with SIM cards from different mobile carriers. However, to be certain, it is recommended to check with your mobile carrier or refer to the Xperia Z product specifications to ensure compatibility with your SIM card.
Q: How do I remove a SIM card from Sony Xperia Z?
A: If you need to remove the SIM card from your Sony Xperia Z, follow these steps:
- Locate the SIM card tray on the side of your Xperia Z smartphone. It is usually on the left side of the device.
- Take a SIM card ejector tool or a small paperclip and insert it into the tiny hole next to the SIM card tray. Apply a bit of pressure until the tray pops out.
- Gently pull the SIM card tray out of the device.
- Remove the SIM card from the tray.
- Insert the empty SIM card tray back into the slot until it clicks back into place.
Q: What size SIM card does Sony Xperia Z use?
A: The Sony Xperia Z uses a micro SIM card. Make sure your SIM card is the correct size to fit into the SIM card tray of the Xperia Z. If you have a different-sized SIM card, you may need to consult your mobile carrier for a SIM card replacement or consider using a SIM card adapter.
Q: Can I use a dual SIM card in Sony Xperia Z?
A: No, the Sony Xperia Z does not support dual SIM functionality. It is designed to accommodate only one SIM card at a time. If you require dual SIM capabilities, you may consider exploring other Sony Xperia models that offer this feature.