
Welcome to our comprehensive guide on how to change your Virgin Wireless password. Virgin Wireless offers a range of cell phone plans and services that cater to your communication needs. One of the essential steps in maintaining the security of your wireless network is regularly updating your password. Changing your password not only helps protect your sensitive information but also prevents unauthorized access to your network. In this article, we will walk you through the step-by-step process of changing your Virgin Wireless password, ensuring that you can enjoy a secure and private browsing experience on your cell phone. So, let’s dive in and learn how to update your Virgin Wireless password to keep your network safe and secure.
Inside This Article
- Steps to Change Virgin Wireless Password
- # Step 1: Access the Router Settings
- Step 2: Log in to the Router
- # Step 3: Locate the Wireless Settings
- Step 4: Change the Wireless Password
- Conclusion
- FAQs
Changing your Virgin Wireless password is a simple process that can help you secure your network and protect your personal information. By following these steps, you can change your password in no time:
Steps to Change Virgin Wireless Password
Step 1: Access the Router Settings
To begin, you need to access the settings page of your Virgin Wireless router. You can do this by opening a web browser and typing in your router’s IP address. Typically, the default IP address for Virgin Wireless routers is 192.168.0.1 or 192.168.1.1. Press Enter to go to the router settings page.
Step 2: Log in to the Router
Once you’re on the router settings page, you will be prompted to enter a username and password. If you haven’t changed the default credentials, you can try using “admin” for the username and “password” for the password. If you have changed the credentials, enter your custom username and password to log in.
Step 3: Locate the Wireless Settings
Once logged in, navigate to the wireless settings section of the router settings page. Look for the option that allows you to change the wireless password. In some routers, it may be labeled as “Wireless Security,” “Wireless Settings,” or “Wi-Fi Password.”
Step 4: Change the Wireless Password
In the wireless settings section, you will find a field where you can enter the new password. Make sure to choose a strong password that includes a combination of letters, numbers, and special characters. Avoid using easily guessable passwords to ensure the security of your network. After entering the new password, click on the “Save” or “Apply” button to save the changes.
That’s it! You have successfully changed your Virgin Wireless password. Be sure to update your connected devices with the new password to maintain access to your network. By regularly changing your wireless password, you can significantly enhance the security of your network and protect your personal data from potential threats.
# Step 1: Access the Router Settings
Accessing the router settings is the first step in changing the Virgin Wireless password. By accessing these settings, you can customize various aspects of your router, including the password. Here’s how you can do it:
1. Connect your computer or mobile device to the Virgin Wireless network. Ensure that you are connected to the same Wi-Fi network that is generated by your Virgin router.
2. Open a web browser on your device. It can be any browser like Chrome, Firefox, or Safari.
3. In the address bar of the browser, type in the default IP address for your Virgin router. The default IP address is often 192.168.0.1 or 192.168.1.1. Press Enter or Return to proceed.
4. If the default IP address doesn’t work, you can find the correct address by checking the documentation provided with your router or by visiting the Virgin website for assistance.
5. After pressing Enter or Return, you will be directed to the router’s login page. Here, you will need to enter the login credentials to access the router settings.
6. Enter the username and password for your router. If you have never changed the default login credentials, you can find them in the router documentation or on the manufacturer’s website.
7. Once you have successfully logged in, you will gain access to the router settings, allowing you to make changes and customize various aspects of your network, including the password.
Now that you have accessed the router settings, you are ready to proceed to the next step and change the Virgin Wireless password as desired.
Step 2: Log in to the Router
Once you have accessed the router settings, the next step in changing your Virgin Wireless password is to log in to the router. Logging in will give you access to the administrative interface where you can make changes to the router settings. Follow these steps to log in:
1. Open your web browser of choice (such as Chrome, Firefox, or Safari) on a device connected to the router. It can be a computer, laptop, smartphone, or tablet.
2. In the address bar of your browser, type in the default IP address for your Virgin router. Typically, it is either 192.168.0.1 or 192.168.1.1. Press Enter to load the router login page.
3. On the login page, you will be prompted to enter the username and password to access the router settings. These details are usually provided with the router documentation or can be found on the router itself. If you don’t have this information, you may need to contact your ISP or Virgin support for assistance.
4. Enter the username and password in the respective fields and click on the “Login” button. If the credentials are correct, you will be granted access to the router’s administrative interface.
5. Once you have successfully logged in, you will be presented with the router settings dashboard. From here, you can navigate to the wireless settings section where you can change the wireless password.
It’s worth noting that some routers may have a different login process or require additional steps. If you’re unsure about how to log in to your specific Virgin router model, referring to the router’s user manual or contacting Virgin support for guidance can be helpful.
# Step 3: Locate the Wireless Settings
Once you have successfully logged in to your Virgin wireless router, it’s time to locate the wireless settings. These settings allow you to make changes to your network name, password, and security settings to ensure that your wireless connection is secure and personalized to your preferences.
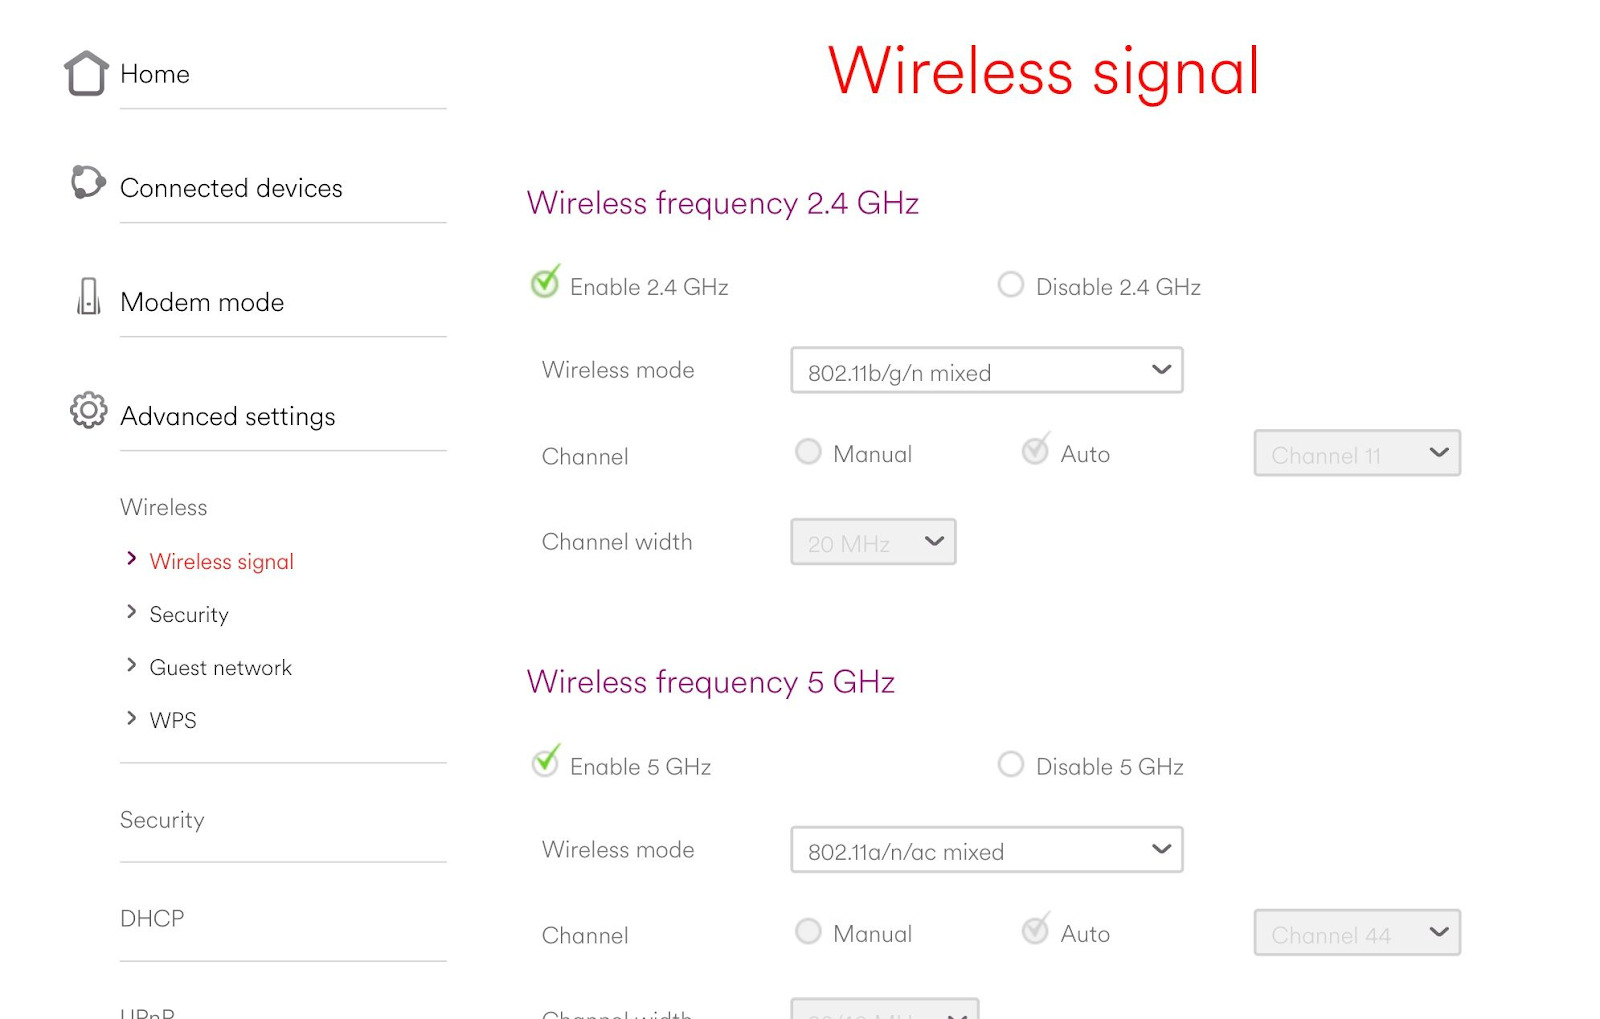
Locating the wireless settings may vary depending on the model of your Virgin wireless router. Generally, you can find them in the “Wireless” or “Wireless Settings” section of the router’s web-based interface. To access this section, look for a tab or menu option labeled “Wireless” or navigate to the “Advanced” settings.
Some routers may require you to enter your administrative password again to access the wireless settings. This is an added layer of security to prevent unauthorized users from making changes to your network settings.
Once you have accessed the wireless settings, you will see a variety of options that you can modify. The key settings to look out for are:
- Network Name (SSID): This is the name of your wireless network that appears when devices search for available networks. It is recommended to choose a unique and easily recognizable name.
- Wireless Security: This setting allows you to choose the type of security protocol for your wireless network. The most common options are WPA2-PSK (AES), WPA-PSK (TKIP/AES), or WEP. It is highly recommended to select WPA2-PSK (AES) for enhanced security.
- Wireless Password: This is the password that devices need to connect to your wireless network. It is crucial to choose a strong, unique password that is not easily guessable.
Take the time to review and modify these settings according to your preferences. Remember to choose a strong password that combines lowercase and uppercase letters, numbers, and special characters for optimal security.
Once you have made the necessary changes, be sure to save the settings before exiting the wireless settings section. This ensures that your new wireless configuration is applied and effective immediately.
Now that you have successfully located and modified the wireless settings on your Virgin wireless router, you can enjoy a more secure and personalized wireless network that meets your needs.
Changing the wireless password on your Virgin Wireless router is a crucial step in securing your network. By regularly updating your password, you can help prevent unauthorized access and protect your personal information. Follow the steps below to change your Virgin Wireless password:
Step 4: Change the Wireless Password
1. Once you log into the router settings, navigate to the “Wireless” or “Wireless Settings” section. This is where you’ll find all the relevant options related to your wireless network.
2. Look for the field labeled “Wireless Password” or “Network Key.” This is the field where you will enter your new password. It may be under the “Security” or “Security Settings” tab.
3. Click on the field and enter your desired password. Make sure to choose a strong password that is a combination of uppercase and lowercase letters, numbers, and special characters. Aim for a password that is at least eight characters long to maximize security.
4. Once you’ve entered your new password, click on the “Save” or “Apply” button to save the changes. The router will now update the wireless network with the new password.
5. It is important to note that changing the wireless password will disconnect all devices currently connected to your network. After changing the password, you will need to reconnect all devices using the new password.
By following these simple steps, you can easily change the wireless password on your Virgin Wireless router. Remember to periodically update your password to maintain the security of your network and keep unwanted intruders at bay.
Conclusion
Changing your Virgin Wireless password is a crucial step in maintaining the security of your wireless network. By following the simple steps outlined in this article, you can ensure that your connection remains safe from unauthorized access and potential cyber threats.
Remember, regularly updating your password and following best practices for password creation can greatly enhance your network’s security. It’s also important to keep in mind that securing your wireless network not only protects your personal information but also prevents others from utilizing your network without your permission.
Now that you know how to change your Virgin Wireless password, take the necessary steps to enhance the security of your network and enjoy a worry-free wireless experience. Stay safe, connected, and in control!
FAQs
1. How do I change my Virgin Wireless password?
To change your Virgin Wireless password, follow these steps:
- Log in to your Virgin Wireless account.
- Navigate to the Settings or Account section.
- Look for the option to change your password.
- Click on it and follow the prompts to enter and confirm your new password.
- Save the changes, and your password will be updated.
2. Why should I change my password regularly?
Regularly changing your password is important for your online security. By doing so, you reduce the risk of unauthorized access to your Virgin Wireless account. It helps protect your personal information, prevent identity theft, and safeguard your privacy. It is recommended to change your password at least every six months or whenever you suspect any suspicious activity in your account.
3. Can I use the same password for my Virgin Wireless account and other online platforms?
While it may be convenient to use the same password across different platforms, it is highly discouraged. Using unique passwords for each account is essential for your overall cybersecurity. If one account gets compromised, having different passwords ensures that your other accounts remain safe. Therefore, always use a unique and strong password for your Virgin Wireless account and other online platforms.
4. What makes a strong password?
A strong password is one that is difficult for others to guess or crack. Here are some tips for creating a strong password:
- Include a combination of upper and lowercase letters, numbers, and special characters.
- Avoid using common words, names, or easily guessable information.
- Make it at least 8 characters long, ideally longer.
- Avoid using the same password for multiple accounts.
- Consider using a password manager to generate and store complex passwords securely.
5. What should I do if I forget my Virgin Wireless password?
If you forget your Virgin Wireless password, don’t worry. You can easily reset it by following these steps:
- Go to the Virgin Wireless login page.
- Click on the “Forgot Password” or “Reset Password” link.
- Enter the email associated with your Virgin Wireless account.
- Follow the instructions in the email you receive to reset your password.
- Choose a new password and confirm it.
- Login to your account with your new password.
If you encounter any issues during the password reset process, you can contact Virgin Wireless customer support for further assistance.