
Are you struggling to charge your wireless earbuds? Whether you’re new to the world of wireless audio or a seasoned user, it’s important to know how to properly charge your wireless earbuds to ensure optimal performance and longevity of the battery. In this article, we will guide you through the process of charging your wireless earbuds, providing you with helpful tips and insights along the way. From understanding the different charging methods to knowing how long to charge your earbuds, we’ve got you covered. So, let’s dive in and learn how to keep your wireless earbuds juiced up and ready for hours of uninterrupted listening pleasure!
Inside This Article
- Step 1: Check the battery level
- Step 2: Connect the charging cable
- Step 3: Insert the wireless earbuds in the charging case
- Step 4: Plug in the charging case
- Step 5: Monitor the charging progress
- Step 6: Remove the fully charged earbuds
- Step 7: Disconnect the charging cable
- Step 8: Store the charging case
- Conclusion
- FAQs
Step 1: Check the battery level
Before you start charging your wireless earbuds, it’s important to check the battery level to determine if they need to be charged. This will prevent any interruptions while using them and ensure that they have enough power to last for your desired duration.
To check the battery level of your wireless earbuds, refer to the user manual or the instructions that came with your specific earbuds model. Most wireless earbuds have a built-in LED indicator that shows the battery level when you press a button or open the charging case.
Typically, the LED indicator will glow green if the battery level is high, yellow if the battery level is moderate, and red or flashing red if the battery level is low. Some models may also have a voice prompt or mobile app that displays the battery level.
If your wireless earbuds do not have a battery level indicator, you can also check the battery level on your connected device. For example, if you have paired your earbuds with a smartphone, you can usually find the battery status in the Bluetooth settings or on the device’s notification panel.
It’s worth noting that the battery level of the charging case may differ from that of the earbuds themselves. In most cases, the charging case has its own battery that is used to recharge the earbuds when they are stored inside. So, make sure to check both the earbuds’ battery level and the charging case’s battery level if applicable.
Once you have determined the battery level of your wireless earbuds, you can proceed with the charging process. So, let’s move on to Step 2: Connect the charging cable.
Step 2: Connect the charging cable
Once you’ve checked the battery level of your wireless earbuds, it’s time to connect the charging cable. This step is crucial to ensure that your earbuds receive the necessary power to charge effectively.
To connect the charging cable, first locate the charging port on your wireless earbuds. The charging port is usually located on the bottom or the side of each earbud, depending on the model. It is usually a small opening, similar to a micro USB or USB-C port.
Next, take the charging cable that came with your wireless earbuds and insert it into the charging port. Make sure to align the cable connector correctly with the port to avoid any damage. Once inserted, you should feel a secure fit with the cable and the port.
Ensure that the other end of the charging cable is connected to a power source. This can be a wall adapter, USB port on your computer, or any other device with a USB port. This power source will provide the necessary electricity to charge your wireless earbuds.
Once the charging cable is securely connected at both ends, you should see a small indicator light on the earbuds or the charging case. This light may be a solid color or blink intermittently to indicate that the charging process has begun.
It’s important to note that some wireless earbuds come with a charging case that serves as both a storage unit and a charging station. In this case, you will need to connect the charging cable to the charging case instead of the earbuds directly.
With the charging cable successfully connected, your wireless earbuds are now ready to receive the power they need to recharge. Keep an eye on the charging progress and move on to the next step once the earbuds have reached the desired battery level.
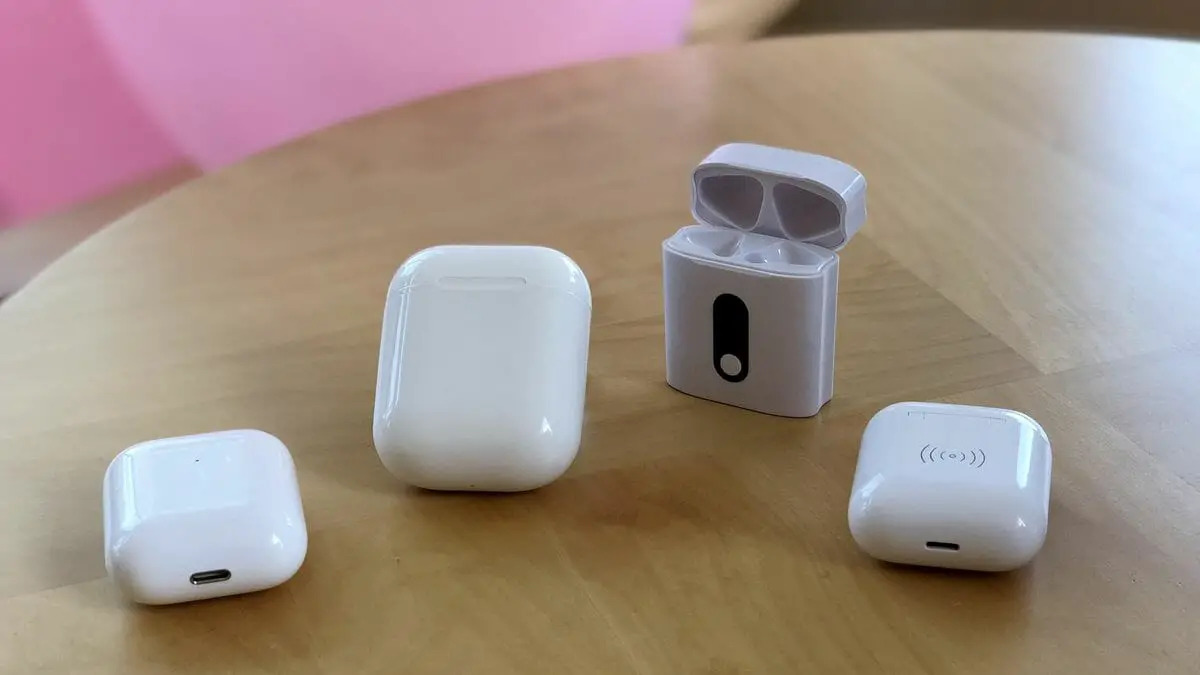
Step 3: Insert the wireless earbuds in the charging case
Once you have connected the charging cable and have the charging case at hand, it’s time to insert your wireless earbuds into the case. This is an essential step to ensure that your earbuds are securely positioned for charging and protected from any damage.
First, open the charging case by flipping the lid or sliding it open, depending on the design of your specific case. Take a moment to familiarize yourself with the inside of the case, as there may be specific slots or holders for each earbud.
Now, pick up one of your wireless earbuds and identify the corresponding slot in the charging case. There is usually a designated spot for each earbud, often indicated by an L (for left) or R (for right) marking. Simply align the earbud with its designated slot and gently place it inside.
Repeat the same process for the second earbud, ensuring that it is placed in the correct slot. Make sure the earbuds are properly oriented, with the ear tips facing upwards and the charging contacts aligned with the charging pins in the case.
Take a moment to examine the placement of the earbuds to ensure they are securely seated in the case. They should fit snugly and not feel loose or wobbly. If needed, adjust the positioning of the earbuds until they are seated properly.
Once both earbuds are properly inserted, close the lid of the charging case. Most cases have a secure latch or magnetic closure to keep the lid shut, ensuring that the earbuds remain in place during the charging process.
Remember to handle the earbuds and the charging case with care to avoid any damage. Avoid exerting excessive force when inserting or removing the earbuds, as this can lead to potential damage to the charging pins or the earbuds themselves.
Now that your earbuds are securely placed in the charging case, you are ready to proceed to the next step and plug in the case to initiate the charging process.
Step 4: Plug in the charging case
Now that you have the wireless earbuds safely nestled in the charging case, it’s time to give them the power they need. Follow these simple steps to plug in the charging case:
1. Locate the charging port on the charging case. It is usually found on the bottom or the back of the case, depending on the design.
2. Take the charging cable provided with your wireless earbuds and insert the USB end into a power source. This can be a USB port on your computer, a wall adapter, or a power bank.
3. Connect the other end of the charging cable to the charging port on the case. Ensure that the connection is secure and snug.
4. Once plugged in, you should see a light or indicator on the charging case. This light might be a solid color or blinking, depending on the brand and model of your wireless earbuds.
5. The charging case will start replenishing the battery of your wireless earbuds. The time it takes to fully charge them can vary, but most cases will indicate when the earbuds are fully charged.
6. While the earbuds are charging, it’s important to leave the charging case undisturbed. Moving or jostling the case could interrupt the charging process and prolong the charging time.
7. Keep an eye on the charging indicator. Once it shows that the earbuds are fully charged, you can proceed to the next step and remove the earbuds from the case.
By plugging in the charging case and allowing it to charge the wireless earbuds, you ensure that they have sufficient power for your next listening session. So, give them some time to charge up before you enjoy the freedom of wireless sound.
Step 5: Monitor the charging progress
Once you have connected the charging cable and inserted your wireless earbuds into the charging case, it is important to monitor the charging progress. This allows you to ensure that your earbuds are charging properly and to estimate how much longer they need to charge.
Most wireless earbuds come with LED indicators on the charging case that provide information about the charging status. The LED lights may be located on the front, side, or top of the case, depending on the brand and model of your earbuds.
Typically, a solid LED light indicates that the charging process is in progress. Some charging cases may have multiple LED lights, where each light represents a different percentage of charging completion. For example, one light may indicate that the earbuds are 25% charged, while two lights indicate 50% charged, and so on.
Keep an eye on these LED indicators while your earbuds are charging. If you notice that the LED lights are not turning on or blinking, it may indicate an issue with the charging connection. In such cases, try disconnecting and reconnecting the charging cable or ensuring that the earbuds are properly seated in the charging case.
Additionally, some wireless earbuds may have companion mobile apps that allow you to monitor the battery level and charging progress through your smartphone. These apps provide detailed information about the charging status and may even send notifications when your earbuds are fully charged.
As the charging process continues, you can estimate the remaining charging time by referring to the manual or checking the manufacturer’s website for approximate charging times. It is important to note that the charging time may vary depending on the brand, model, and battery capacity of your wireless earbuds.
While monitoring the charging progress, avoid disconnecting the charging cable or removing the earbuds from the case prematurely. It is recommended to allow the earbuds to fully charge to maximize their battery life and usage time.
Once you observe that the LED indicators show a full charge or the mobile app notifies you that the charging is complete, your wireless earbuds are ready to use. Remember to disconnect the charging cable, remove the earbuds from the case, and store the charging case in a safe place until the next charging session.
Step 6: Remove the fully charged earbuds
Once you’ve confirmed that your wireless earbuds are fully charged, it’s time to remove them from the charging case. This step is essential as it allows you to enjoy the freedom of untethered listening.
To remove the fully charged earbuds, open the lid of the charging case. Most wireless earbuds come with a magnetic design that securely holds the earbuds in place. Gently pull the earbuds out of the charging case, taking care not to accidentally drop them or apply excessive force.
As you remove the earbuds, you may notice a satisfying click or magnetic release sound indicating that they are no longer connected to the charging pins. This click usually signals a successful connection, ensuring that the earbuds are now ready to be used.
Before placing the earbuds in your ears, it’s crucial to ensure that they are free from any dust or debris. Give them a quick visual inspection and use a soft, lint-free cloth to wipe away any dirt or smudges. Keeping your earbuds clean will optimize both their performance and your listening experience.
Now that your earbuds are clean and ready to use, it’s time to enjoy your favorite music, podcasts, or phone calls. Insert the earbuds into your ears, making sure they fit comfortably and snugly. Adjust the placement if needed to ensure a secure fit that provides the best sound quality and noise isolation.
In case you’re not planning to use the earbuds immediately after removing them from the charging case, it’s advisable to store them in a protective case or pouch. This will safeguard them from accidental damage and reduce the likelihood of losing them.
With your fully charged earbuds in hand, you’re now ready to experience the wireless convenience and exceptional sound quality they deliver. Enjoy your audio journey with a new level of freedom and mobility!
Step 7: Disconnect the charging cable
After your wireless earbuds have finished charging, you will need to disconnect the charging cable. This step is crucial to ensure the safety of your earbuds and to prevent any damage to the charging port.
To disconnect the charging cable, gently unplug it from the charging case. Be careful not to pull on the cable forcefully, as this can weaken the connection or even cause the cable to fray over time. It’s always best to handle the cable with care to maintain its longevity.
Once the cable is disconnected, you can safely remove your fully charged wireless earbuds from the charging case. Make sure to handle them properly and avoid dropping them, as this can result in damage to the earbuds or affect their functionality.
It’s important to note that leaving the charging cable plugged into the charging case when the earbuds are already fully charged can potentially lead to overcharging. This can shorten the overall battery life of your wireless earbuds in the long run, so it’s always recommended to disconnect the cable as soon as the charging process is complete.
By following this step and disconnecting the charging cable promptly, you are taking the necessary precautions to maintain the performance and lifespan of your wireless earbuds. This will ensure that they continue to provide you with a seamless and enjoyable audio experience for years to come.
Step 8: Store the charging case
Once you have successfully charged your wireless earbuds, it’s important to properly store the charging case to ensure its longevity and protect it from damage. Following these simple steps will help you keep your charging case in great condition:
1. Clean the charging case: Before storing the case, make sure to clean it thoroughly. Use a soft, dry cloth to wipe away any dust or dirt that may have accumulated on the surface or inside the case.
2. Secure the charging cable: Wrap the charging cable neatly and secure it by using the designated groove or storage compartment inside the case. This will prevent tangles and keep the cable in place, making it easier to find and access when you need to charge your earbuds again.
3. Store in a safe place: Find a cool, dry and safe spot to store your charging case. Avoid exposing it to extreme heat or cold, excessive moisture, or direct sunlight. It’s best to keep it in a protective pouch, drawer, or shelf to prevent any accidental damage.
4. Keep away from magnets and keys: Avoid storing your charging case near strong magnets or keys, as they can potentially cause damage to the case or interfere with the charging process.
5. Use a carrying case: If your wireless earbuds came with a compatible carrying case, it’s a good idea to use it for added protection during storage and transportation. The carrying case provides an extra layer of cushioning and shields the charging case from any potential bumps or scratches.
6. Regularly check the case: Every few weeks, take a moment to inspect your charging case. Look for any signs of wear and tear, loose connections, or dust build-up. If you notice anything out of the ordinary, it’s a good idea to address the issue promptly to prevent further damage.
By following these steps, you can ensure that your wireless earbud charging case remains in optimal condition and prolong its lifespan. Proper storage not only enhances the functionality and aesthetics of the case but also helps to maintain the overall performance of your wireless earbuds.
Conclusion
In conclusion, wireless earbuds have become a popular choice for many users due to their convenience, portability, and hassle-free charging options. Whether you own a pair of Now You Know wireless earbuds or any other brand, understanding how to charge them properly is essential to ensure optimal performance and longer battery life.
By following the manufacturer’s guidelines, finding the right charging method (whether it’s through a charging case, USB cable, or wireless charging pad), and avoiding common charging mistakes, you can make the most of your wireless earbuds.
Remember to check for charging indicators, keep the charging components clean, avoid overcharging or extreme temperature conditions, and always choose a reputable charging source. Taking these steps will help you enjoy uninterrupted, high-quality audio while extending the lifespan of your wireless earbuds.
So go ahead, charge up your wireless earbuds and let the music play!
FAQs
1. How do I charge my wireless earbuds?
To charge your wireless earbuds, simply connect the charging cable to the charging port on the earbuds and the other end to a power source, such as a USB port or a wall adapter. Make sure the connection is secure, and the charging indicator light on the earbuds should turn on to indicate that they are charging.
2. How long does it take to charge wireless earbuds?
The charging time for wireless earbuds varies depending on the model and brand. Typically, it takes around 1 to 2 hours to fully charge wireless earbuds. However, it is always recommended to refer to the manufacturer’s instructions for specific charging times.
3. Can I use any charging cable to charge my wireless earbuds?
In most cases, wireless earbuds come with a specific charging cable that is designed to fit their charging port. It is always best to use the provided charging cable to ensure compatibility and proper charging. However, if you need to use a different cable, make sure it is compatible with the earbuds’ charging port and meets the necessary voltage and amperage requirements.
4. Can I charge my wireless earbuds with a wireless charger?
Yes, if your wireless earbuds support wireless charging, you can charge them using a wireless charger. Simply place the earbuds on the wireless charging pad or dock, ensuring that the charging indicators line up correctly. It is essential to note that not all wireless earbuds are compatible with wireless charging, so it is important to check the product specifications or the manufacturer’s instructions.
5. How often should I charge my wireless earbuds?
The frequency of charging your wireless earbuds will depend on your usage patterns and the battery life of the earbuds. It is generally advisable to charge your earbuds when the battery level is low or depleted. This helps ensure that your earbuds are always ready for use when you need them. It is important not to overcharge your earbuds as it can affect the overall battery life in the long run.