
Are you wondering how to connect your Dish Network to wireless internet? With the rise of smart TVs and streaming devices, it has become increasingly popular to connect our entertainment systems to the internet. This not only allows you to access a wide range of online services, but also enables features such as on-demand programming and software updates. In this article, we will provide you with a step-by-step guide on how to connect your Dish Network receiver to your wireless network. Whether you want to stream your favorite shows or enjoy the convenience of online content, we’ve got you covered. So let’s dive in and get your Dish Network up and running on a wireless connection!
Inside This Article
- How to Connect Dish Network to Wireless Internet
- Understanding the Basics
- Ensure Proper Equipment
- Connect the Receiver to Wi-Fi
- Troubleshooting Common Issues
- Conclusion
- FAQs
How to Connect Dish Network to Wireless Internet
Connecting your Dish Network to a wireless internet connection can provide you with an easy and convenient way to access on-demand movies, TV shows, and other streaming content. By following a few simple steps, you can enjoy the benefits of a wireless connection with your Dish Network receiver.
1. Understanding the Basics: Before you begin, make sure you have a wireless internet router, a Dish Network receiver with built-in Wi-Fi capabilities, and your Wi-Fi network name and password handy. It’s also a good idea to check whether your receiver is compatible with wireless connections. You can refer to the user manual or contact Dish Network customer support for more information.
2. Ensure Proper Equipment: If your receiver is not Wi-Fi enabled, you may need to purchase a wireless adapter from Dish Network to connect it to your Wi-Fi network. Once you have all the necessary equipment, power on your Dish Network receiver and your wireless router.
3. Connect the Receiver to Wi-Fi: Using your remote control, access the “Settings” menu on your Dish Network receiver. Look for the “Network” or “Internet Connection” option and select it. From there, choose the “Wireless” option and scan for available networks.
4. Troubleshooting Common Issues: If you encounter any problems during the setup process, here are a few troubleshooting tips you can try:
- Ensure that your Wi-Fi network is working properly and that other devices can connect to it.
- Double-check that you entered the correct Wi-Fi network name and password.
- If you are using a wireless adapter, make sure it is securely connected to the receiver and that the adapter is supported by Dish Network.
- Try restarting both your receiver and your wireless router to refresh the connection.
- If all else fails, contact Dish Network customer support for further assistance.
By following these steps, you’ll be able to connect your Dish Network receiver to your wireless internet connection, allowing you to access a wide range of entertainment options at your convenience. Enjoy the benefits of wireless streaming with Dish Network!
Understanding the Basics
Before diving into the process of connecting your Dish Network to wireless internet, it’s important to understand the basics of how this connectivity works. Dish Network receivers are equipped with built-in Wi-Fi capabilities, allowing you to access and stream online content directly to your TV.
The wireless internet connection enables you to enjoy a wide range of features such as On-Demand movies, streaming services, and interactive apps. By connecting your Dish Network receiver to your home’s wireless network, you can seamlessly integrate the online world with your satellite TV experience.
Connecting your Dish Network receiver to wireless internet provides you with the convenience of accessing a variety of entertainment options without the need for additional cables or connections. With an active internet connection, you can unlock an array of content and enhance the overall entertainment value of your Dish Network experience.
Now that you have a good grasp of the basics, let’s move on to the next step – ensuring you have the proper equipment.
Ensure Proper Equipment
Before you can connect your Dish Network receiver to the wireless internet, it’s important to make sure you have the proper equipment. Here are the key components you’ll need:
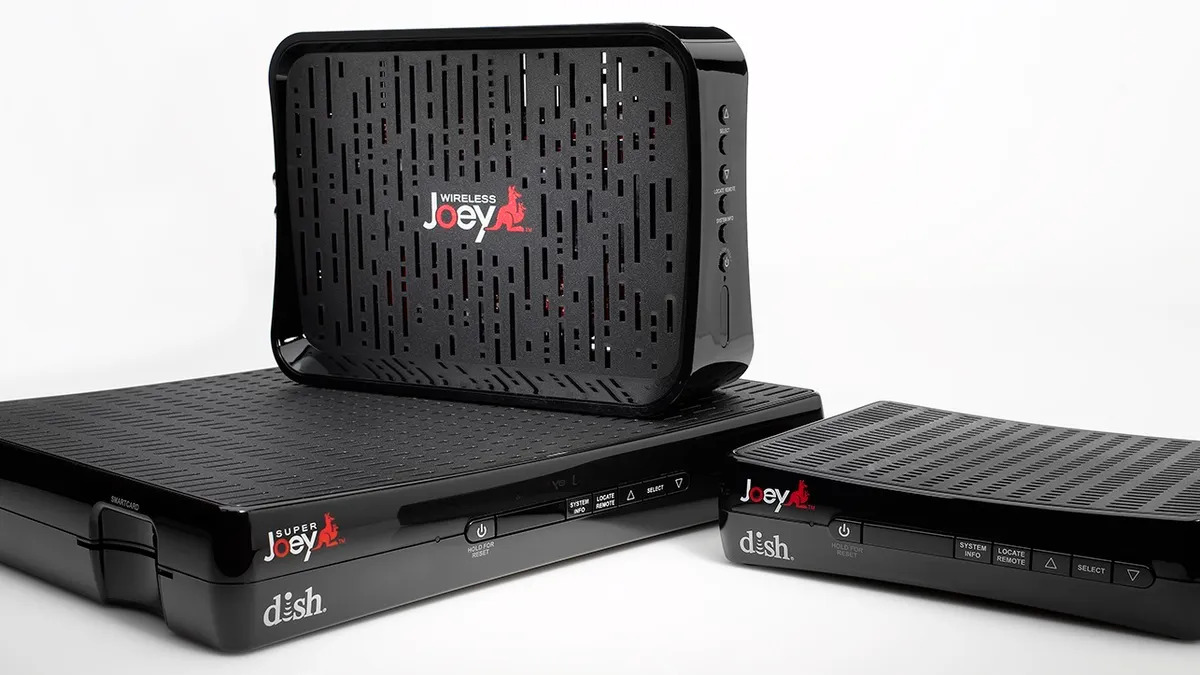
- Dish Network Receiver: Ensure you have a compatible Dish Network receiver that supports wireless internet connectivity. Check the model number and specifications to confirm if it has built-in Wi-Fi capabilities.
- Wireless Router: You will need a wireless router to create the Wi-Fi network in your home. Make sure the router is compatible with your Dish Network receiver and capable of providing a strong and stable internet connection.
- Internet Service: Of course, you’ll need an active internet service provider (ISP) subscription to connect your Dish Network receiver to the internet. Ensure that your internet service is up and running before attempting to connect the receiver.
Having the right equipment is crucial to ensure a successful connection between your Dish Network receiver and the wireless internet. Double-check that you have all the necessary components before proceeding to the next steps.
Connect the Receiver to Wi-Fi
Connecting your Dish Network receiver to your Wi-Fi network is a straightforward process. Follow these steps to ensure a seamless connection:
1. Start by turning on your Dish Network receiver and navigating to the menu using your remote control.
2. From the menu, locate and select the “Settings” or “Network” option. This will vary depending on the model of your receiver.
3. Within the settings menu, look for the “Wireless Setup” or “Wi-Fi Setup” option. Select it to begin the process.
4. Your receiver will scan for available Wi-Fi networks. Once the list is populated, choose your desired network from the options provided.
5. If your network is password-protected, you will be prompted to enter the password. Use the on-screen keyboard on your TV to input the correct password. Be sure to double-check for any typos.
6. After entering the password, select “Connect” or “Join” to establish the connection between your Dish Network receiver and your Wi-Fi network.
7. Once connected, your receiver will display a confirmation message or an icon indicating a successful Wi-Fi connection.
8. To ensure a stable and uninterrupted connection, it is recommended to place your receiver within range of your Wi-Fi router and avoid obstructions that may interfere with the signal.
Congratulations! Your Dish Network receiver is now connected to your Wi-Fi network. This will enable you to stream on-demand content, access online services, and make the most of your entertainment experience.
Troubleshooting Common Issues
Connecting your Dish Network receiver to wireless internet may sometimes come with its own set of challenges. If you encounter any issues during the process, here are some common troubleshooting tips to help you overcome them:
1. Check your Wi-Fi signal strength: Poor signal strength can lead to a weak or unstable connection. Make sure that your receiver is within range of your Wi-Fi router and there are no obstructions blocking the signal.
2. Restart your receiver: Sometimes a simple restart can resolve connection issues. Unplug your receiver from the power source, wait for a few seconds, and then plug it back in. Allow the receiver to boot up and attempt the connection again.
3. Verify your Wi-Fi credentials: Double-check that you have entered the correct Wi-Fi network name (SSID) and password. One small typo can prevent your receiver from connecting to the internet. It’s always a good idea to re-enter the credentials to ensure accuracy.
4. Reset your network settings: If all else fails, you can try resetting your network settings on the Dish Network receiver. Look for the network settings menu in the receiver’s system settings and select the option to reset network settings. This will remove any previous network configurations and allow you to start fresh.
5. Update the receiver’s software: It’s important to keep your Dish Network receiver’s software up to date. In some cases, outdated software can cause compatibility issues with your wireless network. Check for any available software updates and install them if necessary.
6. Contact Dish Network support: If you have tried all of the above steps and are still unable to connect your receiver to the wireless internet, it may be time to reach out to Dish Network support. They have dedicated technicians who can assist you in troubleshooting and resolving any connectivity issues you may be experiencing.
Remember, connecting your Dish Network receiver to wireless internet can offer you greater convenience and access to a wide range of features. By following these troubleshooting tips, you can overcome common issues and enjoy seamless connectivity in no time.
Connecting your Dish Network to wireless internet is a convenient way to enhance your viewing experience. By following the steps outlined in this article, you can easily connect your Dish receiver to your home’s wireless network.
With a wireless connection, you can take advantage of features such as Video On Demand, access to streaming services, and software updates. It eliminates the need for extra cables and allows you to enjoy your favorite shows and movies without any interruptions.
Remember to ensure that you have a compatible Dish receiver model and a stable wireless internet connection for optimal performance. If you encounter any issues during the setup process, refer to the troubleshooting section or reach out to Dish Network’s customer support for assistance.
So why wait? Take the steps to connect your Dish Network to wireless internet and enjoy a seamless and convenient entertainment experience today!
FAQs
1. How do I connect my Dish Network receiver to wireless internet?
To connect your Dish Network receiver to wireless internet, follow these steps:
– Press the MENU button on your remote control.
– Go to Settings and select the Internet option.
– Choose the option to set up the wireless connection.
– Select your wireless network from the list of available networks.
– Enter your Wi-Fi password when prompted.
– Once the connection is established, you can access online features and on-demand content through your Dish Network receiver.
2. Can I connect multiple Dish Network receivers to the same wireless network?
Yes, you can connect multiple Dish Network receivers to the same wireless network. Each receiver will need to go through the setup process individually and connect to the Wi-Fi network using the correct password. Once connected, all the receivers can access online features and on-demand content simultaneously.
3. What if I don’t have a wireless internet connection?
If you don’t have a wireless internet connection, you can still connect your Dish Network receiver using an Ethernet cable. Simply plug one end of the cable into the receiver and the other end into your router or modem. Then, follow the on-screen instructions to set up the wired internet connection.
4. How can I improve the performance of my Dish Network receiver’s wireless connection?
To improve the performance of your Dish Network receiver’s wireless connection, you can try the following tips:
– Position your Wi-Fi router in a central location and away from obstructions.
– Avoid placing the router near other electronic devices that may cause interference.
– Use the 5GHz frequency band for faster and more stable connections, if your router supports it.
– Ensure that your Wi-Fi network is password protected to prevent unauthorized access.
– If possible, consider upgrading to a higher-speed internet plan for better streaming quality.
5. What should I do if I’m experiencing connectivity issues with my Dish Network receiver?
If you’re experiencing connectivity issues with your Dish Network receiver, here are some troubleshooting steps you can try:
– Restart your receiver and Wi-Fi router/modem.
– Move your receiver and Wi-Fi router closer together to improve signal strength.
– Check if other devices can connect to the Wi-Fi network to rule out any network issues.
– Verify that your Wi-Fi password is correct and hasn’t changed.
– Contact your internet service provider to ensure there are no outages or technical issues in your area.
– If all else fails, you can reach out to Dish Network’s technical support for further assistance.