
The wireless Wii Sensor Bar is a convenient and hassle-free way to enhance your gaming experience on the Nintendo Wii console. With its wireless capabilities, you can say goodbye to messy cables and enjoy the freedom to place the sensor bar anywhere within range.
Whether you’re a casual gamer or a dedicated enthusiast, connecting the wireless Wii Sensor Bar is a simple process that can be done in just a few steps. In this article, we’ll guide you through the process to ensure you can start gaming without any delays or technical issues.
So, if you’re ready to take your Wii gaming to the next level and enjoy the freedom of a wireless setup, read on to learn how to connect the wireless Wii Sensor Bar.
Inside This Article
- Connecting the Wireless Wii Sensor Bar to the Wii console
- Powering on the Wireless Wii Sensor Bar
- Troubleshooting common issues with the Wireless Wii Sensor Bar connection
- Tips for optimal placement and usage of the Wireless Wii Sensor Bar
- Conclusion
- FAQs
Connecting the Wireless Wii Sensor Bar to the Wii console
If you’ve recently purchased a wireless Wii Sensor Bar for your Wii console, you might be wondering how to connect it. The wireless Wii Sensor Bar offers you the convenience of placing it anywhere in the room without the need for cumbersome cables. In this guide, we’ll walk you through the simple steps to connect the wireless sensor bar to your Wii console.
Before you begin, make sure that both the wireless Wii Sensor Bar and your Wii console are powered off. This will help ensure a successful connection without any interference. Once everything is turned off, follow the steps below:
- Locate the sensor bar connector on the back of the Wii console. It is a small, rectangular slot labeled “Sensor Bar.”
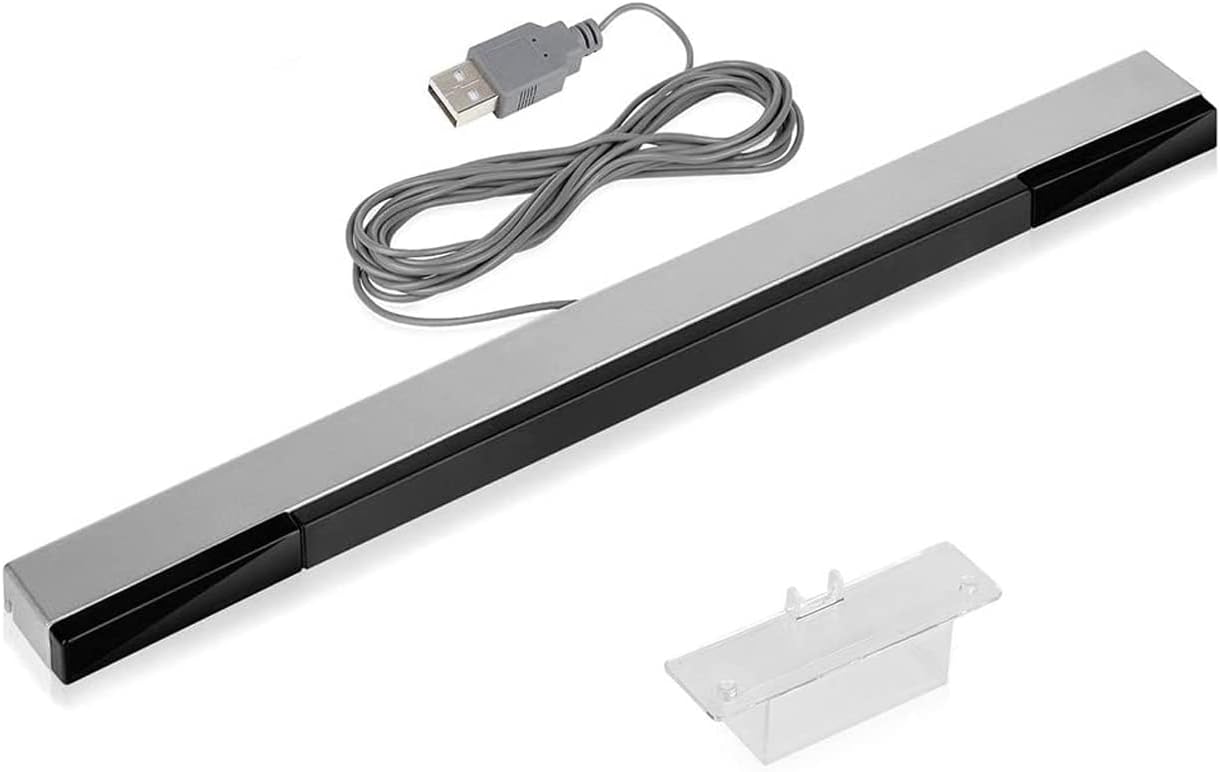
- Take the wireless sensor bar and insert the USB connector into the USB port of the Wii console. Make sure to insert it firmly to establish a secure connection.
- Next, find a suitable spot for the wireless sensor bar in front of your TV. Ideally, it should be placed above or below the television screen for optimal tracking of your Wii remote.
- If needed, adjust the angle of the wireless sensor bar to ensure that it aligns with the position of your Wii remote when you’re playing games or navigating menus.
- Once you’ve positioned the wireless sensor bar, power on your Wii console and wait for it to initialize.
- Now, grab your Wii remote and press the “Sync” button located on the back of the remote. Once pressed, you will see the LED lights on the remote start flashing.
- Finally, press the “Sync” button located on the wireless sensor bar. This will establish a connection between the remote and the sensor bar.
- You should now see the LED lights on your Wii remote stop flashing and stabilize, indicating a successful connection.
Congratulations! You have successfully connected the wireless Wii Sensor Bar to your Wii console. Now you can enjoy a more flexible and hassle-free gaming experience. If you encounter any issues during the connection process, check out the troubleshooting section below for some common solutions.
Powering on the Wireless Wii Sensor Bar
The Wireless Wii Sensor Bar is a convenient option for Wii console owners who want to eliminate the clutter of wires. When setting up the Wireless Wii Sensor Bar, it’s important to know how to power it on properly to ensure a smooth gaming experience.
Here are the steps to power on the Wireless Wii Sensor Bar:
- Locate the power button on the Wireless Wii Sensor Bar. It is usually located on the side or on the back of the device.
- Press and hold the power button for a few seconds until the LED indicator lights up. The LED light indicates that the Wireless Wii Sensor Bar is now powered on and ready to connect with the Wii console.
- Once the Wireless Wii Sensor Bar is powered on, ensure that the Wii console is also powered on and in a detection mode. This will allow the console to recognize and establish a connection with the sensor bar.
- Position the Wireless Wii Sensor Bar in an optimal location near or on top of your TV, preferably centered and at a similar height to the TV screen. Make sure the sensor bar is not obstructed by any objects or furniture that might interfere with its detection capabilities.
- Enjoy your wireless gaming experience with the Wireless Wii Sensor Bar!
Remember, it’s important to properly power on the Wireless Wii Sensor Bar and position it correctly to ensure accurate motion tracking during gameplay. By following these steps, you can enjoy the freedom of a wireless setup without compromising the responsiveness of your Wii console.
Troubleshooting common issues with the Wireless Wii Sensor Bar connection
Having trouble with your Wireless Wii Sensor Bar connection? Don’t worry, we’ve got you covered. In this section, we will outline some common issues you may encounter when setting up or using the Wireless Wii Sensor Bar, along with helpful tips to resolve them.
1. No power or signal: If your Wireless Wii Sensor Bar is not powering on or if there is no signal, the first step is to check the batteries. Ensure they are properly inserted and have enough charge. If the problem persists, try replacing the batteries with fresh ones.
2. Interference: Wireless devices and certain electronic equipment may cause interference with the Wireless Wii Sensor Bar signal. Keep the Sensor Bar away from sources of interference such as fluorescent lights, other wireless devices, and large metal objects. Adjust the position of the Sensor Bar to find the best signal reception.
3. Distance from the Wii console: The Wireless Wii Sensor Bar has a specified range within which it can function optimally. If you are experiencing connection issues, ensure that the Sensor Bar is within the recommended distance from the Wii console. Try moving the Sensor Bar closer to the console to see if it improves the connection.
4. Obstructions: Make sure there are no obstructions blocking the communication between the Sensor Bar and the Wii console. Move any objects that may be obstructing the line of sight between the two. Clear the area around the Sensor Bar to ensure a clear and uninterrupted signal.
5. Syncing issues: Sometimes, the Wireless Wii Sensor Bar may need to be synced with the Wii console. To do this, go to the Wii menu and select the “Wii Remote Settings” option. Follow the on-screen instructions to sync the Sensor Bar with the console. Make sure the Sensor Bar is properly connected to the Wii console via the included wireless receiver.
6. Check connections: Ensure that all connections are properly made. Check that the cables connected to the Wii console and the wireless receiver are secure and undamaged. If necessary, unplug and re-plug the cables to ensure a proper connection.
7. Resetting the system: If none of the above solutions work, try resetting the Wii console. Power off the console, unplug it from the power source, and wait for a few minutes. Then, plug it back in and power it on. This can help resolve any temporary software glitches.
Remember, troubleshooting the Wireless Wii Sensor Bar connection issues may vary depending on the specific problem you are facing. If you have tried all the suggestions above and are still experiencing issues, it may be best to contact the manufacturer’s support team for further assistance.
Tips for optimal placement and usage of the Wireless Wii Sensor Bar
When it comes to enjoying your favorite Wii games, having the Wireless Wii Sensor Bar properly positioned is crucial for an enhanced gaming experience. Here are some handy tips to help you optimize the placement and usage of your Wireless Wii Sensor Bar:
1. Position the Sensor Bar correctly: The Wireless Wii Sensor Bar should be placed above or below your television screen, facing towards the play area. Make sure it is positioned at the same height as your Wii remote when you are playing. This helps to ensure accurate motion tracking and responsiveness during gameplay.
2. Use the adjustable stand: If your Wireless Wii Sensor Bar comes with an adjustable stand, take advantage of it. This stand allows you to easily adjust the angle and alignment of the Sensor Bar so that it is perfectly aligned with your play area. Experiment with different angles to find the optimal position for accurate tracking.
3. Check for obstructions: Make sure that there are no objects blocking the line of sight between the Wireless Wii Sensor Bar and your Wii remote. Objects such as furniture, decorations, or other devices can interfere with the infrared signals and result in poor tracking. Clear any obstructions to maximize tracking accuracy.
4. Avoid direct sunlight: Direct sunlight can cause interference with the infrared signals emitted by the Wireless Wii Sensor Bar. To prevent this, avoid placing the Sensor Bar in direct sunlight or in areas where sunlight can directly hit it. This will ensure accurate tracking and prevent any disruptions during gameplay.
5. Use the sensitivity settings: The Wii console allows you to adjust the sensitivity settings for the Wii remote and Sensor Bar. Experiment with these settings to find the right balance that suits your gameplay style. Increasing the sensitivity can improve tracking accuracy, while decreasing it can make the controls less sensitive to minor movements.
6. Keep the Sensor Bar clean: Dust and dirt can accumulate on the surface of the Wireless Wii Sensor Bar over time, which can affect its performance. Regularly clean the Sensor Bar with a soft, dry cloth to remove any debris and ensure optimal tracking accuracy.
7. Calibrate your Wii remote: Properly calibrating your Wii remote can also contribute to optimal tracking. Follow the instructions in your Wii console’s manual to calibrate the Wii remote for accurate motion control. This will help improve the overall gaming experience and ensure precise gameplay.
8. Test the tracking: Once you have set up the Wireless Wii Sensor Bar, test the tracking by playing a Wii game that requires motion control. Move your Wii remote in different directions and see if the on-screen movements accurately correspond to your actions. If you notice any inconsistencies or lag, double-check the placement and adjust as needed.
By following these tips, you can ensure that your Wireless Wii Sensor Bar is optimally placed and setup for an immersive gaming experience. Enjoy your favorite games with precise motion control and responsiveness!
Conclusion
In conclusion, connecting a wireless Wii sensor bar is a simple and convenient way to enhance your gaming experience. By following the steps outlined in this article, you can easily set up and sync your sensor bar without the hassle of wires. Not only does it provide a clutter-free gaming environment, but it also offers the flexibility to place the sensor bar in a location that best suits your needs.
With a wireless sensor bar, you can enjoy uninterrupted gameplay and precise motion tracking. Whether you’re playing intense action games or engaging in interactive virtual activities, the wireless Wii sensor bar ensures that your movements are accurately captured, allowing for a truly immersive gaming experience.
So, why wait? Say goodbye to tangled wires and hello to hassle-free gaming by connecting a wireless Wii sensor bar today!
FAQs
1. Can I connect a wireless Wii sensor bar?
Yes, you can connect a wireless Wii sensor bar to your Wii console. It provides the same functionality as a wired sensor bar but without the need for any cables.
2. How does a wireless Wii sensor bar work?
A wireless Wii sensor bar uses infrared technology to capture the movements of your Wii remote controllers. It emits infrared signals, which are picked up by the Wii remote controllers, allowing them to track your movements accurately.
3. Do I need any additional equipment to set up a wireless Wii sensor bar?
No, you don’t need any additional equipment to set up a wireless Wii sensor bar. It usually comes with a wireless receiver that connects directly to the Wii console.
4. Is the setup process complicated?
The setup process for a wireless Wii sensor bar is straightforward. Simply connect the wireless receiver to the Wii console using the provided cables and ensure that the sensor bar is placed correctly. The instructions included with the wireless sensor bar will guide you through the process.
5. Can I use a wireless Wii sensor bar with other game consoles?
While the wireless Wii sensor bar is designed specifically for the Wii console, it may be compatible with other game consoles that use similar infrared tracking technology. However, it is always recommended to check the compatibility specifications before attempting to use it with a different system.