
If you’re an avid gamer, you know that having high-quality audio is essential for an immersive and enjoyable experience. One popular brand that has gained a reputation for its exceptional audio products is Turtle Beach. Known for their top-notch gaming headsets, Turtle Beach offers a range of options to enhance your gaming sessions.
While Turtle Beach headsets are commonly used with consoles like Xbox and PlayStation, many users want to know if these wireless headsets are compatible with their PC as well. In this article, we will explore how to use wireless Turtle Beach headsets on your PC, providing step-by-step instructions to ensure a seamless connection and optimal audio performance. Whether you’re a PC gamer or just looking to use your headset for other purposes, we’ve got you covered. Let’s dive in!
Inside This Article
- Connecting the Turtle Beach Headset to PC
- Adjusting Audio Settings on PC
- Configuring Microphone Settings on PC
- Troubleshooting Common Issues with Wireless Turtle Beaches on PC
- Conclusion
- FAQs
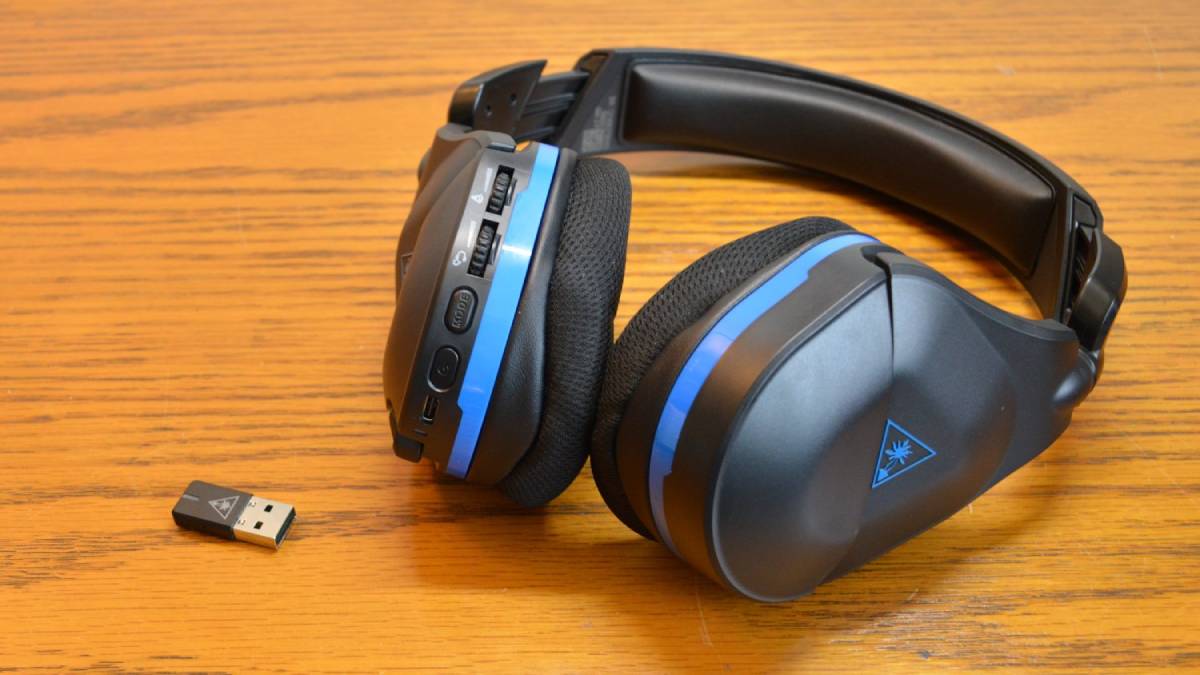
Connecting the Turtle Beach Headset to PC
One of the key advantages of using a wireless Turtle Beach headset is the convenience and flexibility it provides. Connecting your Turtle Beach headset to your PC is a straightforward process that ensures you can enjoy high-quality sound and advanced features when gaming, listening to music, or making voice calls.
To connect your Turtle Beach headset to your PC, follow these simple steps:
- Ensure that your Turtle Beach headset is fully charged. Most wireless Turtle Beach headsets come with built-in rechargeable batteries. It’s important to charge the headset fully before attempting to pair it with your PC.
- Turn on your PC and navigate to the Bluetooth settings. If your Turtle Beach headset uses Bluetooth technology for the wireless connection, make sure that your PC has Bluetooth capabilities and that it is enabled. You can usually find Bluetooth settings in the system tray or in the control panel of your PC.
- Put your Turtle Beach headset into pairing mode. This step may vary depending on the model of your headset. Refer to the user manual or documentation that came with your headset to find the specific instructions for your model. Generally, it involves pressing and holding a button on the headset to enable pairing mode.
- On your PC, click on the “Add Bluetooth or other device” option. This option can usually be found in the Bluetooth settings menu. Your PC will search for available devices to pair with.
- Select your Turtle Beach headset from the list of available devices. Once your PC has discovered your Turtle Beach headset, click on it to initiate the pairing process. Follow any on-screen prompts to complete the pairing.
- Once the pairing is successful, your Turtle Beach headset should be connected to your PC. You can now enjoy using your headset for various activities on your PC, including gaming, streaming, and communication.
Remember to refer to the specific instructions provided by Turtle Beach for your particular headset model if you encounter any difficulties during the pairing process. Each headset may have slightly different steps, so following the manufacturer’s guidelines will ensure a successful connection.
Adjusting Audio Settings on PC
When using wireless Turtle Beaches on your PC, it’s important to ensure that the audio settings are properly configured for the best possible sound experience. Here are some simple steps to adjust the audio settings on your PC:
-
Open the Control Panel on your PC by clicking on the Start button and selecting Control Panel from the menu.
-
Once in the Control Panel, locate and click on the “Sound” option. This will open the Sound settings window.
-
In the Sound settings window, go to the “Playback” tab and select the Turtle Beach headset as the default playback device. Right-click on the Turtle Beach headset and click on “Set as Default Device”.
-
Next, go to the “Recording” tab and select the Turtle Beach microphone as the default recording device. Right-click on the Turtle Beach microphone and click on “Set as Default Device”.
-
Once you have set the Turtle Beach headset and microphone as the default devices, click on the “Apply” button and then click on “OK” to save the changes.
-
Now, launch any audio or video application on your PC and test the sound output through your wireless Turtle Beach headset. If the sound is not coming through the headset, ensure that the volume is properly adjusted on both the PC and the headset.
By following these steps to adjust the audio settings on your PC, you can optimize the sound quality and enjoy an immersive audio experience with your wireless Turtle Beach headset.
Configuring Microphone Settings on PC
One of the essential aspects of using wireless Turtle Beaches on your PC is configuring the microphone settings correctly. By adjusting these settings, you can ensure that your voice is captured clearly and accurately during online gaming sessions, voice chats, or video conferences. Here’s a step-by-step guide on how to configure your microphone settings on PC:
- Access Sound Settings: Start by accessing the sound settings on your PC. You can typically find them by right-clicking on the speaker icon located on the taskbar and selecting “Sounds.”
- Select Recording Tab: Once the Sound dialog box appears, navigate to the Recording tab. Here, you will find a list of available recording devices connected to your PC, including your headset’s microphone.
- Set Your Turtle Beach Headset as Default: Right-click on your Turtle Beach headset’s microphone and select “Set as Default Device.” This ensures that your PC recognizes the microphone on your headset as the primary input device for recording audio.
- Adjust Microphone Levels: To optimize microphone performance, you can adjust the microphone levels. Double-click on the Turtle Beach headset’s microphone, and a new window will appear. Go to the “Levels” tab and adjust the microphone volume slider to an appropriate level. Test the microphone by speaking into it and adjusting the level until the input volume is satisfactory.
- Enhance Microphone Quality: If you want to enhance the quality of your microphone audio, you can apply various enhancements. In the same window as the levels tab, go to the “Enhancements” tab. Here, you can enable features like noise cancellation, echo reduction, or voice enhancements to improve the overall audio experience.
- Apply Changes and Test: Once you have configured the microphone settings to your liking, click on the “Apply” button to save the changes. Take a moment to test your microphone by recording a short audio clip or participating in a voice chat to ensure that your voice is clear and audible.
By following these steps, you can configure the microphone settings on your PC to optimize the performance of your wireless Turtle Beach headset. Remember to periodically check and adjust the settings as needed to ensure the best audio experience during your gaming or communication sessions.
Troubleshooting Common Issues with Wireless Turtle Beaches on PC
Wireless Turtle Beaches are a popular choice for gamers looking to enjoy immersive audio and clear communication while gaming on their PCs. However, like any electronic device, they can sometimes encounter issues that may disrupt the gaming experience. If you’re facing any problems with your wireless Turtle Beach headset on your PC, don’t worry! We’ve got you covered with some troubleshooting tips to help you get back on track.
1. No Sound: If you’re not getting any sound from your Turtle Beach headset on your PC, the first thing to check is the volume settings. Ensure that the volume is not muted or set to a very low level both on your PC and the headset itself. Additionally, make sure the audio output is correctly selected in your PC’s sound settings.
2. Poor Audio Quality: If you’re experiencing a degraded audio quality, there are a couple of things you can try. First, make sure that your headset is properly charged. A low battery can result in poor audio performance. Additionally, check for any physical damage or loose connections in the headset’s cables or wireless receiver. If everything seems fine, you can try updating the headset’s firmware or drivers to ensure optimal performance.
3. Connectivity Issues: If your Turtle Beach headset is having trouble connecting to your PC, try the following troubleshooting steps. First, ensure that the wireless receiver is properly plugged into your PC’s USB port. If it’s already connected, try unplugging and re-plugging it to establish a new connection. If the issue persists, check for any interference from other wireless devices or Bluetooth connections that might be disrupting the headset’s signal.
4. Mic Not Working: If your microphone is not functioning correctly, there are a few things you can check. First, make sure that the microphone is not muted on the headset itself or in your PC’s sound settings. Additionally, ensure that the microphone is correctly positioned and isn’t obstructed by any physical objects. If the problem persists, you can try updating the headset’s firmware or reinstalling the microphone drivers.
5. Echo or Feedback: If you’re experiencing echo or feedback issues while using your Turtle Beach headset on your PC, it could be due to improper audio settings. Make sure that the mic monitoring level is set to an appropriate level. Additionally, consider adjusting the microphone sensitivity to eliminate any background noise that might be causing the echo or feedback.
6. Random Disconnects: If your Turtle Beach headset is randomly disconnecting from your PC, there are a few possible causes. First, check the battery level of the headset and recharge it if necessary. Low battery power can lead to frequent disconnections. Additionally, move closer to the wireless receiver to ensure a strong and stable connection. Finally, try updating the headset’s firmware or resetting the wireless connection to resolve the issue.
By following these troubleshooting tips, you should be able to resolve common issues with your wireless Turtle Beach headset on your PC. However, if you’re still facing persistent issues, it’s recommended to reach out to Turtle Beach support for further assistance. Happy gaming!
Conclusion
Wireless Turtle Beaches provide a seamless and convenient way to enjoy high-quality audio while gaming on your PC. With their wireless functionality, you can move freely without being tethered to your computer. Whether you are a casual gamer or a competitive player, these wireless headsets offer impressive sound quality and comfortable design to enhance your gaming experience.
By following the steps outlined in this guide, you can easily set up and use your Wireless Turtle Beaches on your PC. From connecting the headset to your computer to adjusting audio settings, you have learned the essential steps for a smooth setup process. With proper care and maintenance, your Wireless Turtle Beaches can provide hours of immersive gaming audio.
Embrace the freedom of wireless gaming audio and take your gaming experience to the next level with Wireless Turtle Beaches on your PC. Get ready to immerse yourself in the world of gaming with crystal-clear sound and an enhanced level of comfort. So why wait? Gear up, connect your headset, and enjoy the ultimate PC gaming experience with Wireless Turtle Beaches!
FAQs
Q: Can I use wireless Turtle Beaches on my PC?
Yes, you can use wireless Turtle Beaches on your PC. Turtle Beach offers a range of wireless gaming headsets that are compatible with PCs, providing you with an immersive audio experience during your gaming sessions.
Q: How do I connect wireless Turtle Beaches to my PC?
To connect wireless Turtle Beaches to your PC, you will typically need a USB transmitter or a Bluetooth adapter. Follow the instructions provided with your specific Turtle Beach headset model to properly connect it to your PC. Make sure to install any necessary drivers or software as well.
Q: Are wireless Turtle Beaches compatible with all PC systems?
Wireless Turtle Beaches are designed to be compatible with a wide range of PC systems. However, it is always recommended to check the compatibility of the specific Turtle Beach headset model with your PC’s operating system and hardware specifications to ensure proper functionality.
Q: Can I use wireless Turtle Beaches for more than just gaming on my PC?
Yes, wireless Turtle Beaches can be used for more than just gaming on your PC. They can also enhance your audio experience while watching movies, listening to music, or participating in video calls. Just make sure to adjust the audio settings accordingly for the best sound quality in different scenarios.
Q: Are wireless Turtle Beaches comfortable for extended use?
Wireless Turtle Beaches are designed with comfort in mind, allowing for extended use without significant discomfort. They often feature adjustable headbands, cushioned ear cups, and lightweight designs to provide a comfortable fit. However, individual comfort levels may vary, so it’s important to find a Turtle Beach headset that suits your preferences.