
As an owner of a Mac computer, you may often find yourself dealing with a multitude of notifications. Whether it’s incoming emails, calendar reminders, or app notifications, staying on top of these alerts is crucial for productivity. Fortunately, Mac computers offer a convenient feature called the Notification Center, which serves as a centralized hub for all your notifications.
In this article, we will delve into the world of Mac’s Notification Center and explore how you can effortlessly check your notifications, customize settings, and manage alerts effectively. From understanding the basics of the Notification Center to utilizing its features, we will provide you with a comprehensive guide to make the most out of this invaluable tool.
Inside This Article
- Accessing the Notification Center
- Viewing Notifications
- Managing Notifications
- Customizing Notification Center
- Conclusion
- FAQs
Accessing the Notification Center
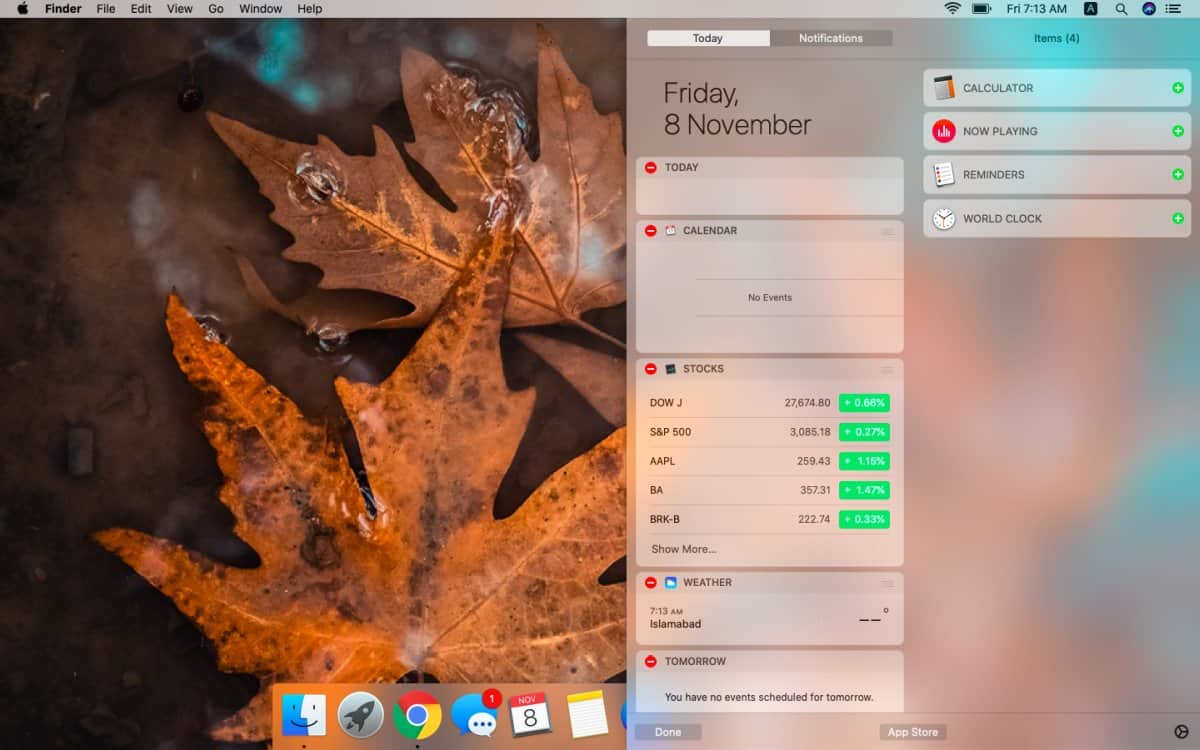
The Notification Center on your Mac is a centralized hub where you can view all your incoming notifications in one place. It’s a convenient feature that allows you to stay updated with important information without being overwhelmed by constant interruptions. Accessing the Notification Center is a breeze, and there are a few different methods you can use:
1. Click on the Notification Center icon in the menu bar: Located at the top-right corner of your screen, the Notification Center icon looks like three stacked horizontal lines. Simply click on it, and the Notification Center will slide out from the right side of the screen.
2. Use a keyboard shortcut: Pressing the combination of Command + Shift + N will also open the Notification Center instantly.
3. Swipe with two fingers: If you have a MacBook with a trackpad, you can use a swiping gesture with two fingers from the right edge of the trackpad towards the left to open the Notification Center.
Once you’ve successfully accessed the Notification Center, you can proceed to view and manage your notifications. Let’s explore how to do that in the next section.
Viewing Notifications
Once you’ve accessed the Notification Center on your Mac, you’ll be able to see all your incoming notifications in one place. Here’s how you can view and interact with your notifications:
1. Notification Center Panel: The Notification Center panel will display all your notifications in a chronological order. You can access it by clicking on the menu bar icon on the top-right corner of your screen or swiping from the right edge of the trackpad with two fingers.
2. Grouped Notifications: If you have multiple notifications from the same app, they will be grouped together to avoid clutter. You can click on a group to expand it and view individual notifications. This feature is especially useful for managing notifications from messaging apps or social media platforms.
3. Previewing Notifications: By hovering over a notification, you can preview its content without opening the app. This allows you to quickly decide whether it needs immediate attention or can be addressed later.
4. Interacting with Notifications: Depending on the app, you can interact with notifications directly from the Notification Center panel. For example, you can reply to messages, mark emails as read, or accept calendar invitations without opening the respective app. Simply click on the desired action within the notification to respond or perform a specific task.
5. Clearing Notifications: To clear a notification, you have multiple options. You can click the “X” button that appears when you hover over the notification, or use the two-finger swipe gesture on the trackpad to dismiss it. Alternatively, you can clear all notifications at once by clicking on the “Clear” button located at the top-right corner of the Notification Center panel.
Tip: If you have accidentally dismissed a notification and need to retrieve it, you can use the “Notification Center History” feature. By clicking on the clock icon at the top-right corner of the Notification Center panel, you can access a list of all previously dismissed notifications, which can be helpful in case you missed an important update.
Now that you know how to view and interact with notifications in the Notification Center on your Mac, you can stay on top of your important updates without getting overwhelmed by constant interruptions.
Managing Notifications
Once you have accessed the Notification Center on your Mac, you can take further control by managing your notifications. Here are some tips to help you effectively manage your notifications:
1. Clearing Notifications: If you have multiple notifications piled up, you can clear them all at once. Simply click on the “Clear” button at the top right corner of the Notification Center. This will remove all the notifications from the list.
2. Dismissing Individual Notifications: If you want to dismiss notifications one by one, you can hover over each notification and click on the “X” icon that appears on the right side. This will remove the selected notification from the list.
3. Snooze Notifications: If you receive a notification that you want to deal with later, you can snooze it. Simply swipe left on the notification and click on the “Snooze” button that appears. You can choose the time duration for snoozing the notification, or you can customize the snooze options in the Notification preferences.
4. Grouping Notifications: By default, notifications are grouped by app in the Notification Center. However, you can also choose to group them by date. To change the grouping, simply go to the Notifications preferences, select the desired grouping option, and the notifications will be rearranged accordingly.
5. Managing Notification Settings: You can customize the notification settings for each app on your Mac. Go to the System Preferences, click on “Notifications,” and select the app for which you want to manage the settings. From there, you can customize the type of alerts, the sound, the badge icons, and more.
6. Do Not Disturb Mode: If you want to temporarily disable notifications on your Mac, you can activate the “Do Not Disturb” mode. Simply click on the Notification Center icon in the menu bar, scroll up to reveal the toggle switch for “Do Not Disturb,” and enable it. This will prevent any notifications from appearing until you turn off the mode.
7. Notification Center Keyboard Shortcuts: Save time navigating through the Notification Center by using keyboard shortcuts. Pressing “Option + Command + 2” will open the Notification Center, while pressing “Option + Command + 0” will close it. Use “Command + Up Arrow” or “Command + Down Arrow” to navigate between notifications.
By effectively managing your notifications, you can optimize your Mac experience and stay organized without being overwhelmed by constant interruptions.
Customizing Notification Center
The Notification Center on your Mac provides a handy way to stay informed about important events and updates. But did you know that you can customize it to suit your preferences? Here are some tips on how to personalize your Notification Center experience:
1. Adjusting Notification Settings: To customize which apps can send you notifications, go to System Preferences, then click on “Notifications.” From here, you can enable or disable notifications for specific applications, configure the type of alerts you want to receive, and even choose the position and size of the alerts on your screen.
2. Rearranging Widgets: The Notification Center includes useful widgets that provide quick access to information like weather updates, calendar events, and news headlines. To rearrange the order of the widgets, simply click and drag them into your preferred arrangement. This allows you to prioritize the information that is most relevant to you.
3. Managing Do Not Disturb: Do Not Disturb mode allows you to temporarily disable notifications and alerts on your Mac. You can set specific times when you don’t want to be interrupted or manually enable Do Not Disturb as needed. To customize your Do Not Disturb settings, go to System Preferences > Notifications > Do Not Disturb.
4. Modifying Alert Styles: The Notification Center offers different alert styles, such as banners, alerts, and badges. Banners appear briefly at the top right corner of your screen then fade away, while alerts stay on the screen until you dismiss them. Badges, on the other hand, display a small number on the app icon to indicate the number of notifications. To modify these styles, go to System Preferences > Notifications and select the app you want to customize.
5. Utilizing Notification Center shortcuts: Did you know that you can quickly access the Notification Center even while working on other applications? You can do this by using keyboard shortcuts. Pressing “Command” + “Spacebar” will open the Spotlight search menu, and from there, you can type “Notification Center” to open it instantly.
By customizing your Notification Center settings, you can tailor it to suit your individual needs and preferences. Whether you want to minimize distractions, keep up with important information, or have quick access to widgets, taking the time to personalize the notification experience on your Mac will enhance your productivity and ensure you never miss an important update.
Conclusion
Checking the Notification Center on your Mac is a simple and convenient way to stay updated with important alerts, messages, and notifications. By following the step-by-step guide outlined in this article, you can easily access and manage the notifications on your Mac, whether they are from emails, messages, calendar events, or other applications.
The Notification Center serves as a centralized hub for all your notifications, allowing you to customize the settings and preferences according to your needs. With the ability to view and interact with notifications, as well as clear them individually or all at once, you can streamline your workflow and never miss any important information again.
So, the next time you need to check your notifications on your Mac, refer back to this article and make the most of the Notification Center’s features. Stay connected and in control of your digital experiences with ease.
FAQs
1. How do I access the Notification Center on Mac?
To access the Notification Center on your Mac, simply click on the Notification Center icon, which is located in the top-right corner of the menu bar. Alternatively, you can also swipe left with two fingers from the right edge of your trackpad to reveal the Notification Center.
2. Can I customize the Notification Center on my Mac?
Yes, you can customize the Notification Center on your Mac to suit your preferences. To do this, go to System Preferences, then click on Notifications. From there, you can configure the settings for each app, including the type of notifications you want to receive and how they are displayed.
3. How do I clear all notifications in the Notification Center?
To clear all notifications in the Notification Center on your Mac, simply click on the “X” button located at the top-right corner of the Notification Center window. This will clear all the notifications, freeing up space for new ones.
4. Can I disable notifications for specific apps on my Mac?
Absolutely! To disable notifications for specific apps on your Mac, go to System Preferences and click on Notifications. From there, you can select the app for which you want to disable notifications, and then uncheck the “Allow Notifications” box.
5. Can I change the order of notifications in the Notification Center on my Mac?
Yes, you can change the order of notifications in the Notification Center on your Mac. To do this, simply click and drag a notification to the desired position within the list. You can arrange the notifications based on priority or personal preference.