
Are you facing issues with your Moto G 3rd Gen after installing TWRP? Has your device been bricked and you’re looking for a way to restore it to factory settings? Don’t worry, we’ve got you covered! In this article, we’ll guide you step-by-step on how to restore your Moto G 3rd Gen to its original factory settings after encountering a bricked TWRP. Whether you accidentally installed an incompatible TWRP version or encountered errors during the installation process, we’ll show you how to get your device back up and running in no time. So grab your device and let’s dive into the world of restoring your Moto G 3rd Gen to factory settings!
Inside This Article
- Understanding TWRP and Its Importance
- Common Causes of Bricked TWRP on Moto G 3rd Gen
- Restoring Moto G 3rd Gen to Factory Settings
- # Method 1: Using TWRP Recovery
- # Method 2: Using Fastboot Commands
- # Method 3: Using Motorola Device Manager
- Conclusion
- FAQs
Understanding TWRP and Its Importance
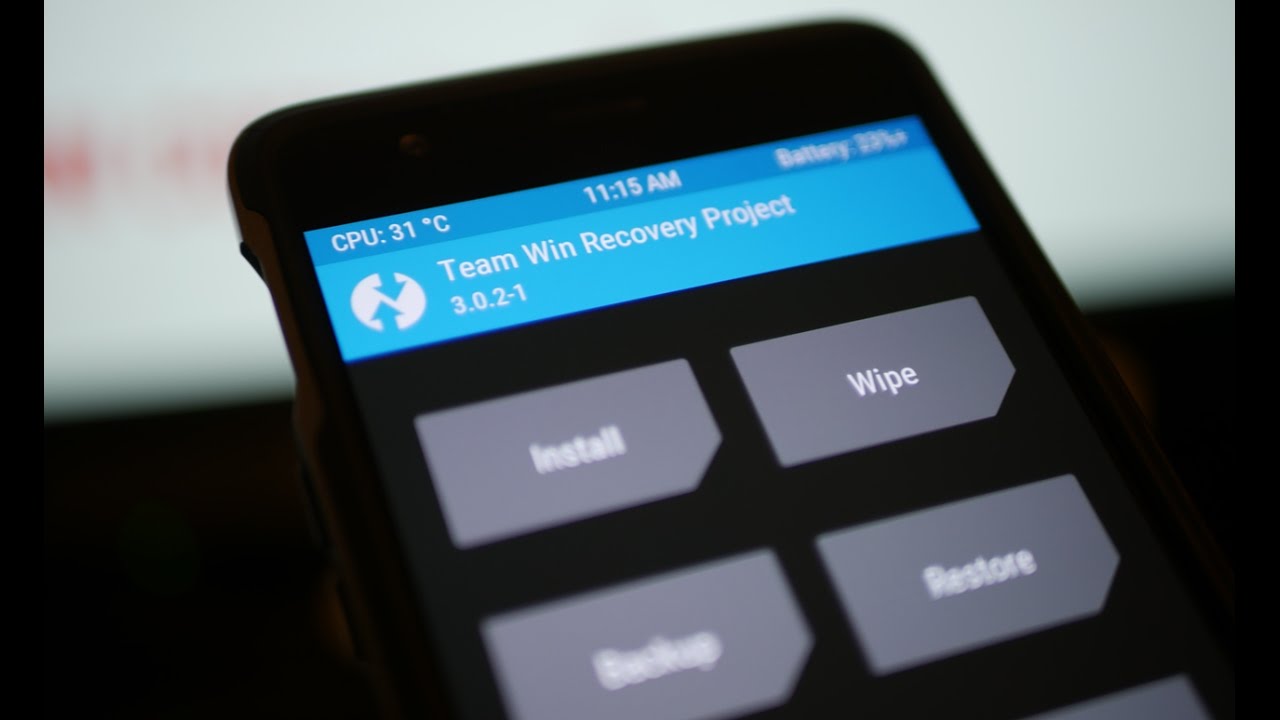
In the world of Android customization, TWRP, short for Team Win Recovery Project, has become a household name. TWRP is a custom recovery image that allows users to perform various system-related tasks on their Android devices. It is especially popular among users who like to tinker with their devices and push the boundaries of what their smartphones can do.
One of the main reasons why TWRP is highly regarded is its ability to provide a user-friendly interface for performing complex operations. With TWRP, users can easily flash custom ROMs, create and restore backups, wipe cache and data, and install modifications that enhance their device’s performance and features.
Moreover, TWRP offers a level of customization and control that is not available with the stock recovery that comes pre-installed on Android devices. This flexibility allows users to fully personalize their Android experience and unlock the full potential of their smartphones.
Another key advantage of TWRP is its compatibility with a wide range of Android devices. Whether you own a flagship device or a budget smartphone, chances are TWRP is available for your device model. This makes it a go-to choice for users who want to take advantage of custom ROMs and other modifications on their specific device.
However, with great power comes great responsibility. It’s important to note that using TWRP and performing advanced operations on your device comes with certain risks. One wrong move or incorrect flashing of a file can potentially brick your device, rendering it unusable. That’s why it’s crucial to fully understand the risks involved and proceed with caution.
Despite the risks, TWRP remains an invaluable tool for Android enthusiasts who love to explore and customize their smartphones. Its user-friendly interface, extensive features, and wide device compatibility make it an essential asset in the world of Android customization.
Common Causes of Bricked TWRP on Moto G 3rd Gen
Bricked TWRP can happen to anyone, and understanding the common causes can help you prevent it from happening. Here are some of the most common reasons why the TWRP recovery on Moto G 3rd Gen may become bricked:
1. Incorrect Installation: One of the main causes of bricked TWRP is an incorrect installation process. If you do not follow the proper steps or use the correct files when installing TWRP, it can lead to issues and render the recovery useless.
2. Incompatible TWRP Version: Using an incompatible version of TWRP can also result in a bricked recovery. It’s important to ensure that the TWRP version you are installing is specifically intended for the Moto G 3rd Gen model.
3. Flashing Incompatible ROMs: Flashing custom ROMs that are not compatible with TWRP recovery can lead to a bricked recovery. Always make sure that the ROM you are installing is compatible with the TWRP version you have installed.
4. Modifying System Files: Making incorrect modifications to system files can cause TWRP to become bricked. It’s crucial to exercise caution when making any changes to the system files, as an incorrect modification can render the recovery useless.
5. Power Interruptions: While installing or flashing TWRP, any sudden power interruptions, such as a battery drain or a power failure, can disrupt the installation process and potentially brick your TWRP recovery.
6. Corrupted or Incorrect File Downloads: If the files you download for installing TWRP recovery on your Moto G 3rd Gen are corrupted or incorrect, it can result in a bricked recovery. Always double-check the integrity of the files before proceeding with the installation.
7. Unsupported Modifications: TWRP recovery can become bricked if you attempt unsupported modifications or tweaks. It’s important to only make modifications that are compatible and supported by TWRP to avoid any potential issues.
Understanding these common causes of bricked TWRP on Moto G 3rd Gen can help you take the necessary precautions to avoid such situations. It’s crucial to follow the correct installation process, use compatible files, and exercise caution when making any modifications to ensure the smooth functioning of your TWRP recovery.
Restoring Moto G 3rd Gen to Factory Settings
If you own a Moto G 3rd Gen and have encountered issues with a bricked TWRP (TeamWin Recovery Project), restoring your device to its factory settings can help resolve the problem.
Restoring your Moto G 3rd Gen to factory settings is a straightforward process that can be done in a few different ways. Here are three methods you can try:
Method 1: Using TWRP Recovery
One way to restore your Moto G 3rd Gen to factory settings is by using the TWRP recovery menu. Here’s how:
- Power off your device.
- Press and hold the Volume Down and Power buttons simultaneously until the device powers on.
- Release the Power button but continue holding the Volume Down button until the device enters the TWRP recovery mode.
- In the TWRP menu, select “Wipe” and then “Factory Reset”.
- Swipe the slider to confirm the factory reset.
- Wait for the reset process to complete, and then select “Reboot” to restart your Moto G 3rd Gen.
Method 2: Using Fastboot Commands
If you’re comfortable with using Fastboot commands, you can also restore your Moto G 3rd Gen to factory settings using the following steps:
- Ensure that you have the necessary drivers installed on your computer.
- Power off your device.
- Boot your Moto G 3rd Gen into Fastboot mode by pressing and holding the Volume Down and Power buttons simultaneously.
- Connect your device to your computer using a USB cable.
- Open a command prompt or terminal window on your computer and navigate to the directory where the Fastboot tool is located.
- Type the command:
fastboot erase userdata, and press Enter. - Wait for the process to complete, then type the command:
fastboot rebootand press Enter to restart your device.
Method 3: Using Motorola Device Manager
If the previous methods don’t work or you prefer a more user-friendly approach, you can use the Motorola Device Manager to restore your Moto G 3rd Gen to factory settings:
- Ensure that you have the Motorola Device Manager software installed on your computer.
- Connect your Moto G 3rd Gen to your computer using a USB cable.
- Launch the Motorola Device Manager software.
- Select your device from the list of connected devices.
- Click on the “Restore/Upgrade Device” option.
- Follow the on-screen instructions to restore your device to its factory settings.
After completing any of these methods, your Moto G 3rd Gen should be restored to its original factory settings. It’s important to note that restoring to factory settings will erase all data and settings on your device, so make sure to back up any important files before proceeding with the restore process.
By following one of these methods, you can easily restore your Moto G 3rd Gen to factory settings and resolve any issues caused by a bricked TWRP. Remember to choose the method that suits your comfort level and always create a backup of your data to avoid any potential loss.
# Method 1: Using TWRP Recovery
If your Moto G 3rd Gen has been bricked due to a TWRP-related issue, you can try restoring it to factory settings using TWRP Recovery. This method involves accessing the TWRP Recovery mode on your device to perform the necessary steps for restoration.
Before proceeding, ensure that you have a compatible TWRP Recovery image for your Moto G 3rd Gen model. You can download the appropriate file from trusted sources or the official TWRP website.
Here are the steps to restore your Moto G 3rd Gen to factory settings using TWRP Recovery:
- Power off your device completely.
- Press and hold the Volume Down button and the Power button simultaneously until the device vibrates and the Motorola logo appears.
- Release the Power button but continue holding the Volume Down button until you see the Fastboot mode menu.
- Using the Volume Down button, navigate to the “Recovery” option and press the Volume Up button to select it.
- Your device will now boot into TWRP Recovery mode.
- In TWRP Recovery, select the “Wipe” option.
- Next, tap on “Format Data” and follow the on-screen prompts to confirm the data wipe.
- Once the data wipe is complete, go back to the main menu and select “Advanced.”
- Tap on “Wipe Dalvik/ART Cache” and confirm the action.
- Go back to the main menu and select “Reboot.”
- Finally, tap on “System” to reboot your device into the factory settings.
It is important to note that performing a factory reset using TWRP Recovery will erase all data on your device, including apps, settings, and personal files. Therefore, it is recommended to backup your important data before proceeding with this method.
If this method does not resolve the issue or you encounter any difficulties during the process, you can try the alternative methods mentioned in this article to restore your Moto G 3rd Gen to factory settings.
# Method 2: Using Fastboot Commands
When your Moto G 3rd Gen is facing a bricked TWRP issue, one effective way to restore it to factory settings is by using Fastboot commands. Fastboot is a tool used for modifying the Android operating system on your device. By utilizing this method, you can reflash your device with the stock firmware, effectively erasing any traces of the bricked TWRP recovery.
Before proceeding with the Fastboot commands, you will need to install the necessary drivers for your Moto G 3rd Gen. You can download and install the Motorola Device Manager from the official Motorola website. Once the drivers are installed, follow the steps below to restore your device:
- Ensure that your Moto G 3rd Gen is powered off.
- Boot your device into Fastboot mode by pressing and holding the “Power” and “Volume Down” buttons simultaneously.
- Connect your Moto G 3rd Gen to your computer using a USB cable.
- Open the command prompt on your computer and navigate to the folder where the Fastboot tool is located. This is usually the Android SDK platform-tools folder.
- Type the following command to check if your device is recognized by Fastboot:
fastboot devices. If your device is detected, you will see its serial number on the command prompt. - Next, enter the command to flash the stock firmware onto your Moto G 3rd Gen:
fastboot flash recovery recovery.img. Replace “recovery.img” with the actual name of the stock recovery image file. - Once the flashing process is complete, enter the command to reboot your device:
fastboot reboot.
After following these steps, your Moto G 3rd Gen should boot up with the stock recovery and the bricked TWRP issue should be resolved. It’s important to note that using Fastboot commands can be technical, so it’s crucial to follow the instructions carefully to avoid any potential risks or errors.
If you encounter any issues or have trouble with this method, it’s recommended to seek assistance from a professional or refer to official Motorola support resources for further guidance.
# Method 3: Using Motorola Device Manager
If you have encountered a bricked TWRP on your Moto G 3rd Gen, you can also try restoring your device to factory settings using the Motorola Device Manager. This method is particularly helpful if you are unable to access the TWRP recovery or use fastboot commands.
The Motorola Device Manager is a software tool that allows you to manage and troubleshoot your Moto G 3rd Gen device from your computer. It provides a user-friendly interface and offers several features, including the ability to restore your device to its original factory settings.
To begin, make sure you have the Motorola Device Manager installed on your computer. If you haven’t installed it yet, you can download it from the official Motorola website. Once installed, follow these steps:
1. Connect your Moto G 3rd Gen to your computer using a USB cable.
2. Launch the Motorola Device Manager on your computer.
3. The software will detect your device and display a list of available options. Click on the option for “Device Recovery”.
4. Follow the on-screen prompts to initiate the recovery process. The software will guide you through the necessary steps to restore your device to factory settings.
5. Once the process is complete, disconnect your device from the computer and check if the TWRP has been restored to its original state.
Using the Motorola Device Manager is a convenient and reliable method to fix a bricked TWRP on your Moto G 3rd Gen. It eliminates the need for complex commands and provides a seamless recovery process through a user-friendly interface.
However, please note that using this method will erase all data on your device, so it is crucial to back up your important files and data before proceeding with the restoration process.
By following these steps, you can efficiently restore your Moto G 3rd Gen to factory settings using the Motorola Device Manager and resolve any issues with a bricked TWRP.
Conclusion
Restoring your Moto G 3rd Gen to factory settings can be a simple and effective way to resolve various issues and start afresh. Whether you encounter a bricked TWRP or want to fix performance issues, the process ensures a clean slate for your device.
By following the steps mentioned in this guide, you can restore your Moto G 3rd Gen to its original state and enjoy a smoother and more stable experience. Remember to back up your important data before initiating the factory reset process to avoid losing any valuable information.
Don’t forget that after restoring to factory settings, you will need to set up your device again and reinstall any desired apps and configurations. Take this opportunity to customize your Moto G 3rd Gen to your liking and enjoy all the features and functionalities it offers.
By having a firm understanding of the factory reset process and knowing how to fix common issues, you can make the most out of your Moto G 3rd Gen and keep it running optimally for years to come.
FAQs
1. Can a bricked TWRP be restored to factory settings on Moto G 3rd Gen?
Yes, a bricked TWRP can be restored to factory settings on the Moto G 3rd Gen. By following a few simple steps, you can restore your phone back to its original state.
2. What does it mean for TWRP to be bricked?
When TWRP (Team Win Recovery Project) is bricked, it means that the custom recovery software has encountered an error or glitch, rendering it unusable. The device may get stuck in a boot loop or fail to boot up altogether.
3. How does TWRP get bricked in the first place?
There are several ways TWRP can get bricked. It can occur during the installation of a custom ROM or when performing an incorrect modification to the phone’s system files. It can also happen due to a software update gone wrong or a failed attempt to flash a custom kernel.
4. What are the consequences of using a bricked TWRP?
Using a bricked TWRP can lead to various issues, such as loss of data, inability to install custom ROMs or updates, and a compromised recovery mode functionality. It is important to resolve the issue as soon as possible to avoid further complications.
5. How can I restore a bricked TWRP to factory settings on Moto G 3rd Gen?
To restore a bricked TWRP to factory settings on Moto G 3rd Gen, you can follow these steps:
– Power off your phone and boot into the bootloader by holding the Volume Down and Power buttons simultaneously.
– Use the Volume Down button to navigate and select “Recovery mode” from the bootloader menu.
– Once in recovery mode, select “Wipe data/factory reset” and confirm the action.
– After the factory reset is complete, select “Reboot system now” to restart your phone with the factory settings restored.