
Are you tired of the same old color on your Razer Kitty headset? Well, you’re in luck! In this comprehensive guide, we’ll show you exactly how to change the color of your Razer Kitty headset and unleash your creativity. Your headset is not just a device for listening to audio; it’s also a fashion statement. With its customizable lighting options, you can personalize your headset to match your style or mood. Whether you want a vibrant rainbow effect, a calming pastel glow, or even a pulsating disco mode, we’ve got you covered. So, let’s dive in and discover how you can transform your Razer Kitty headset into a colorful accessory that will turn heads wherever you go.
Inside This Article
- Overview of the Razer Kitty Headset
- Step 1: Installing Razer Synapse software
- Step 2: Accessing Chroma lighting settings
- Step 3: Selecting and customizing the color options
- Step 4: Applying the new color to the Razer Kitty Headset
- Troubleshooting common issues
- Conclusion
- FAQs
Overview of the Razer Kitty Headset
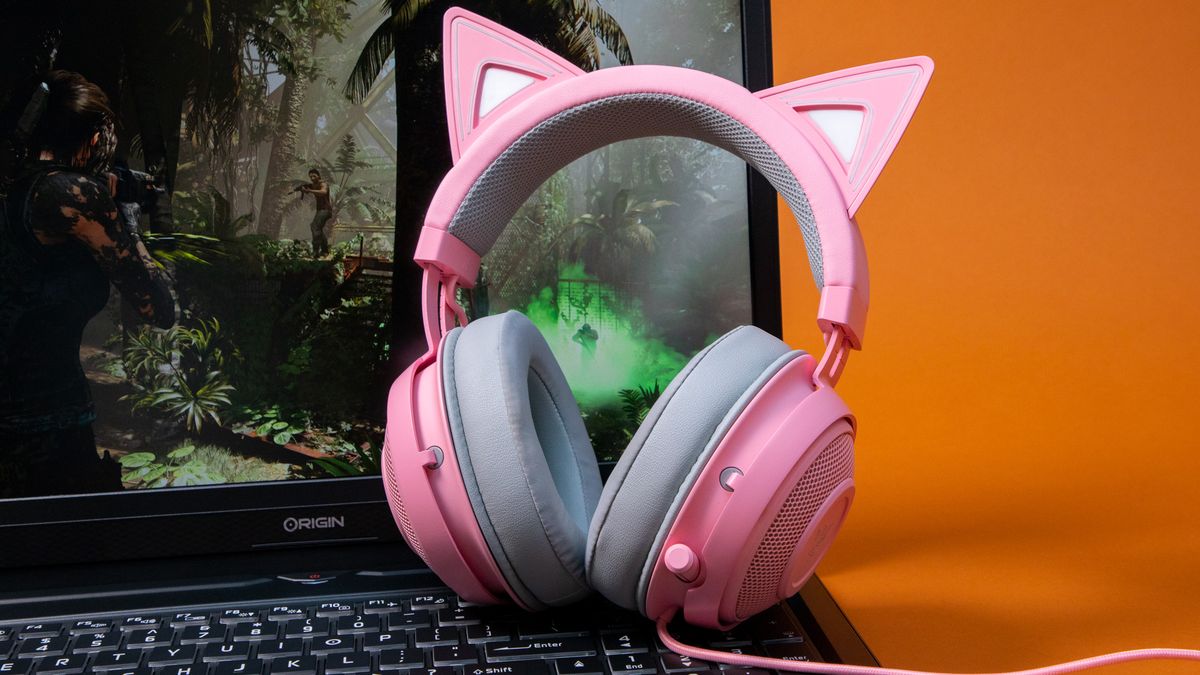
The Razer Kitty Headset is a stylish and innovative accessory for all the cat lovers out there. Combining functionality with cuteness, this headset is designed to enhance your gaming experience while showcasing your love for feline companions.
This unique headset features a playful and eye-catching cat ear design, making it stand out from traditional gaming headsets. The Razer Kitty Headset is not just about looks, though. It boasts impressive audio quality and advanced features that will immerse you in your favorite games.
Equipped with Razer’s signature Chroma lighting technology, the Kitty Headset allows you to personalize the ear cups with a vibrant array of colors. With over 16.8 million customizable color options, you can match your headset to your gaming setup or express your own individual style.
Built for comfort, the Razer Kitty Headset features adjustable headband and ear cushions that provide a snug fit. The lightweight design ensures that you can wear it for hours without feeling any discomfort, allowing you to fully enjoy your gaming sessions without distractions.
In addition to its aesthetic appeal and comfort, the Razer Kitty Headset also offers superior sound quality. The 50mm neodymium drivers deliver powerful and immersive audio, allowing you to hear every detail of the game, from the subtlest footstep to the thunderous explosion.
Whether you’re gaming, streaming, or simply listening to music, the Razer Kitty Headset ensures crystal-clear sound and precise audio positioning. Its omnidirectional microphone enables clear communication with your teammates, while the in-line controls make it easy to adjust volume and mute the microphone on the fly.
Overall, the Razer Kitty Headset combines style, comfort, and performance in one adorable package. If you’re looking for a headset that not only delivers exceptional audio quality but also showcases your love for cats, then the Razer Kitty Headset is definitely worth considering.
Step 1: Installing Razer Synapse software
Before you can change the color of your Razer Kitty Headset, you’ll need to install the Razer Synapse software. This intuitive software allows you to customize various settings on your Razer devices, including the color and lighting effects.
To get started, follow these simple steps:
- Connect your Razer Kitty Headset to your computer using the provided USB cable.
- Visit the official Razer website and navigate to the Support section.
- Search for the latest version of the Razer Synapse software and download it.
- Once the download is complete, run the installer and follow the on-screen instructions to install the software.
- After the installation process is finished, launch the Razer Synapse software.
Congratulations! You have successfully installed the Razer Synapse software on your computer. With this powerful tool at your disposal, you’re now ready to dive into the world of customization and personalize your Razer Kitty Headset according to your preferences.
Step 2: Accessing Chroma lighting settings
Once you have successfully installed the Razer Synapse software on your computer, you are ready to access the Chroma lighting settings for your Razer Kitty Headset. Follow the steps below to access these settings:
1. Launch the Razer Synapse software by double-clicking on the desktop shortcut or searching for it in the Windows Start menu.
2. Once the software is open, you will see the main dashboard with various tabs and options. Look for the “Lighting” tab and click on it to proceed.
3. The “Lighting” tab will open a new page with different options for customizing the lighting effects of your Razer Kitty Headset. Here, you can choose from a variety of preset lighting effects or create your own custom lighting profiles.
4. To access the Chroma lighting settings specifically, look for the “Chroma Studio” option within the “Lighting” tab and click on it.
5. The “Chroma Studio” page will provide you with advanced customization options to change the color and effects of your Razer Kitty Headset. You can select individual sections of the headset, such as the earcups or the kitty ears, and apply different colors or effects to each one.
6. Experiment with the different options available in the “Chroma Studio” page to find the perfect color combination and lighting effect for your gaming setup. You can also synchronize the lighting effects with other Razer Chroma-compatible devices to create a cohesive and immersive lighting experience.
7. Once you have made your desired changes, click on the “Save” button to apply the settings to your Razer Kitty Headset.
With the Chroma lighting settings accessed and customized, you can now enjoy a visually stunning and personalized lighting experience with your Razer Kitty Headset.
Step 3: Selecting and customizing the color options
Now that you have installed the Razer Synapse software and accessed the Chroma lighting settings, it’s time to dive into the exciting world of selecting and customizing the color options for your Razer Kitty Headset. With a wide range of vibrant shades and effects at your disposal, you can truly make your headset stand out from the crowd.
When you open the Chroma lighting settings in Razer Synapse, you will be presented with a variety of options to choose from. One of the most basic options is selecting a static color for your headset. This allows you to pick a single hue that will remain constant while you use your headset.
If you prefer something more dynamic, Razer Synapse offers a multitude of exciting color effects. You can choose from options like Spectrum Cycling, where the colors on your headset will smoothly transition through the entire spectrum, creating a mesmerizing display. Alternatively, you can opt for Breathing, where the color fades in and out, mimicking the rhythm of your breathing.
For those who enjoy a touch of personalization, Razer Synapse also allows you to create your own unique color profiles. You can experiment with different combinations of colors, gradients, and effects to create a truly customized lighting experience that matches your style and preferences.
Once you have selected the color effect you desire, you can further refine it by adjusting the brightness and speed. The brightness control allows you to dial up or down the intensity of the color, while the speed control determines how quickly the color transitions or pulses.
If you’re feeling adventurous, you can even sync the lighting effects of your Razer Kitty Headset with other Razer Chroma-enabled devices. This allows for an immersive lighting experience where all your Razer peripherals harmoniously glow in perfect synchronization.
Remember to click the ‘Apply’ button once you’re satisfied with your color selections and customizations. This will ensure that your changes take effect on your Razer Kitty Headset.
Overall, the color customization options available in Razer Synapse for the Razer Kitty Headset are extensive and provide endless possibilities to personalize your headset to your liking. Whether you want a subtle and sleek design or a bold and vibrant display, you can easily create the perfect lighting setup to match your style and mood.
Step 4: Applying the new color to the Razer Kitty Headset
Once you have selected and customized your desired color options using the Razer Synapse software, it’s time to apply the new color to your Razer Kitty Headset. Follow these simple steps to bring your headset to life with vibrant and personalized lighting:
- Make sure your Razer Kitty Headset is connected to your computer via USB.
- Open the Razer Synapse software on your computer.
- Navigate to the Chroma lighting settings within the software.
- Locate the option specifically for the Razer Kitty Headset. It should be listed along with your other Razer devices.
- Select the Razer Kitty Headset from the device list.
- Choose the color profile that you previously customized.
- Click on the “Apply” button to synchronize the new color settings with your headset.
- Wait for a few seconds until the changes are applied. You will notice the LED lights on your Razer Kitty Headset update to reflect the newly selected color.
It’s important to note that some Razer Kitty Headsets may have different lighting zones, such as the ear cups, the headset frame, or the Kitty ears. Ensure that you have selected the appropriate lighting zone within the Razer Synapse software to modify the color in the desired area of your headset.
With the new color applied, you can now enjoy a personalized and visually stunning experience with your Razer Kitty Headset. Whether you prefer a vibrant and energetic color or a calming and subtle hue, the customizable lighting options provided by the Razer Synapse software allow you to create a headset that matches your style and mood.
Troubleshooting common issues
While changing the color of your Razer Kitty Headset is generally a straightforward process, you may encounter some common issues along the way. Here are a few troubleshooting tips to help you resolve any problems:
1. Software compatibility issues: Ensure that you have the latest version of Razer Synapse software installed on your computer. If not, update it to the latest version as older versions may have compatibility issues with the color settings.
2. Connection problems: If your Razer Kitty Headset is not connecting to your computer, try unplugging and re-plugging the USB cable. If the issue persists, try using a different USB port or a different computer to rule out any hardware problems.
3. Inconsistent color changes: If you are experiencing inconsistency in color changes, make sure that you have applied the changes correctly in the Razer Synapse software. Double-check that the color profile is selected and applied to the headset.
4. No color changes: If you are unable to change the color of your Razer Kitty Headset, ensure that the headset is properly connected to your computer and recognized by the Razer Synapse software. If the issue persists, try restarting your computer and reinstalling the Razer Synapse software.
5. Headset not lighting up: If your Razer Kitty Headset is not lighting up at all, check that the USB cable is securely connected and the headset is receiving power. If necessary, try using a different USB cable or plugging it into a different USB port to rule out any issues with the cable or port.
6. Customization limitations: It’s important to note that not all Razer Kitty Headset models may support extensive color customization. Some models may have limited color options or lack the capability to change colors entirely. Refer to the product specifications or contact Razer customer support for more information.
If you have followed these troubleshooting steps and are still experiencing issues with changing the color of your Razer Kitty Headset, it may be best to contact Razer customer support for further assistance. They will be able to provide specific guidance based on the model of your headset and help you resolve any persistent issues.
Conclusion
In conclusion, changing the color of your Razer Kitty headset is a fun and exciting way to personalize your gaming experience. With just a few simple steps, you can transform the look of your headset to match your style and mood. Whether you prefer a vibrant and eye-catching color or a subtle and sophisticated tone, the Razer Kitty headset gives you the flexibility to express yourself.
By following the instructions outlined in this article, you can easily switch between different colors and lighting effects to create a dynamic and visually stunning gaming setup. The ability to customize the color of your Razer Kitty headset adds another layer of immersion and individuality to your gaming sessions.
So go ahead, unleash your creativity, and enjoy gaming in style with your Razer Kitty headset!
FAQs
1. How do I change the color on my Razer Kitty Headset?
To change the color on your Razer Kitty Headset, you can use the Razer Synapse software. Connect your headset to your computer via the USB cable and open the Razer Synapse software. From there, navigate to the “Chroma” tab and select your headset. You will be able to customize the color and lighting effects of your headset using the software.
2. Can I change the color of the Razer Kitty Headset to match my gaming setup?
Yes, you can customize the color of your Razer Kitty Headset to match your gaming setup. The Razer Synapse software allows you to choose from a wide range of colors and lighting effects, so you can perfectly coordinate the headset with your gaming rig.
3. Are there any pre-set lighting effects available for the Razer Kitty Headset?
Yes, the Razer Synapse software offers various pre-set lighting effects for the Razer Kitty Headset. You can choose from effects like breathing, spectrum cycling, reactive, and more. These effects add a dynamic and vibrant touch to your headset’s appearance.
4. Can I sync the color of my Razer Kitty Headset with other Razer devices?
Yes, if you own other Razer devices that are compatible with Razer Synapse, you can sync the color of your Razer Kitty Headset with them. The Razer Synapse software allows you to create synchronized lighting effects across different devices, creating a cohesive and visually stunning setup.
5. How do I reset the color settings on my Razer Kitty Headset?
If you want to revert back to the default color settings on your Razer Kitty Headset, you can do so by opening the Razer Synapse software and selecting the headset. Within the software, you will find an option to reset the color settings to their default state. This will restore the original color and lighting effects of the headset.