
In today’s digital world, staying connected is more important than ever. Whether you’re a student or a professional, having a reliable internet connection on your laptop is crucial for completing tasks, accessing online resources, or simply staying connected with friends and family. One way to ensure connectivity on the go is by connecting your laptop to a hotspot. A hotspot is a wireless network that allows you to access the internet using your mobile device’s data plan. In this article, we will guide you through the step-by-step process of connecting your laptop to a hotspot, so you can enjoy seamless internet access wherever you are. So, if you’re ready to get started, let’s dive in and learn how to connect a laptop to a hotspot.
Inside This Article
- Step 1: Check Laptop Compatibility
- Step 2: Set Up Hotspot on Laptop
- Step 3: Connect Devices to Laptop Hotspot
- Troubleshooting Common Hotspot Connection Issues
- Conclusion
- FAQs
Step 1: Check Laptop Compatibility
Before you begin connecting your laptop to a hotspot, it’s important to ensure that your laptop is compatible. Here are a few things you should consider:
1. Wi-Fi Capabilities: Make sure your laptop has built-in Wi-Fi capabilities. Most modern laptops come with Wi-Fi functionality, but older models may require an external Wi-Fi adapter.
2. Operating System: Check if your laptop’s operating system supports hotspot connections. Windows, macOS, and many Linux distributions have native support for creating and connecting to hotspots.
3. Hardware Requirements: Verify that your laptop meets the hardware requirements for creating a hotspot. This includes having sufficient processing power and memory to handle the additional task of acting as a hotspot.
4. Network Driver: Ensure that the network driver on your laptop is up to date. A outdated or incompatible network driver can prevent your laptop from connecting to a hotspot.
5. Internet Connection: You will need an active internet connection on your laptop to create a hotspot. This can be a wired connection or another Wi-Fi connection.
By checking these compatibility factors, you can ensure that your laptop is ready to connect to a hotspot seamlessly. Once you have confirmed compatibility, you can move on to the next step of the process.
Step 2: Set Up Hotspot on Laptop
Once you have turned on the hotspot feature on your laptop, the next step is to set up the hotspot settings. Here’s how you can do it:
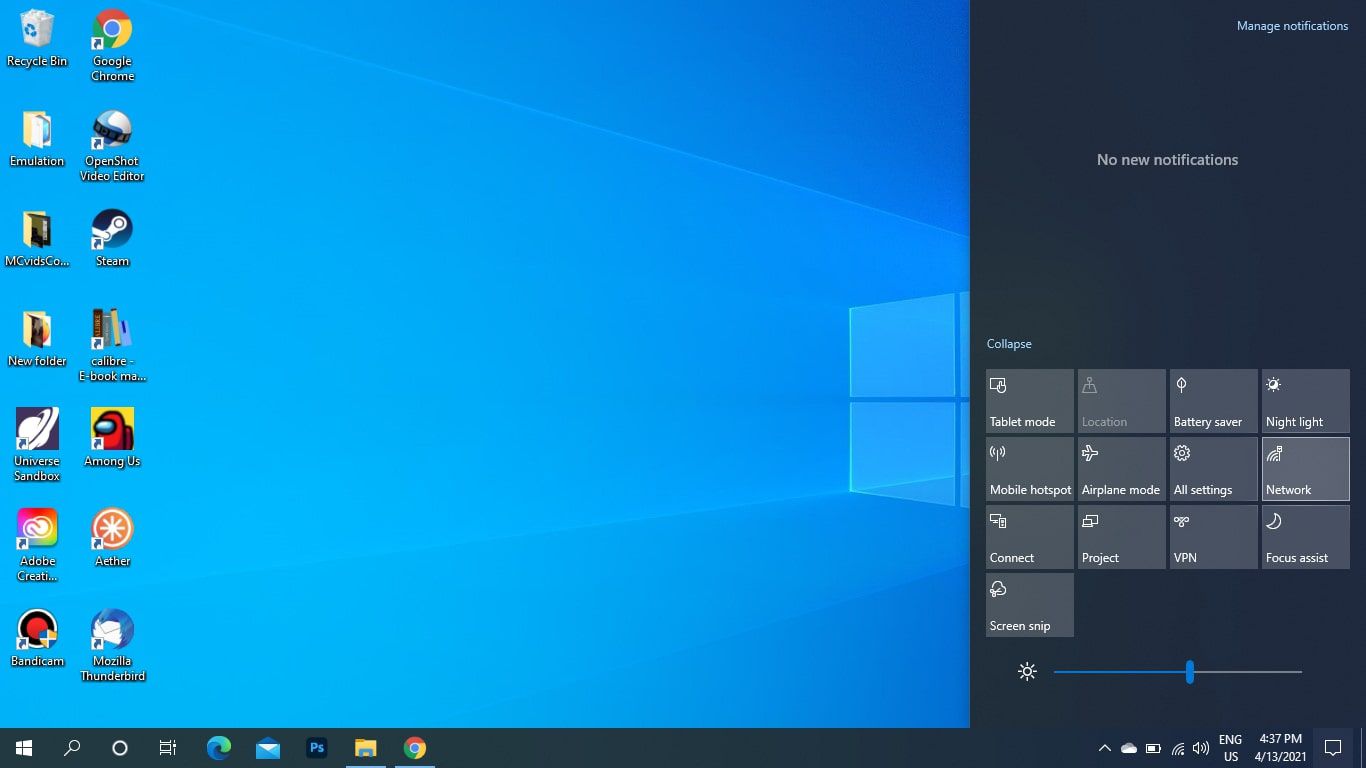
1. Open the “Settings” menu on your laptop. This can usually be accessed by clicking on the gear icon in the Start menu or by pressing the Windows key + I.
2. In the Settings menu, click on the “Network & Internet” option.
3. In the Network & Internet menu, select the “Mobile hotspot” tab from the left sidebar.
4. On the Mobile hotspot settings page, you will see options to customize your hotspot.
5. To change the network name (SSID) of your hotspot, click on the “Edit” button next to the “Network name” field. Enter the desired name for your hotspot.
6. To change the password for your hotspot, click on the “Edit” button next to the “Network password” field. Choose a strong and secure password.
7. By default, your laptop’s hotspot will use the Wi-Fi band set to 2.4 GHz. If you want to use the faster and less crowded 5 GHz band, click on the “Edit” button next to the “Network band” field and select the desired option.
8. If you want to allow other devices to connect to your hotspot even when your laptop is in sleep mode, enable the “Stay connected when asleep” option.
9. Once you have customized the hotspot settings according to your preferences, close the Settings menu.
10. Your laptop’s hotspot is now set up and ready to use. Other devices can connect to it using the network name (SSID) and password you have set.
Remember to turn off the hotspot feature when you’re no longer using it to save battery life and prevent unauthorized access to your laptop.
Step 3: Connect Devices to Laptop Hotspot
Once you have successfully set up a hotspot on your laptop using either the built-in hotspot feature or a third-party software, you can now connect your devices to the hotspot. Follow these steps to connect your devices:
1. On the device you want to connect to the hotspot, navigate to the Wi-Fi settings.
2. Look for the list of available Wi-Fi networks and select the name of the hotspot you created on your laptop.
3. If prompted, enter the password for the hotspot. This password is the same password you set when configuring the hotspot on your laptop.
4. Wait for the device to establish a connection to the hotspot. Once connected, you should see the Wi-Fi symbol or a notification indicating a successful connection.
5. Repeat these steps for each additional device you want to connect to the hotspot.
It’s important to note that the number of devices you can connect to the hotspot depends on your laptop’s capabilities and the strength of your internet connection. Some laptops may allow a limited number of connections, while others can handle multiple devices simultaneously.
Keep in mind that connecting multiple devices to a hotspot can affect the speed and stability of the internet connection. If you notice a significant decrease in performance, you may need to limit the number of devices connected or consider using a more robust internet connection.
With your devices connected to the laptop hotspot, you can now enjoy internet access on the go. Whether you’re traveling, working remotely, or simply in a location without Wi-Fi, connecting your devices to the laptop hotspot allows you to stay connected and productive.
Remember to disable the hotspot when you no longer need it to save battery life and protect your laptop’s security. Simply turn off the hotspot feature or disconnect all devices from the hotspot to deactivate it.
Now that you know how to connect devices to a laptop hotspot, you can make the most out of your internet connectivity options and stay connected wherever you go.
Troubleshooting Common Hotspot Connection Issues
Connecting your laptop to a hotspot can sometimes be a frustrating experience due to various technical issues. If you’re facing problems with your hotspot connection, don’t worry. In this section, we will discuss some common issues and how to troubleshoot them.
1. Weak Signal: One of the most common issues is a weak signal. If you’re experiencing slow or intermittent connectivity, the first thing you should check is the signal strength. Make sure you are within range of the hotspot and there are no physical obstructions, such as walls or furniture, blocking the signal. You may also consider repositioning the hotspot to get a better signal.
2. Incorrect Password: Another common issue is entering the incorrect password. Double-check that you have entered the correct password for the hotspot network. Passwords are case-sensitive, so ensure that you have entered uppercase and lowercase letters correctly. If you’re not sure about the password, try resetting the hotspot or contacting the network administrator.
3. Limited Data Allowance: If your hotspot is limited by a data plan, you may experience connectivity issues when you reach your data limit. Check your data consumption and ensure that you have not exceeded your allotted data. If you have, consider upgrading your data plan or using your hotspot sparingly until the next billing cycle.
4. Firewall or Antivirus Settings: Sometimes, firewall or antivirus settings on your laptop can interfere with the hotspot connection. Temporarily disable your firewall or antivirus software and check if the connection improves. If it does, you may need to adjust the settings to allow your hotspot connection.
5. Driver Issues: Outdated or incompatible drivers can also cause hotspot connection problems. Update your laptop’s network drivers to the latest version and check if the issue is resolved. You can usually download the drivers from the manufacturer’s website or use the device manager to update them automatically.
6. Device Overload: If you’re trying to connect multiple devices to the same hotspot simultaneously, it can overload the connection and result in poor performance. Try connecting fewer devices and see if the connection improves. Additionally, avoid running bandwidth-intensive tasks like streaming or gaming on multiple devices at the same time.
7. Clear Cache and Cookies: Sometimes, clearing the cache and cookies on your laptop can resolve hotspot connection issues. Go to your browser settings and clear browsing data. This will remove any temporary files that may be interfering with the connection.
8. Hotspot Firmware Update: Lastly, check if there are any firmware updates available for your hotspot device. Manufacturers often release updates to improve performance and fix connectivity issues. Refer to the user manual or visit the manufacturer’s website to download and install the latest firmware for your hotspot.
By following these troubleshooting tips, you can overcome common hotspot connection issues and enjoy a smooth and uninterrupted browsing experience on your laptop.
Conclusion
Connecting a laptop to a hotspot is a convenient way to access the internet on the go. By following the steps outlined in this article, you can easily set up a connection between your laptop and a hotspot device. Whether you’re using your smartphone as a hotspot, a portable hotspot device, or even a public Wi-Fi hotspot, the process remains relatively simple.
Remember to ensure your laptop is equipped with a Wi-Fi adapter and that you have the necessary hotspot credentials or permission to access the network. With a stable hotspot connection, you can browse the web, stream videos, and stay connected wherever you are.
So, the next time you’re on the move and in need of internet access for your laptop, give hotspot connectivity a try. Stay connected, productive, and make the most out of your mobile data plan or public Wi-Fi hotspot!
FAQs
Q: How do I connect my laptop to a hotspot?
A: Connecting your laptop to a hotspot is a straightforward process. Simply go to the network settings on your laptop and select the available hotspot network. Enter the password if required, and you will be connected to the hotspot.
Q: Can I use my smartphone as a hotspot for my laptop?
A: Absolutely! Most smartphones have a built-in hotspot feature that allows you to share your mobile data connection with other devices, including laptops. Simply enable the hotspot feature in your smartphone’s settings and connect your laptop to the hotspot network as mentioned in the previous question.
Q: What are the benefits of connecting my laptop to a hotspot?
A: Connecting your laptop to a hotspot offers several benefits. Firstly, it provides internet connectivity when you are not within the range of Wi-Fi networks. It is also useful in situations where the available Wi-Fi networks are slow or unreliable. Additionally, using a hotspot can be more secure since you have control over the network password.
Q: Are there any data limitations when using a hotspot for my laptop?
A: The data limitations depend on your mobile data plan. When you connect your laptop to a hotspot, it will consume data from your mobile data plan. If you have limited data, be mindful of your usage to avoid exceeding your plan’s limit. Some mobile carriers also offer unlimited data plans specifically for using your phone as a hotspot.
Q: Can I connect multiple devices to a hotspot simultaneously?
A: In most cases, yes. Smartphones allow you to connect multiple devices to a hotspot simultaneously. However, the number of connections may depend on your specific device and its capabilities. It’s always a good idea to check your smartphone’s specifications or user manual to determine the maximum number of allowed connections.