
Smart bracelets have become a popular accessory for tech-savvy individuals looking to enhance their health and fitness routines. These wearable devices offer a wealth of features, from tracking steps and monitoring heart rate to receiving notifications and controlling music playback. However, to fully utilize the capabilities of a smart bracelet, it needs to be connected to a phone. This connection allows for data synchronization, app control, and more. In this article, we will guide you through the process of connecting a smart bracelet to a phone, ensuring that you can make the most out of your wearable device. Whether you are a fitness enthusiast or simply someone who wants to stay connected on-the-go, understanding how to connect your smart bracelet will greatly enhance your experience. So, let’s get started and unlock the full potential of your smart bracelet!
Inside This Article
- Setting Up Your Smart Bracelet
- Downloading and Installing the App
- Pairing Your Smart Bracelet with Your Phone
- Managing Notifications and Settings
- Conclusion
- FAQs
Setting Up Your Smart Bracelet
Setting up your smart bracelet is the first step in unlocking its full potential. The process may vary slightly depending on the model and brand of your bracelet, but the general steps are similar across devices. Here’s a comprehensive guide to help you get started:
1. Read the Manual: Before diving into the setup process, it’s essential to consult the user manual provided with your smart bracelet. This will give you specific instructions, troubleshooting tips, and important information about its features.
2. Charge Your Bracelet: Before powering on your smart bracelet, make sure it is fully charged. Connect it to a USB charger or a charging dock, following the instructions in the manual. Wait until the battery is fully charged to ensure uninterrupted usage.
3. Power On the Bracelet: Once fully charged, power on your smart bracelet by pressing and holding the designated button or touch area. It may take a few seconds to boot up, so be patient. You’ll know it’s on when you see the screen come to life.
4. Set the Language and Date/Time: Follow the on-screen instructions to set your preferred language, date, and time format. These settings will ensure that your smart bracelet displays information accurately and in your preferred language.
5. Install the Companion App: To unlock the full functionality of your smart bracelet, you’ll need to download and install the compatible companion app on your smartphone. The app can usually be found in the Apple App Store or Google Play Store. Search for the app using the name specified in the manual or recommended by the manufacturer.
6. Open the App and Create an Account: Once the app is installed, open it and create a new account if prompted. This will allow you to sync your smart bracelet with your phone and access additional features, such as health tracking, notifications, and firmware updates.
7. Enable Bluetooth: Enable Bluetooth on your phone by going to the settings and toggling the Bluetooth switch to the on position. This step is crucial for establishing a wireless connection between your smart bracelet and your phone.
8. Pair Your Bracelet with Your Phone: In the app, locate the option to pair your smart bracelet with your phone. The process may involve scanning a QR code, entering a pairing code, or selecting your bracelet from a list of available devices. Follow the on-screen instructions to successfully establish a connection.
9. Customize Your Settings: Once your smart bracelet is successfully paired with your phone, explore the various settings and customization options in the app. You can personalize features such as display settings, notification preferences, fitness goals, and more.
10. Get Familiar with the Features: Take some time to familiarize yourself with the features and functions of your smart bracelet. Explore the different screens, buttons, and gestures to navigate through menus, track your fitness, monitor your sleep patterns, and receive notifications.
By following these steps, you’ll be able to set up your smart bracelet and start enjoying its many features. Remember to refer back to the user manual and app instructions if you encounter any difficulties during the setup process. Now, you’re ready to take advantage of the convenience and functionality your smart bracelet offers!
Downloading and Installing the App
Once you have your brand new smart bracelet ready, the next step is to download and install the corresponding app on your phone. The app is essential for accessing the features and settings of your smart bracelet, so follow these steps to get started:
- Check the User Manual: Before you begin, it’s always a good idea to consult the user manual or guide that came with your smart bracelet. It may provide specific instructions or recommendations for downloading and installing the app.
- Identify the App: Determine the name of the app associated with your smart bracelet. This information can usually be found in the user manual or on the product packaging. Common examples include “Smart Bracelet,” “Fit Bracelet,” or the specific brand name of your device.
- App Store or Play Store: Open the designated app store for your smartphone – the App Store for Apple devices or the Play Store for Android devices.
- Search for the App: In the search bar of the app store, enter the name of the app associated with your smart bracelet. Look for the official app developed by the brand or manufacturer to ensure compatibility and reliability.
- Select and Install: Once you find the correct app, tap on it to access the app’s page. Review the app’s description, ratings, and user reviews to ensure it meets your needs. If you’re satisfied, click the “Install” or “Get” button to initiate the installation process.
- Wait for Installation: Depending on your internet connection, the app may take some time to download and install. Ensure that your phone is connected to a stable and reliable internet source to ensure a smooth installation process.
- Open the App: Once the installation is complete, navigate to your phone’s home screen or app drawer, and locate the app associated with your smart bracelet. Tap on the app’s icon to launch it.
Congratulations! You’ve successfully downloaded and installed the app for your smart bracelet. With the app now on your phone, you’re ready to move on to the next step of connecting your smart bracelet to your phone.
Pairing Your Smart Bracelet with Your Phone
Pairing your smart bracelet with your phone is a straightforward process that allows you to fully utilize its features and functionalities. Whether you have an Android or iPhone, the steps to pair the two devices are generally similar. Here’s a step-by-step guide on how to get started:
1. Ensure that your smart bracelet is fully charged and turned on. Most smart bracelets have a power button that needs to be pressed and held for a few seconds to turn on.
2. On your phone, go to the settings menu and enable Bluetooth. This will allow your phone to search for nearby Bluetooth devices, including your smart bracelet.
3. Open the app associated with your smart bracelet. Some smart bracelets come with their own dedicated apps, while others may require you to download a specific app from the app store.
4. Within the app, look for the option to pair your device. This can usually be found in the settings or device management section of the app.
5. Tap on the pairing option and wait for your phone to detect the smart bracelet. Once it appears in the list of available devices, select it to initiate the pairing process.
6. Follow any additional instructions that may be displayed on your phone or smart bracelet’s screen. This may include entering a passcode or confirming the pairing request.
7. Once the pairing is successful, you should receive a notification or confirmation message on both your phone and smart bracelet. This indicates that they are now connected and ready to be used together.
It’s important to note that the specific steps may vary slightly depending on your smart bracelet model and the accompanying app. Be sure to consult the user manual or manufacturer’s website for detailed instructions tailored to your device.
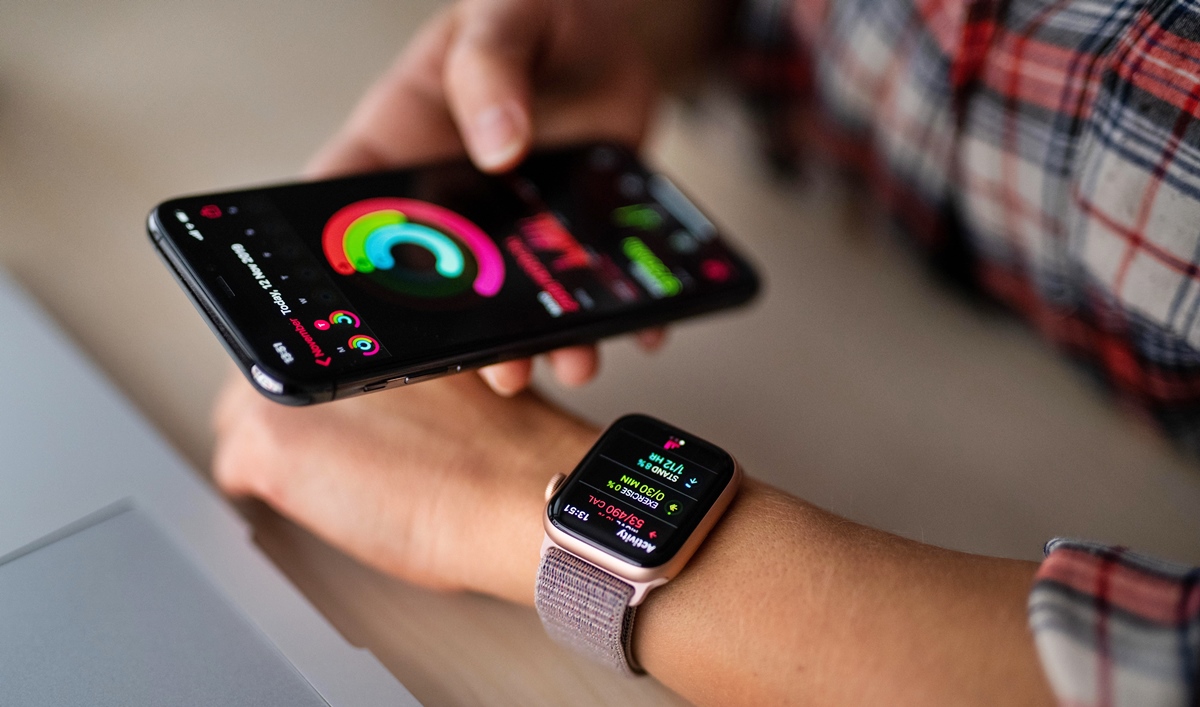
Once your smart bracelet is paired with your phone, you’ll be able to access a range of features, such as activity tracking, heart rate monitoring, sleep tracking, and receiving notifications directly on your wrist. Explore the app settings to customize the experience and make the most out of your smart bracelet.
Managing Notifications and Settings
Once you have successfully paired your smart bracelet with your phone, you can start managing your notifications and settings to customize your wearable experience. Here’s a guide on how to do it:
1. Notification Settings:
Most smart bracelets come with the ability to receive notifications from your phone, such as incoming calls, text messages, and app alerts. To manage which notifications you want to receive on your bracelet, you’ll need to access the app on your phone.
2. App Permissions:
Depending on your smart bracelet and the app you’re using, you may need to grant permissions to access certain apps or features on your phone. Make sure to go through the app settings and grant permissions as necessary to ensure full functionality.
3. Activity Tracking:
Smart bracelets are not just for receiving notifications; they also serve as fitness trackers. In the app settings, you can customize the types of activities you want to track, such as steps taken, distance traveled, calories burned, and sleep patterns. This will help you stay on top of your fitness goals.
4. Display Settings:
Customizing the display settings on your smart bracelet can greatly enhance your user experience. You can adjust the screen brightness, choose different watch faces, and customize the layout of the information that is displayed on your bracelet’s screen.
5. Vibration and Alerts:
Most smart bracelets allow you to customize the vibration patterns and intensity for different notifications and alerts. This way, you can easily distinguish between a call, a text message, or a social media notification just by the way your bracelet vibrates.
6. Battery Optimization:
To ensure that your smart bracelet lasts as long as possible on a single charge, you can enable battery optimization settings in the app. This will help conserve battery life by reducing background activity and optimizing power usage.
7. Firmware Updates:
Manufacturers often release firmware updates for their smart bracelets to provide new features, fix bugs, and improve performance. Stay up to date with the latest firmware updates by regularly checking the app settings and downloading any available updates for your device.
By managing your notifications and settings, you can personalize your smart bracelet to meet your needs and preferences. Whether you’re using it for fitness tracking, staying connected, or simply as a stylish accessory, customizing these settings will enhance your overall experience with your smart bracelet.
The process of connecting a smart bracelet to a phone can seem daunting at first, but with the right steps, it becomes a seamless experience. By following the instructions provided by the manufacturer, you can quickly establish a connection between your smart bracelet and your phone, gaining access to a plethora of useful features and capabilities. Remember to ensure that your smart bracelet is compatible with your phone’s operating system to avoid any compatibility issues.
Once connected, your smart bracelet can serve as a valuable companion in tracking your fitness goals, monitoring your health, and even receiving notifications from your phone. It opens up a world of possibilities and convenience, allowing you to stay connected and informed while on the go.
So, don’t hesitate to dive into the world of smart bracelets and make the most out of this innovative accessory. Connect your smart bracelet to your phone today and embark on a journey towards a healthier and more connected lifestyle!
FAQs
1. Can I connect any smart bracelet to my phone?
Yes, most smart bracelets are designed to be compatible with a wide range of smartphones. However, it’s always a good idea to check the compatibility requirements of the specific smart bracelet model you are interested in before making a purchase.
2. How do I connect my smart bracelet to my phone?
The process of connecting a smart bracelet to a phone typically involves the following steps:
- Ensure that your smart bracelet is charged and turned on.
- Download and install the companion app for your smart bracelet from the app store on your phone.
- Open the app and follow the on-screen instructions to pair your smart bracelet with your phone via Bluetooth.
- Once the pairing process is complete, you should be able to access and control various aspects of your smart bracelet through the app on your phone.
3. Can I use a smart bracelet without a phone?
Although some basic functions of a smart bracelet, such as tracking steps or monitoring heart rate, can be used without a phone, many advanced features and functionalities require a connection to a smartphone. Therefore, it is recommended to use a smart bracelet in conjunction with a phone for the best experience.
4. Is it necessary to enable Bluetooth on my phone to connect a smart bracelet?
Yes, Bluetooth is the primary technology used for establishing a connection between a smart bracelet and a phone. Therefore, it is necessary to enable Bluetooth on your phone before attempting to connect the two devices.
5. Can I connect multiple smart bracelets to the same phone?
In most cases, it is not possible to connect multiple smart bracelets to the same phone simultaneously. However, you may be able to connect multiple smart bracelets to the same phone by using different companion apps or switching between paired devices within the app.