
Are you looking to elevate your audio experience to the next level? If so, you may be considering connecting a DAC (Digital-to-Analog Converter) to an AMP (Amplifier). This powerful combination can significantly enhance the audio quality of your music, movies, and gaming experiences.
Connecting a DAC to an AMP allows you to convert digital audio signals into high-fidelity analog signals, which can then be amplified to deliver clearer, more detailed sound. Whether you’re a discerning audiophile or simply someone who appreciates exceptional audio performance, this article will guide you through the process of connecting a DAC to an AMP, so you can enjoy a richer and more immersive audio experience.
Inside This Article
- Understanding DAC and AMP
- Connection Options for DAC and AMP
- Step-by-Step Guide to Connecting DAC to AMP
- Troubleshooting and Common Issues
- Conclusion
- FAQs
Understanding DAC and AMP
Before we dive into the process of connecting a DAC (Digital-to-Analog Converter) to an AMP (Amplifier), let’s take a moment to understand what DAC and AMP are and their significance in the world of audio devices.
A DAC plays a crucial role in converting digital audio signals into analog signals that can be processed and amplified by an AMP. In simpler terms, when you listen to music or any other audio on your digital devices, such as smartphones or computers, the audio is initially in a digital format. The DAC converts this digital audio into analog signals, which can then be amplified and played through your headphones or speakers.
On the other hand, an AMP is responsible for boosting the low-powered analog audio signals from the DAC to a level that can drive speakers or headphones. Its primary function is to amplify the audio signals and ensure that they can be heard clearly and at an appropriate volume.
Both DAC and AMP are essential components in achieving high-quality audio output. While some audio devices, such as smartphones and audio interfaces, already have built-in DACs and AMPs, dedicated ones are often preferred by audiophiles and professionals who seek to achieve the best possible audio experience.
Dedicated DACs and AMPs offer better audio quality, improved soundstage, and enhanced detail and clarity in the music. They also provide additional features and customization options, allowing users to fine-tune their audio output according to their preferences.
Now that we understand the role of DAC and AMP let’s move on to the different connection options available when connecting them together.
Connection Options for DAC and AMP
When it comes to connecting a DAC (Digital-to-Analog Converter) to an AMP (Amplifier), there are different options available, depending on the specific equipment you have and the connectivity options they support. Here, we will explore some common connection options that can help you achieve the best audio quality and performance.
1. USB Connection: This is one of the most widely used and convenient options for connecting a DAC to an AMP. Using a USB cable, you can connect the USB output of your DAC to the USB input of your AMP. This allows for a direct digital audio signal transfer, ensuring high-quality audio playback without any loss of data.
2. Coaxial Connection: Many DACs and AMPs come with coaxial input and output ports. If your DAC and AMP both support coaxial connections, you can use a coaxial cable to establish the connection. This connection method allows for a stable and reliable transfer of digital audio signals, providing excellent sound quality.
3. Optical Connection: Another popular option is the optical connection, also known as TOSLINK. This connection type uses optical cables to transfer the digital audio signal between the DAC and AMP. It offers excellent noise immunity and can deliver high-quality audio, making it a preferred choice for audiophiles.
4. Bluetooth Connection: If both your DAC and AMP support Bluetooth connectivity, you can easily connect them wirelessly. This eliminates the need for any cables and allows for convenient and flexible audio playback. However, it is important to note that the audio quality may be slightly compromised compared to wired connections.
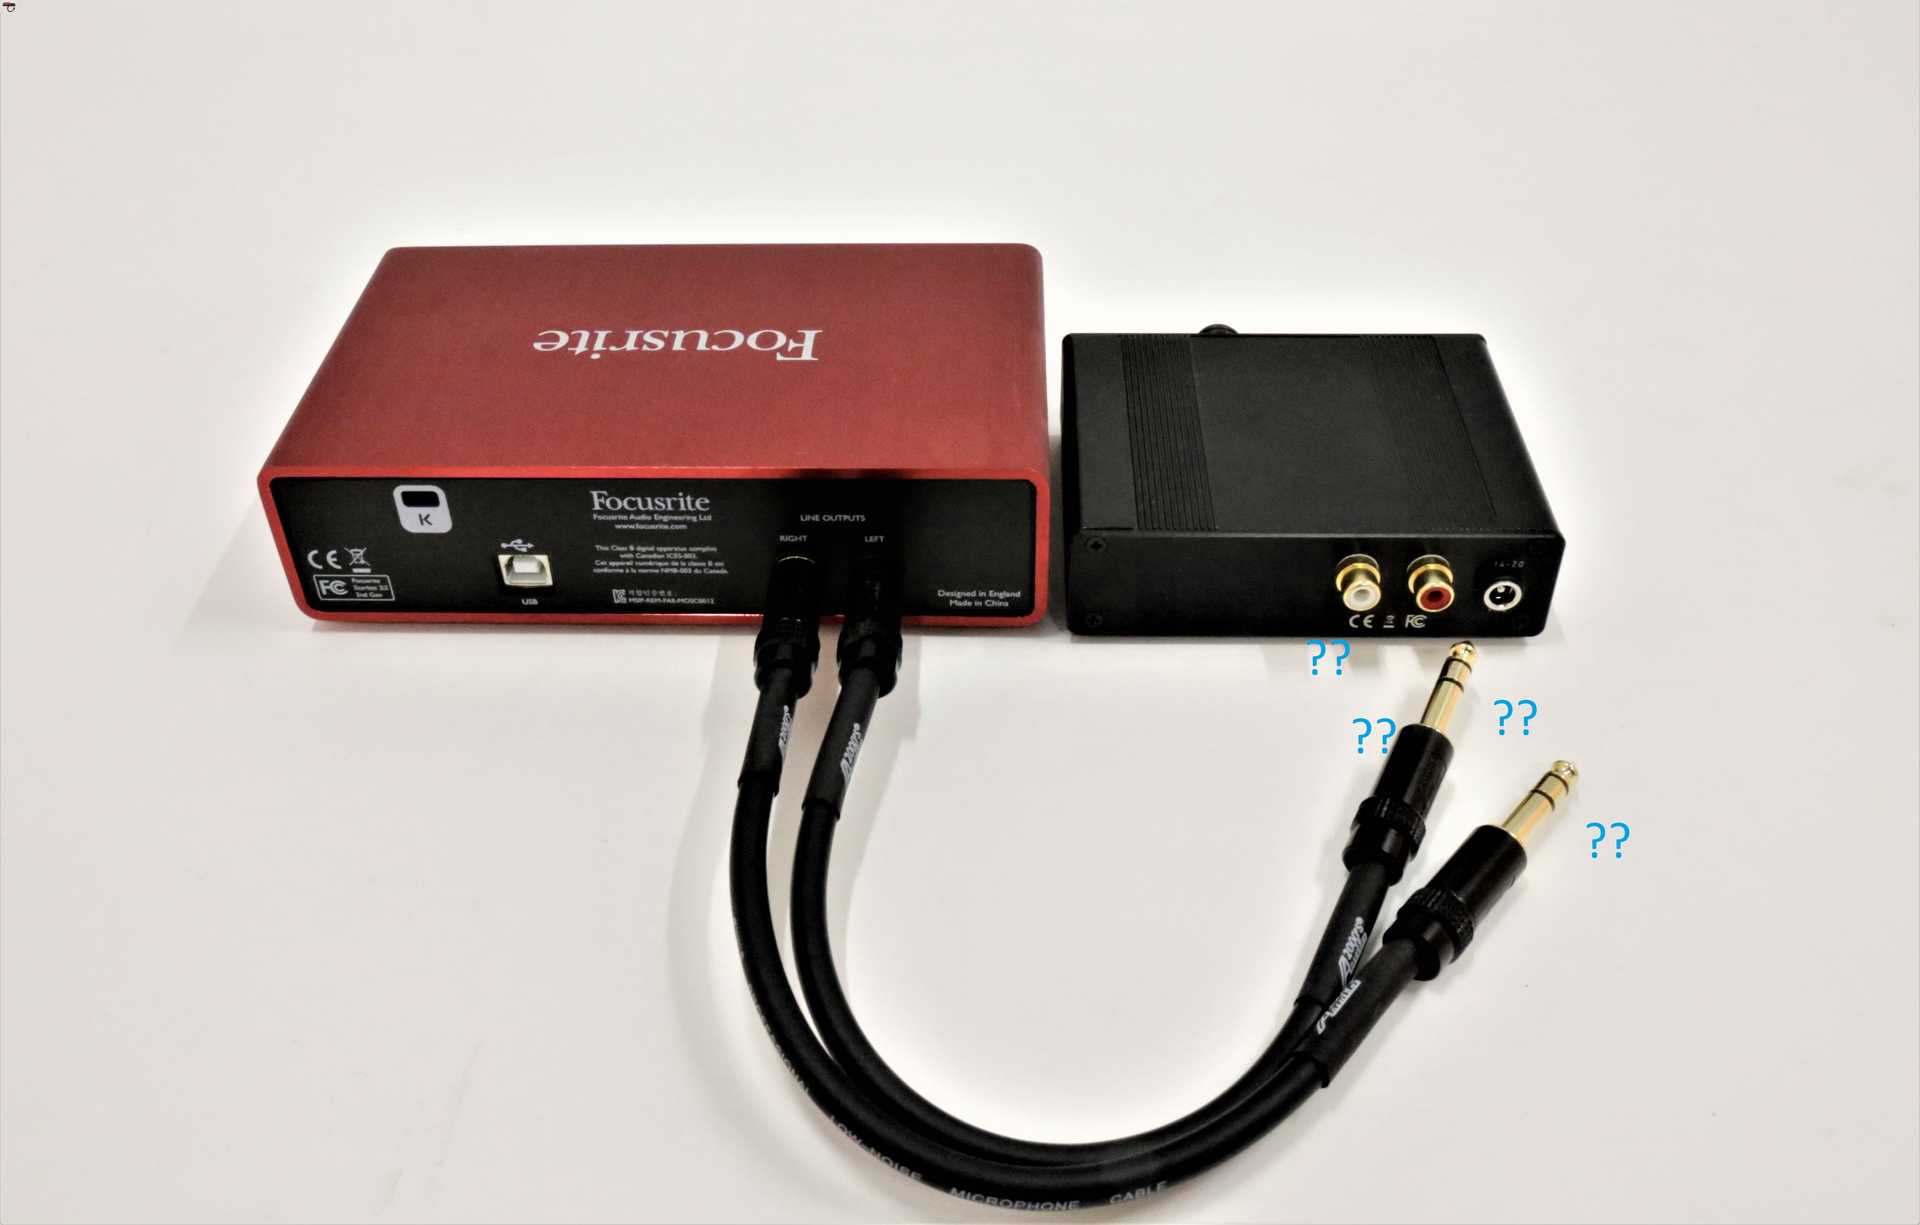
5. Analog Connection: In some cases, you may have a DAC with analog outputs and an AMP with analog inputs. In this scenario, you can simply use an analog audio cable to connect the DAC’s output to the AMP’s input. While this connection method may not offer the same level of digital audio precision as other options, it can still provide decent sound quality.
It’s important to note that the availability of connection options may vary depending on the specific models and brands of your DAC and AMP. Be sure to check the user manuals or specifications of your equipment to determine the compatible connection options.
Ultimately, the choice of connection option will depend on your specific requirements, equipment compatibility, and desired audio quality. So, take the time to consider all the available options before making a decision. With the right connection setup, you can enjoy an immersive and high-fidelity audio experience with your DAC and AMP combination.
Step-by-Step Guide to Connecting DAC to AMP
Connecting a digital-to-analog converter (DAC) to an amplifier (AMP) is a crucial step in optimizing your audio experience. A DAC translates digital audio signals into analog signals, while an AMP amplifies those signals to provide better sound quality and louder volume.
Ready to connect your DAC to your AMP? Follow these simple steps:
- Step 1: Gather the necessary cables – make sure you have the appropriate cables to connect your DAC and AMP. Most DACs come with a USB or optical output, while most AMPs have RCA input ports. Ensure you have the right cables to connect these ports.
- Step 2: Power off your devices – before making any connections, power off both your DAC and AMP. This will prevent any electrical damage and ensure a safe and secure setup.
- Step 3: Connect the DAC and AMP – begin by connecting one end of the appropriate cable (USB, optical, or coaxial) to the output port of your DAC. Then, connect the other end of the cable to the corresponding input port on your AMP. Ensure a secure and snug connection.
- Step 4: Power on your devices – once the connections are made, power on your DAC and AMP. Allow them a few seconds to initialize and establish a connection.
- Step 5: Adjust settings – depending on your DAC and AMP, you may need to adjust some settings. Refer to the user manuals of your devices to ensure proper configuration. This may include selecting the appropriate input on your AMP or adjusting the sample rate settings on your DAC.
- Step 6: Test the setup – play some audio through your DAC and AMP to check if the connection is successful. Start with low volume and gradually increase it to avoid any potential damage to your speakers.
- Step 7: Fine-tune the sound – listen to the audio output and make any necessary adjustments to the EQ or volume levels on your AMP. Experiment with different settings to find the optimal sound experience.
By following these steps, you can successfully connect your DAC to your AMP and unlock the full potential of your audio system. Enjoy enhanced sound quality, improved clarity, and a more immersive listening experience.
Troubleshooting and Common Issues
While connecting a DAC to an AMP is generally a straightforward process, you may come across some common issues or troubleshooting situations. Here are a few scenarios you might encounter and some tips to resolve them:
- No Sound: If you are not getting any sound output after connecting your DAC to the AMP, double-check the connections. Ensure that the cables are properly connected to both devices and that the volume on both the DAC and the AMP is turned up. Also, check if the DAC requires any drivers or software installation for it to function properly.
- Intermittent Sound: If you are experiencing intermittent sound or dropouts, it could be due to a loose or faulty connection. Try reinserting the cables firmly into the respective ports of the DAC and AMP. If the issue persists, you may want to test the cables with another device to determine if they are the cause of the problem.
- No Power: If either the DAC or the AMP is not powering on, make sure they are plugged into a power source. Check the power cables and ensure they are securely connected. If the issue persists, try using a different power outlet or cable to rule out any power supply problems.
- Compatibility Issues: Verify that the DAC and AMP you are using are compatible with each other. Different models or brands may have specific requirements or limitations. Consult the user manuals or online resources for both devices to confirm their compatibility. If necessary, consider using an alternative DAC or AMP that is known to work well together.
- Noisy or Distorted Sound: If you hear noise or distortion in the sound output, it could be due to interference or signal degradation. Try moving the DAC away from any electronic devices or appliances that may be causing interference. Additionally, ensure that you are using high-quality cables and that they are not damaged or worn out.
- Mismatched Sample Rates: If you encounter issues with playback or hear out-of-sync audio, it could be a mismatch between the sample rates of your DAC and the audio source. Check the settings on both devices and ensure that they are set to the same sample rate. You may need to adjust the sample rate settings in the audio software or driver settings.
By troubleshooting these common issues and following the recommended tips above, you should be able to resolve most problems encountered when connecting a DAC to an AMP and enjoy high-quality sound output from your audio setup.
Conclusion
Connecting a Digital-to-Analog Converter (DAC) to an Amplifier (AMP) is a simple yet essential step for anyone looking to enhance their audio experience. By converting digital audio signals into analog signals, a DAC ensures optimal playback quality, while an amplifier amplifies the signals and delivers them to the speakers or headphones.
While the process may vary depending on the specific DAC and AMP models, the basic principle remains the same: connecting the DAC’s output to the input of the AMP using the appropriate cables. It is important to ensure compatibility between the devices, and to use high-quality cables for optimal signal transfer.
By following the steps outlined in this article, you can easily connect your DAC to your AMP and enjoy superior audio performance. Whether you’re a music enthusiast, a gamer, or a home theater aficionado, this simple setup can take your audio experience to the next level.
So, go ahead and try it out! Connect your DAC to your AMP and immerse yourself in a world of high-fidelity sound.
FAQs
Q: What is a DAC?
A: DAC stands for Digital-to-Analog Converter. It is a device that converts digital audio signals into analog signals that can be processed by audio equipment, such as amplifiers and speakers. This conversion is necessary because most of our audio sources, such as smartphones and computers, produce digital signals.
Q: What is an AMP?
A: An AMP, or amplifier, is a device that amplifies a weak audio signal to a level suitable for driving speakers or headphones. It helps to enhance the sound quality, volume, and overall listening experience. An AMP is commonly used in conjunction with a DAC to improve the audio output of digital devices.
Q: Why do I need to connect a DAC to an AMP?
A: Connecting a DAC to an AMP can significantly improve audio quality. Many digital devices, such as smartphones and computers, have built-in DACs, but these internal DACs may not always provide the best audio performance. By using an external DAC and connecting it to an AMP, you can bypass the internal DAC and achieve higher fidelity and clarity in your audio playback.
Q: How do I connect a DAC to an AMP?
A: Connecting a DAC to an AMP is a straightforward process. First, ensure that both your DAC and AMP have the necessary input and output ports. Common connection methods include using RCA cables, a 3.5mm stereo cable, or a digital optical cable. Simply connect the output of your DAC to the input of your AMP using the appropriate cables, and you’re good to go.
Q: Can I connect my DAC to a mobile device?
A: Yes, you can connect a DAC to a mobile device to enjoy improved audio quality. However, keep in mind that not all mobile devices have the necessary connectors to support an external DAC. Some smartphones may require an adapter or a specific cable for this purpose. Make sure to check your mobile device’s compatibility and consult the user manual or contact the manufacturer for guidance.