
Are you struggling to connect your Plantronics headset to your Cisco phone? Don’t worry, we’re here to help! A Plantronics headset can greatly enhance your communication experience by providing excellent audio quality and hands-free convenience. However, configuring it to work seamlessly with your Cisco phone may require some technical know-how. In this article, we will guide you through the step-by-step process of connecting your Plantronics headset to your Cisco phone. Whether you’re a tech novice or an experienced user, this comprehensive guide will ensure a smooth and hassle-free setup. So, let’s dive in and get your Plantronics headset up and running with your Cisco phone in no time!
Inside This Article
- Connecting a Plantronics Headset to a Cisco Phone
- Checking Compatibility
- Connecting the Headset Base
- Configuring the Cisco Phone Settings
- Testing the Headset Connection
- Conclusion
- FAQs
Connecting a Plantronics Headset to a Cisco Phone
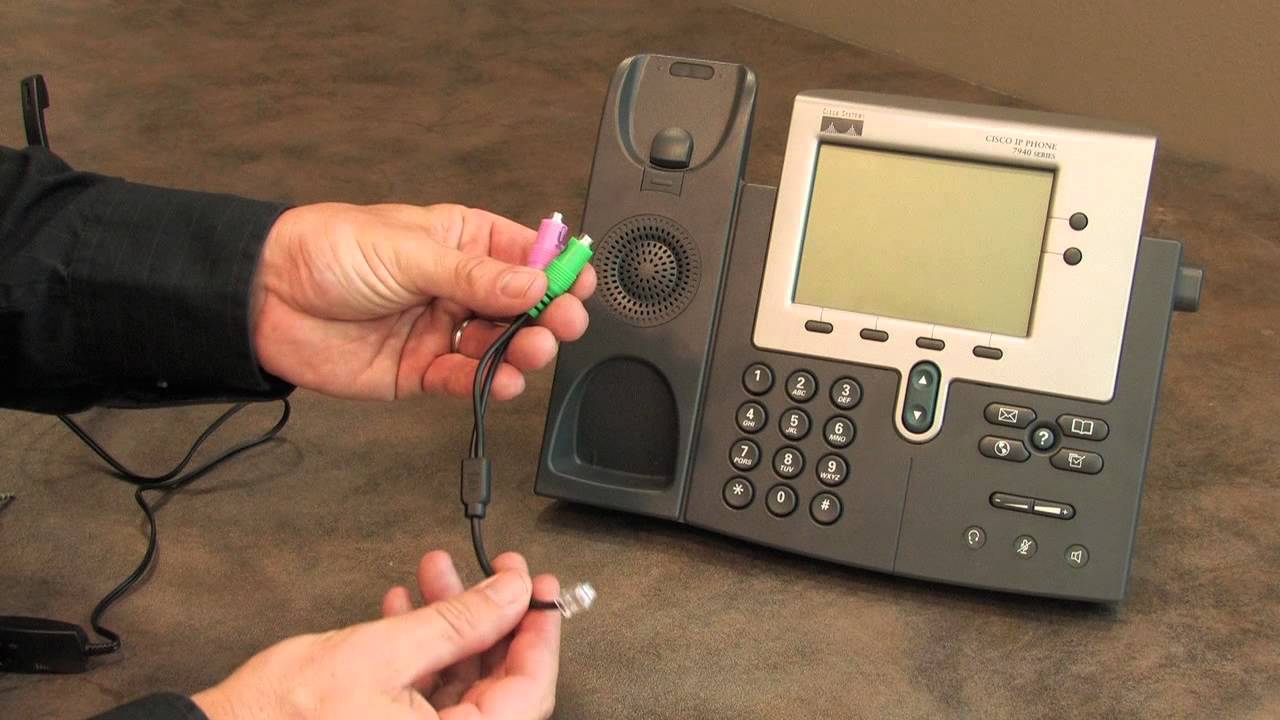
If you are looking to connect a Plantronics headset to your Cisco phone, you have come to the right place. Plantronics is a well-known brand in the mobile accessories industry, offering high-quality headsets that provide excellent audio clarity and comfort. Cisco phones, on the other hand, are widely used in business settings for their advanced communication features. In this article, we will guide you through the process of connecting your Plantronics headset to a Cisco phone seamlessly.
Compatibility Requirements
Before you begin the connection process, it’s important to ensure that your Plantronics headset and Cisco phone are compatible with each other. Plantronics offers a wide range of headsets, so make sure that the one you have is compatible with Cisco phones. You can refer to the user manual or the Plantronics website to check for compatibility.
Additionally, ensure that your Cisco phone has a headset port. Most Cisco phones come with either a 2.5mm or a 3.5mm headset jack. Make sure you have the appropriate cable or adapter to connect your Plantronics headset to the Cisco phone.
Understanding the Cisco Phone Interface
Before you start connecting your Plantronics headset, it’s helpful to familiarize yourself with the Cisco phone interface. Cisco phones usually have dedicated buttons or a menu option to enable headset mode. Some models have a “headset” button, while others may require you to access the settings menu to enable the headset mode. Refer to your Cisco phone’s user manual or check the manufacturer’s website for specific instructions on enabling the headset mode.
Steps to Connect Plantronics Headset to Cisco Phone
- First, ensure that your Cisco phone is powered on and the headset mode is enabled.
- Locate the headset port on your Cisco phone. It is usually located on the side or the back of the phone.
- Insert the appropriate cable or adapter into the headset port of your Cisco phone.
- Connect the other end of the cable or adapter to the headset jack of your Plantronics headset.
- Once the headset is connected, you may need to adjust the settings on your Cisco phone to ensure that the audio output is routed to the headset.
- Test the connection by making a call or playing audio. If you can hear sound through your Plantronics headset, the connection is successful.
Troubleshooting Tips for Connection Issues
If you encounter any issues while connecting your Plantronics headset to your Cisco phone, here are some troubleshooting tips:
- Ensure that all cables and adapters are securely connected.
- Double-check that the headset mode is enabled on your Cisco phone.
- If the audio is not routed to the headset, access the audio settings on your Cisco phone to make the necessary adjustments.
- If the issue persists, try restarting your Cisco phone and reconnecting the headset.
- If none of the above steps work, consult the user manual for both your Plantronics headset and your Cisco phone, or reach out to the respective customer support teams for assistance.
By following these steps and troubleshooting tips, you should be able to successfully connect your Plantronics headset to your Cisco phone. Enjoy the enhanced audio experience and convenience of using a high-quality headset for your business communication needs.
Checking Compatibility
Before connecting your Plantronics headset to your Cisco phone, it’s crucial to ensure that they are compatible with each other. Compatibility is essential to ensure optimal functionality and seamless integration. Here are a few things to check:
1.1 Headset Model: Make sure that your Plantronics headset model is compatible with Cisco phones. Different headset models may have varying compatibility requirements, so it’s important to verify this information.
1.2 Cisco Phone Model: Check the model of your Cisco phone and confirm its compatibility with your Plantronics headset. This information can usually be found in the phone’s user manual or on the manufacturer’s website.
1.3 Cisco Phone Firmware Version: Ensure that your Cisco phone’s firmware version is up-to-date. Outdated firmware may cause compatibility issues with your headset. You can find information on how to update the firmware in the phone’s user manual or by contacting Cisco support.
1.4 Additional Compatibility Accessories: Some Plantronics headsets may require additional accessories, such as an Electronic Hook Switch (EHS) cable or a lifter, for full compatibility with Cisco phones. Check if any additional accessories are needed for your specific headset model.
By verifying the compatibility between your Plantronics headset and Cisco phone, you can avoid any potential issues and ensure a smooth and successful connection.
Connecting the Headset Base
Once you have properly configured your Cisco phone and prepared your Plantronics headset, you are ready to connect the headset base to your phone. Follow these steps to ensure a successful connection:
1. Locate the headset base: The headset base is a small device that connects the Plantronics headset to your Cisco phone. It typically has an AC power adapter port, a telephone interface port, and a headset port.
2. Connect the AC power adapter: Take the AC power adapter that came with your Plantronics headset and plug it into a nearby power outlet. Ensure the power adapter is securely connected to both the headset base and the power source.
3. Connect the telephone interface cable: The telephone interface cable should have come with your Plantronics headset. Insert one end of the cable into the headset port on the headset base. The other end of the cable should be connected to the telephone interface port on your Cisco phone.
4. Verify the connection: Once you have connected the headset base to your Cisco phone, make sure that all the connections are secure and properly aligned. Check that the headset base is receiving power and that the telephone interface cable is firmly plugged into both the headset base and the Cisco phone.
5. Test the headset: Now that the headset base is connected, put on your Plantronics headset and make a test call. Follow the instructions provided by Plantronics to ensure that the headset is working correctly with your Cisco phone. Adjust the headset volume if necessary to achieve optimal audio levels.
By following these steps, you should be able to successfully connect your Plantronics headset to your Cisco phone using the headset base. If you encounter any issues during the process, refer to the troubleshooting section or consult the user manual provided by Plantronics for further assistance.
Configuring the Cisco Phone Settings
After successfully connecting your Plantronics headset to the Cisco phone, the next step is to configure the phone settings to ensure optimal performance. Follow these steps to configure the Cisco phone settings:
Step 1: Access the Cisco phone menu by pressing the menu button located on the phone’s interface. The menu button is typically represented by a series of horizontal lines or the word “Menu”.
Step 2: Navigate through the menu options using the arrow buttons. Look for the “Settings” or “Configuration” option and select it by pressing the corresponding button.
Step 3: Within the settings menu, find the “Audio” or “Audio Settings” option. Use the arrow keys to highlight it and press the select button to enter the audio settings menu.
Step 4: Locate the “Headset” or “Headset Mode” option within the audio settings menu. This option allows you to enable or disable the headset mode on your Cisco phone. Ensure that the headset mode is enabled by selecting the appropriate button or checkbox.
Step 5: Some Cisco phone models may also have additional options for headset volume control. If available, adjust the headset volume to your preference using the volume controls on the phone or within the audio settings menu.
Step 6: Once you have configured the desired settings, save the changes by navigating to the “Save” or “Apply” option within the menu. Confirm the changes by selecting the appropriate button.
By following these steps, you can configure the Cisco phone settings to work seamlessly with your Plantronics headset. Remember to test the headset functionality after making the configuration changes to ensure that the audio quality and call handling are working as expected.
Testing the Headset Connection
Once you have successfully connected your Plantronics headset to your Cisco phone, it is important to test the connection to ensure everything is working as expected. Here’s how you can test the headset connection:
1. Make a test call: Dial a number or make a test call to a colleague or voicemail to check if the audio is coming through the headset. Listen for any distortions or connectivity issues during the call.
2. Adjust volume settings: Use the volume buttons on the headset or the Cisco phone to adjust the volume levels. Test the headset at various volume levels to determine the optimal setting for clear audio.
3. Try different features: Experiment with different features of the headset, such as mute, answer/end call, and call transfer, to ensure they are functioning correctly. Verify if the microphone is picking up your voice accurately and if the call controls are responsive.
4. Walk around during the call: Move away from your desk and walk around the room while remaining on the call. Ensure that the wireless connection remains stable without any audio interruptions or dropouts.
5. Test with different devices: If possible, test the connectivity of your Plantronics headset with other devices such as smartphones or laptops to ensure it works seamlessly across different platforms.
If you encounter any issues or inconsistencies during the testing process, refer to the troubleshooting tips mentioned earlier in this article or consult the Plantronics support website for further assistance.
Connecting a Plantronics headset to a Cisco phone is a simple and convenient way to enhance your communication experience. By following the steps outlined in this article, you can easily pair your headset with your phone and enjoy hands-free communication.
Whether you’re using a wired or wireless headset, the process is relatively straightforward, and you’ll be able to start making and receiving calls with ease. The compatibility between Plantronics headsets and Cisco phones ensures seamless integration and optimal performance.
With the ability to answer calls, adjust volume, and mute your microphone, a Plantronics headset offers flexibility and convenience. Whether you’re working in a busy office environment or need to stay connected on the go, a Plantronics headset is a reliable companion.
So, go ahead and connect your Plantronics headset to your Cisco phone today, and enjoy a hassle-free and efficient communication experience!
FAQs
1. How do I connect my Plantronics headset to my Cisco phone?
To connect your Plantronics headset to your Cisco phone, follow these steps:
– First, locate the headset port on your Cisco phone. It is usually labeled with a headset icon and is located on the side or the back of the phone.
– Next, take the quick disconnect cable that came with your Plantronics headset and connect one end to the headset port on the phone.
– Connect the other end of the cable to the quick disconnect base of your Plantronics headset.
– Once connected, put on your headset and adjust the microphone boom to your desired position.
– Finally, test the headset by making a call or answering a call to ensure that it is working properly.
Now you’re ready to enjoy the convenience and hands-free communication that your Plantronics headset offers!
2. Can I use my Plantronics headset with other phone models?
Yes, in most cases your Plantronics headset can be used with other phone models and brands. However, it is important to check the compatibility of your headset with the specific phone model you intend to use it with. Plantronics provides compatibility guides on their website, where you can look for your specific phone model to see if it is compatible with your headset.
3. How do I adjust the volume on my Plantronics headset?
To adjust the volume on your Plantronics headset, follow these steps:
– Locate the volume buttons on the headset. These buttons are usually located on the side or on the earpiece of the headset.
– Press the up (+) button to increase the volume and the down (-) button to decrease the volume.
– Adjust the volume to your desired level and test it by making a call or playing audio.
By adjusting the volume on your headset, you can ensure clear and comfortable communication.
4. Can I use a wireless Plantronics headset with my Cisco phone?
Yes, you can use a wireless Plantronics headset with your Cisco phone. Plantronics offers a range of wireless headsets that are compatible with Cisco phones. These headsets use Bluetooth or DECT technology to connect wirelessly to your phone, providing you with the freedom of movement and convenience of hands-free communication.
5. How do I answer and end calls with my Plantronics headset?
Answering and ending calls with your Plantronics headset can be done directly from the headset itself. Here’s how:
– When you receive an incoming call, simply press the answer/end button on your headset to answer the call.
– To end a call, press the same button again.
– Some headsets also offer additional features, such as call mute, call hold, and call transfer, which can be accessed through the buttons on the headset.
By familiarizing yourself with these functions, you can easily manage your calls without needing to touch your phone.