
Transferring calls is a fundamental skill when using a Cisco phone. Being able to seamlessly transfer a call can improve communication flow and ensure that calls are routed to the correct person or department. Whether you’re working in a busy office environment or a customer service center, knowing how to transfer calls on a Cisco phone can greatly enhance productivity and customer service. In this article, we will guide you through the process of transferring a call on a Cisco phone, providing step-by-step instructions and useful tips to help you master this essential skill. So, let’s get started and learn how to transfer calls like a pro on your Cisco phone.
Inside This Article
- Understanding the Cisco Phone Interface
- Transferring a Call to Another Extension
- Transferring a Call to an External Number
- Transferring a Call to Voicemail
- Conclusion
- FAQs
Understanding the Cisco Phone Interface
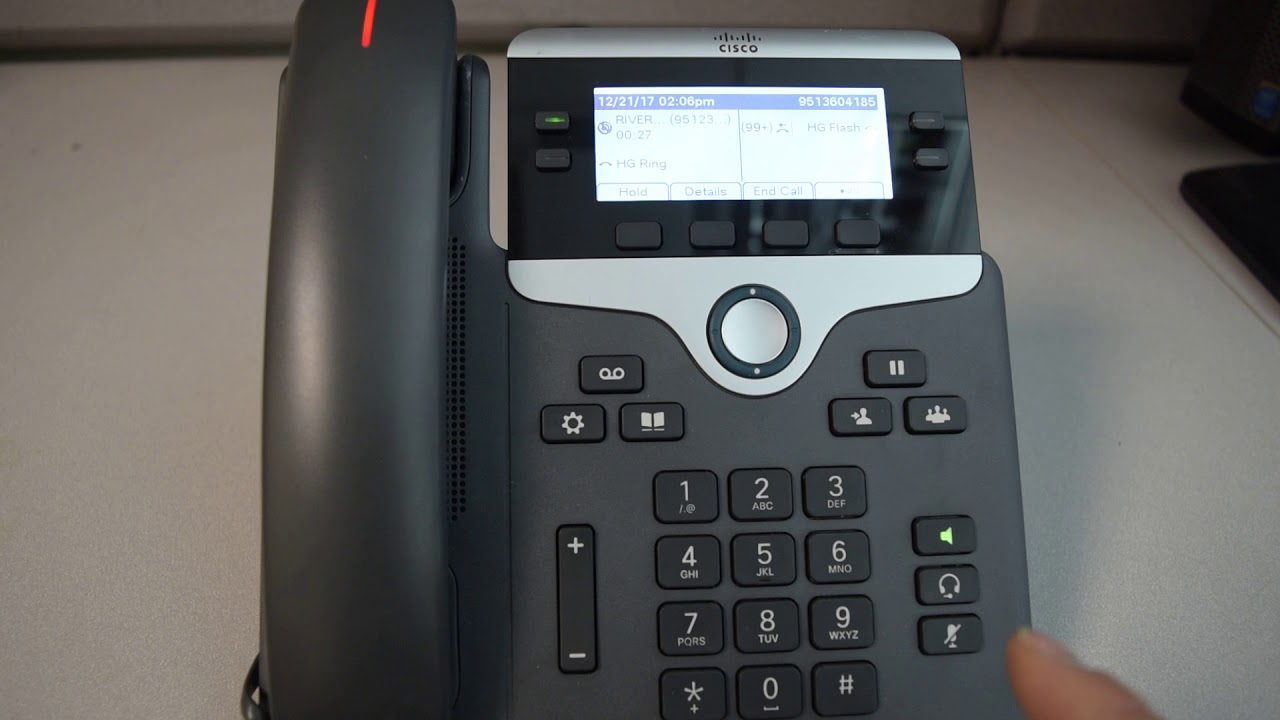
When using a Cisco Phone, it is essential to familiarize yourself with its interface to make the most out of its features. The Cisco Phone interface consists of several key components that allow you to control your calls effectively.
At the top of the Cisco Phone, you will find a display screen, which provides visual feedback and information about your calls. It displays caller IDs, call durations, and status updates. The display is easy to read and navigate, ensuring that you stay informed throughout your conversations.
Beneath the display screen, you will find a keypad, which allows you to enter phone numbers, access menus, and navigate through various options. The keypad is designed with large, tactile buttons that make it easy to press and operate, even during fast-paced conversations.
On the sides of the Cisco Phone, you will find dedicated buttons for common call functions. These buttons include options such as answer, hang up, hold, and mute. Having these buttons readily accessible enables you to manage your calls efficiently and without interruption.
Additionally, the Cisco Phone interface includes a speakerphone feature, allowing you to have hands-free conversations. By activating the speakerphone function, you can continue your call while working on other tasks or involve multiple people in the conversation.
Moreover, the Cisco Phone interface offers a headset functionality for users who prefer a more private and focused conversation experience. By connecting a headset to the phone, you can communicate without distractions and ensure that your calls remain confidential.
Lastly, the Cisco Phone interface incorporates an intuitive navigation menu that allows you to access additional features and settings. By navigating through the menu, you can personalize your phone settings, adjust volume levels, and configure advanced call options according to your preferences.
Understanding the Cisco Phone interface is crucial to effectively navigate your calls and utilize the various features available. By familiarizing yourself with the display, keypad, call buttons, speakerphone, headset functionality, and navigation menu, you can take full advantage of the capabilities offered by your Cisco Phone.
Transferring a Call to Another Extension
One of the most useful features of a Cisco phone is the ability to transfer calls to another extension within your organization. This allows you to efficiently connect callers to the appropriate person or department. To transfer a call to another extension, follow these simple steps:
1. While on an active call, locate the Transfer button on your Cisco phone. It is usually represented by an icon that resembles an arrow or a phone handset.
2. Press the Transfer button. This will place the current call on hold.
3. Enter the extension number of the person you wish to transfer the call to using the keypad on your Cisco phone. Ensure that you enter the correct extension number to avoid any confusion.
4. Once you have entered the extension number, you have two options for transferring the call:
- Blind Transfer: If you want to transfer the call without speaking to the recipient first, simply press the Transfer button again. The call will be immediately transferred to the entered extension.
- Consultative Transfer: If you want to speak to the recipient before transferring the call, wait for the recipient to answer the call and have a brief conversation. Once you have spoken to the recipient, press the Transfer button to complete the transfer.
5. After selecting the appropriate transfer option, hang up the phone to complete the transfer. The call will be seamlessly transferred to the designated extension, and you can move on to your next task.
Transferring calls to another extension is a simple yet essential feature of a Cisco phone. By mastering this skill, you can effectively streamline communication within your organization, ensuring that callers are connected to the right person in no time.
Transferring a Call to an External Number
Transferring a call to an external number on a Cisco phone is a useful feature that allows you to redirect calls to a different phone number outside of your organization. Whether you need to transfer a call to a client’s mobile phone or to a colleague working remotely, the process is fairly straightforward. Here’s a step-by-step guide to help you transfer a call to an external number.
1. Obtain the external number: Before transferring the call, make sure you have the correct phone number of the external party to whom you want to transfer the call. This could be a mobile number or a landline number.
2. Put the call on hold: Once you have the external number, put the current call on hold by pressing the “Hold” button on your Cisco phone. This will temporarily place the caller on hold without disconnecting the call.
3. Access the transfer menu: Look for the “Transfer” button on your phone’s interface. This button is usually represented by an arrow pointing to the right. Pressing the “Transfer” button will open the transfer menu on your phone’s display.
4. Enter the external number: On the transfer menu, you will see a prompt asking you to enter the phone number where you want to transfer the call. Use the keypad on your Cisco phone to enter the external number accurately. Double-check the digits to ensure accuracy.
5. Initiate the transfer: Once you have entered the external number, press the “Transfer” button again to initiate the transfer. At this point, your Cisco phone will connect the call to the external number, effectively transferring the call to that number.
6. Complete the transfer: After initiating the transfer, you can simply hang up the call or wait for the external party to answer. Once the call is connected to the external number, you are free to end your involvement in the call. The call will continue between the caller and the external party.
It is important to note that the ability to transfer calls to external numbers may be subject to your organization’s phone system configuration. Some companies may restrict this feature or require special permissions to transfer calls outside of the organization. Make sure you have the necessary authorization to perform external call transfers before attempting this process.
By following these steps, you can easily transfer calls to external numbers on your Cisco phone. Whether you need to connect callers to mobile phones, landlines, or other external lines, this feature provides flexibility and convenience in managing your calls.
Transferring a Call to Voicemail
Transferring a call to voicemail can be a convenient option when you’re unable to answer a call or need to redirect it to someone’s voicemail without interrupting their workflow. Cisco Phones offer a seamless process to transfer calls directly to voicemail. Let’s explore how to do it:
1. While on an active call, locate the “Transfer” button on your Cisco Phone’s interface. It is typically represented by an arrow or a phone icon.
2. Press the “Transfer” button to initiate the transfer process.
3. Once you’ve pressed the “Transfer” button, you will hear a dial tone. This indicates that you’re in the transfer mode.
4. Next, enter the extension number or voicemail number of the intended recipient. If you are unsure of the extension, consult your organization’s directory or contact list.
5. After entering the voicemail or extension number, you can then press the “Transfer” button again. The call will be transferred directly to the recipient’s voicemail without ringing their phone.
6. Hang up the call to complete the transfer process.
Voicemail transfer allows you to seamlessly redirect calls to the recipient’s voicemail, ensuring they receive the message promptly without causing any interruption or inconvenience. This feature can be particularly useful when trying to reach someone who is currently unavailable or prefer to prioritize voicemail communication.
However, keep in mind that not all Cisco Phone models may have the exact same interface or button placement. If you’re using a different model, refer to the user manual or consult with your organization’s IT department for specific instructions.
By utilizing the “Transfer to Voicemail” feature on your Cisco Phone, you can efficiently manage call flow and ensure important messages are delivered even when the recipient is away from their desk or unable to answer the call.
Remember, transferring calls to voicemail is just one of the many useful features that Cisco Phones offer. Take some time to explore your phone’s capabilities and simplify your communication workflow.
Conclusion
In conclusion, knowing how to transfer a call on a Cisco phone is an essential skill for effective communication in the modern workplace. Whether you need to redirect a call to a colleague, transfer a customer to the correct department, or simply pass along important information, understanding the transfer feature on your Cisco phone can greatly enhance your productivity and efficiency.
By following the step-by-step instructions outlined in this article, you can confidently transfer calls on your Cisco phone without any hassle. Remember to familiarize yourself with the different transfer options available, such as blind transfer and consultative transfer, and choose the method that best suits your needs.
Now that you have the knowledge and tools to transfer calls on your Cisco phone, embrace the power to seamlessly connect callers and ensure their queries are promptly addressed. With this skill in your arsenal, you will be able to maintain professional and effective communication in any business setting.
FAQs
FAQ 1: Can I transfer a call on a Cisco Phone?
Yes, you can easily transfer a call on a Cisco Phone. Cisco Phones have a built-in transfer feature that allows you to transfer calls to another extension or external number with just a few simple steps.
FAQ 2: How do I transfer a call on a Cisco Phone?
To transfer a call on a Cisco Phone, follow these steps:
- During a call, press the “Transfer” soft key or button on your Cisco Phone.
- Enter the extension or external number to which you want to transfer the call.
- Press the “Transfer” soft key or button again to complete the transfer.
FAQ 3: Can I perform a blind transfer on a Cisco Phone?
Yes, you can perform a blind transfer on a Cisco Phone. A blind transfer allows you to transfer a call without speaking to the recipient first. To perform a blind transfer, follow these steps:
- During a call, press the “Transfer” soft key or button on your Cisco Phone.
- Enter the extension or external number to which you want to transfer the call.
- Press the “Blind” soft key or button.
- Press the “Transfer” soft key or button again to complete the blind transfer.
FAQ 4: How do I transfer a call directly to voicemail on a Cisco Phone?
To transfer a call directly to voicemail on a Cisco Phone, follow these steps:
- During a call, press the “Transfer” soft key or button on your Cisco Phone.
- Enter the voicemail extension or the recipient’s extension followed by the voicemail access code.
- Press the “Transfer” soft key or button again to complete the transfer.
FAQ 5: What should I do if the transfer feature is not working on my Cisco Phone?
If the transfer feature is not working on your Cisco Phone, you can try the following troubleshooting steps:
- Check your phone’s settings and make sure call transfer is enabled.
- Ensure that you are using the correct transfer method (blind transfer, consult transfer, etc.) for your specific phone model.
- If the issue persists, contact your IT department or Cisco support for further assistance.